
Want to remove ads? Become a MK3OC Club Member today!
You are using an out of date browser. It may not display this or other websites correctly.
You should upgrade or use an alternative browser.
You should upgrade or use an alternative browser.
Dave b's VXR Powered Gsi Diary
- Thread starter DavebGsi
- Start date

Awesome progress mate...
cheers mate, tomorrow should be engine in the hole day!
Had you thought about getting the exhaust manifold ceramic coated? It'll certainly help keep the under bonnet temps down and more to the point look amazing for that authentic OCD pleasure 
Very amazing work Dave - That engine is looking really good man!
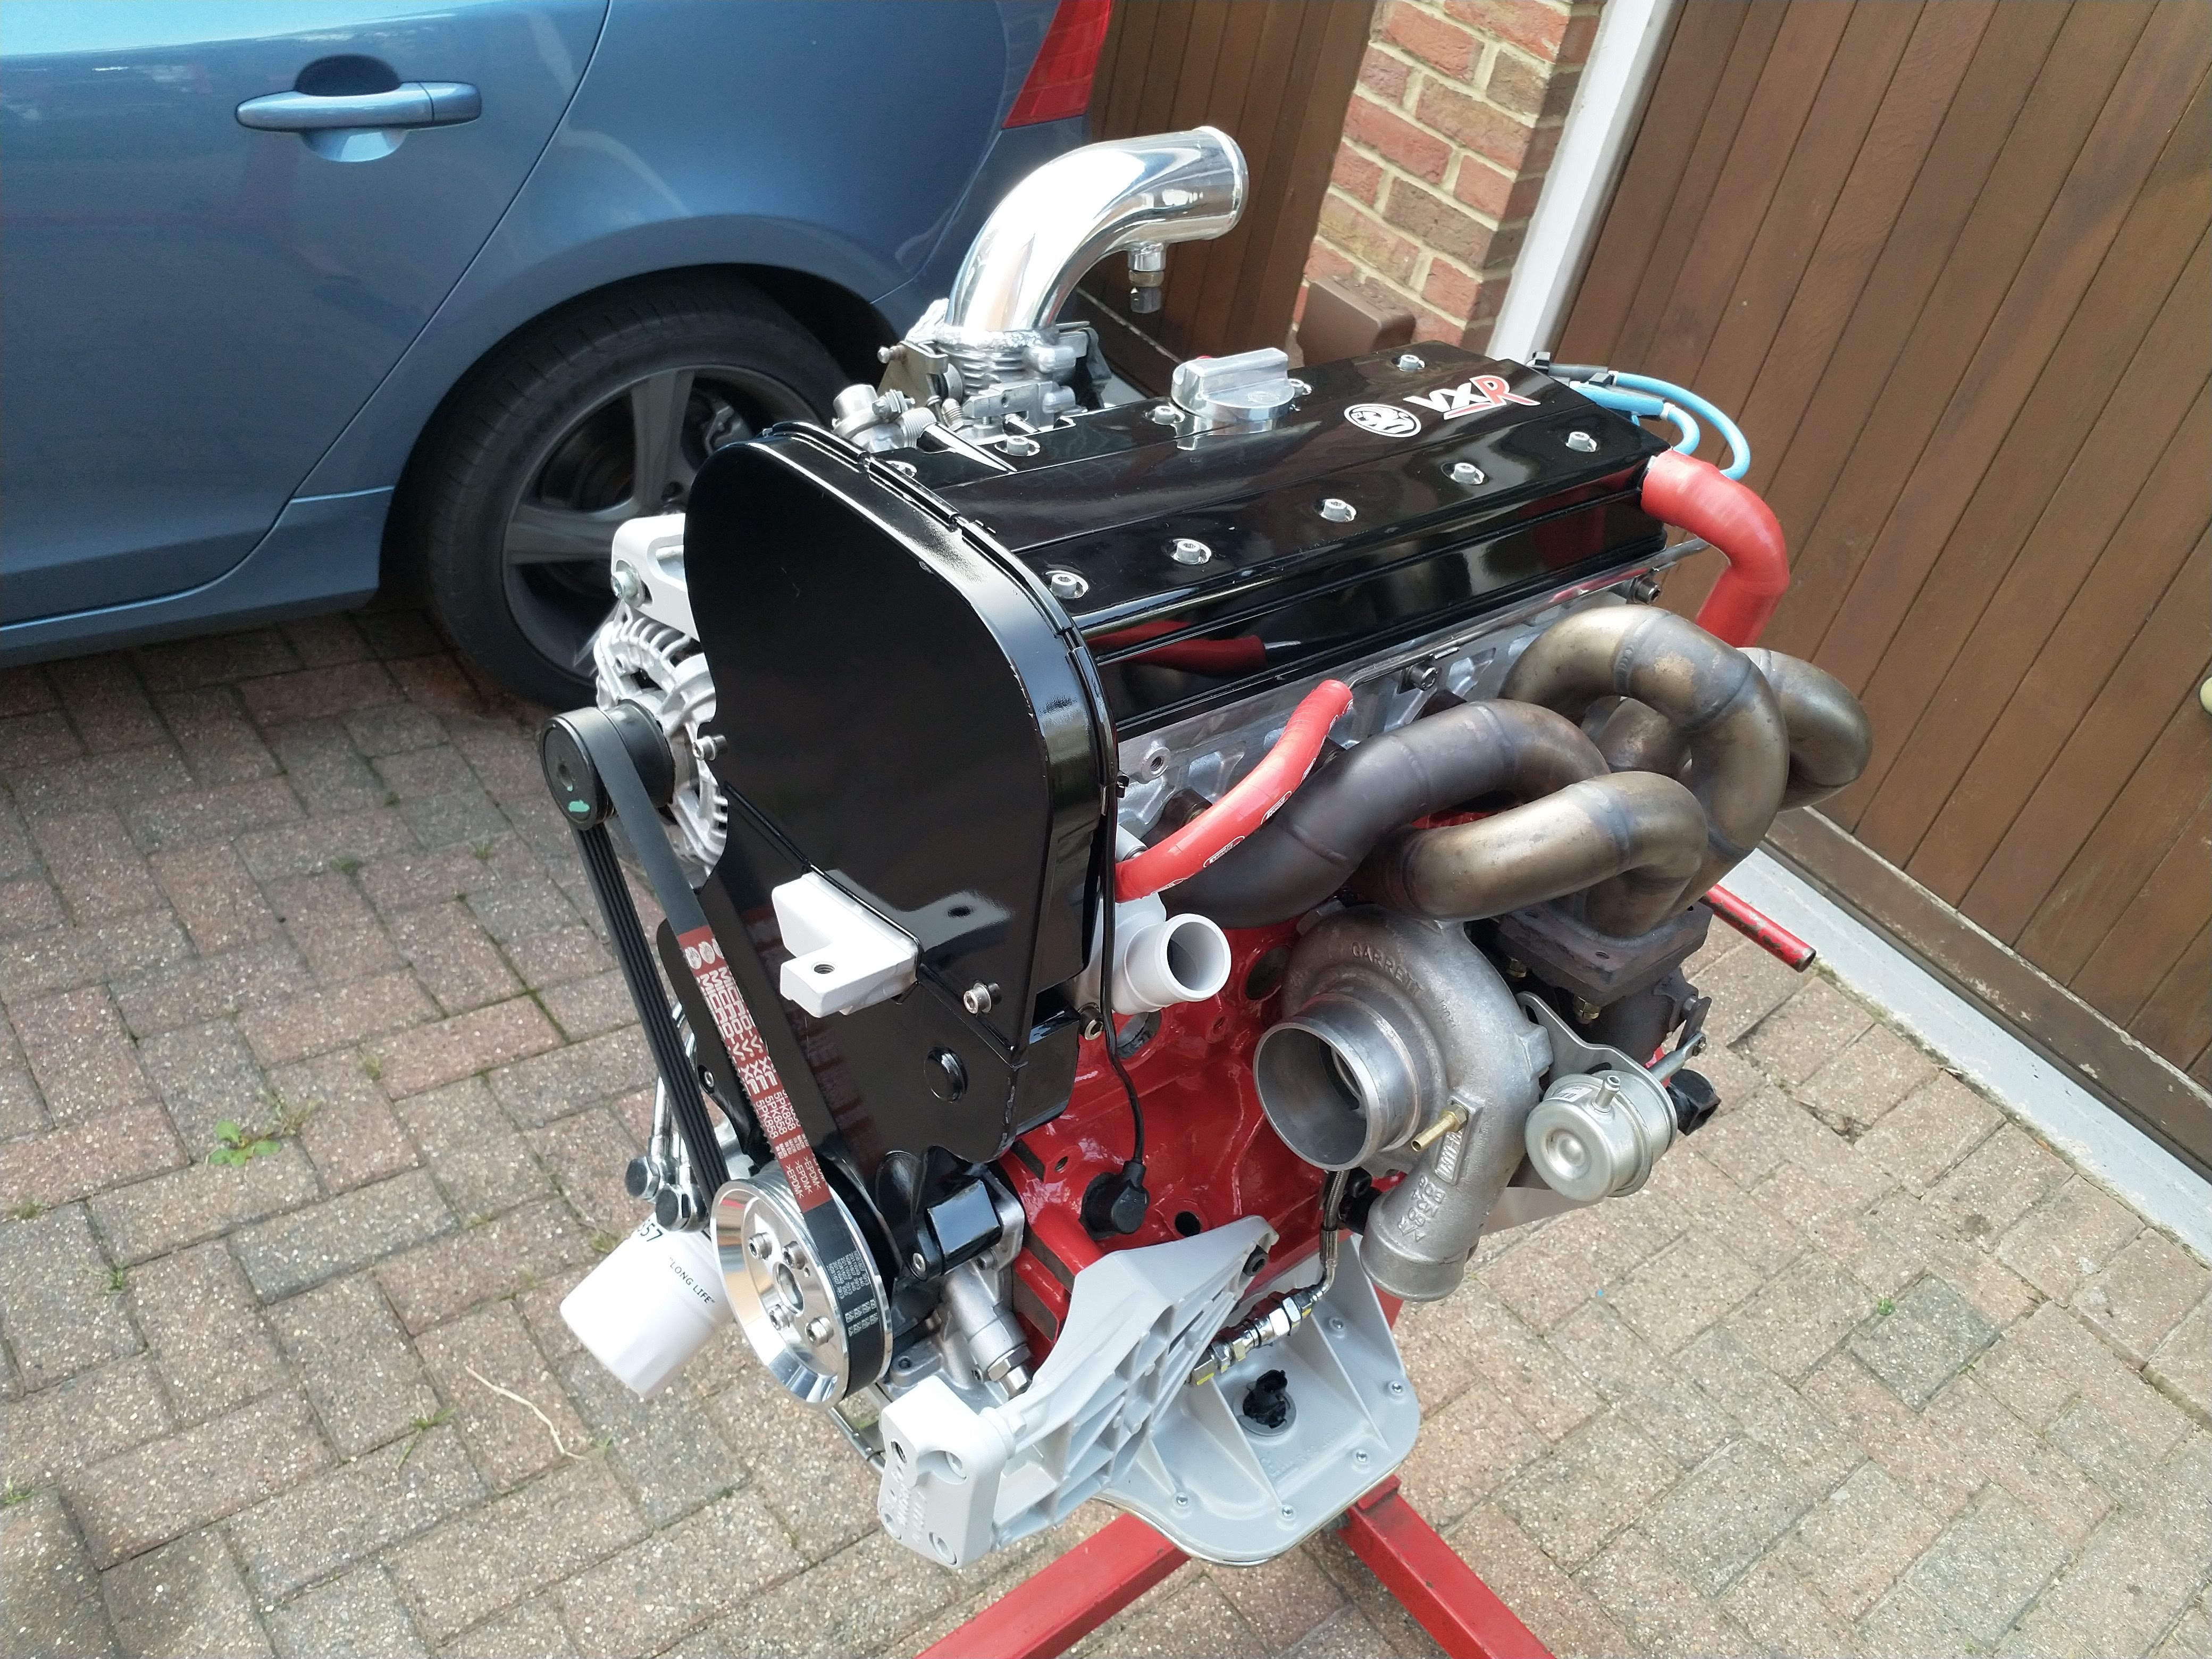
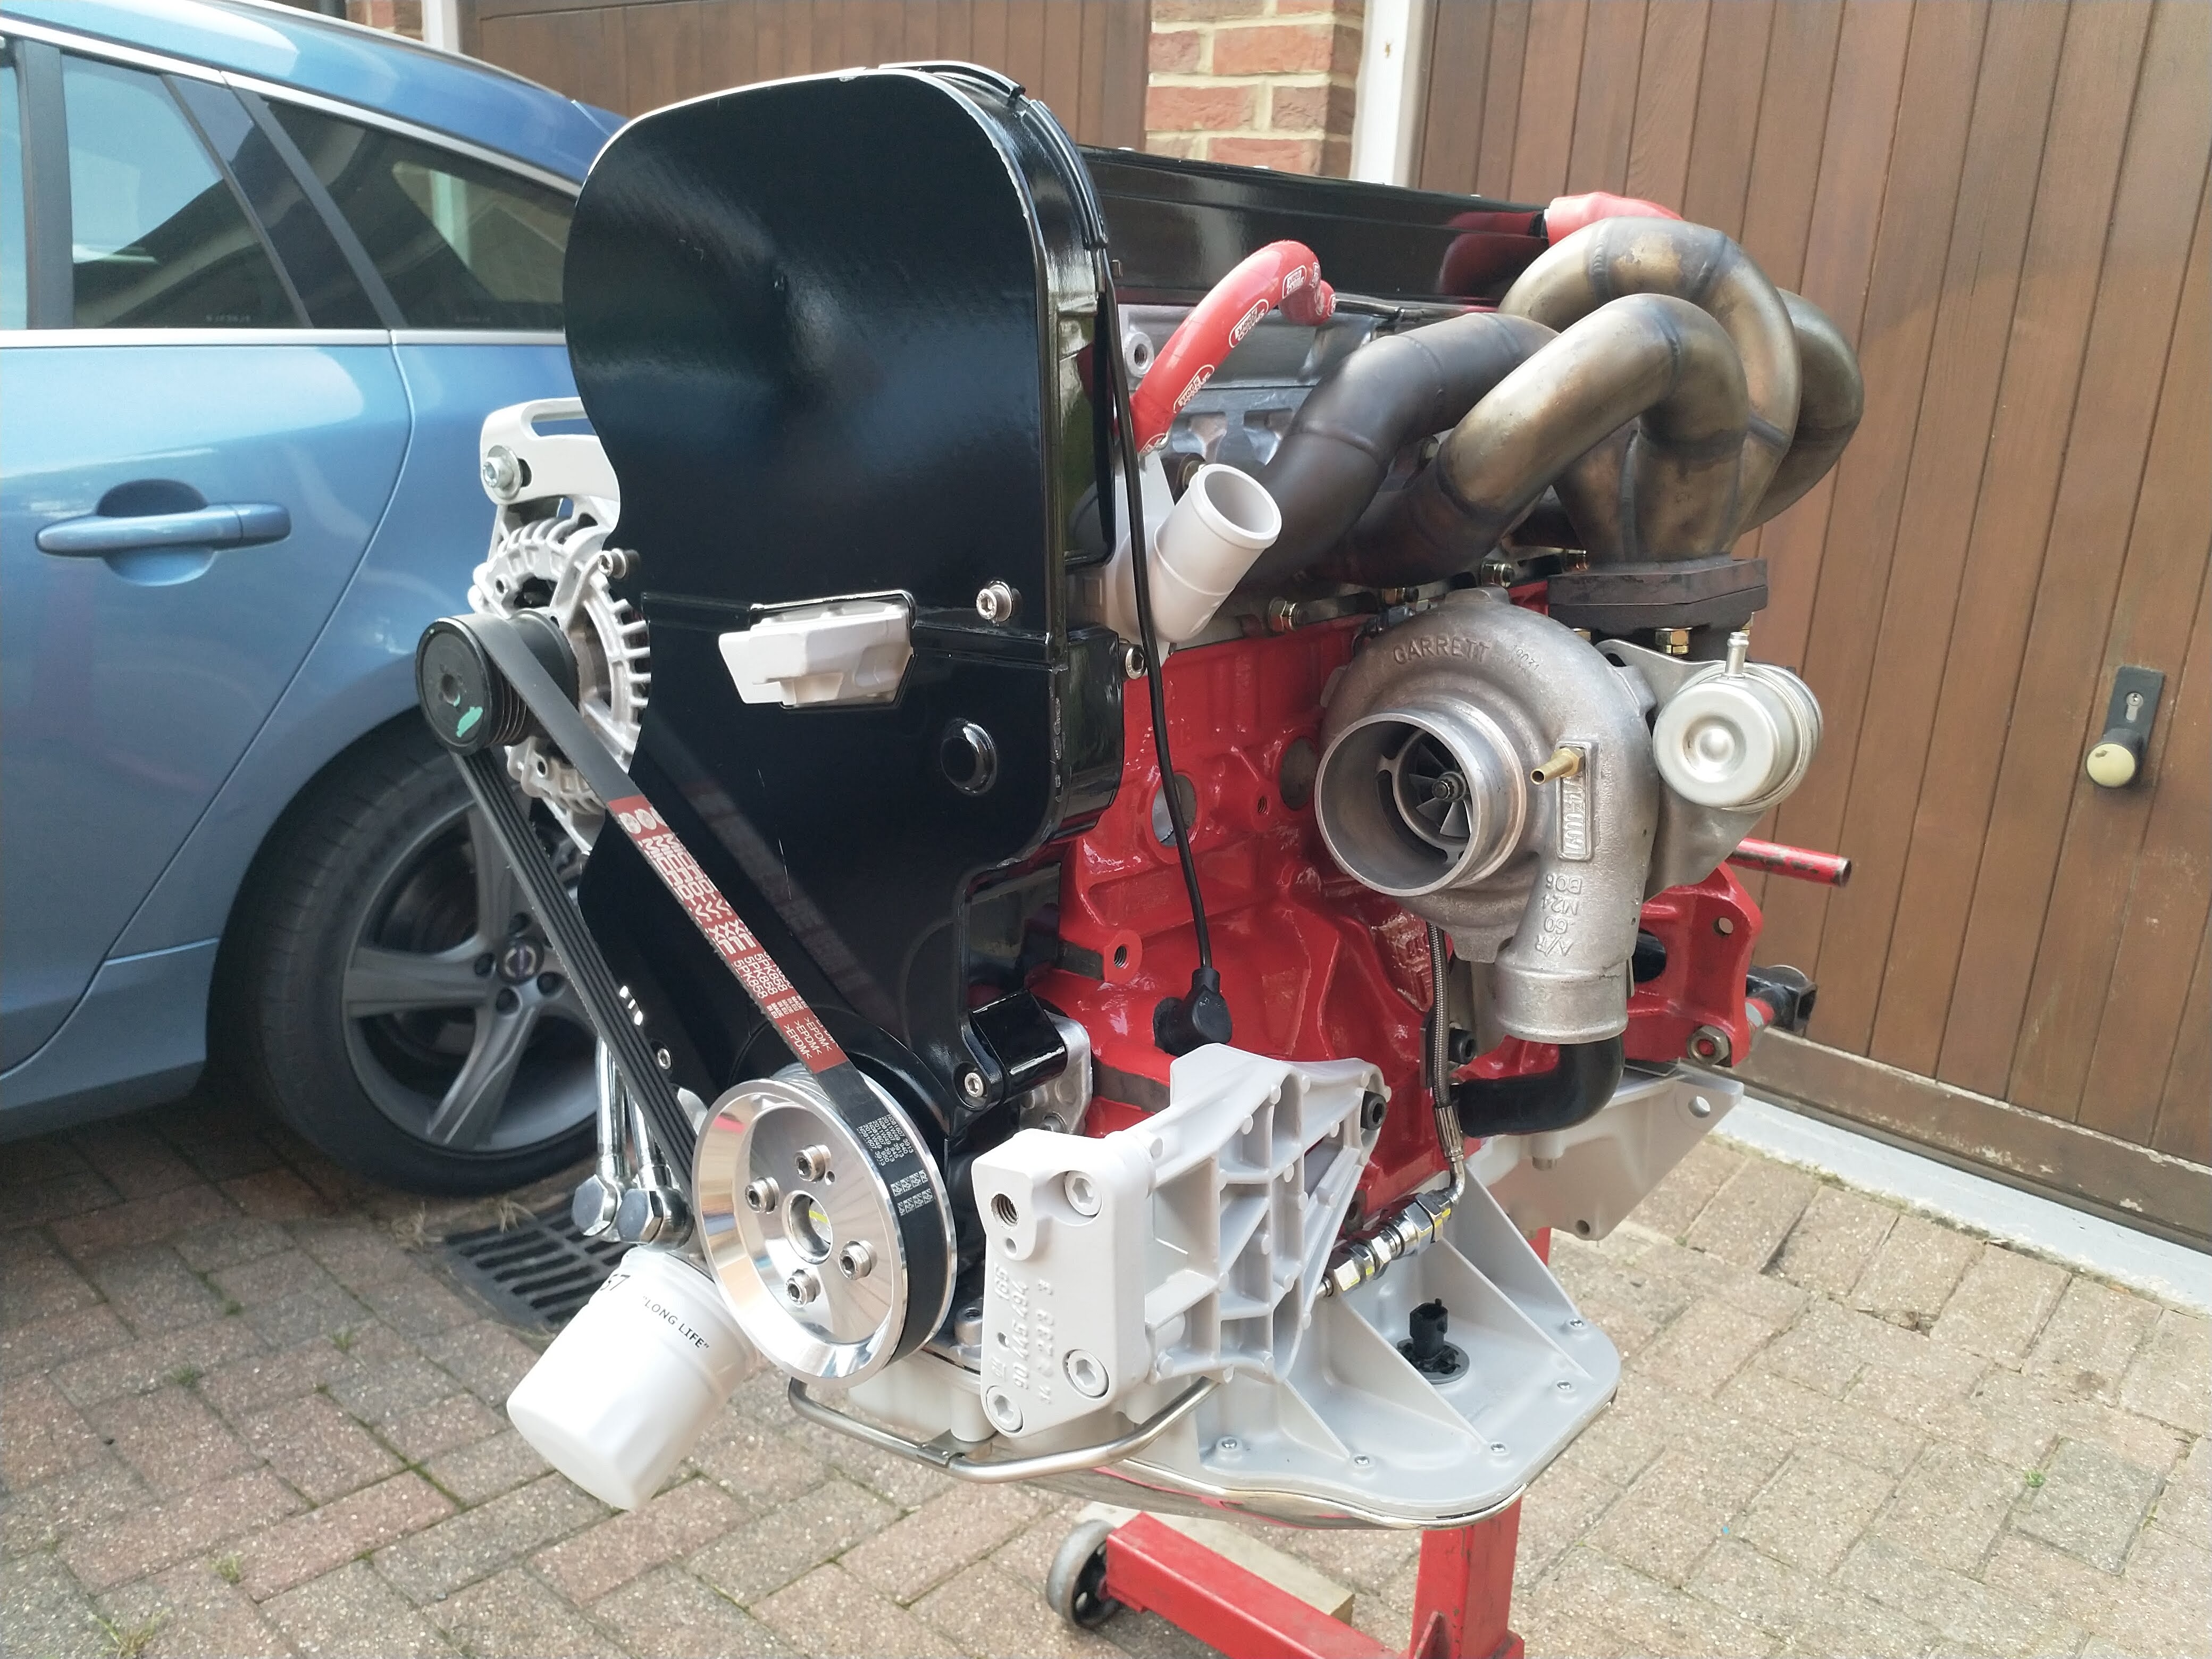
Is that inlet plenum standard? Would it fit an XE ?
Is that inlet plenum standard? Would it fit an XE ?
Very amazing work Dave - That engine is looking really good man!
Is that inlet plenum standard? Would it fit an XE ?
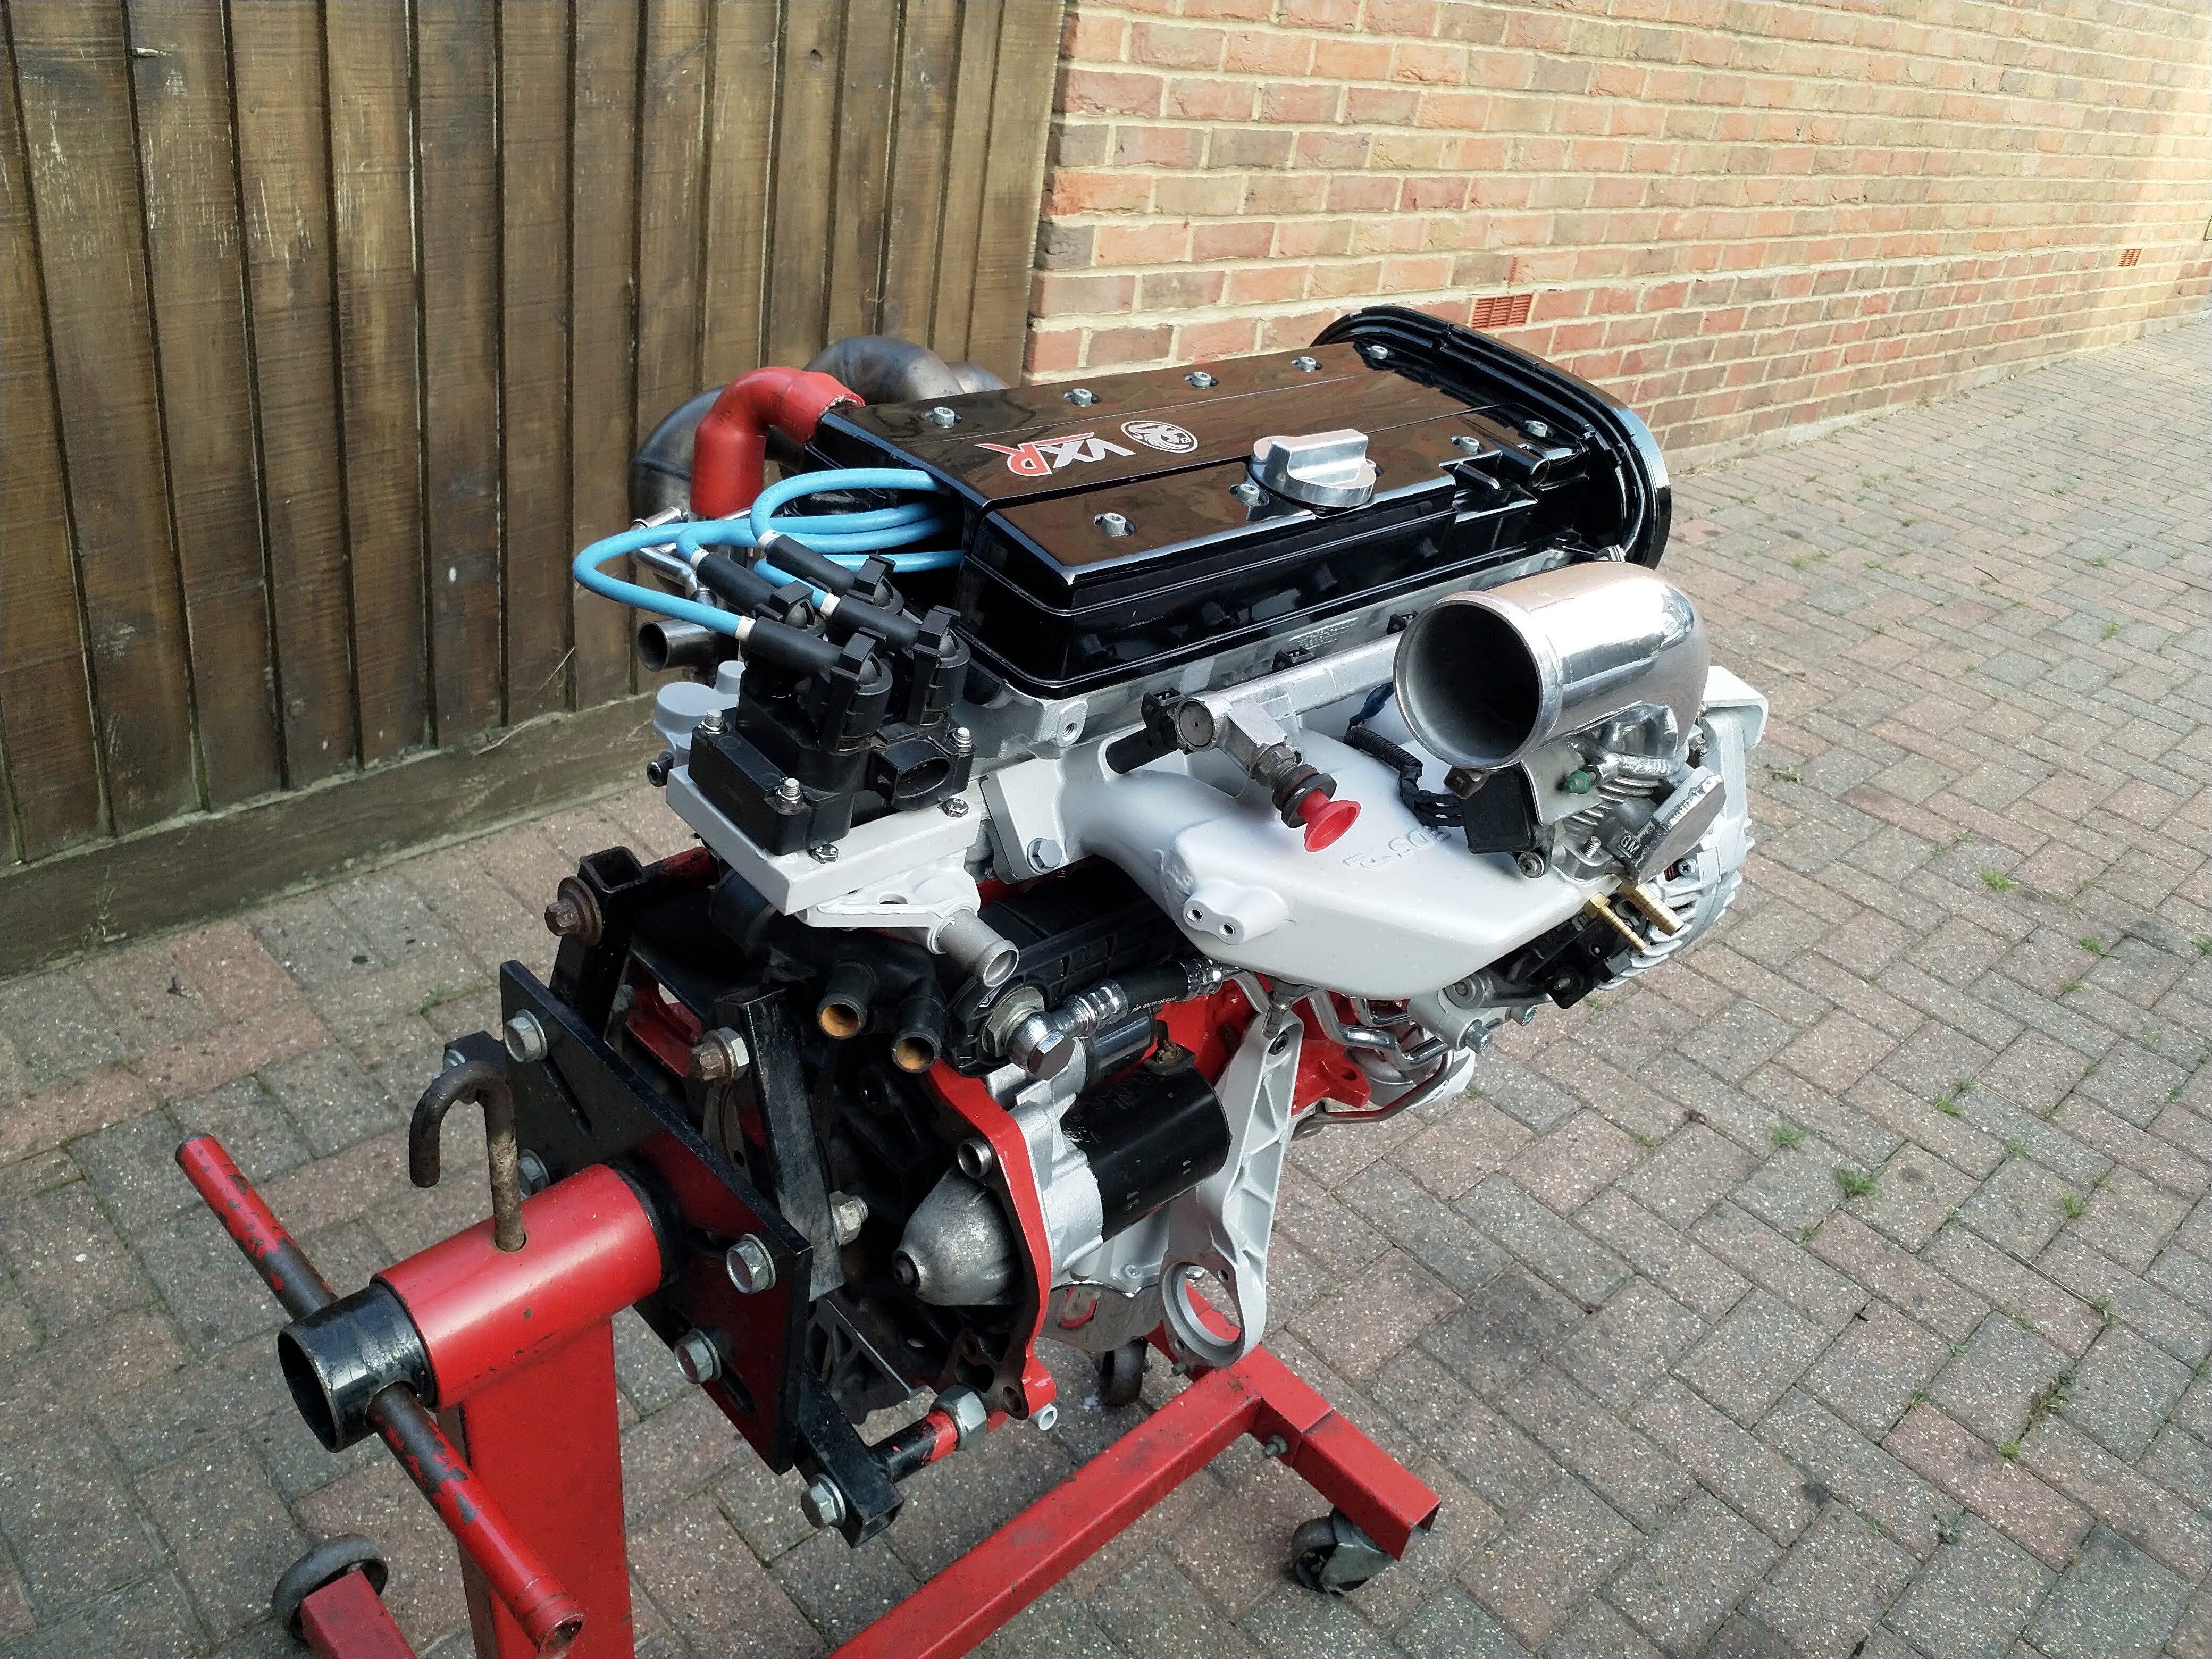
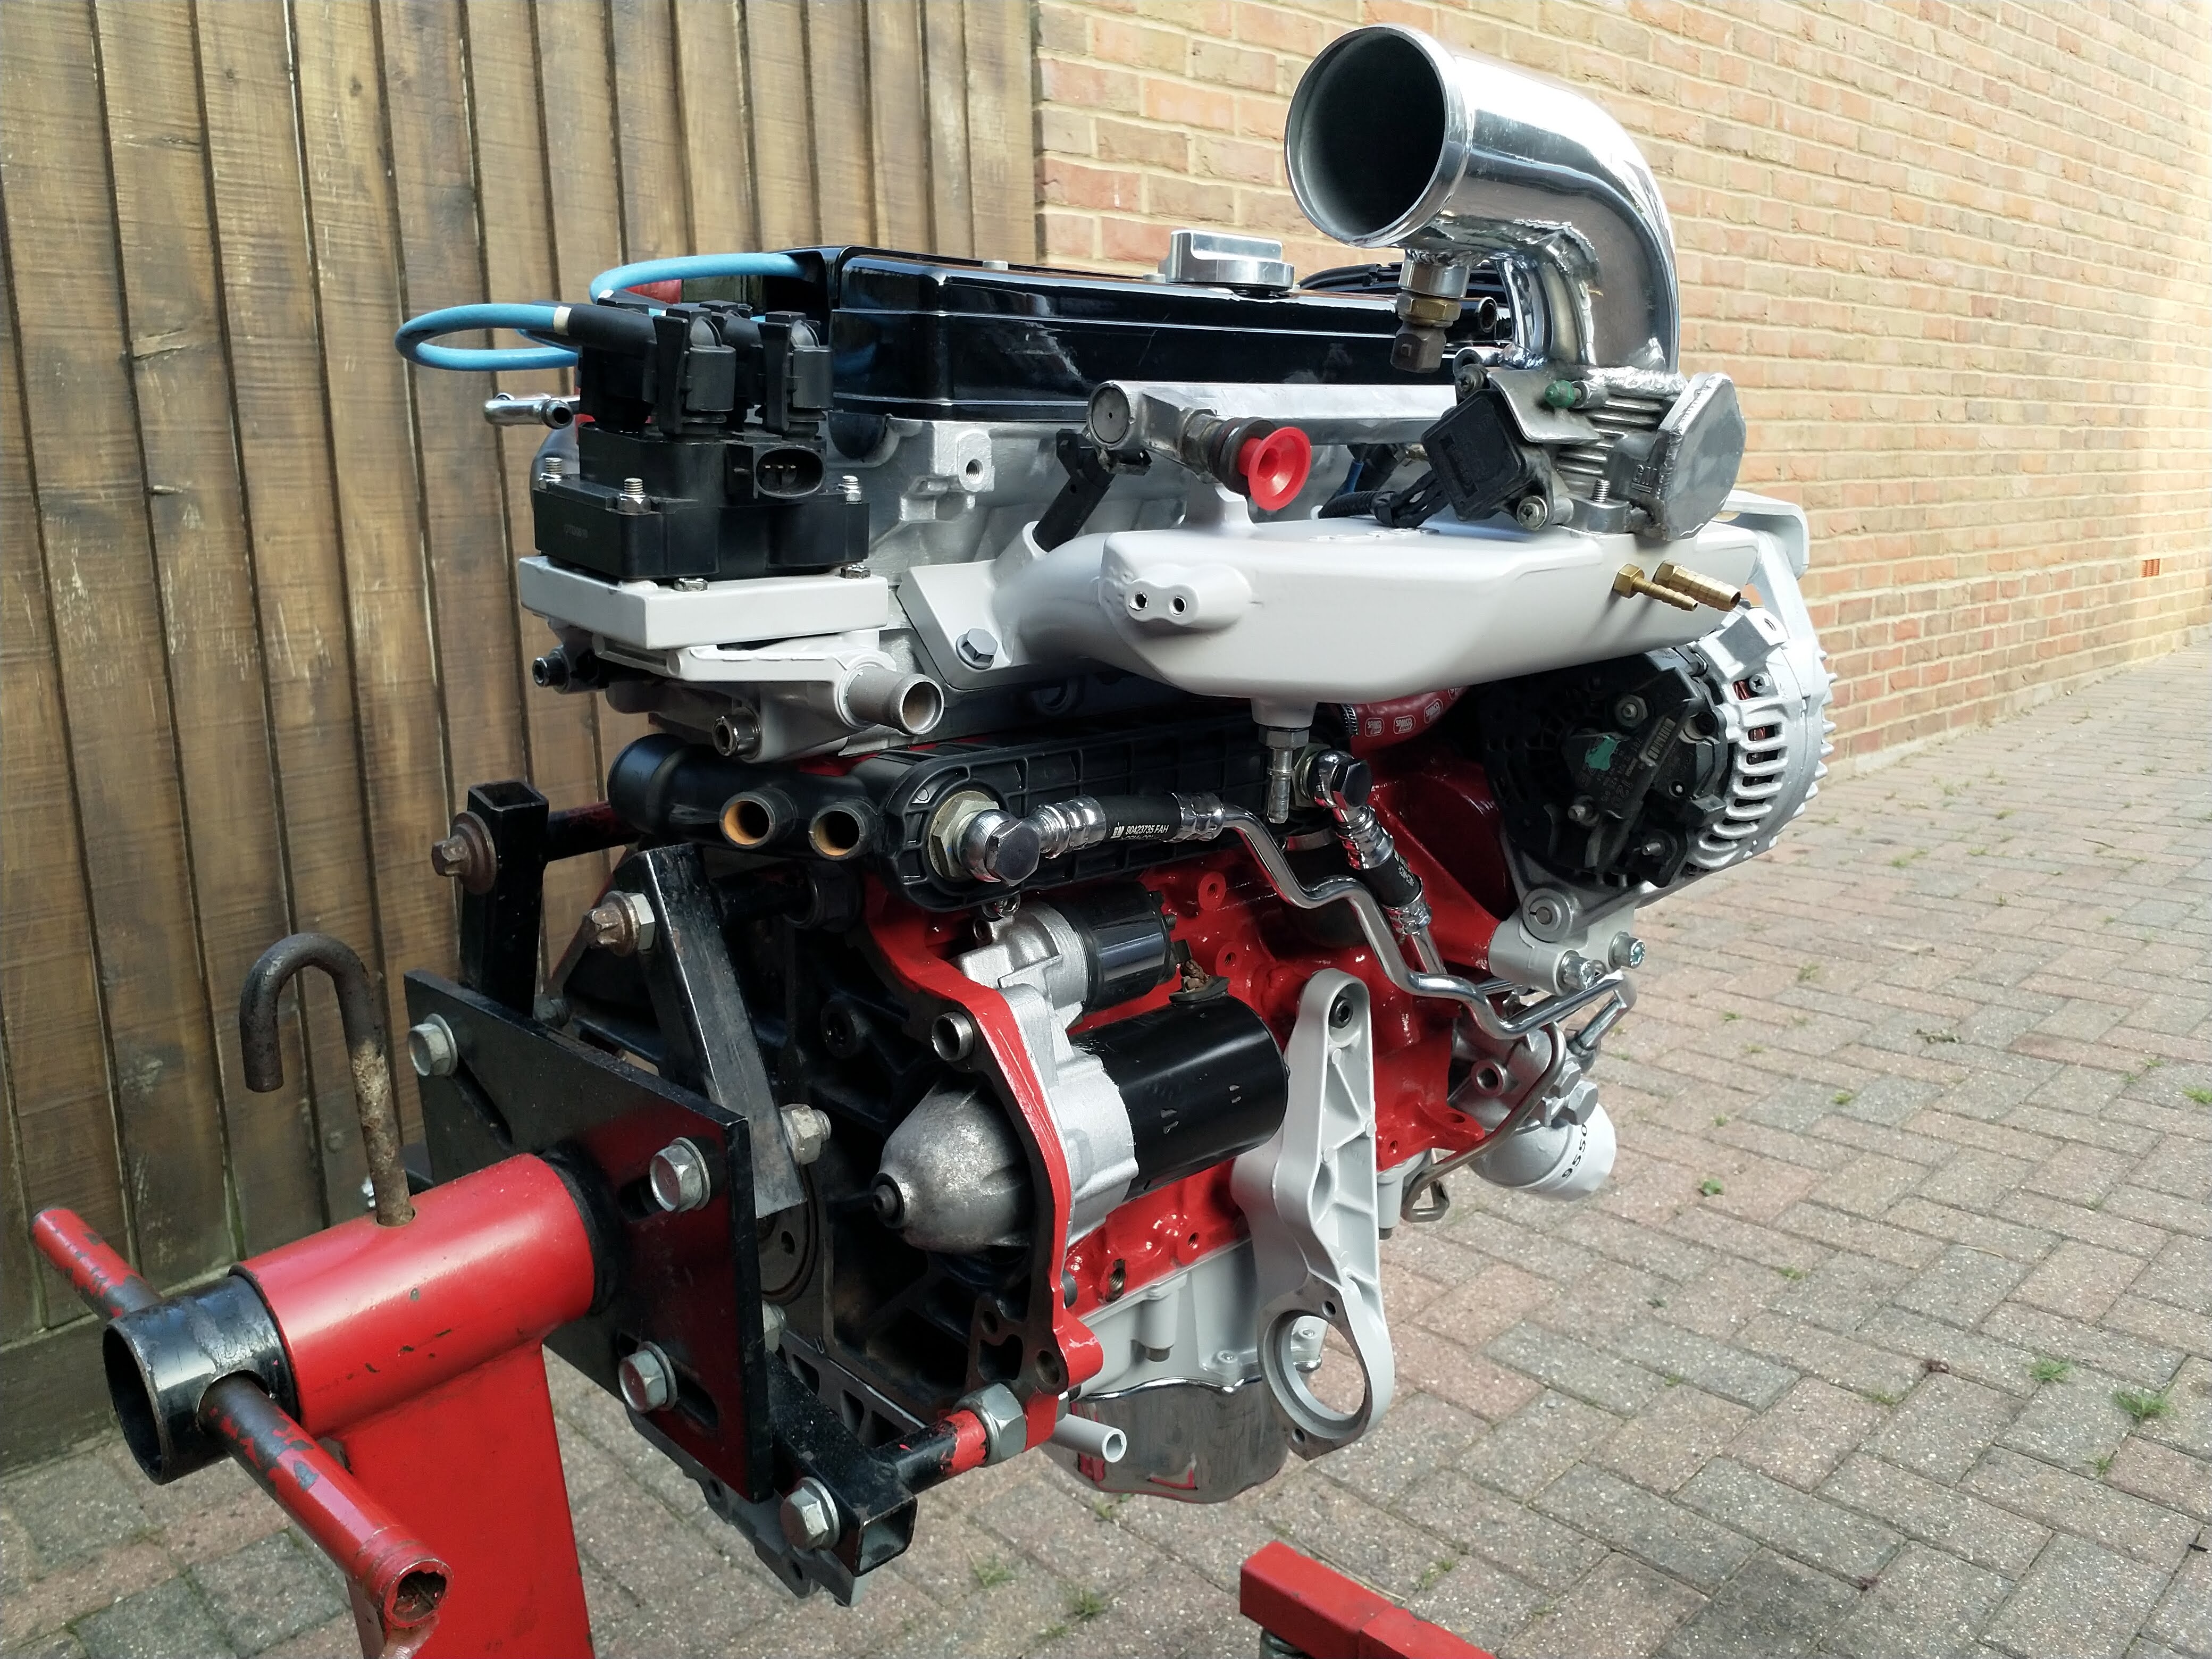
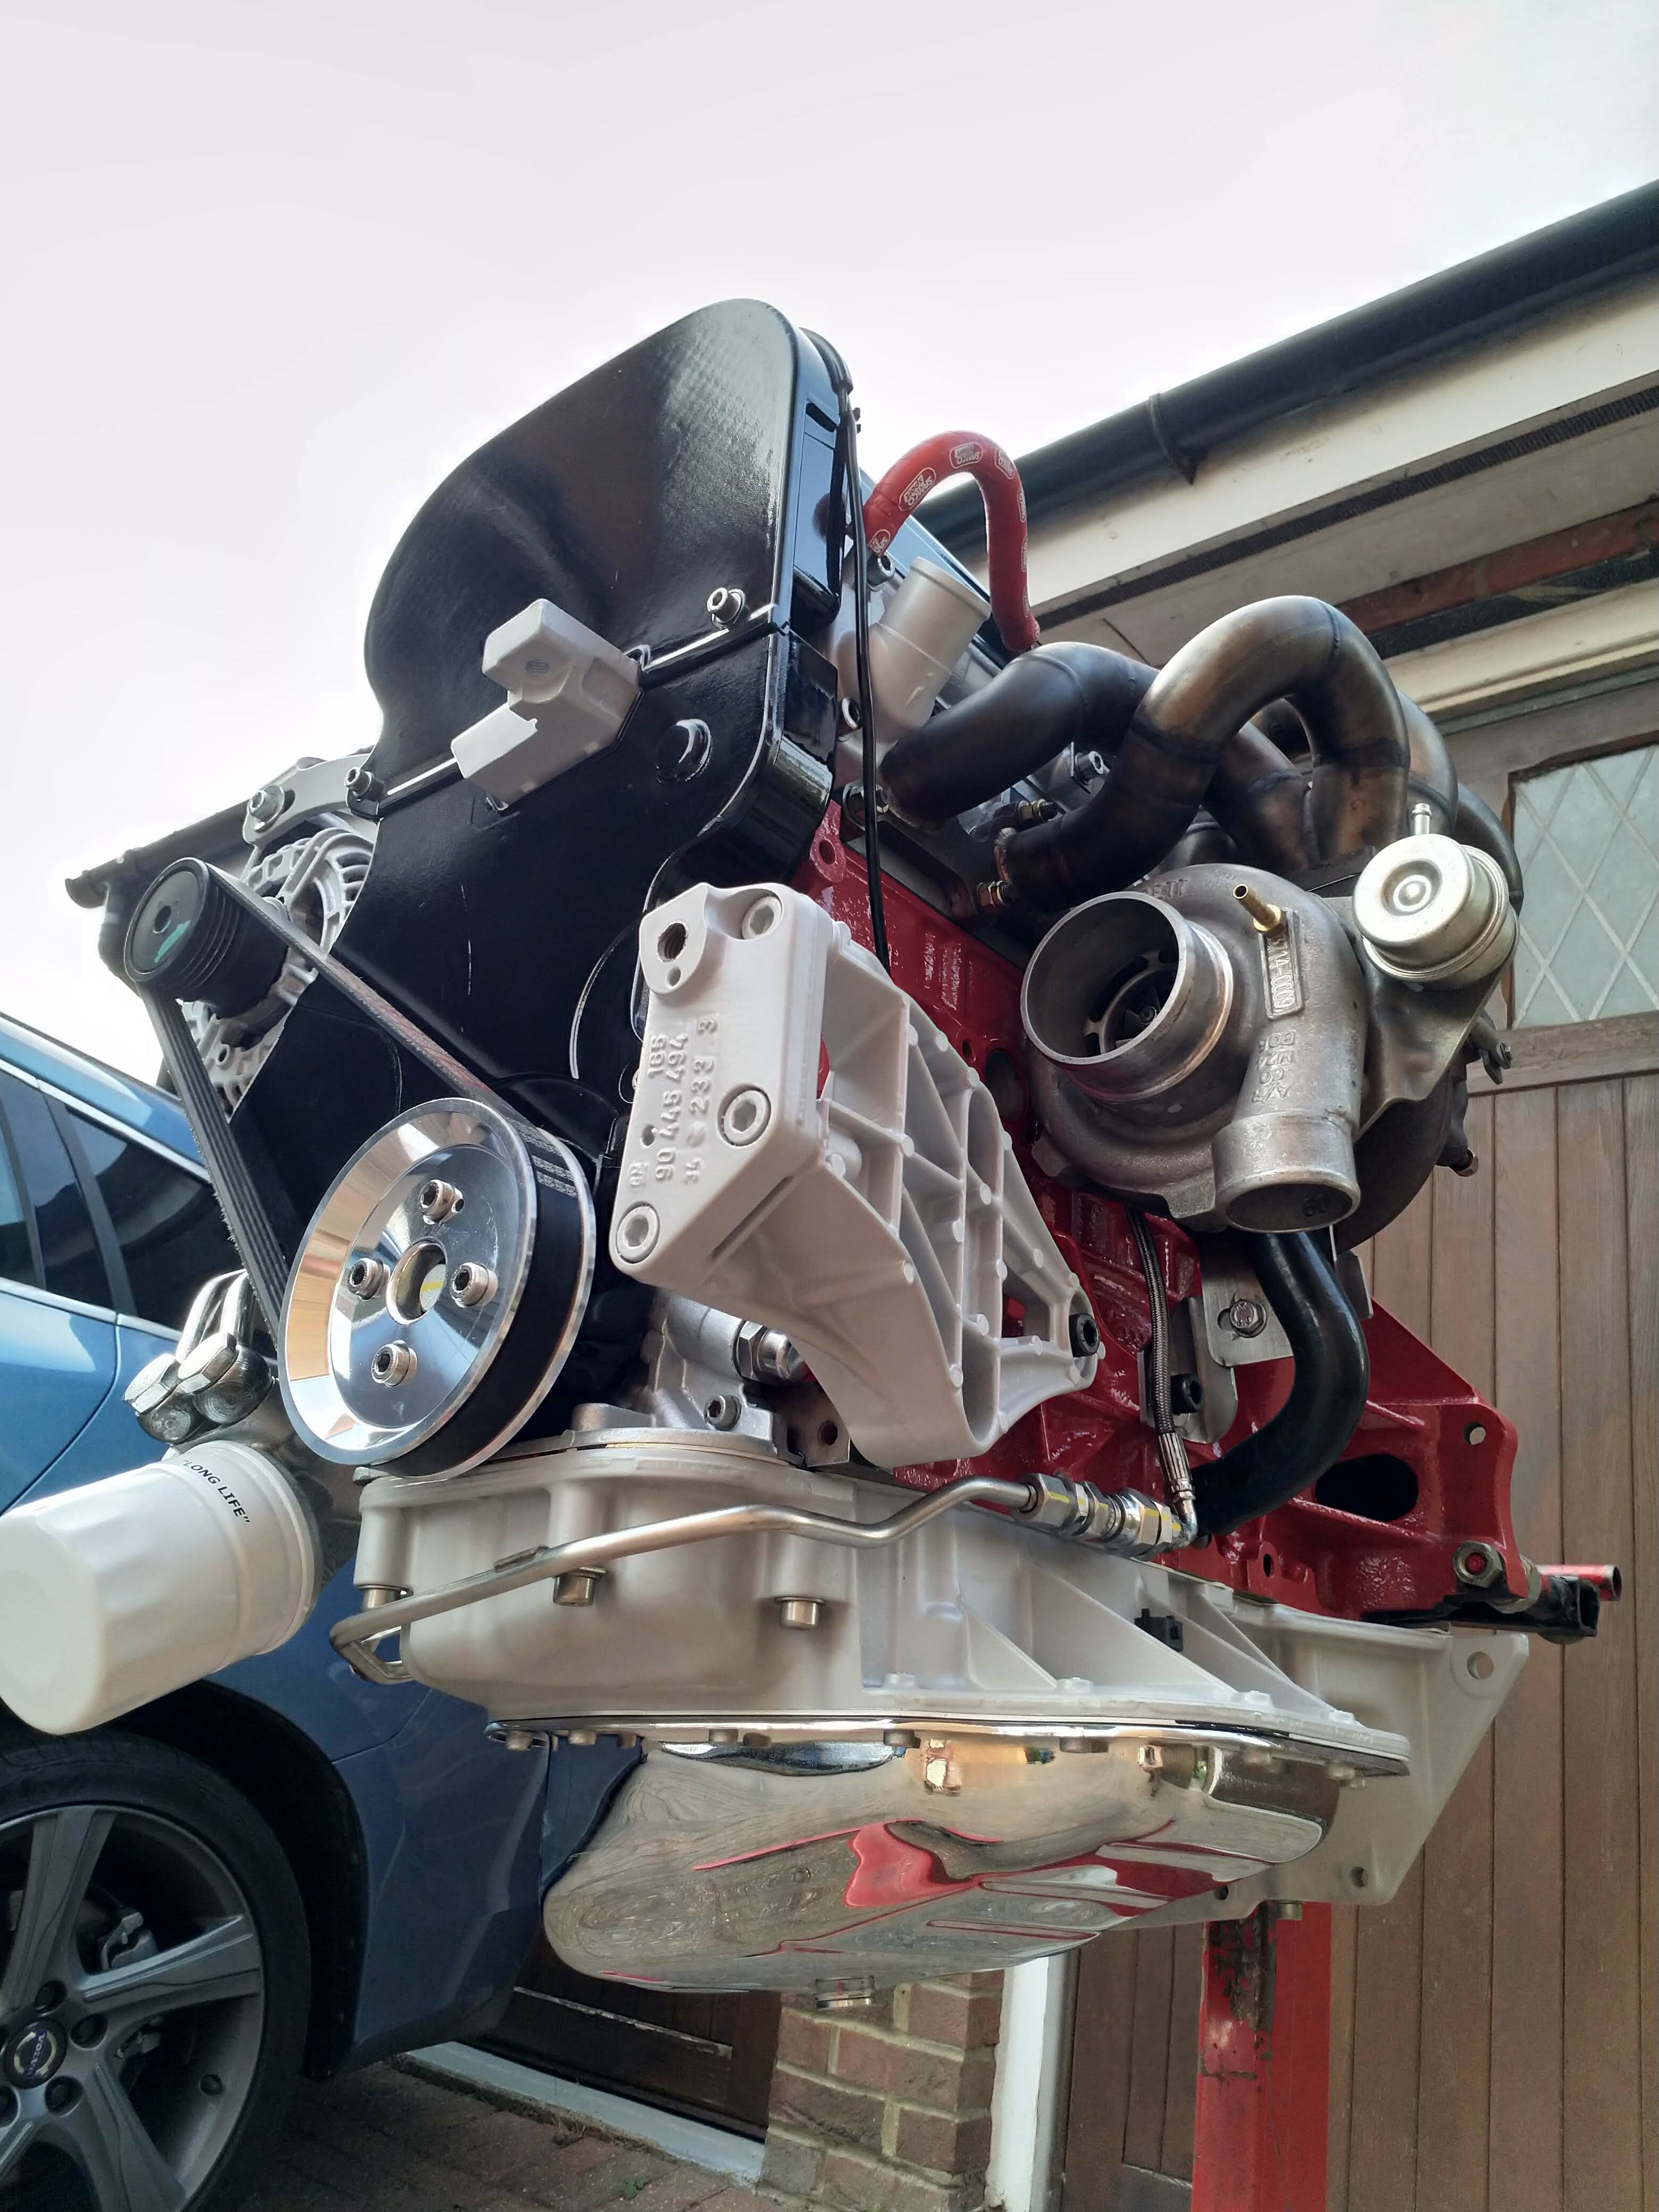
Hello mate, just seen this reply! Not standard no, the standard one wouldn't flow the boost level above 4500rpm so this is an EDS inlet manifold. I'm 99% sure it won't fit mate. The inlet ports are a different shape. XE is just an oval ( which is a better shape for power) where as the LEH is oval with a teardrop at the top for the injector.
This is a genuine EDS manifold because I wasn't surely on the quality of the fakes, but all these years late would seem their pretty good!
Had you thought about getting the exhaust manifold ceramic coated? It'll certainly help keep the under bonnet temps down and more to the point look amazing for that authentic OCD pleasure
I often thought about getting it ceramic coated, but I do like having a glowing manifold!
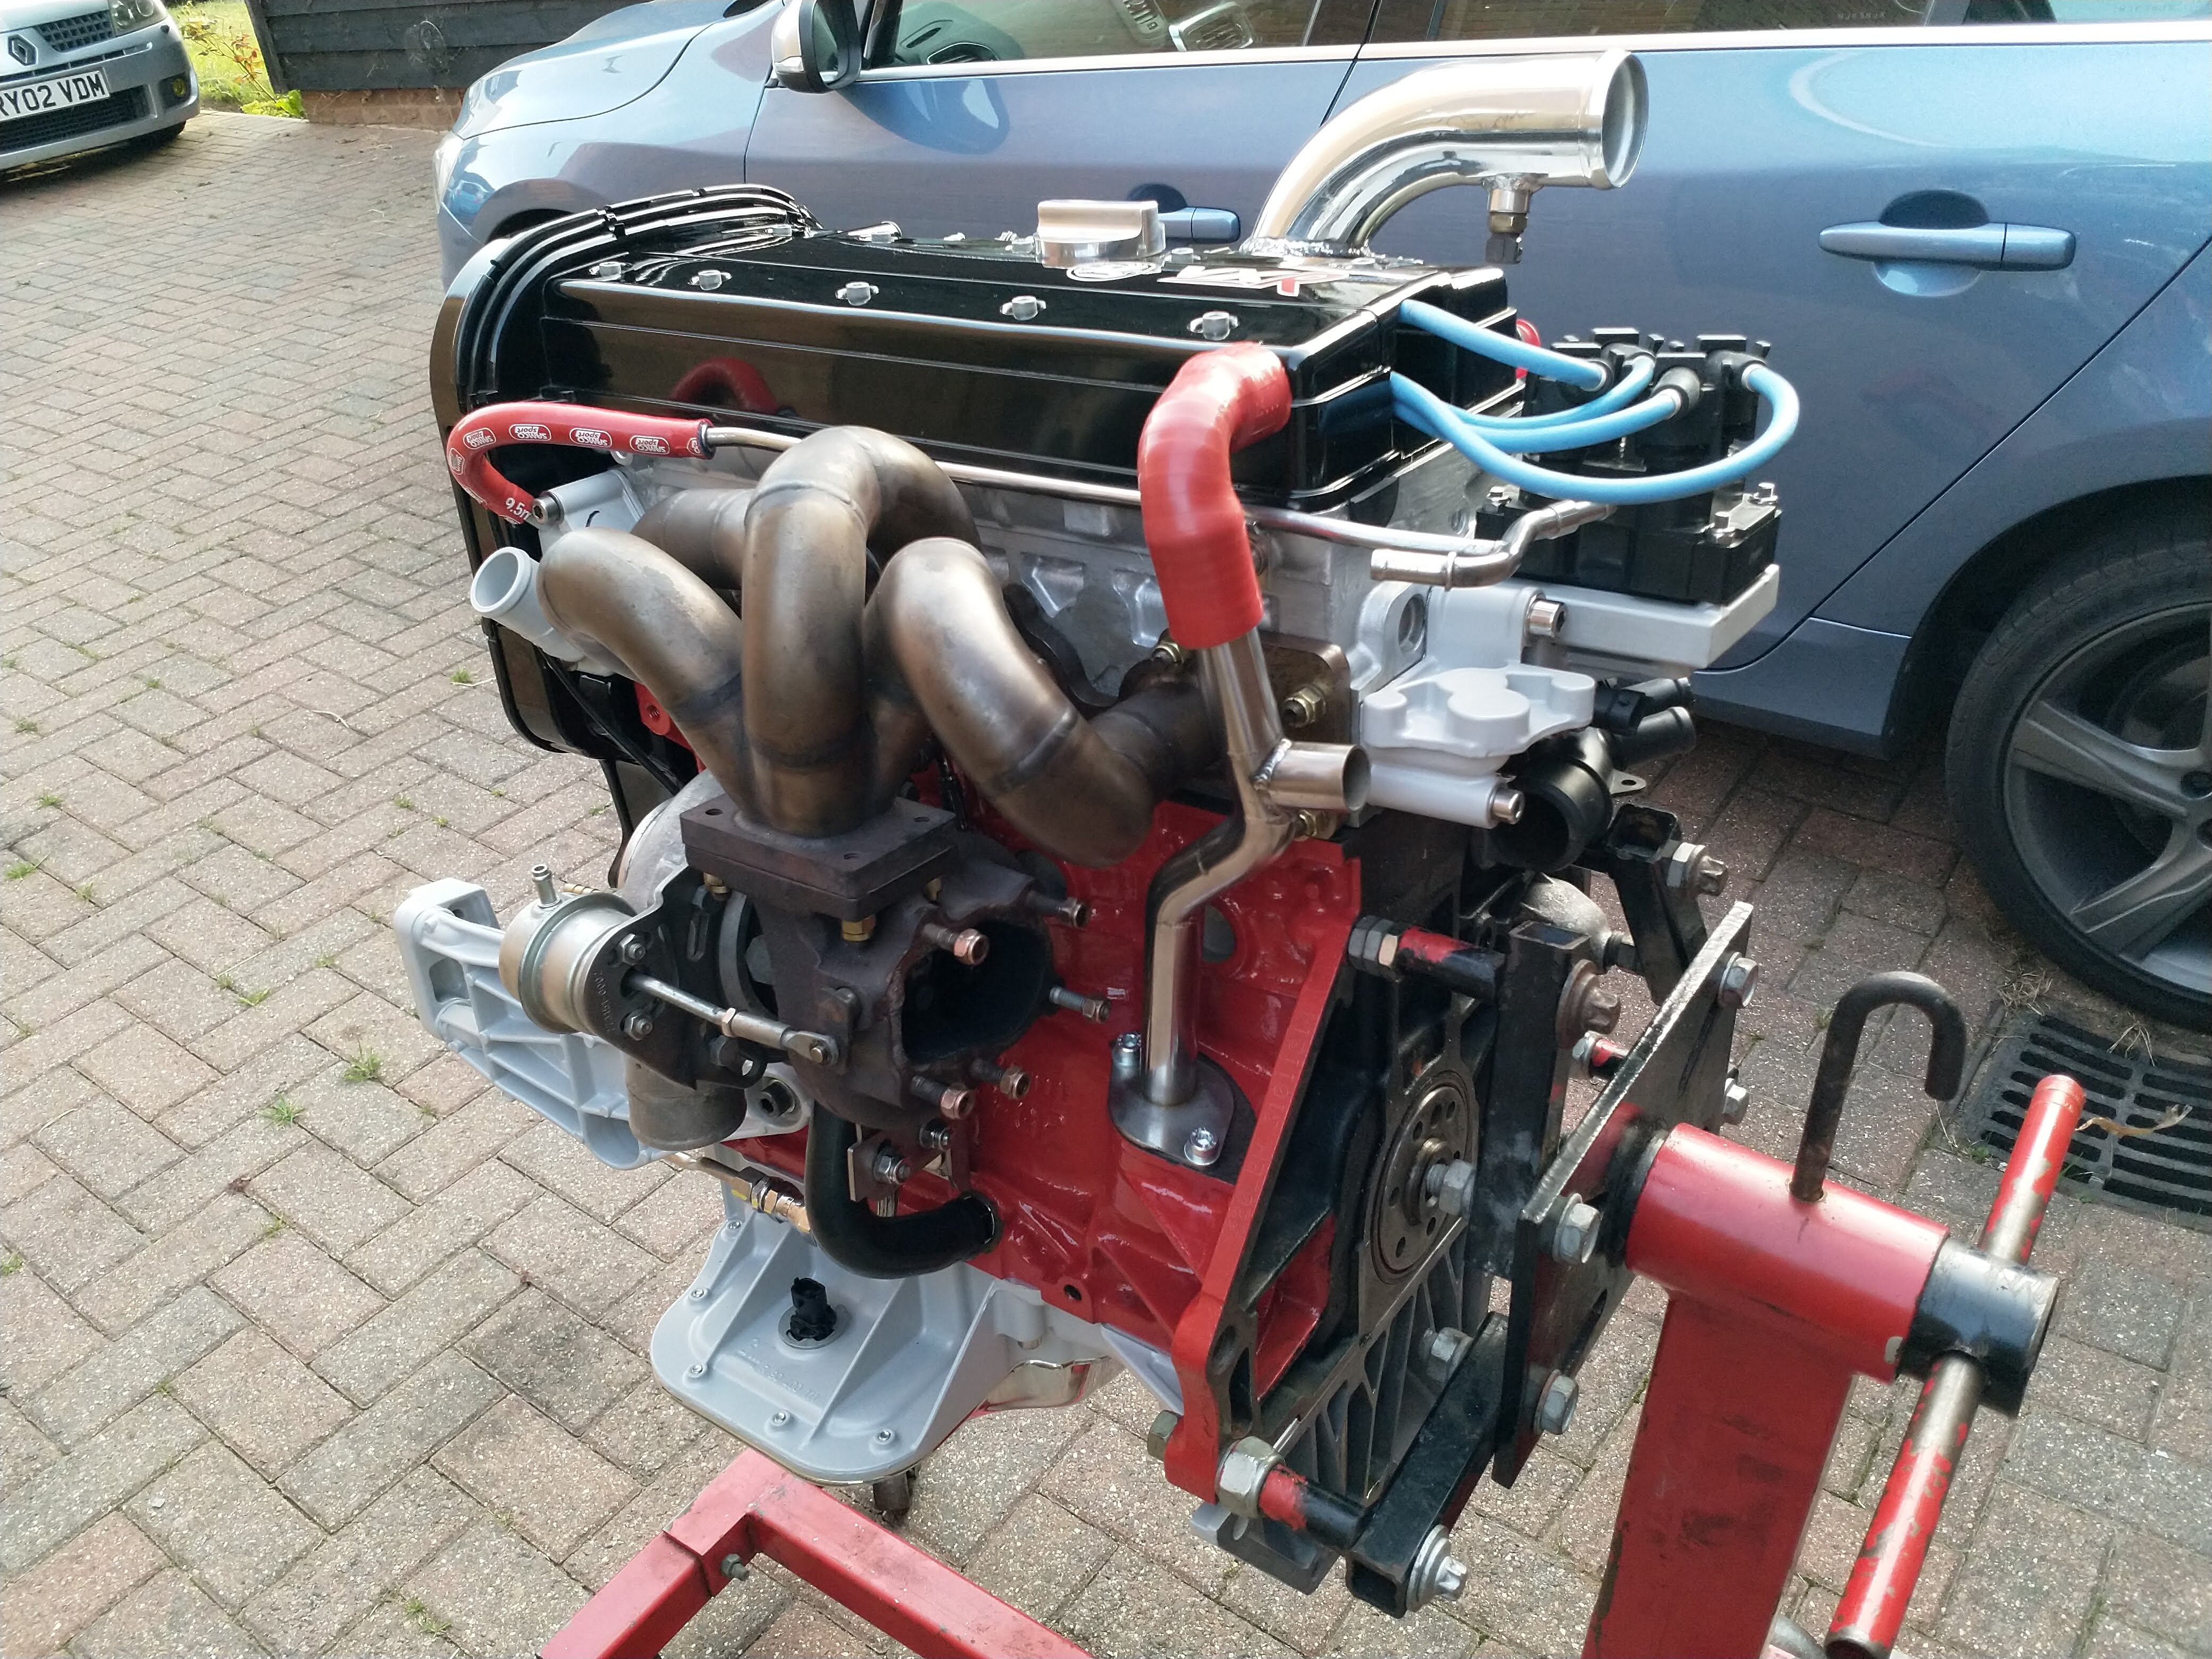
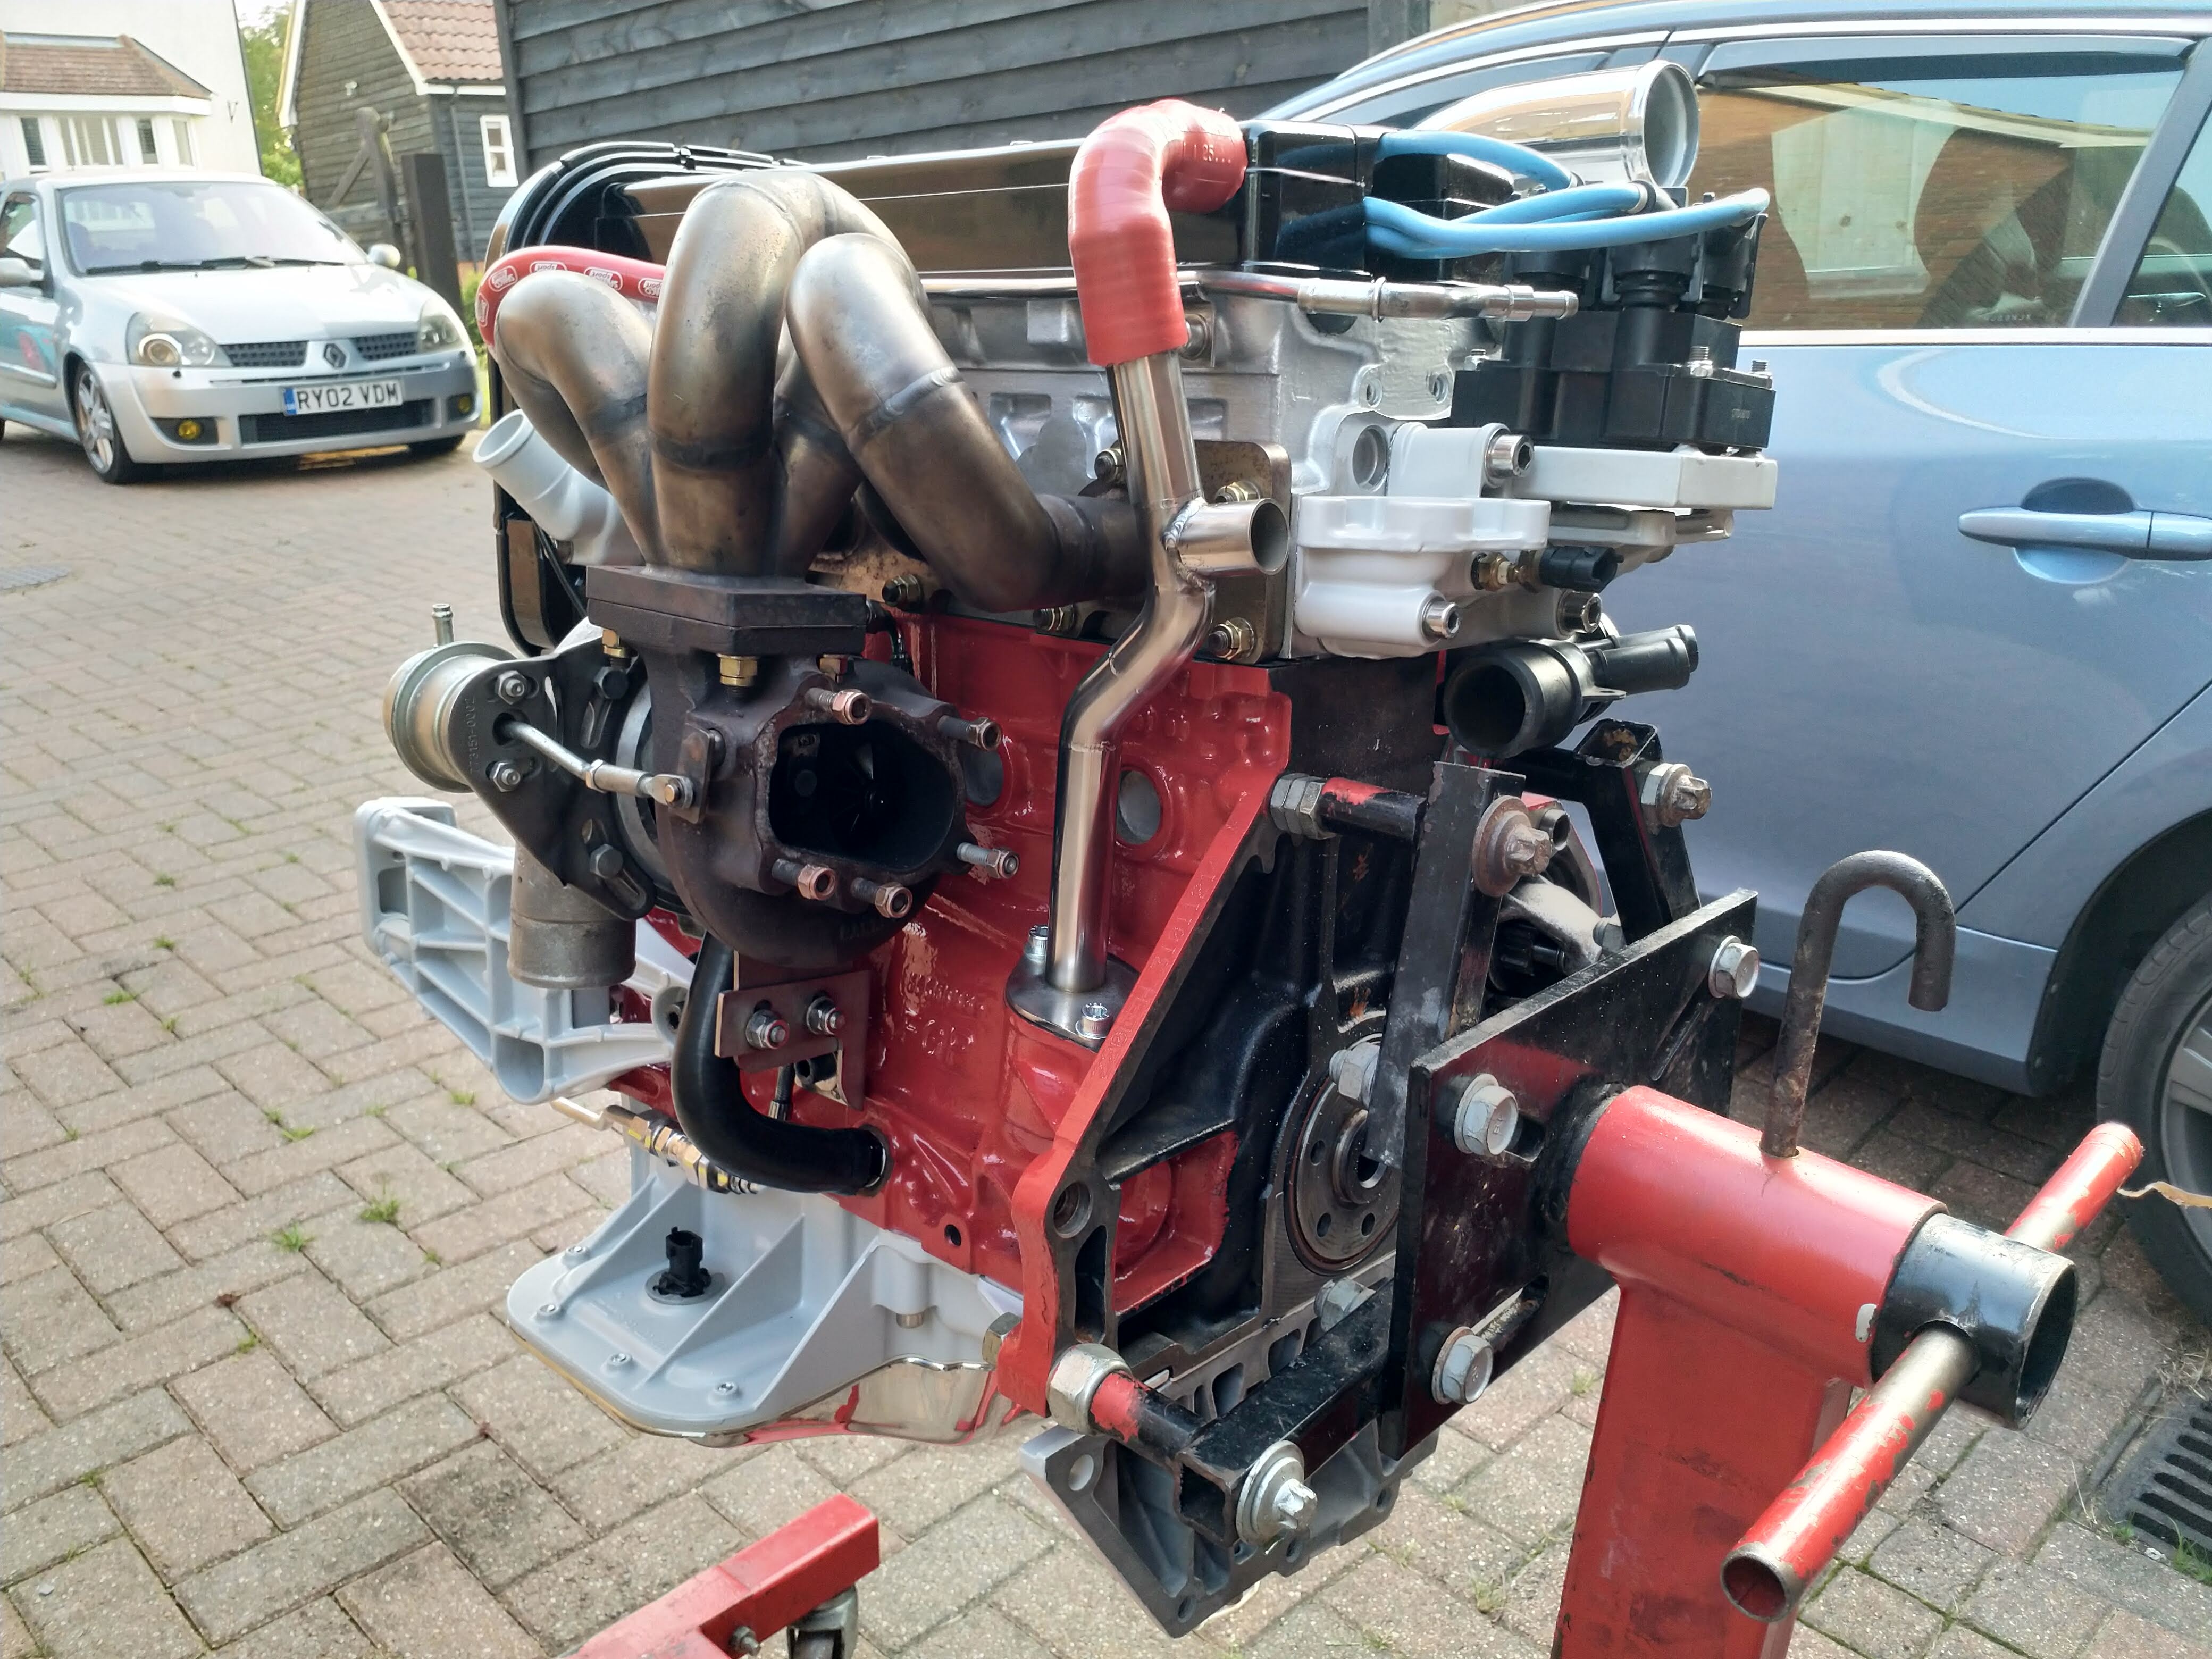
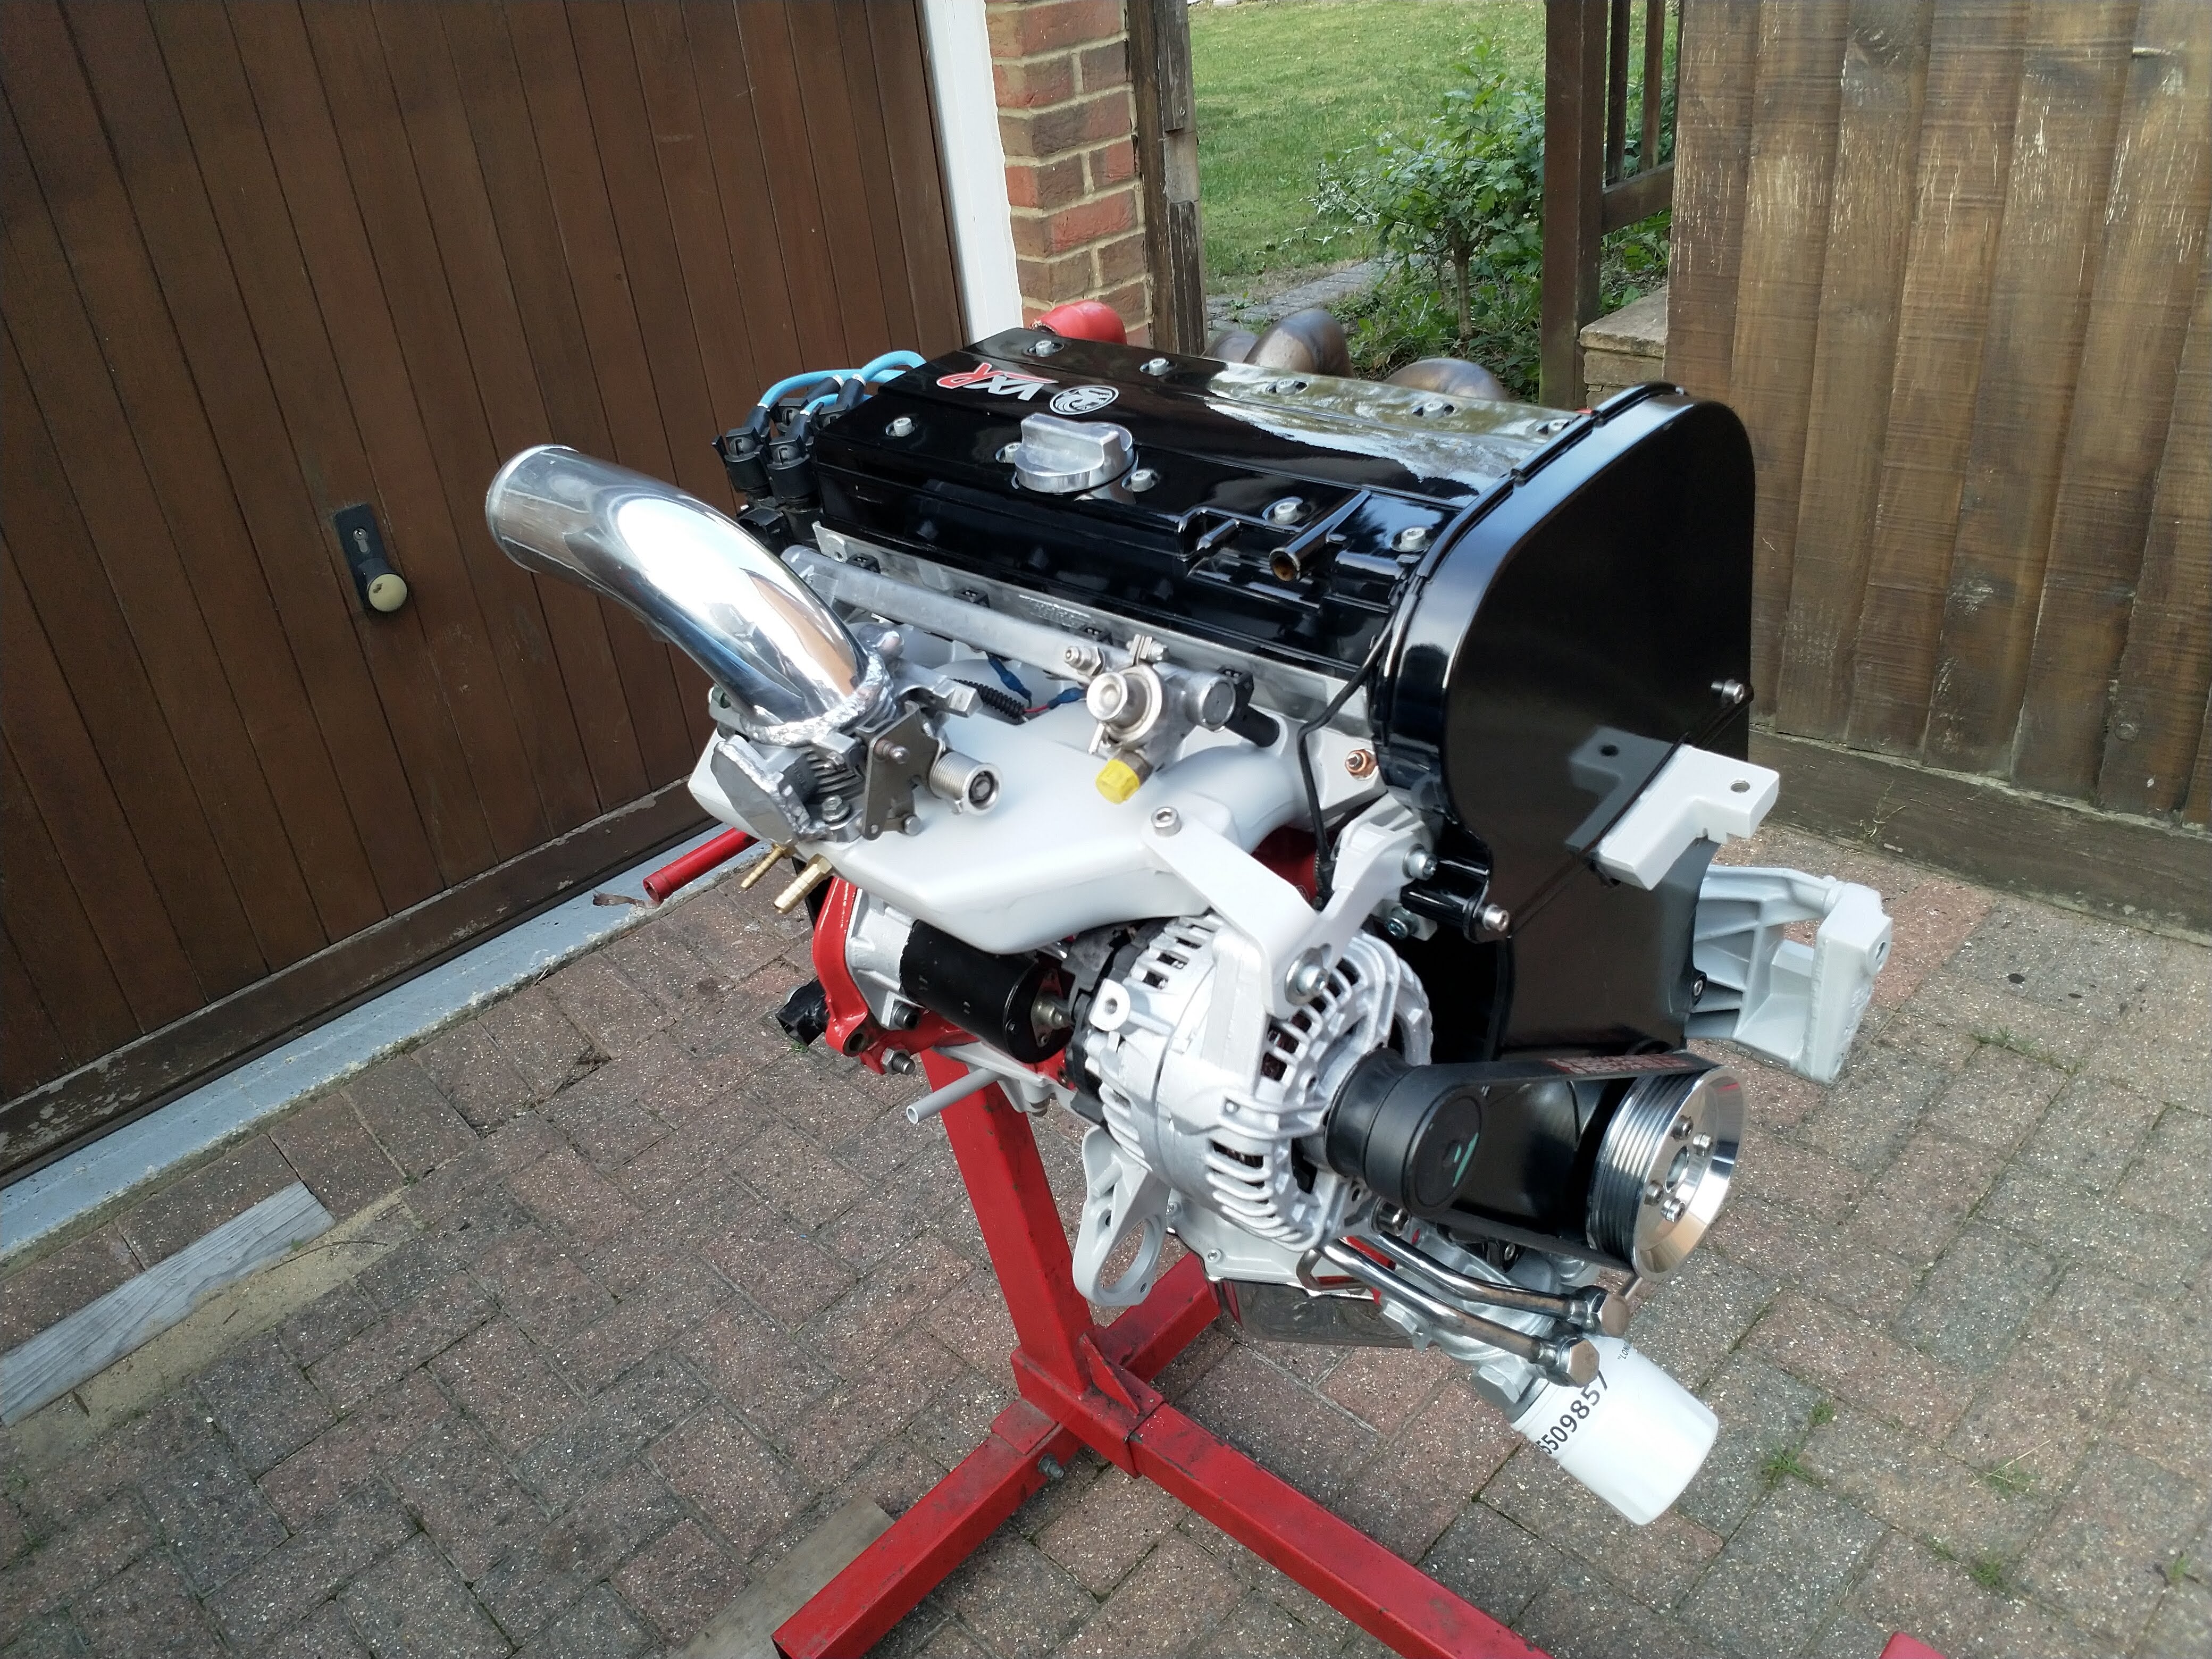
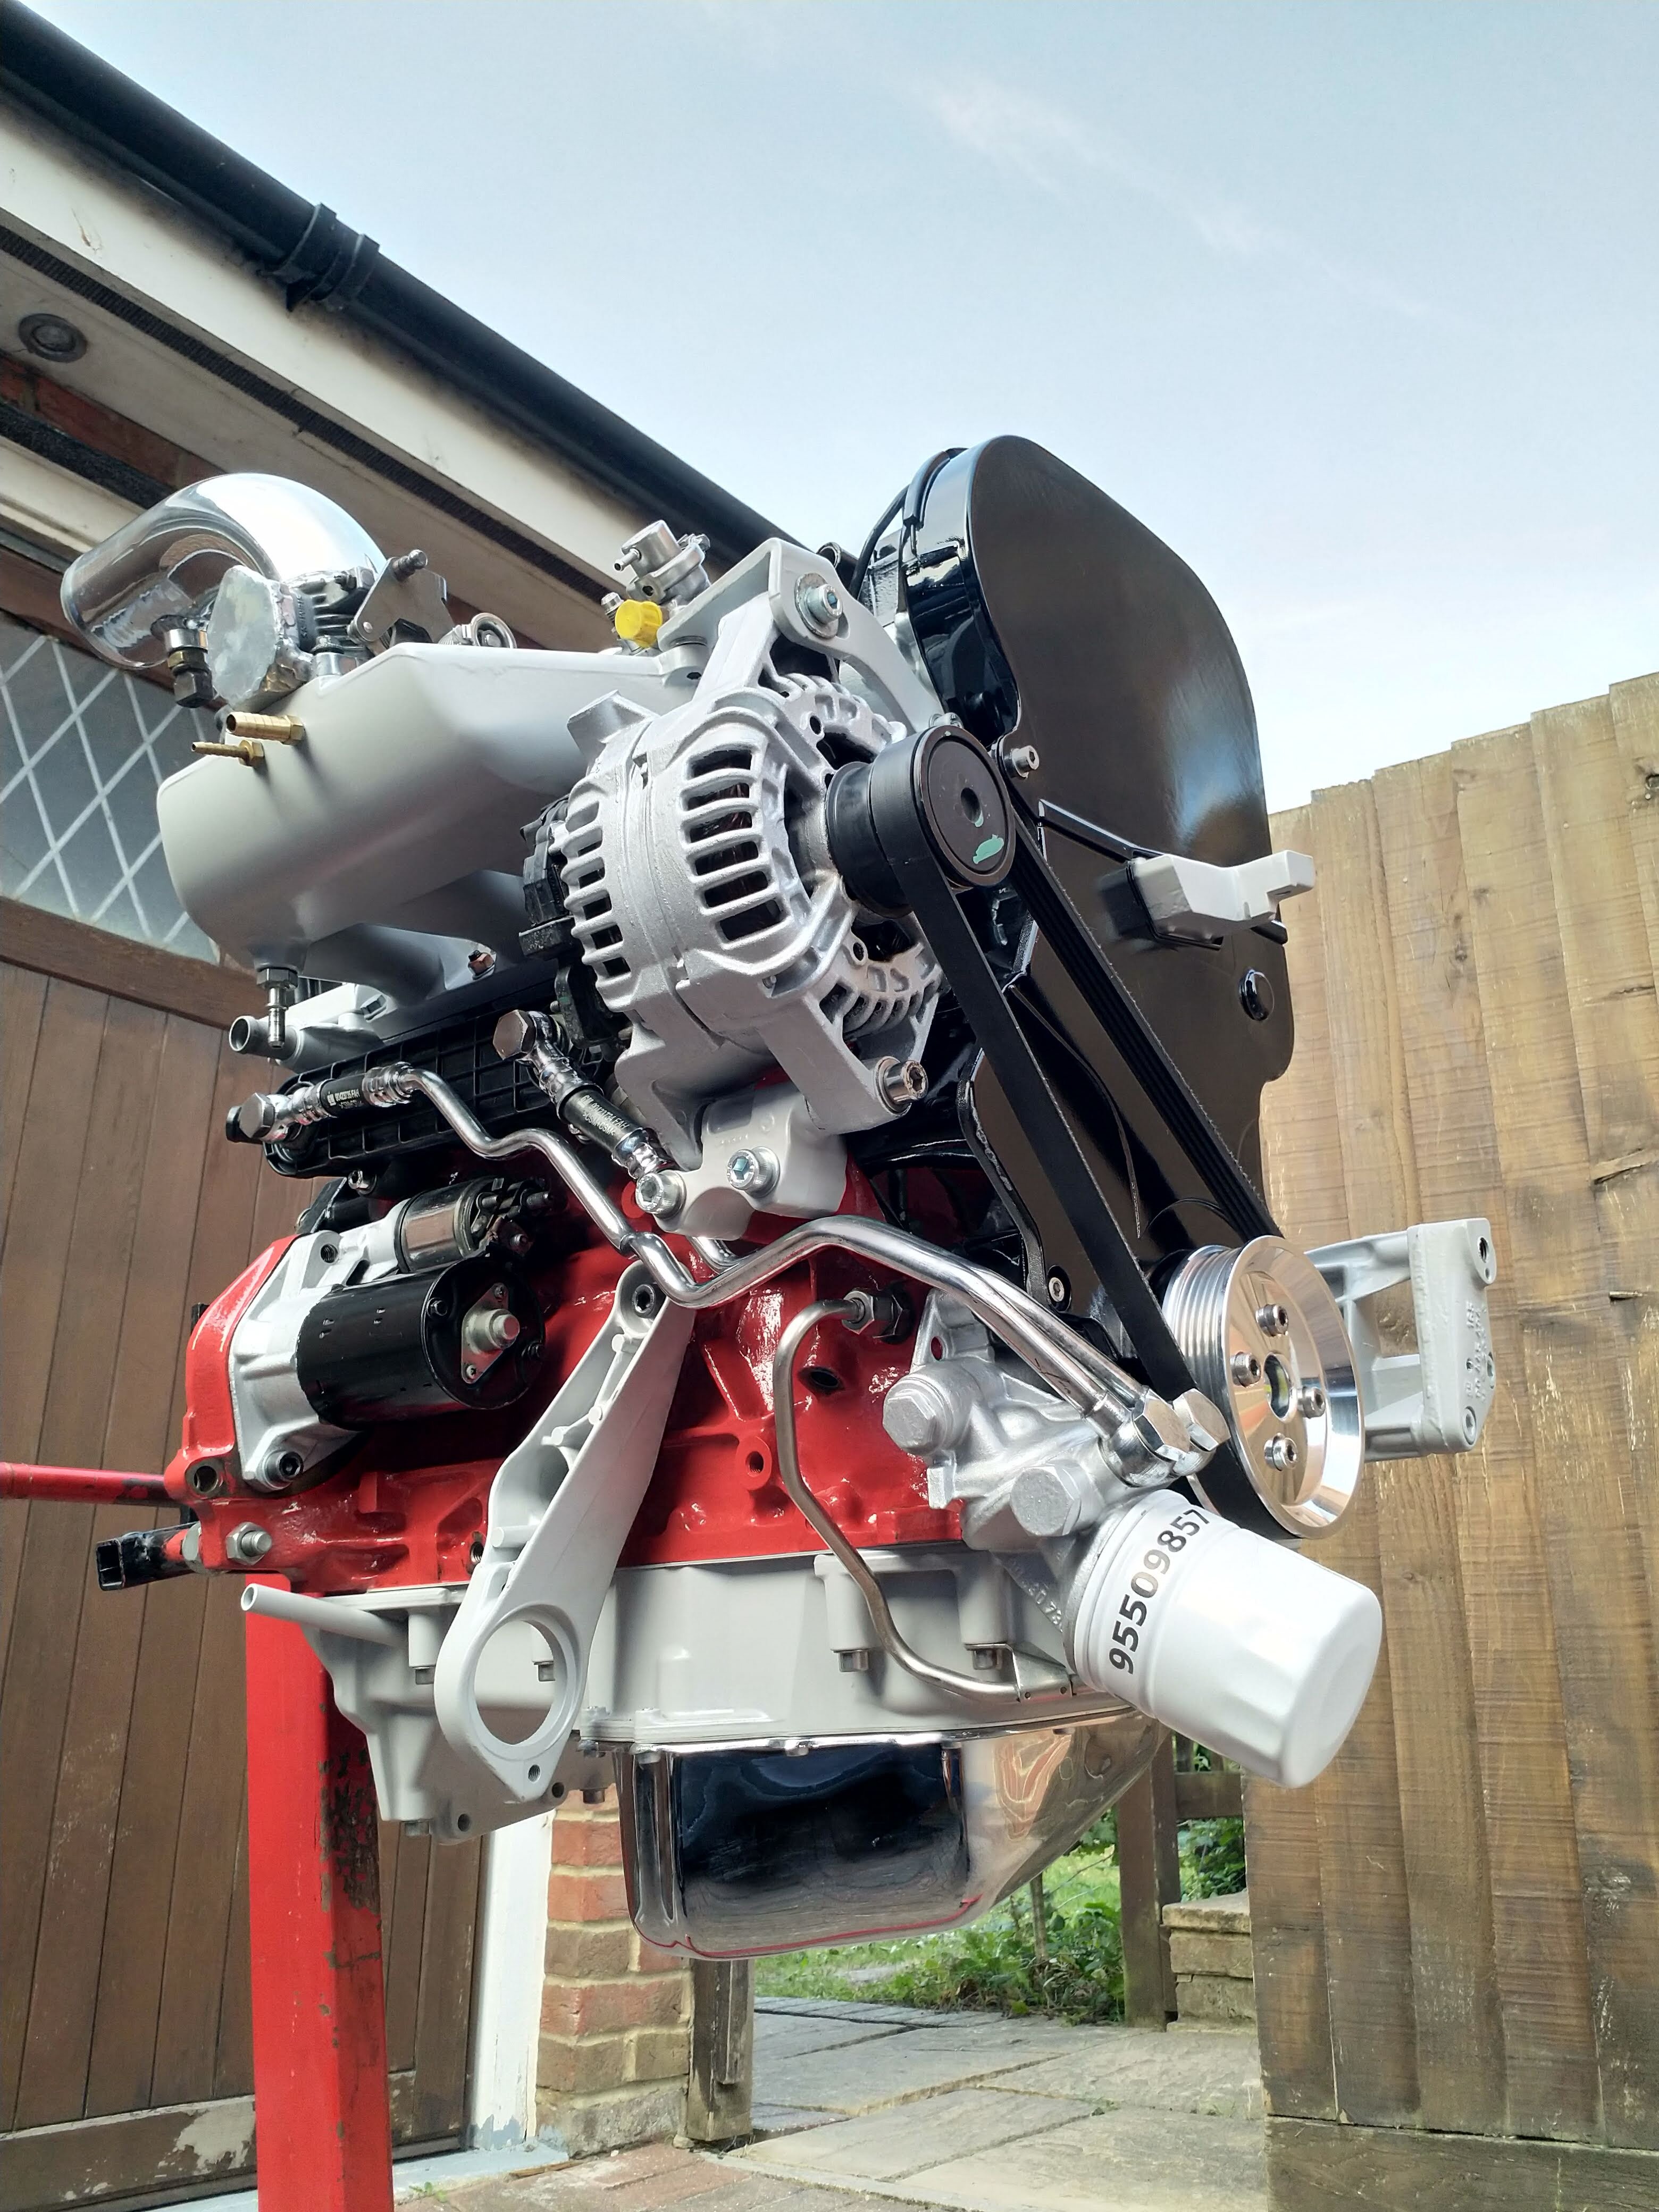
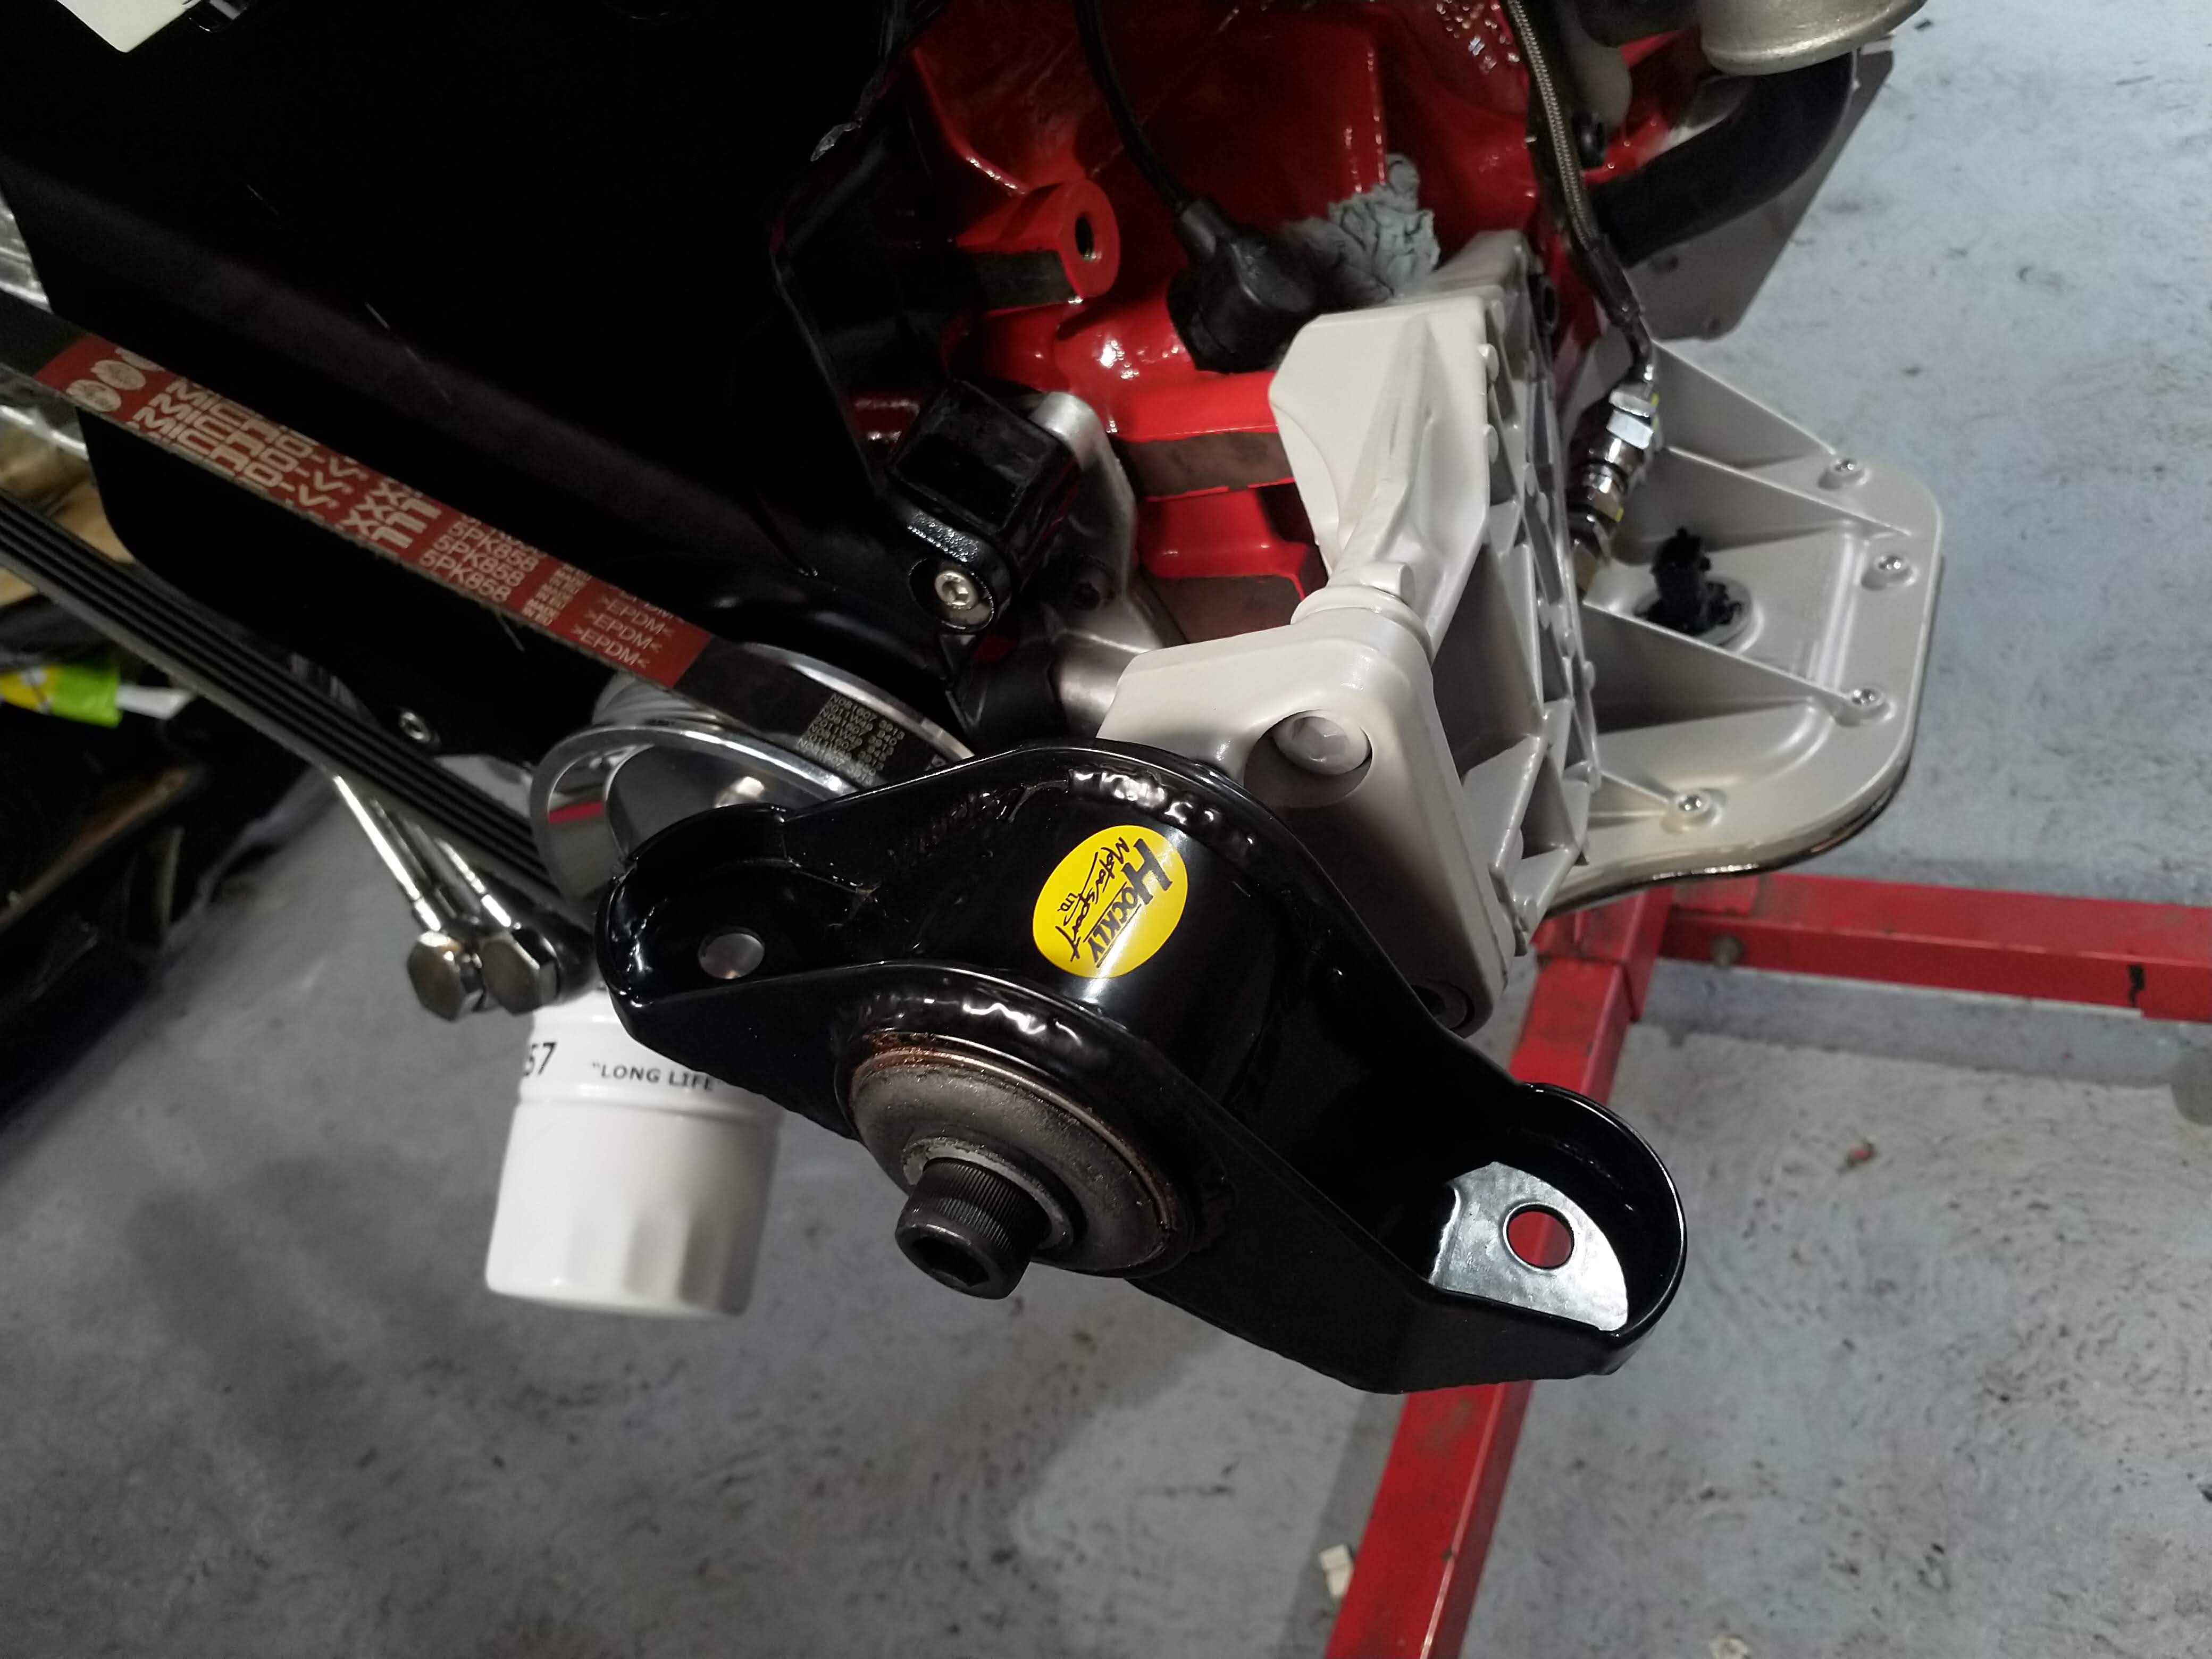
So next, my harry hockley engine mount turned up, sexy bit of kit. but also still a rubber bush. I don't wanna any crazy vibration in the car!

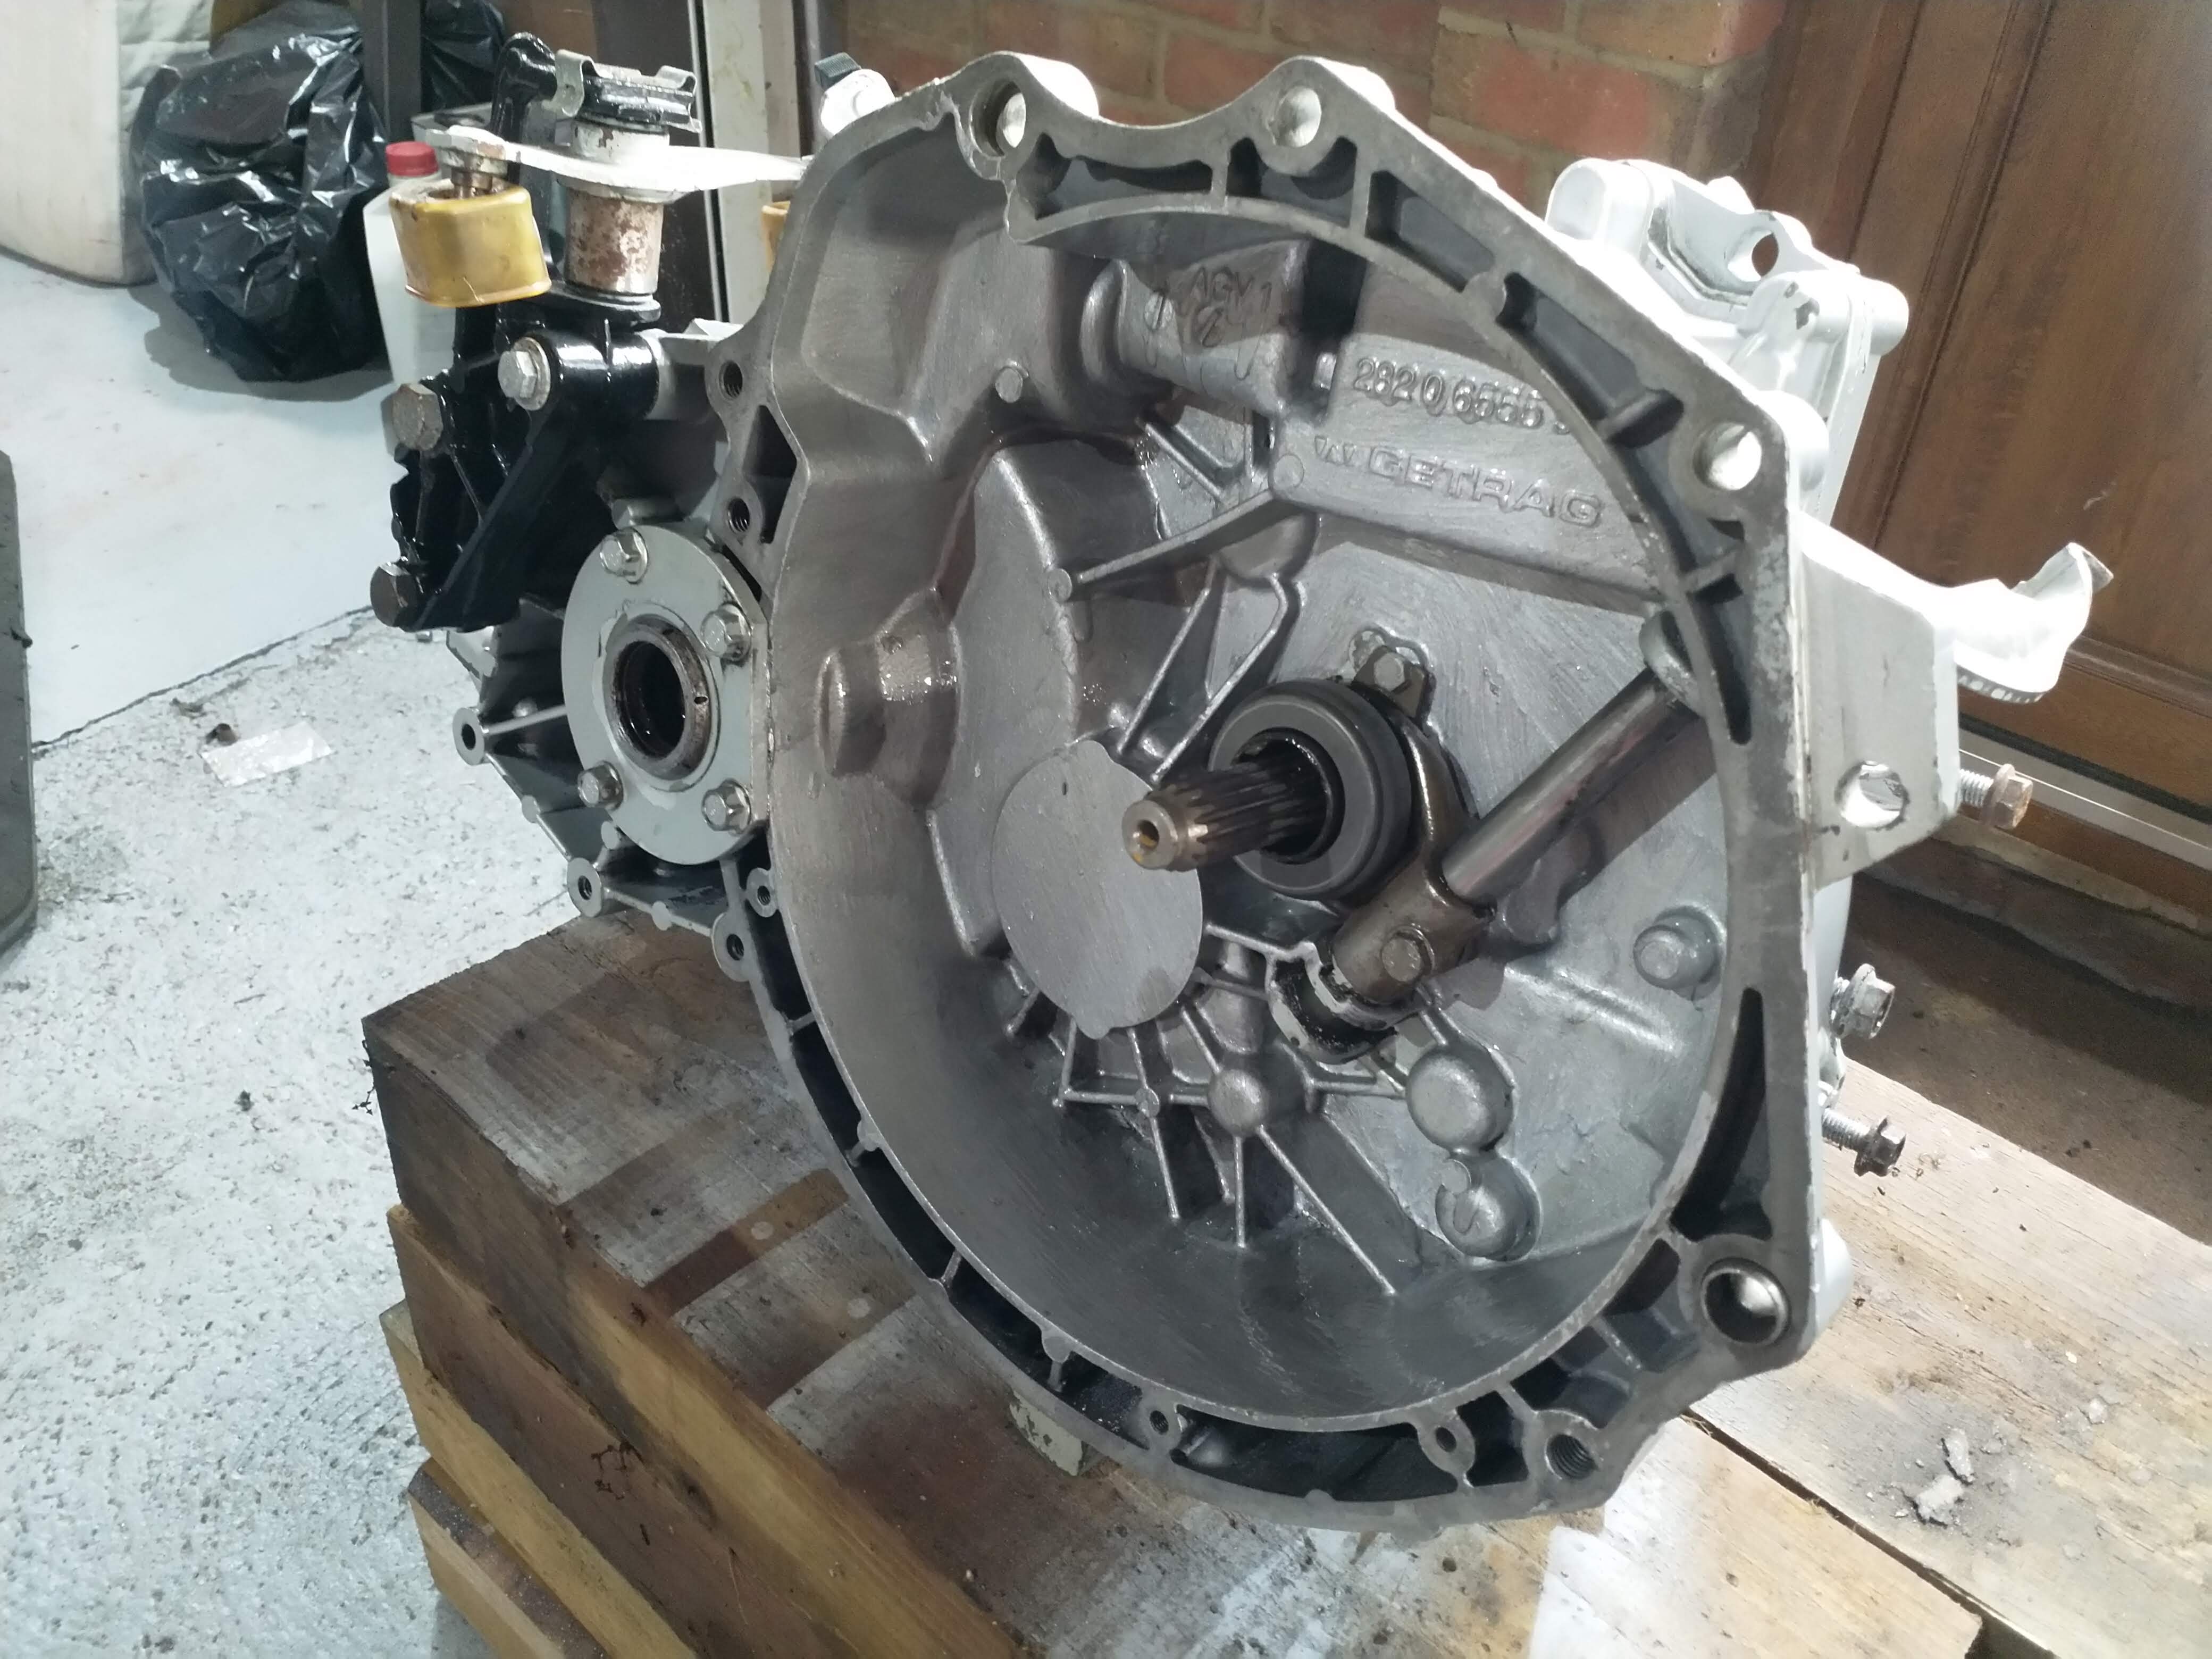
So I was there, ready for the gearbox to go in. I toyed with the idea of respraying the gearbox again, but I think its not worth it, so I bought some touch up paint for now and will attack that with it in the car. I threw some hammerite inside the bellhousing though to make it easy to clean
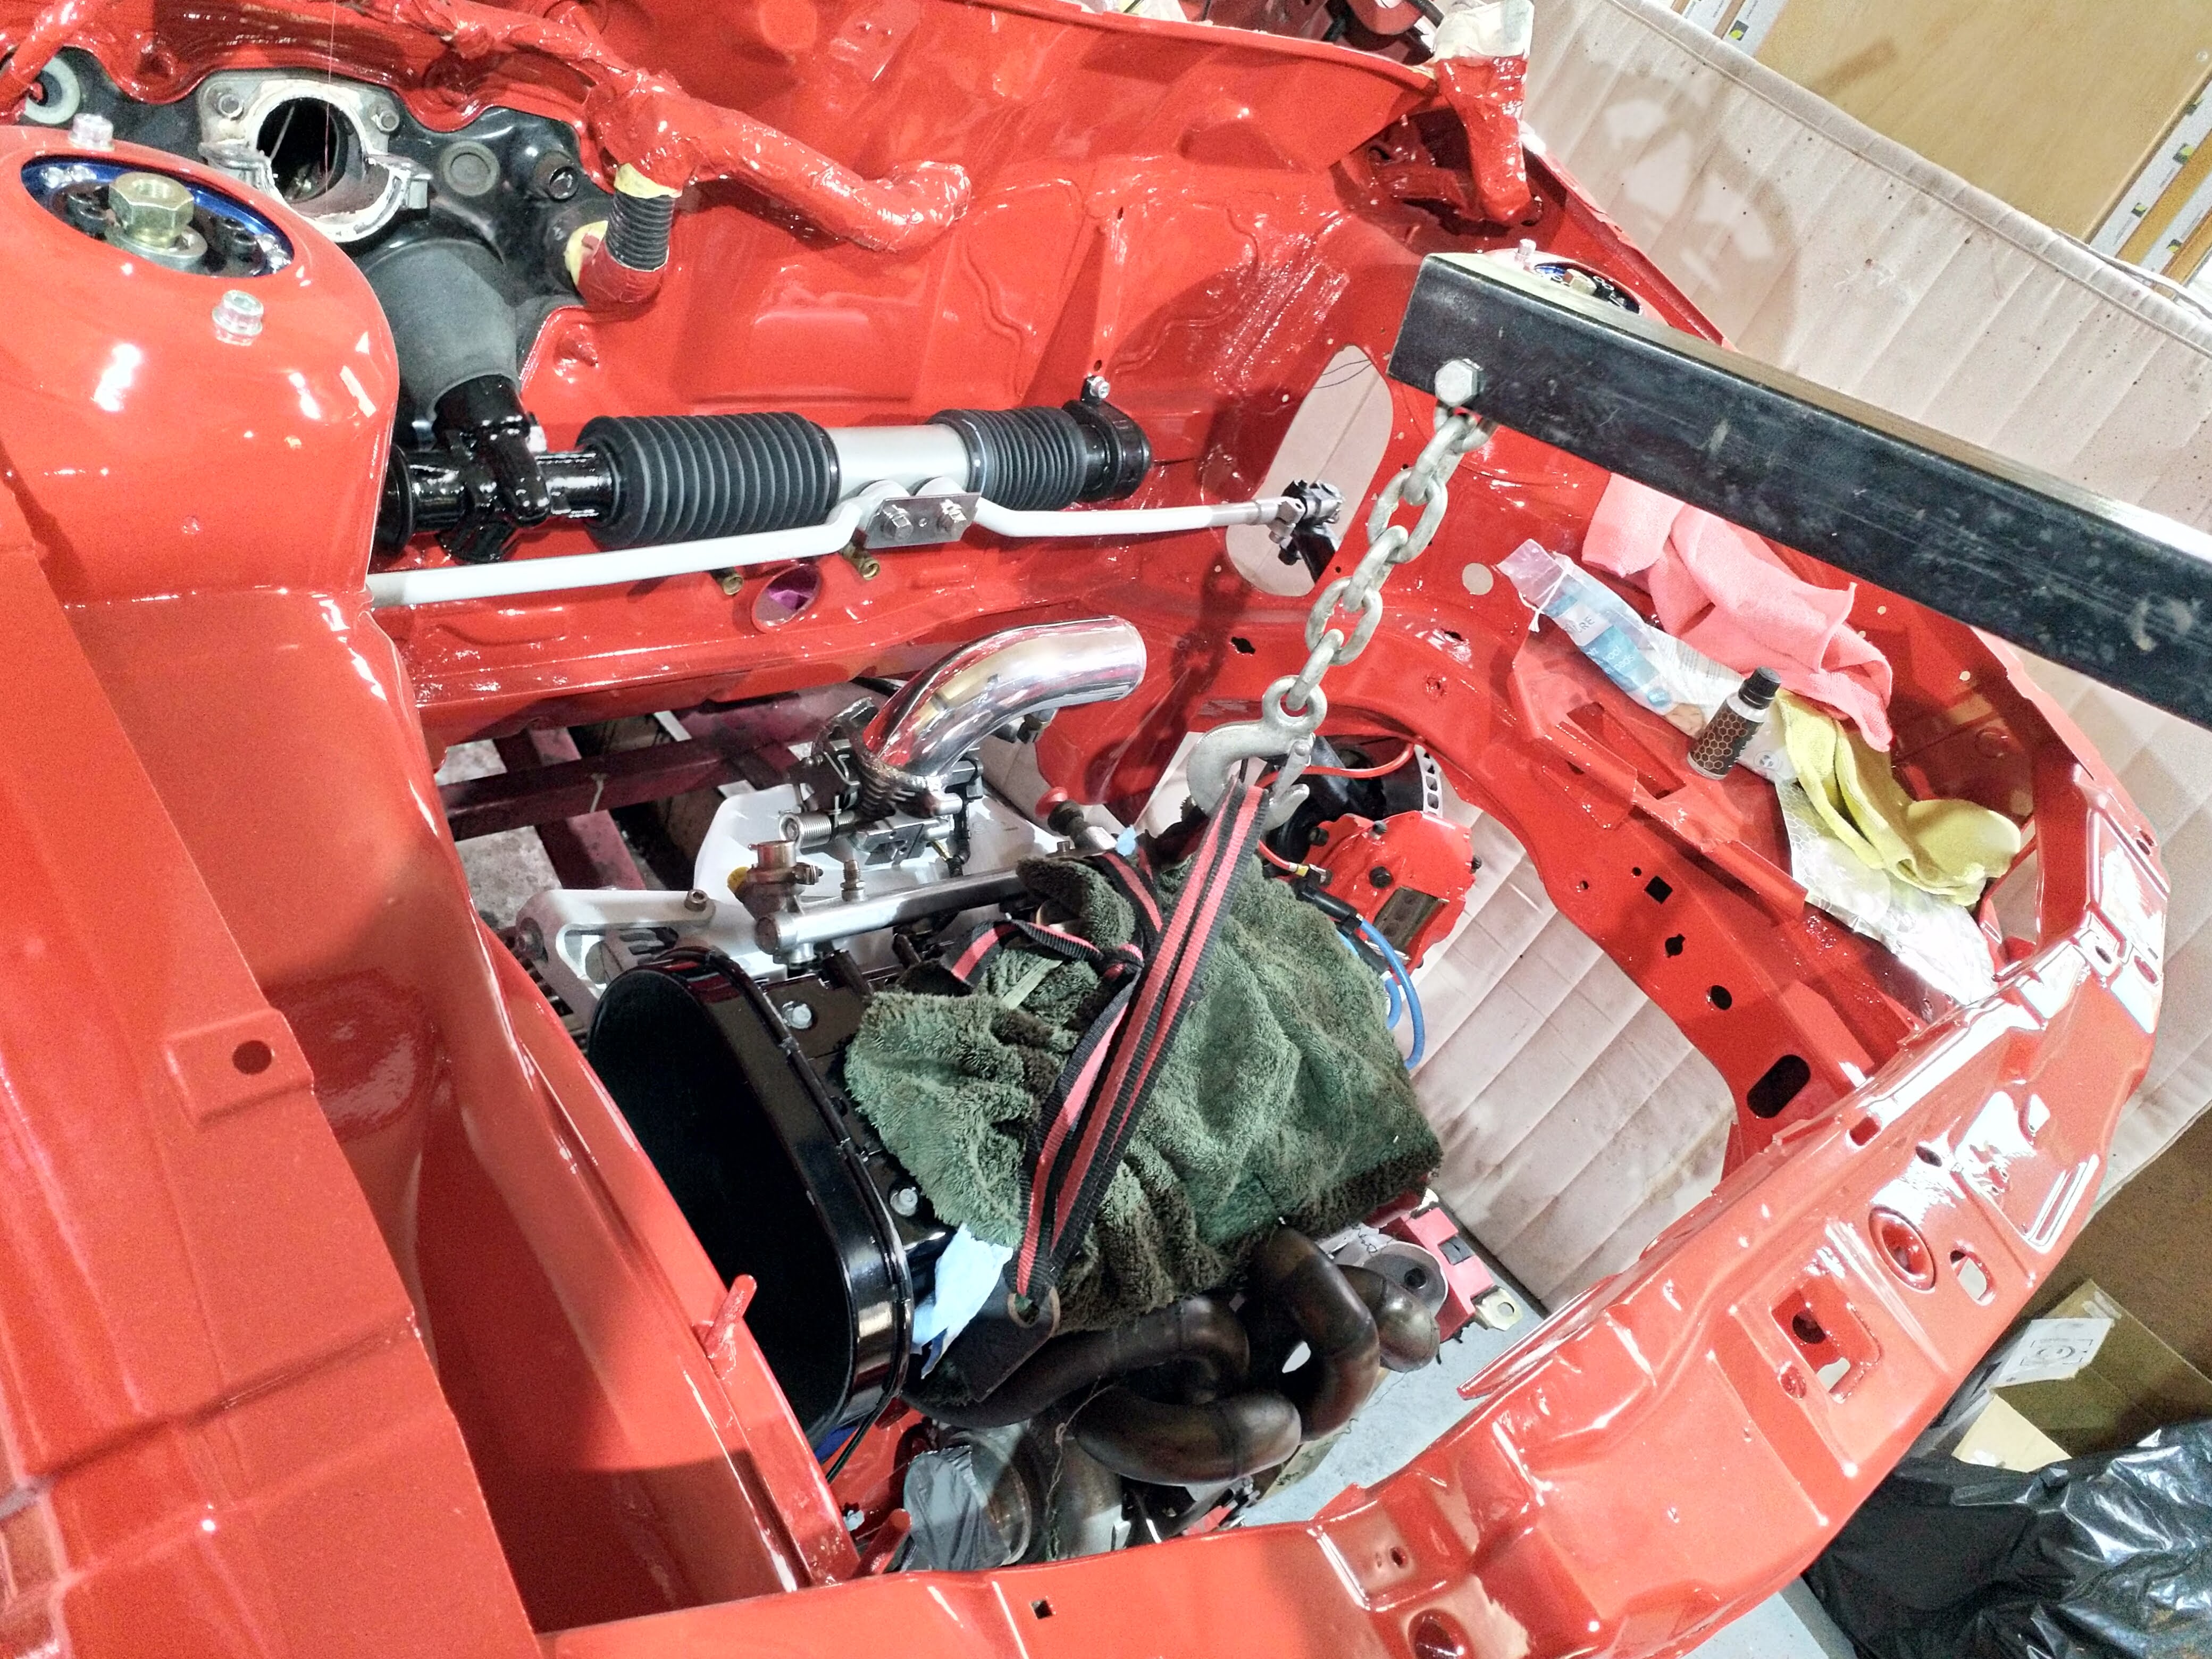
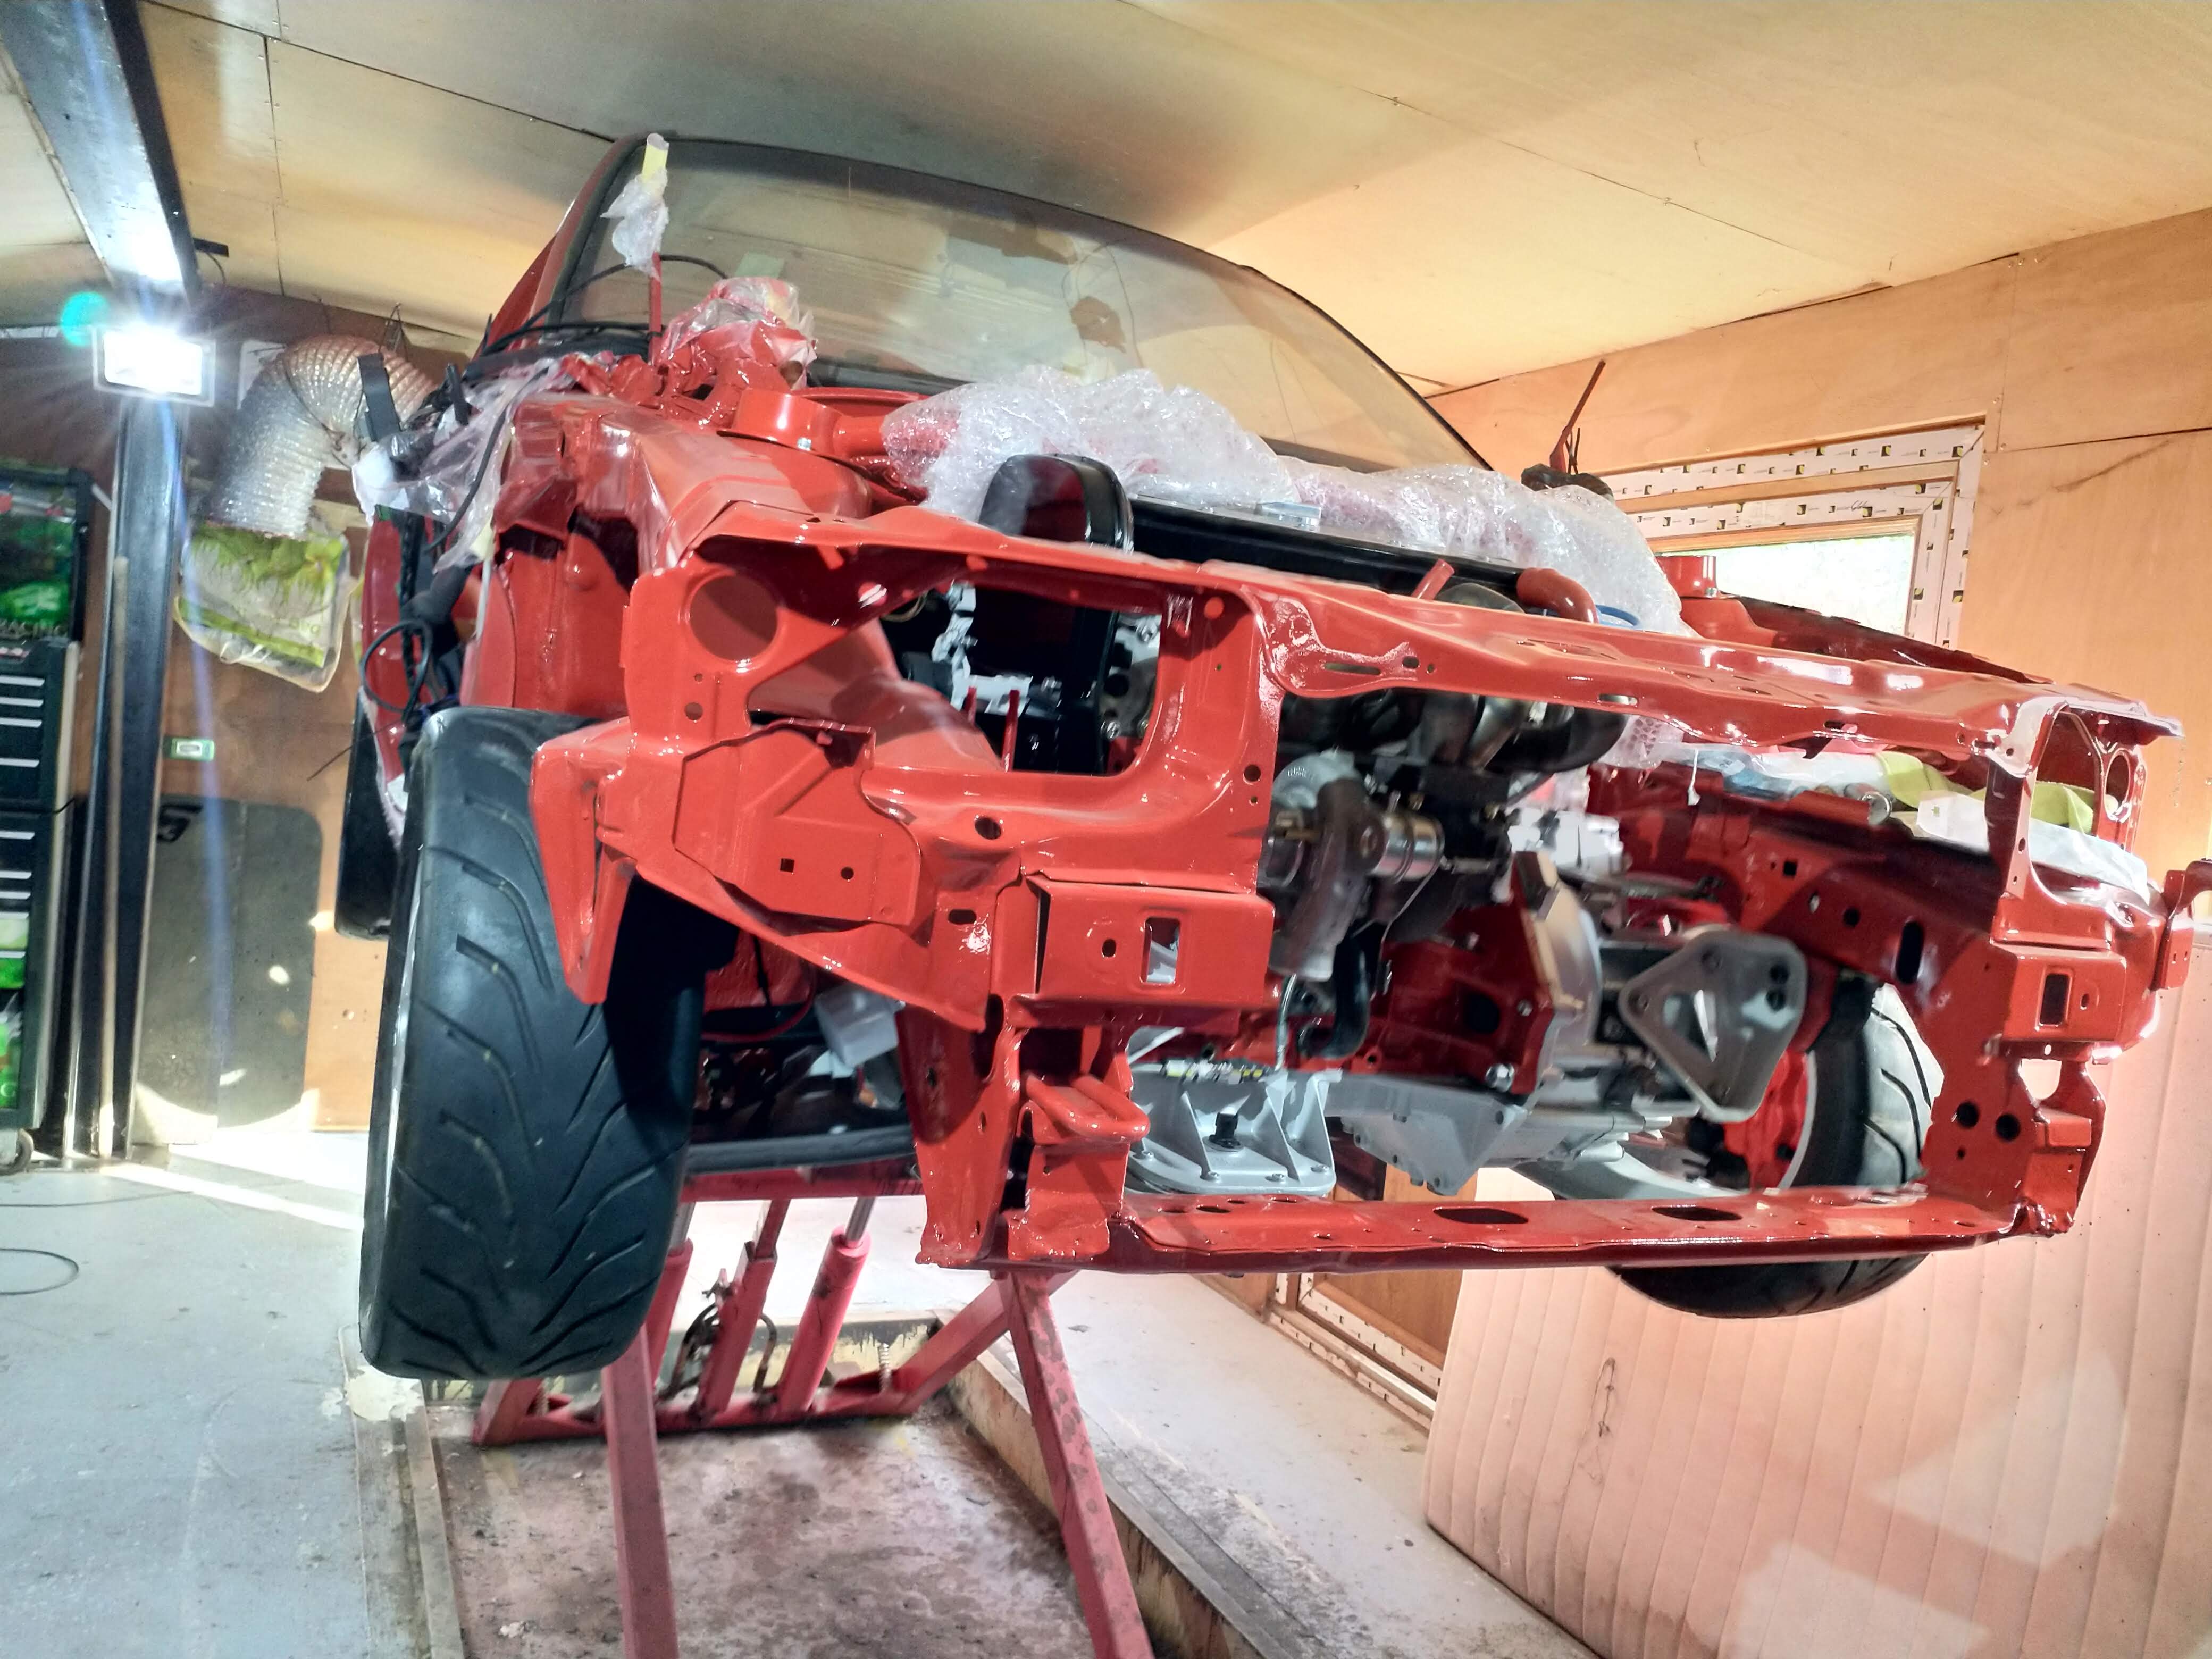
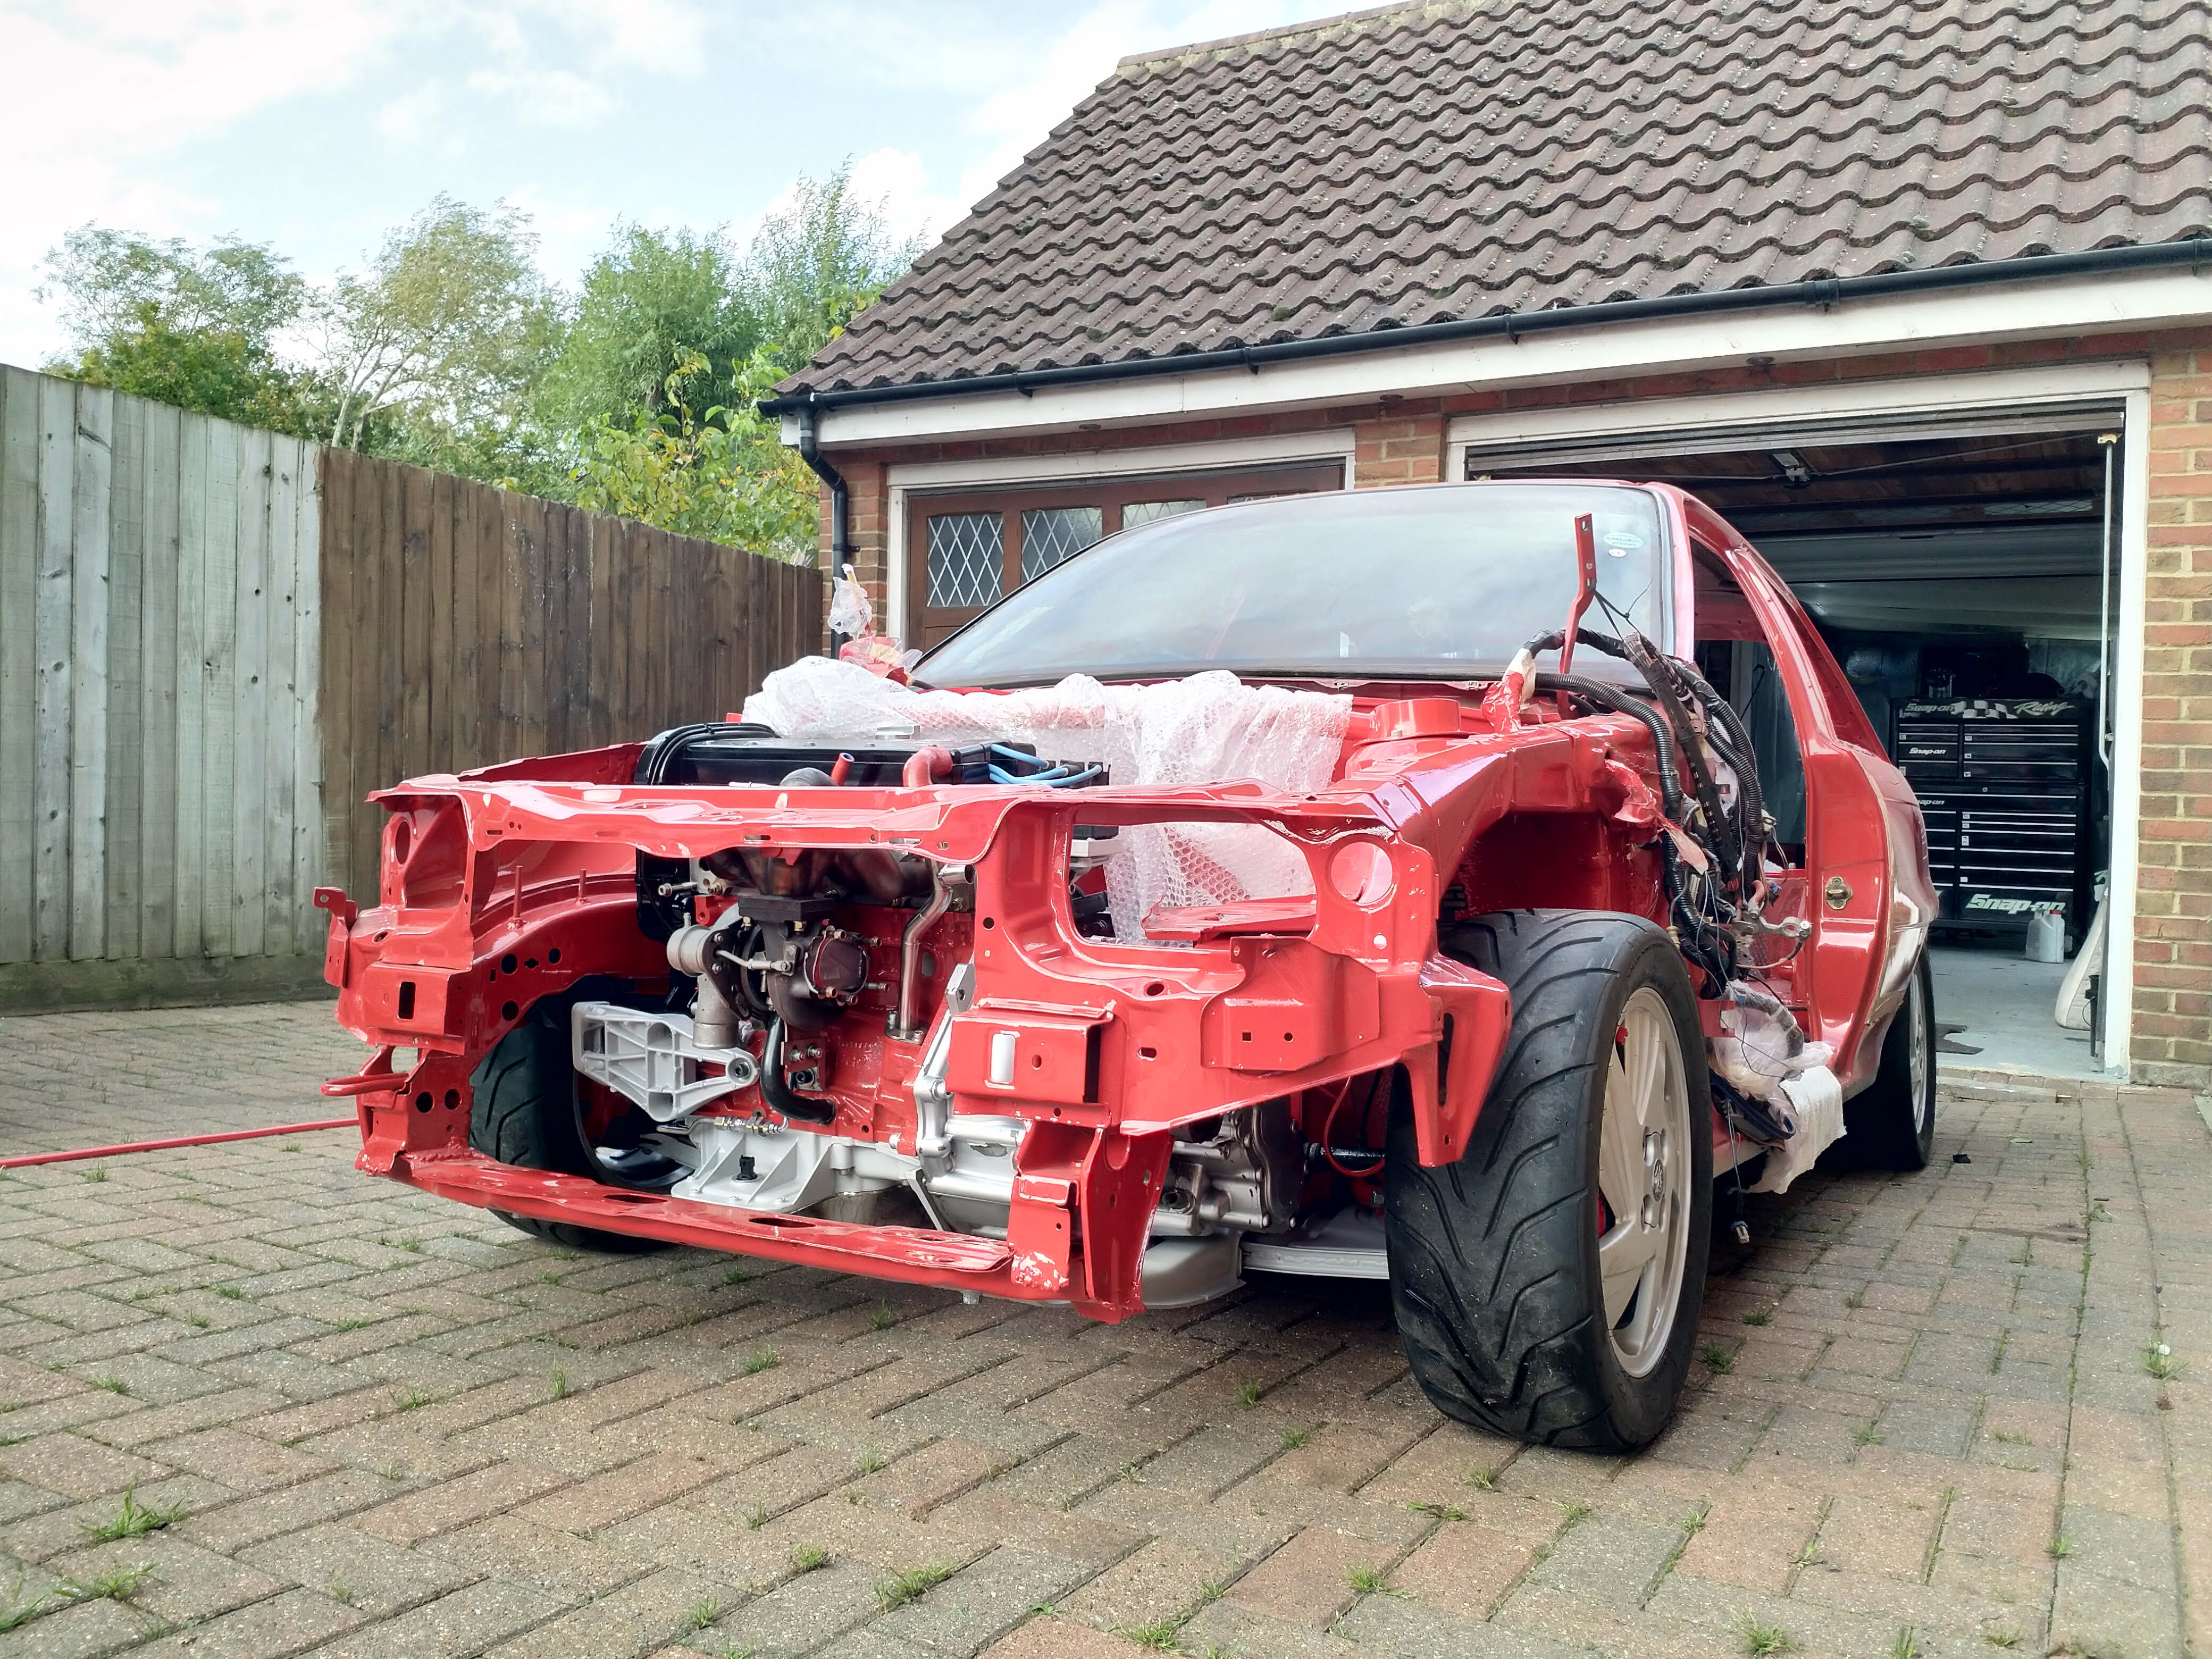
Gearbox on, and engine ready to go in!
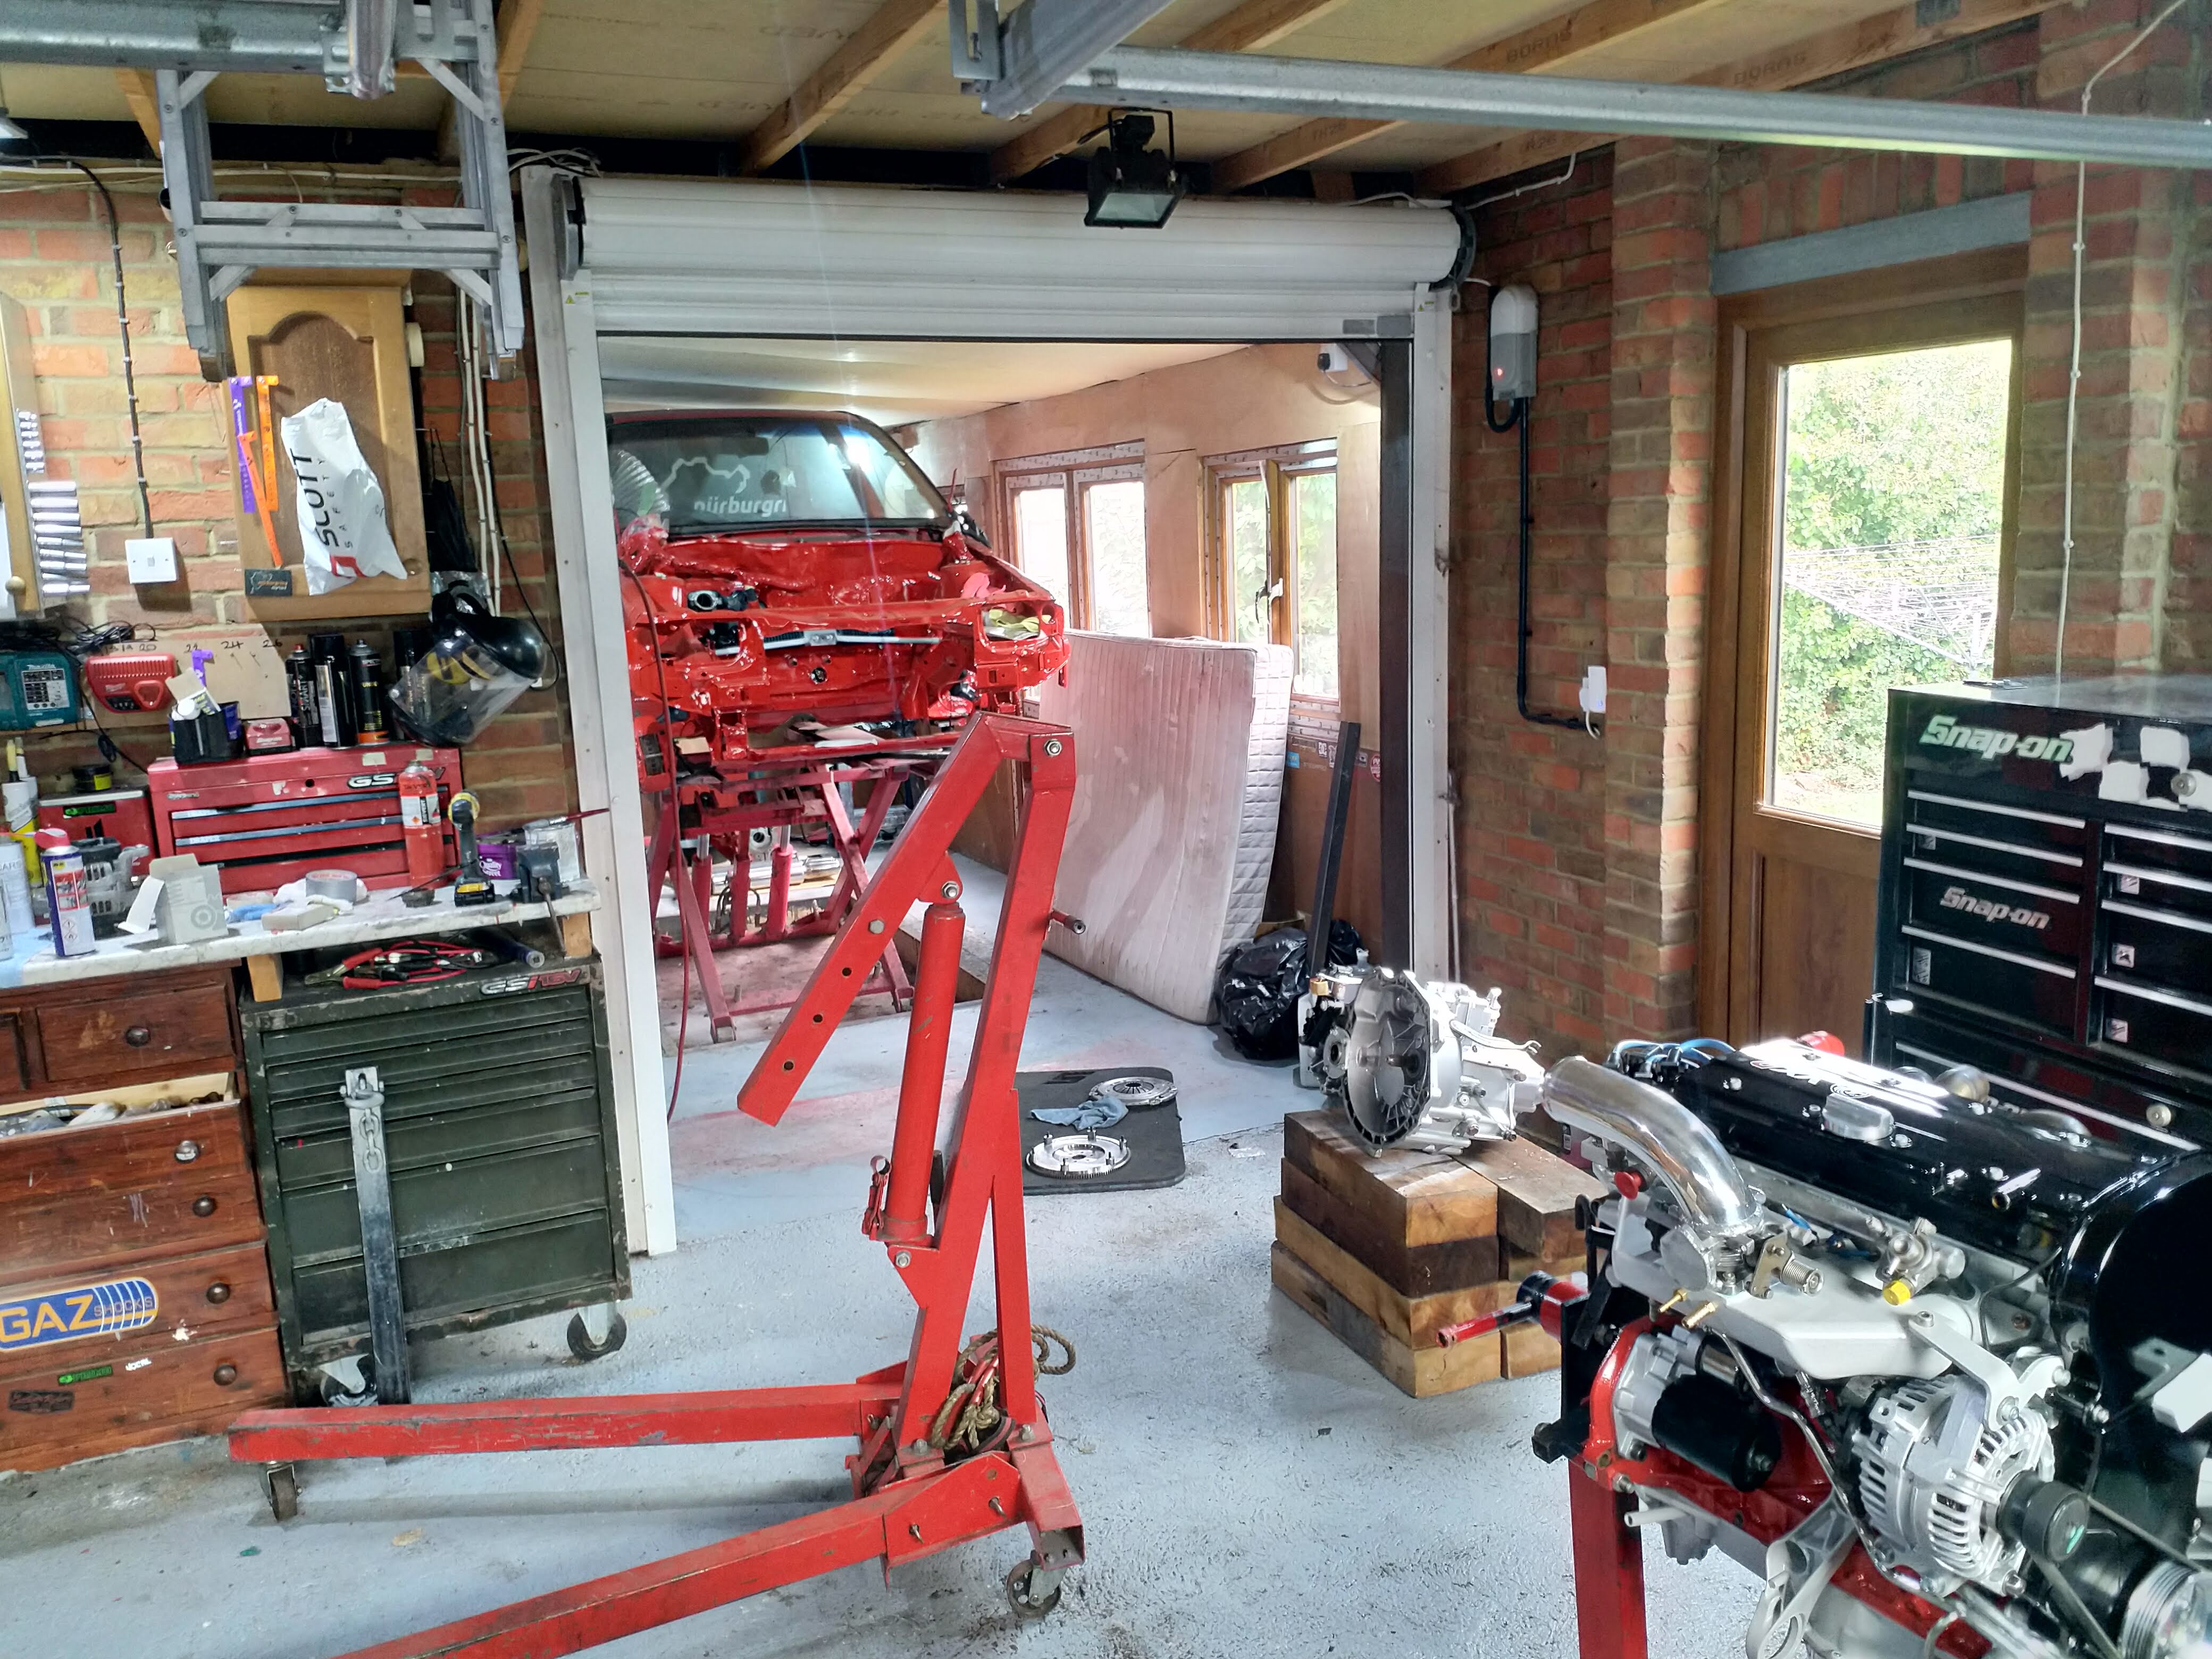
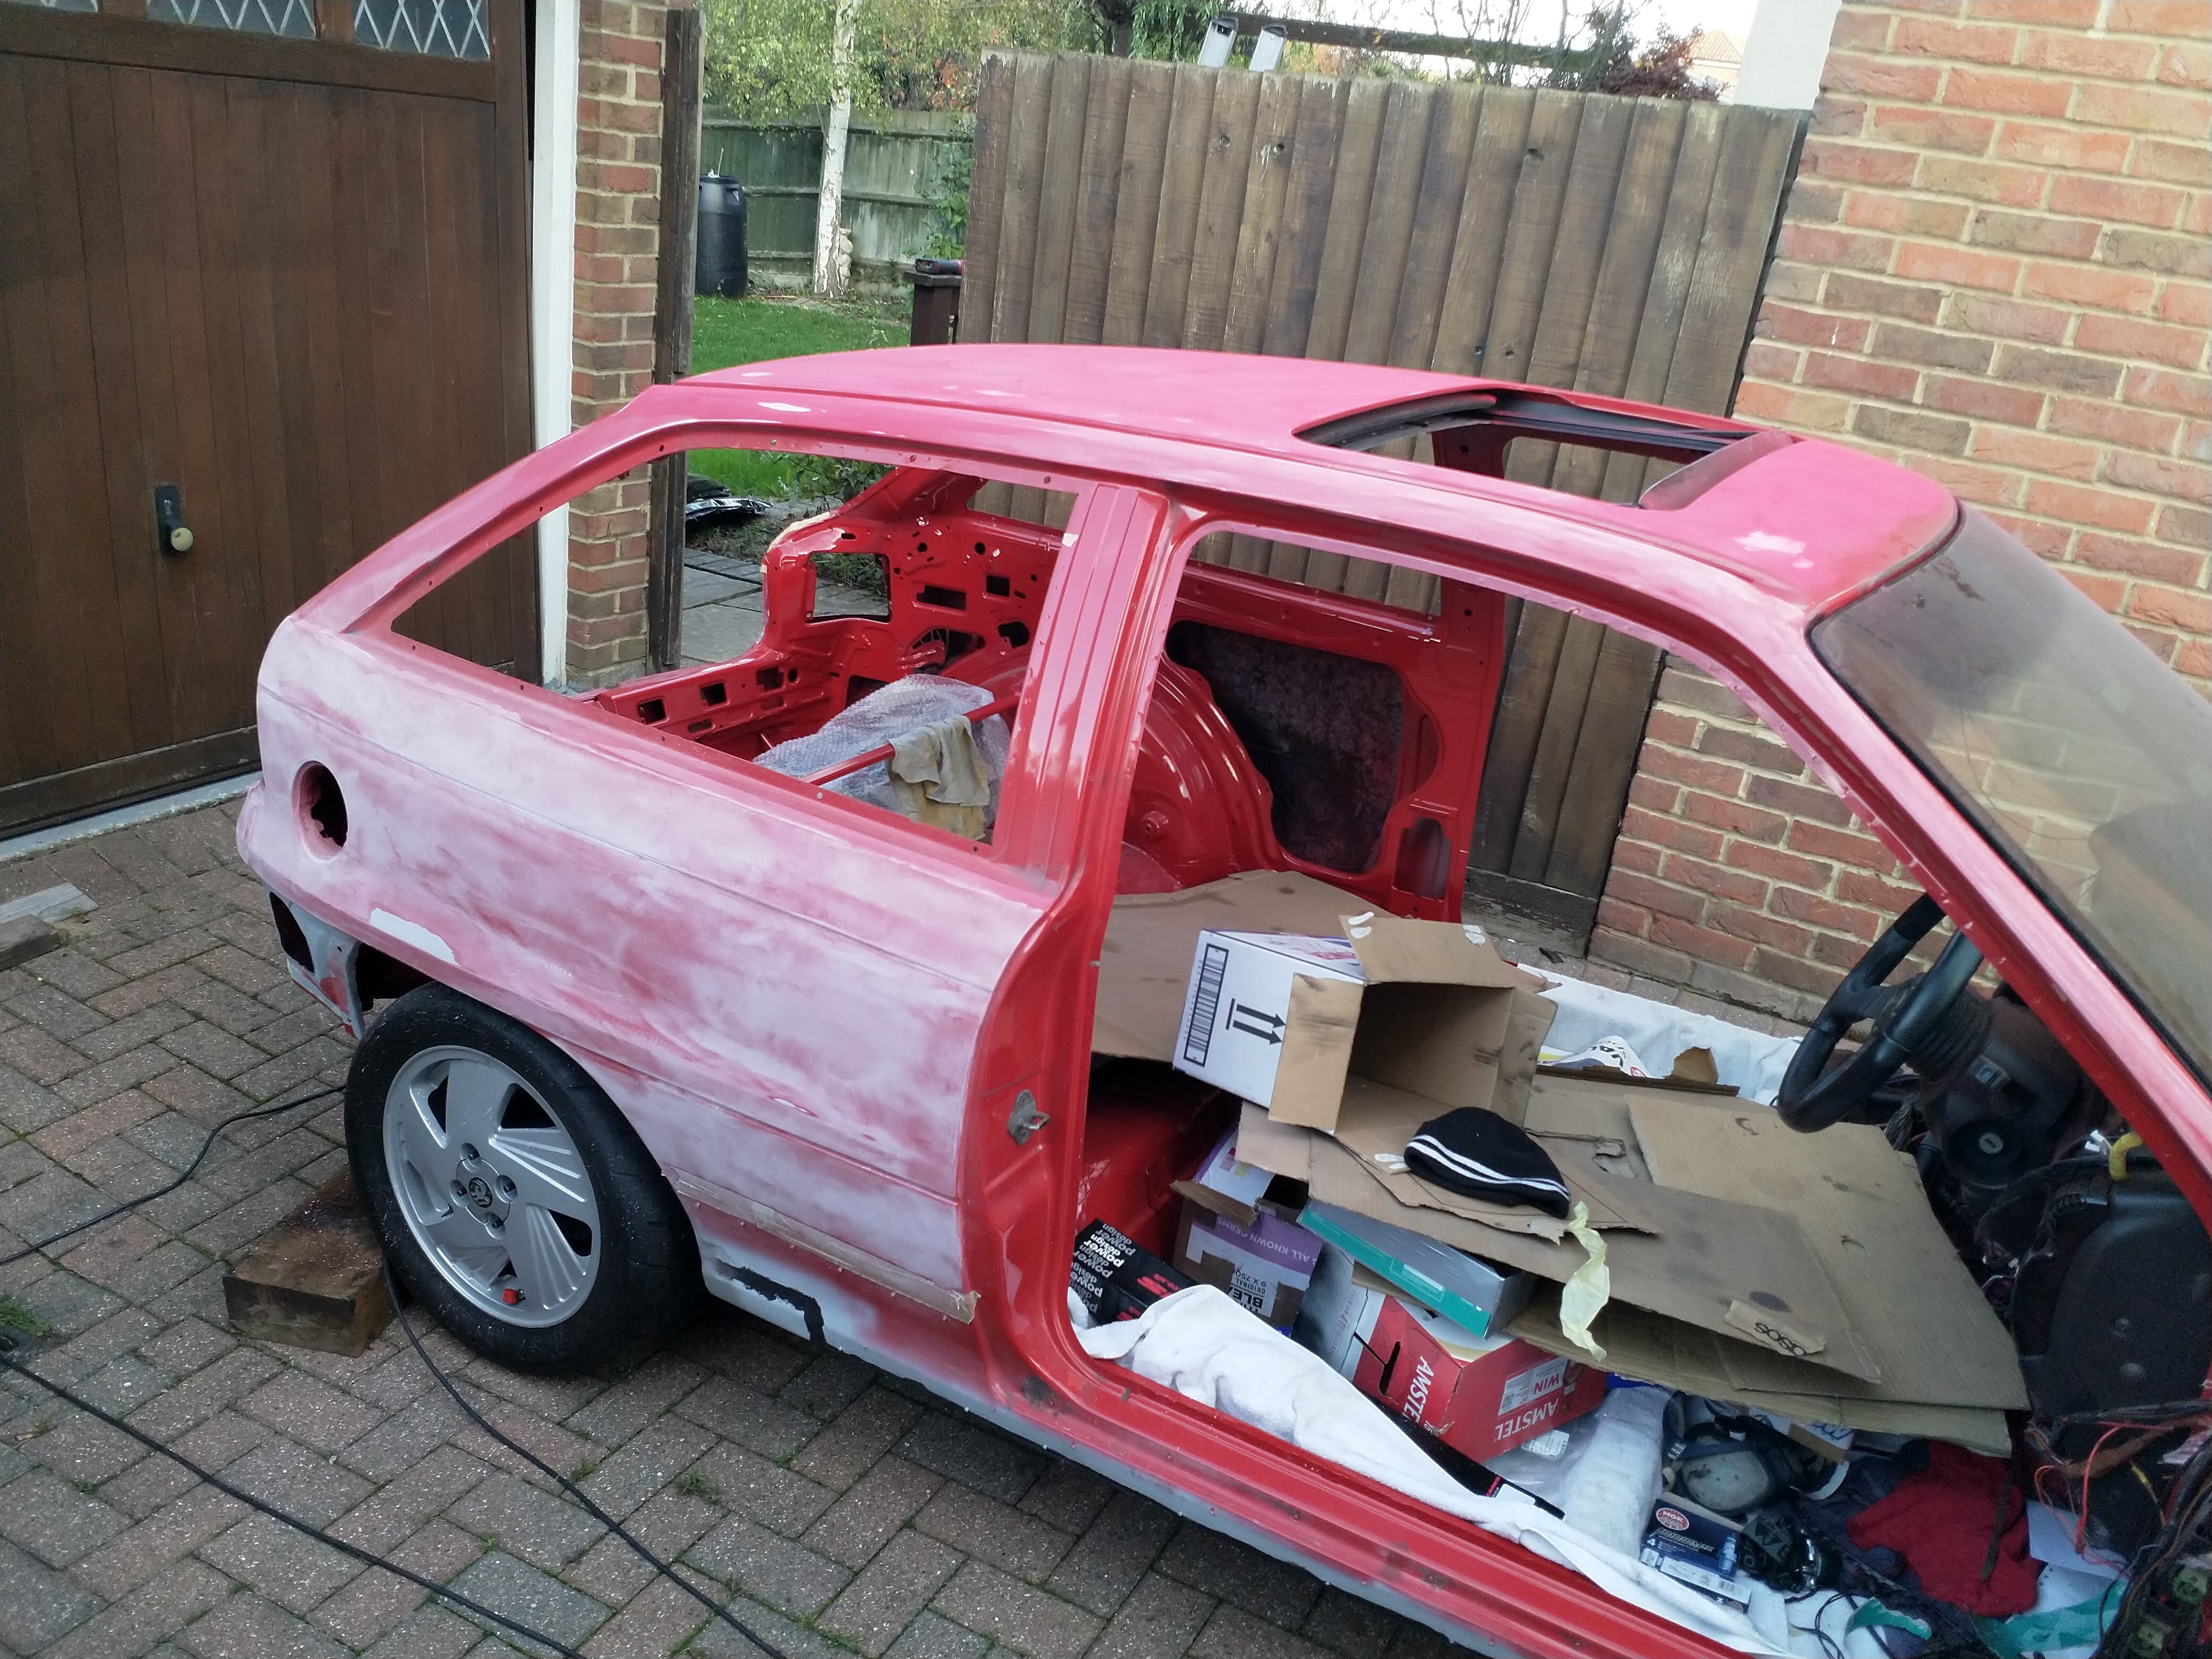
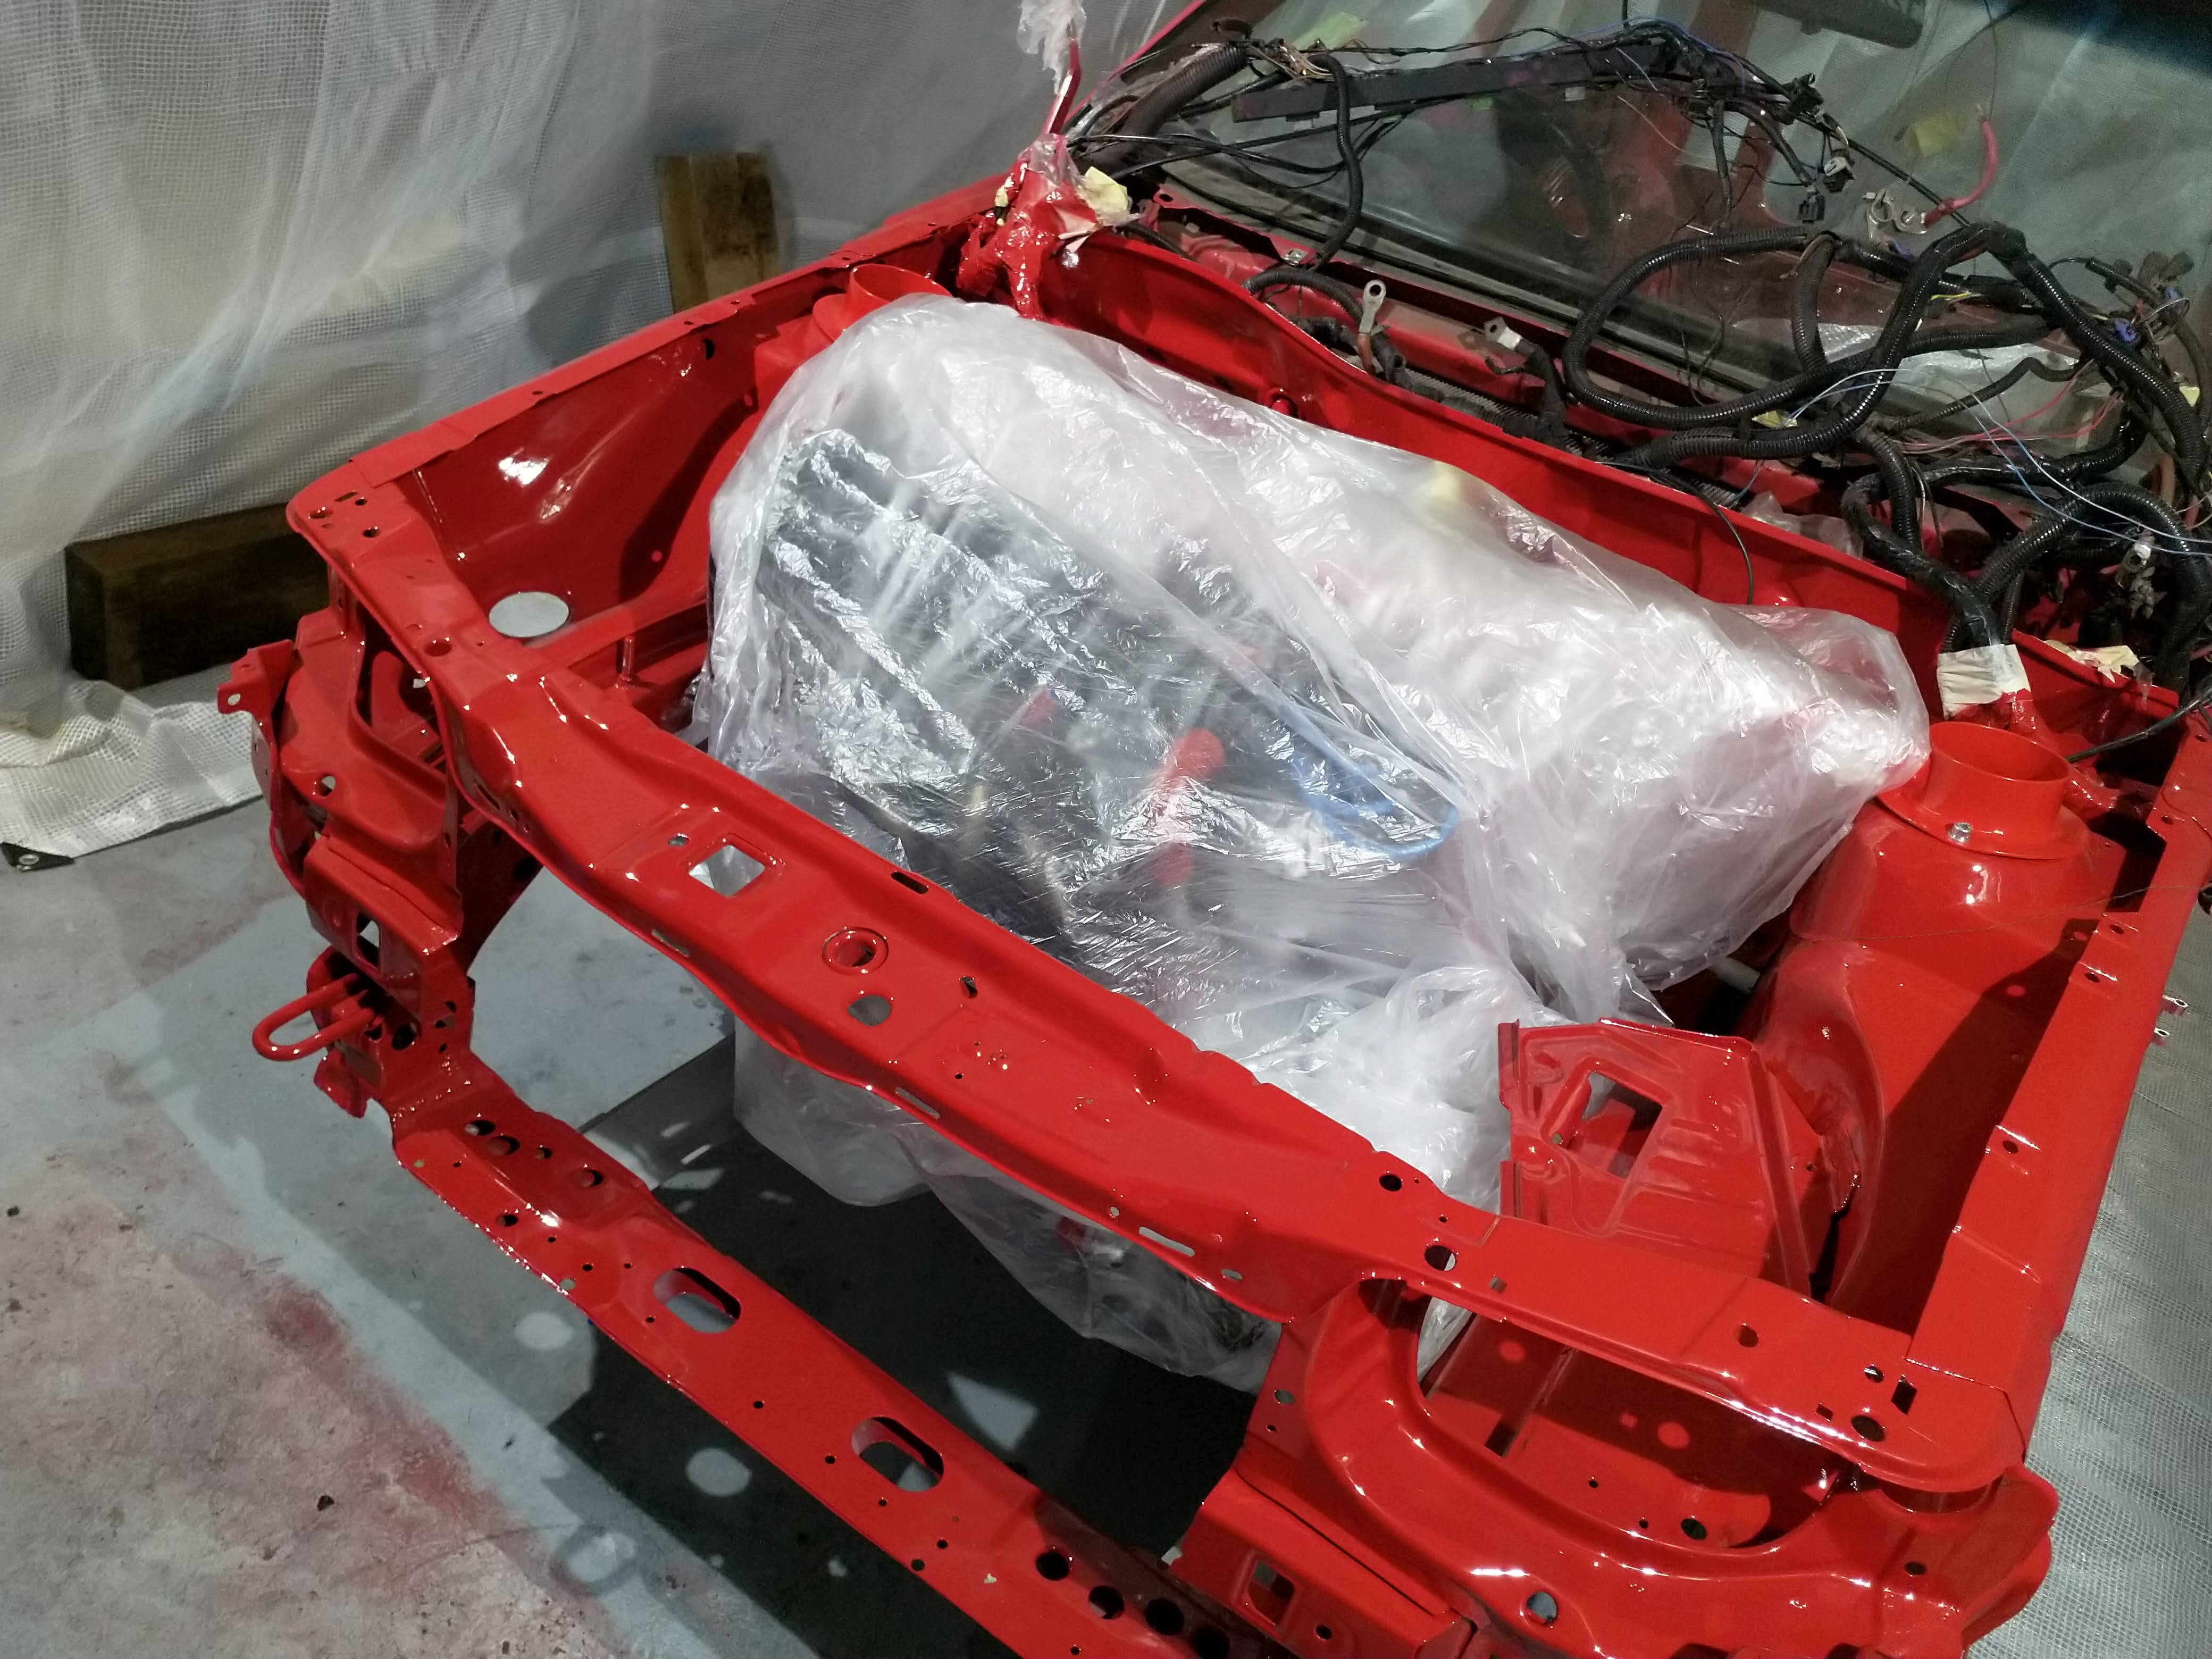
Now the ides behind this is everything forward of the A pillar doesn't need spraying, but also I'm running short on room, I want to work on the megane track car over the winter etc. So engine is going to go in, and why not! wrapped in plastic, fit everything else, shafts etc get the car on it wheels, roll it out, clean the workshop and flat the car outside, keep the dust outside etc. A challenge now its winter lol. But i should be good to spray in a few weeks if i do before the bitter cold appears.
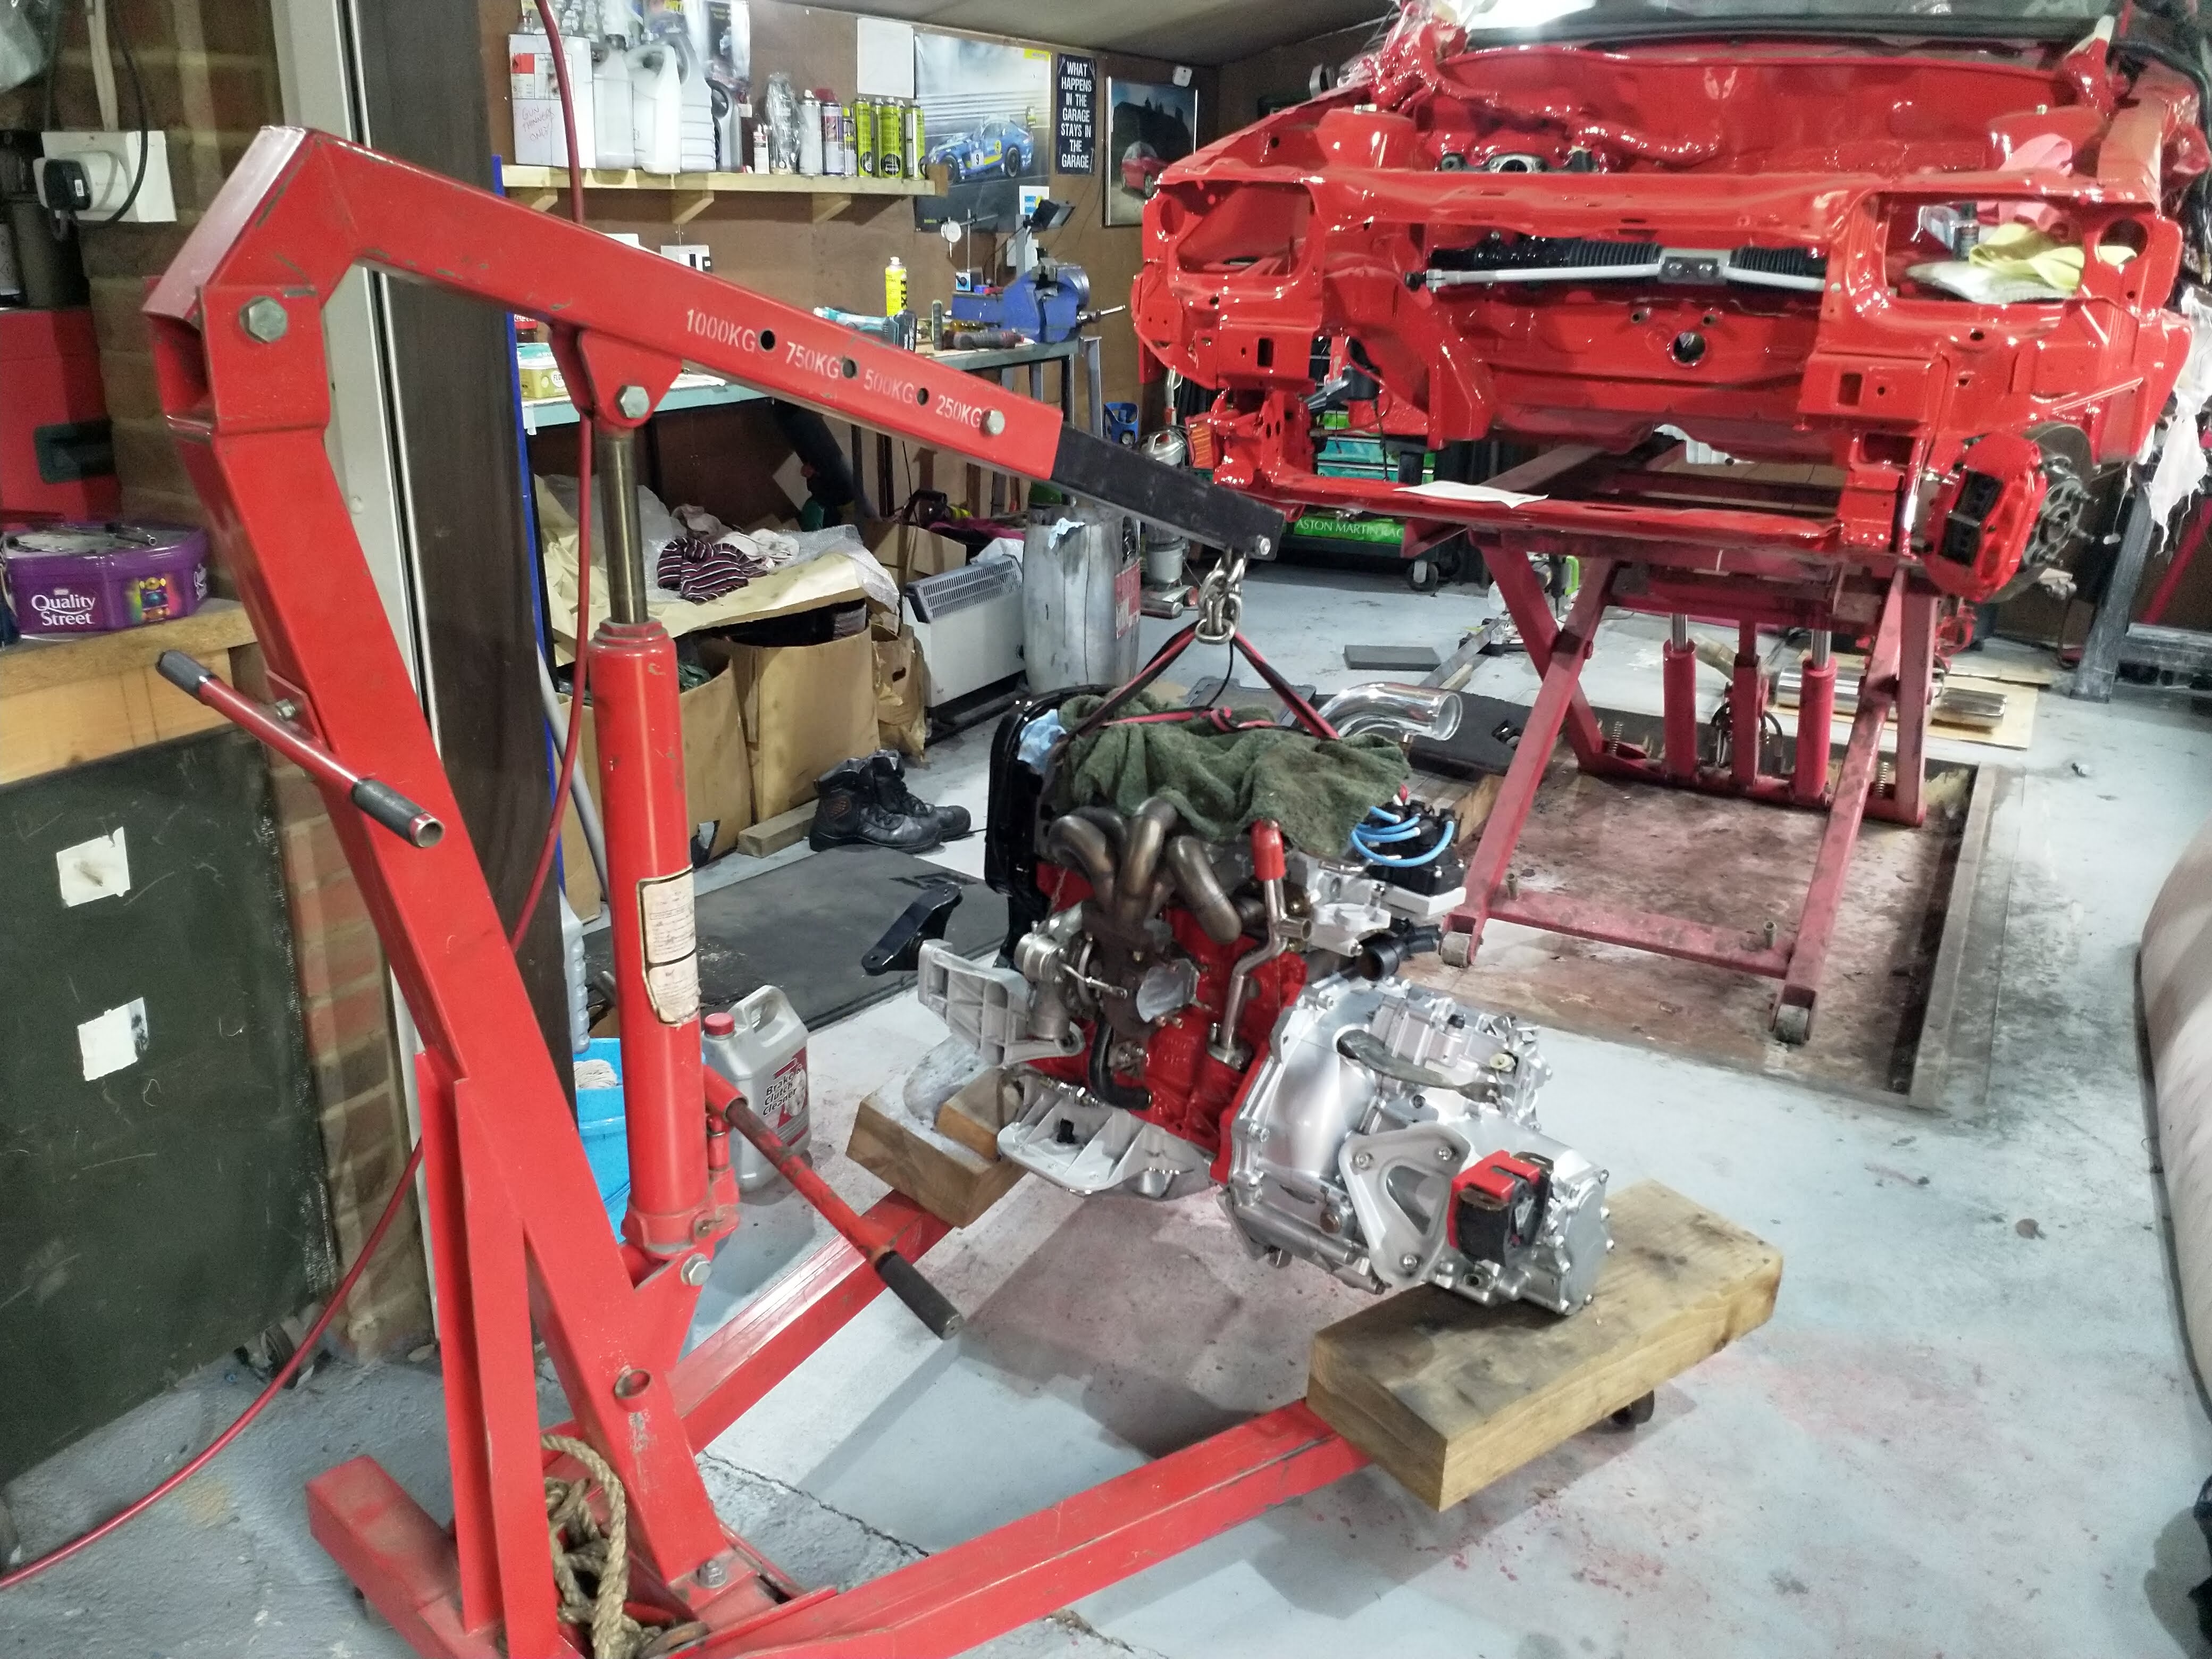
So in went the engine...
gearbox mount is brand new OE with poly insert

Finally got it to this stage
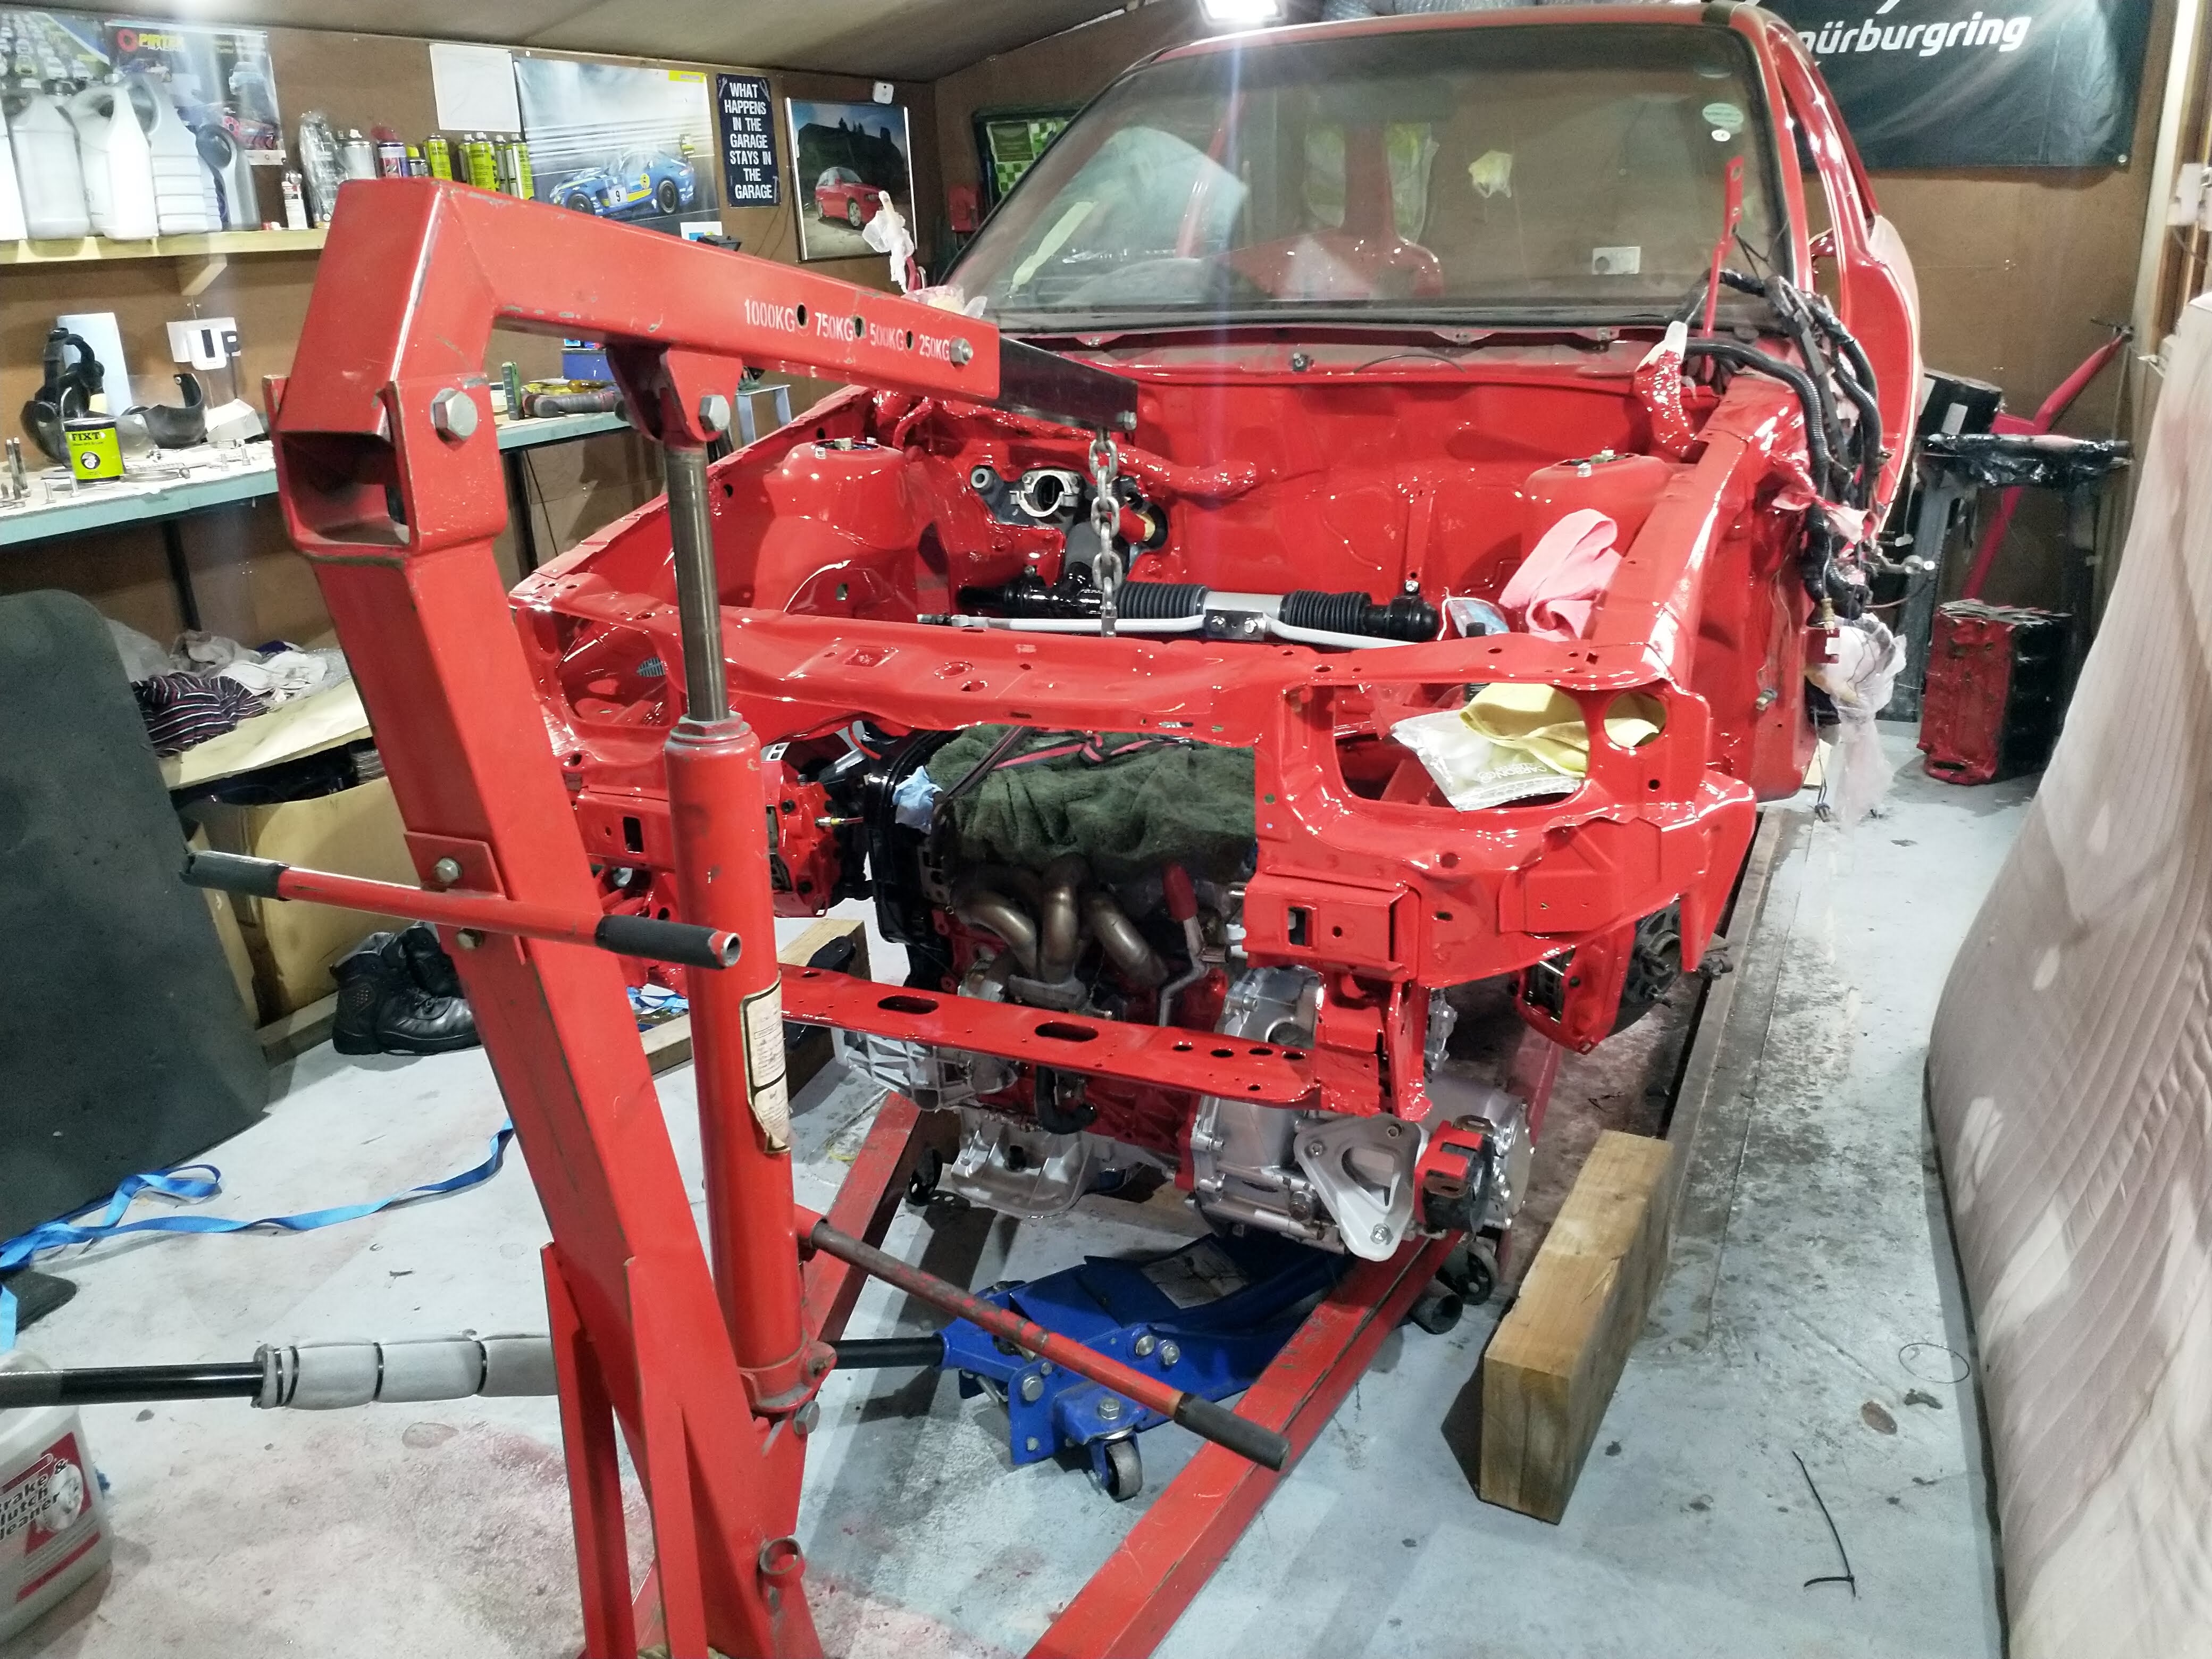
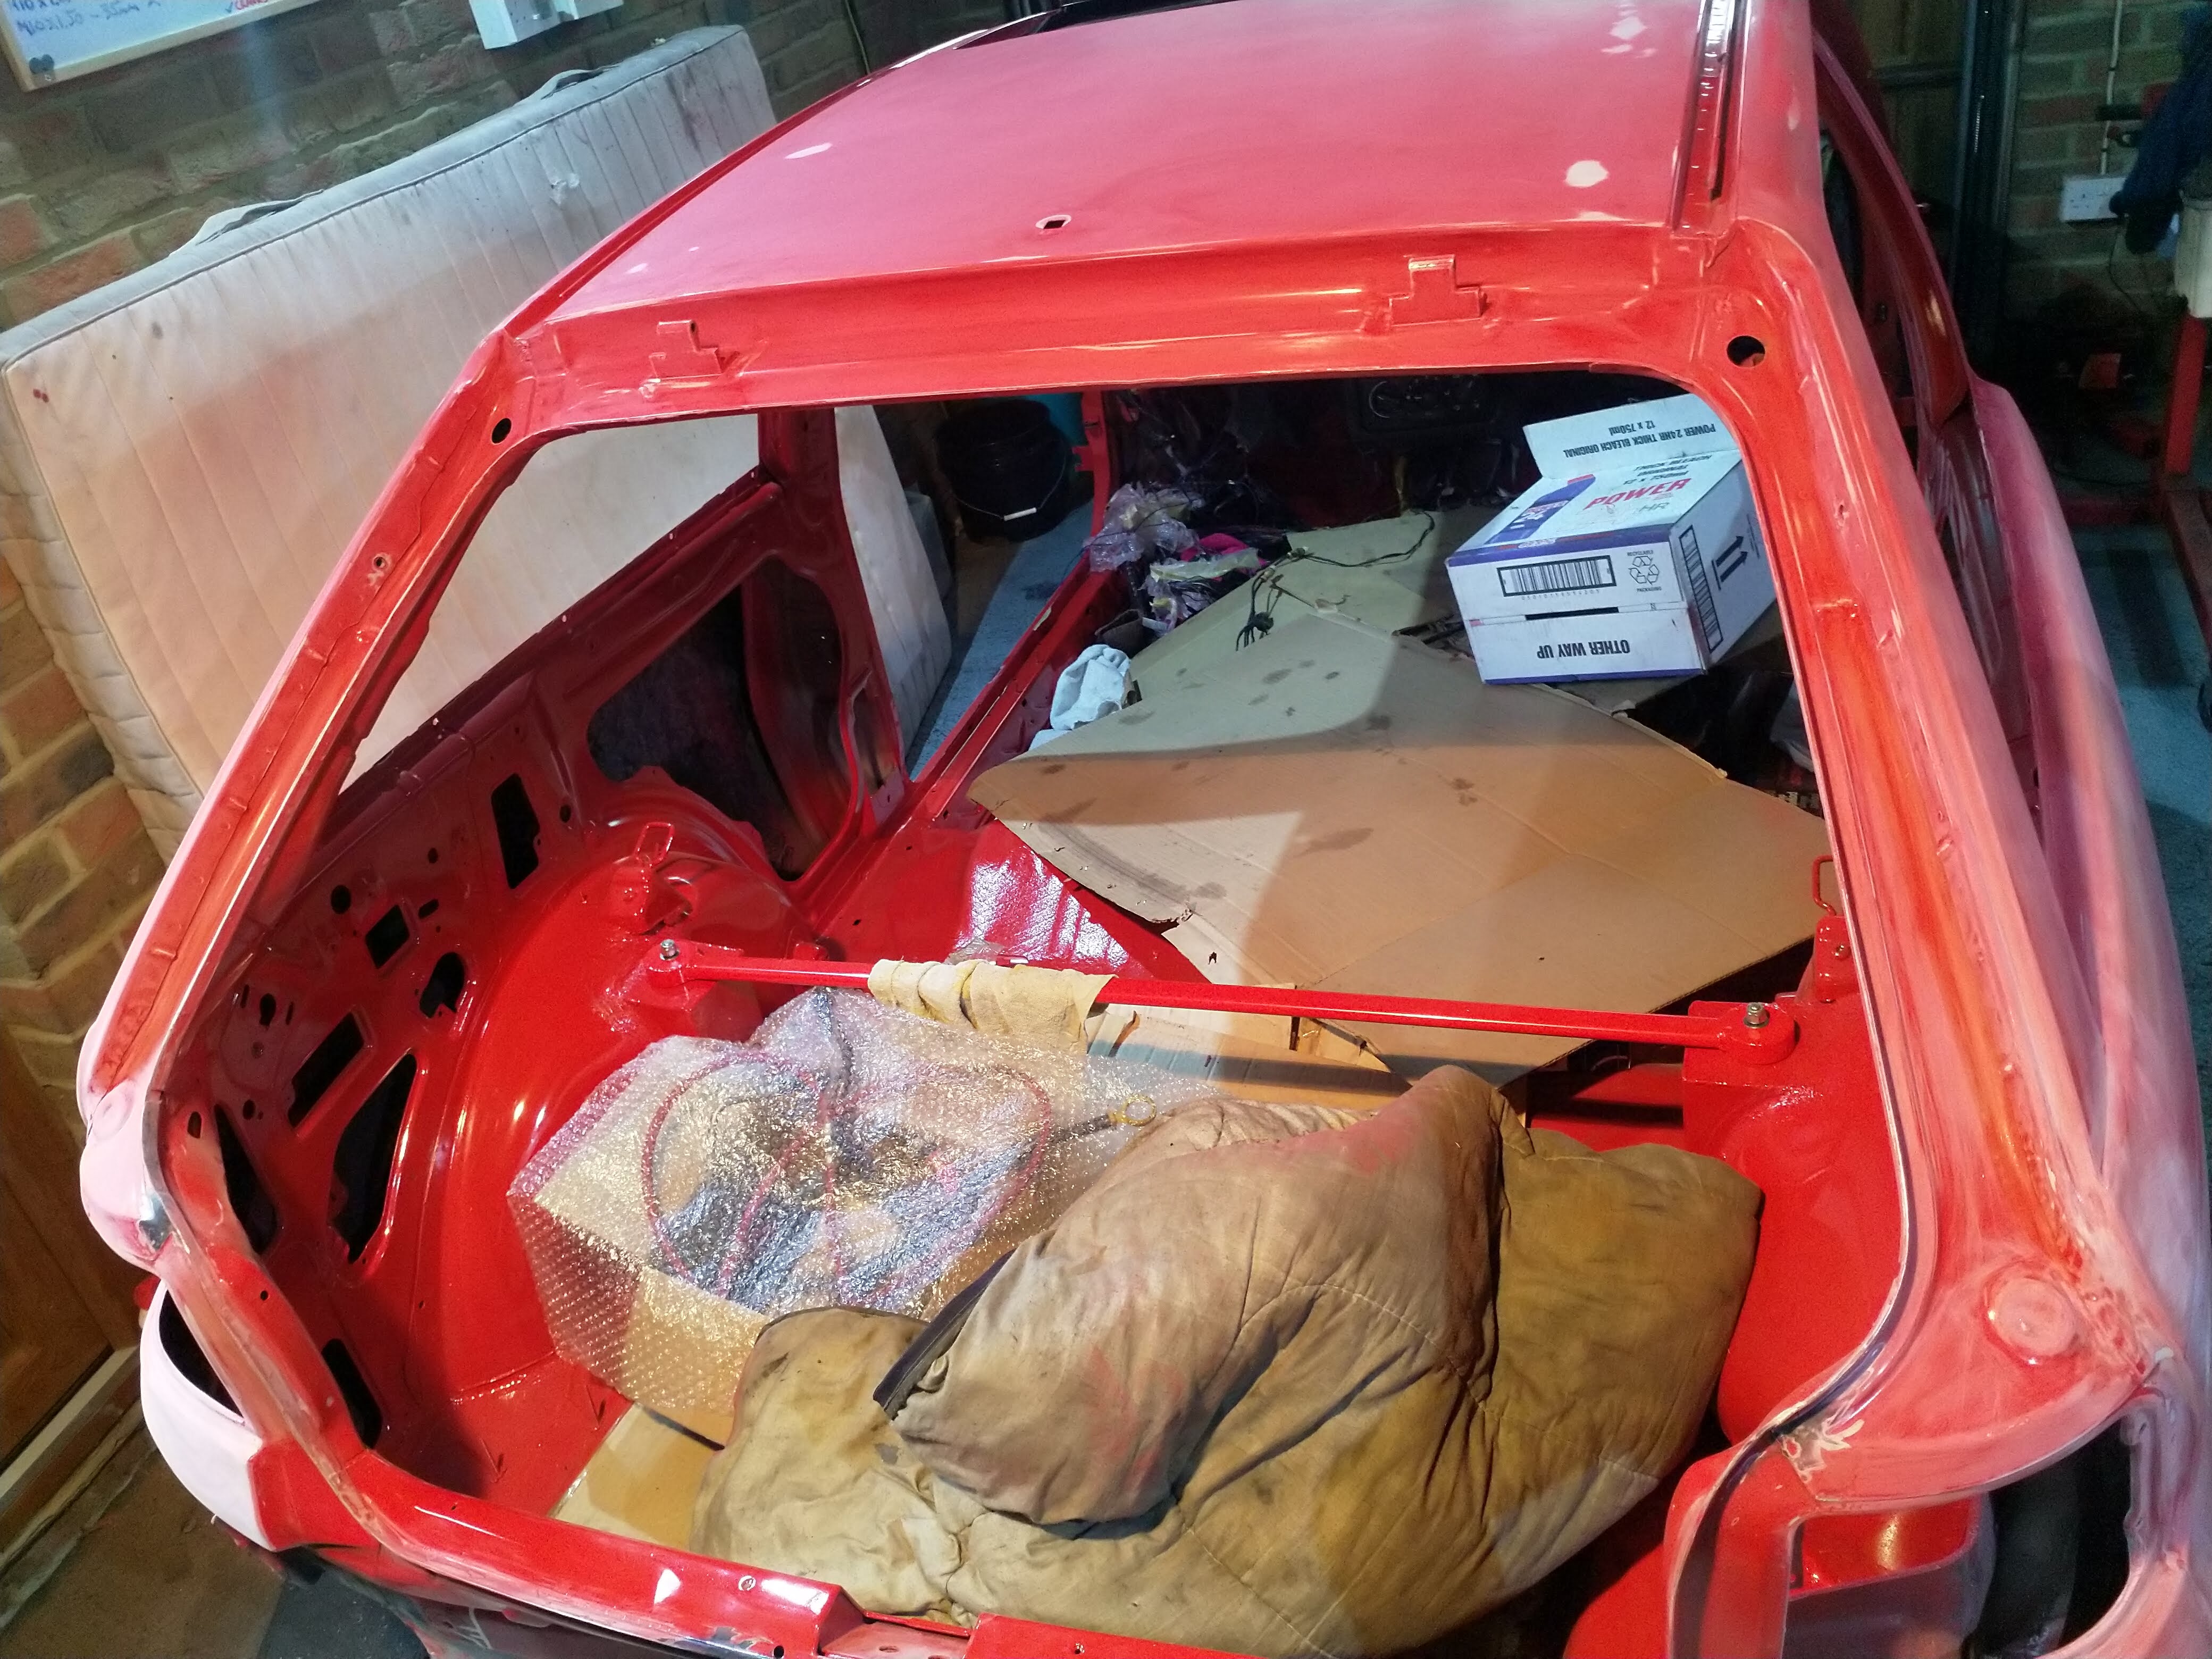
then I could drop the car onto the engine. this too about 4 hours all this update haha. But I got it in without a single scratch. And that is priceless!!
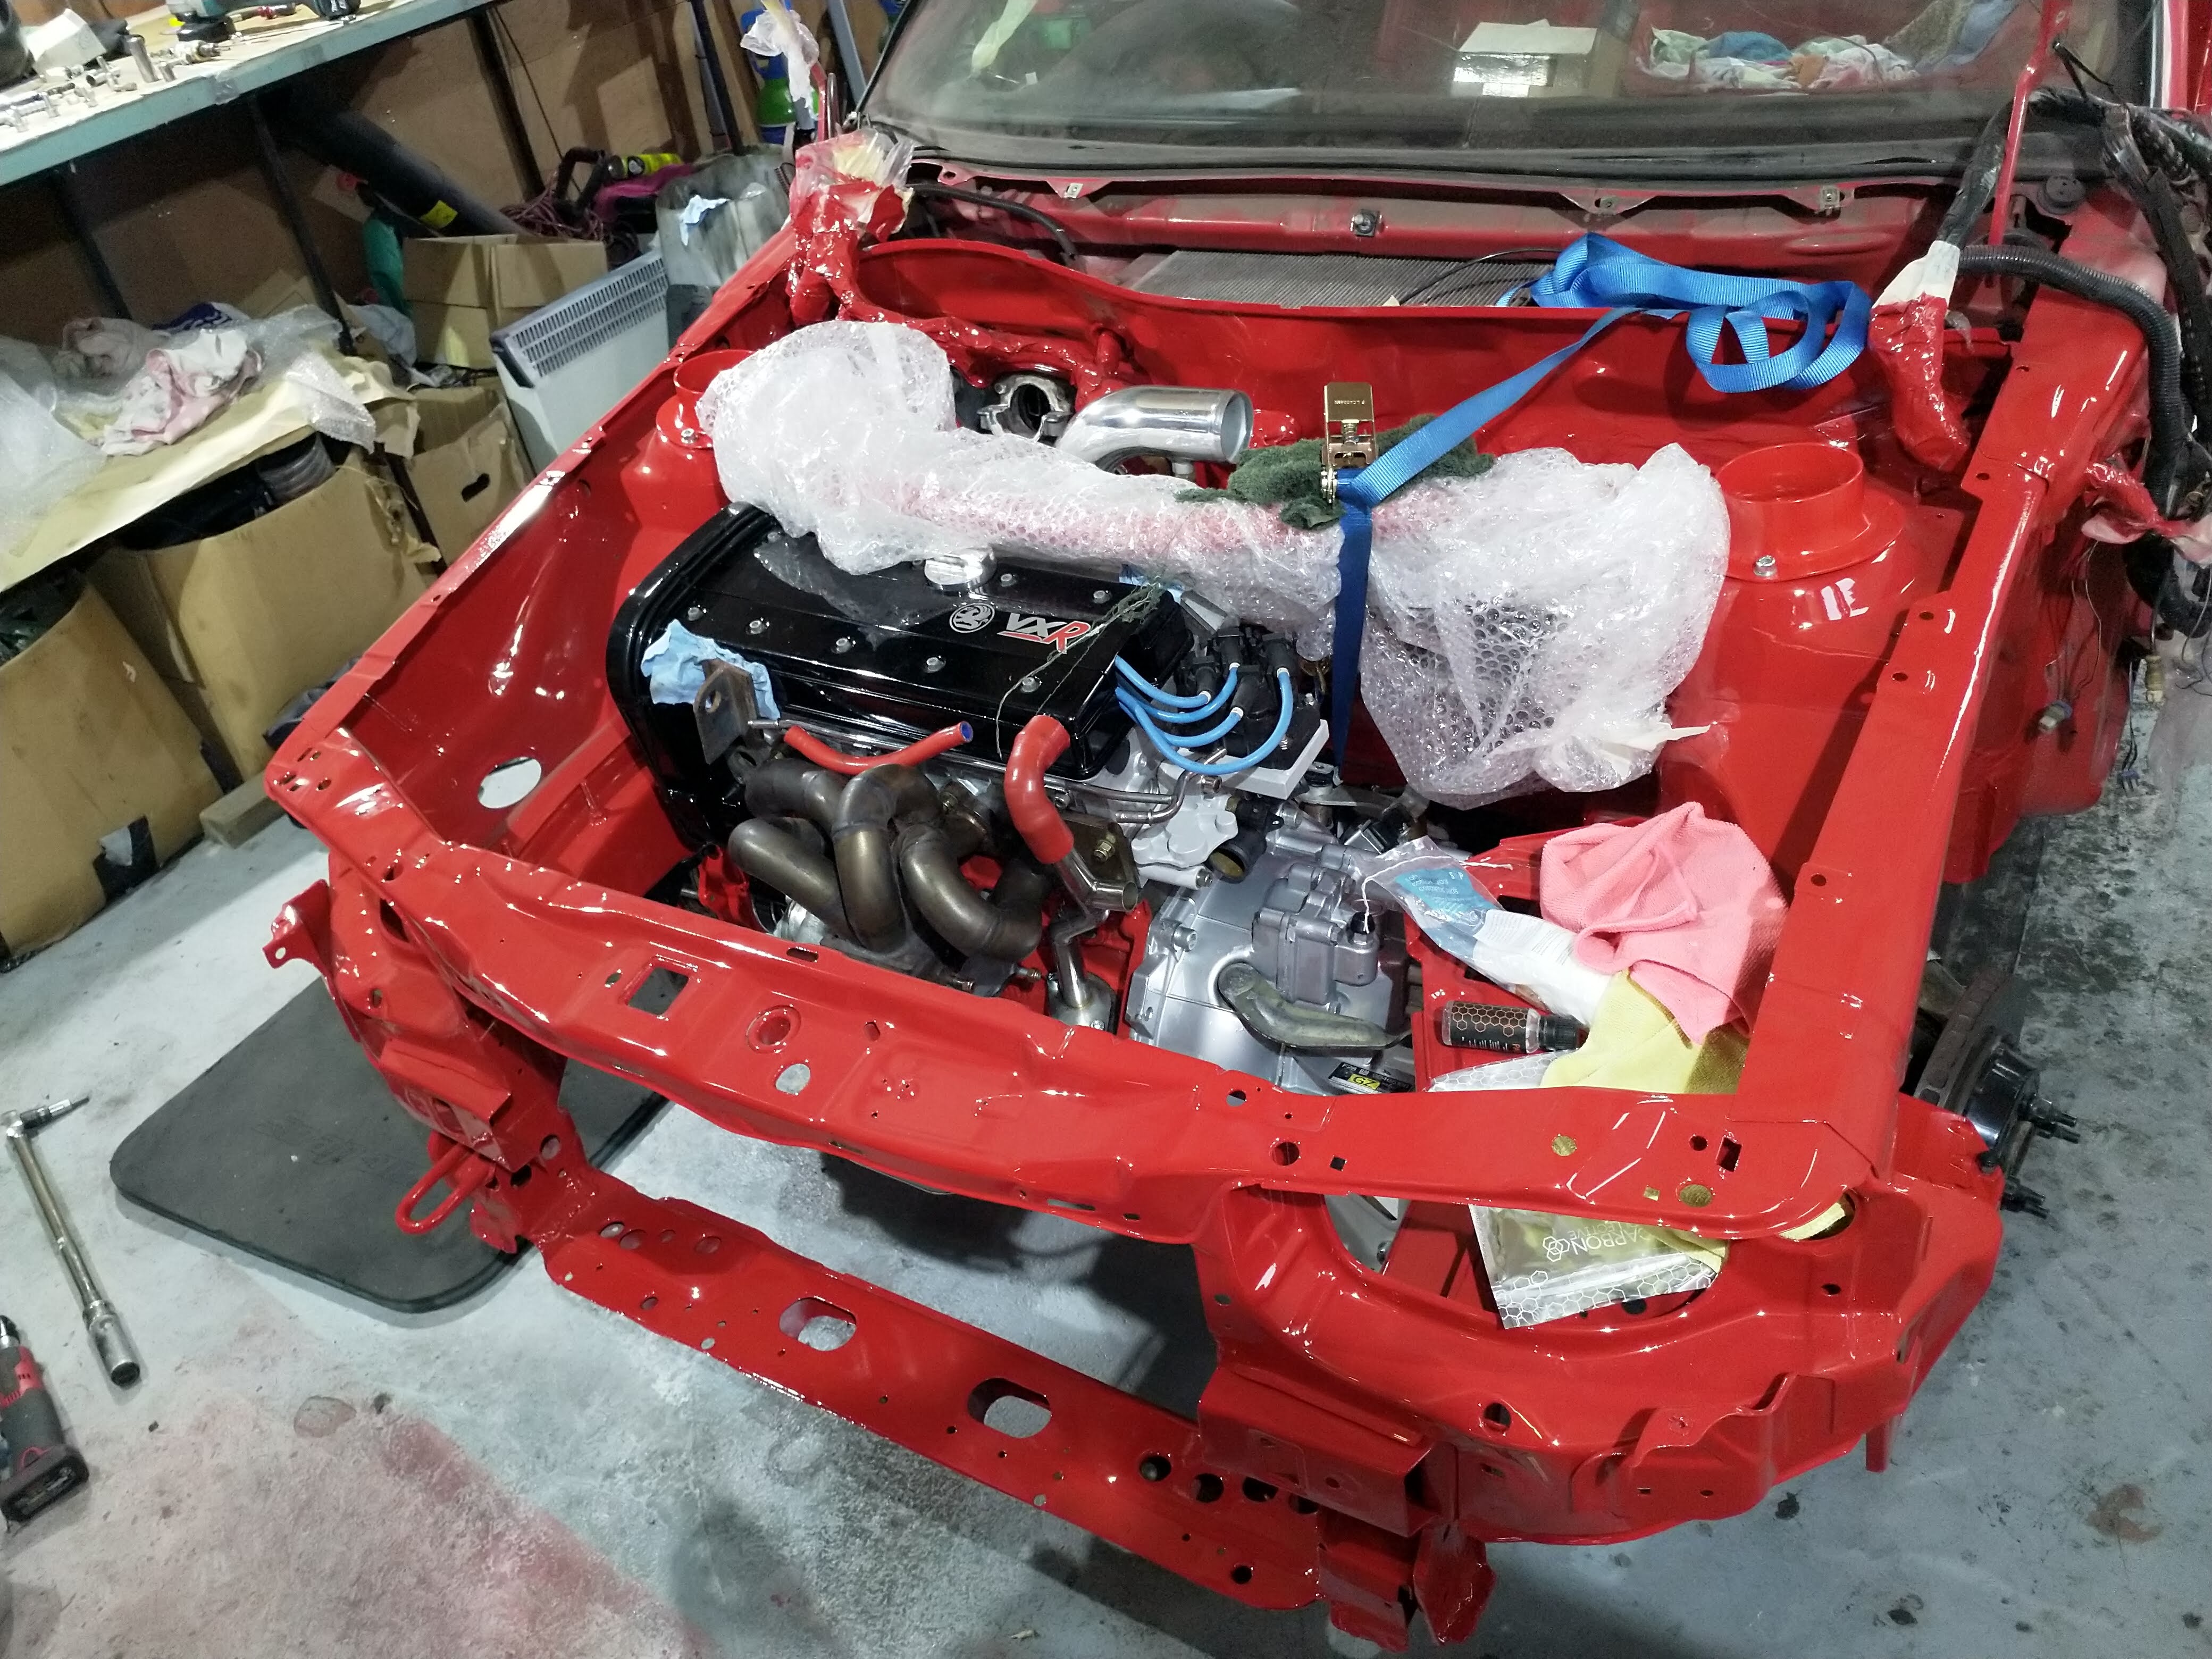
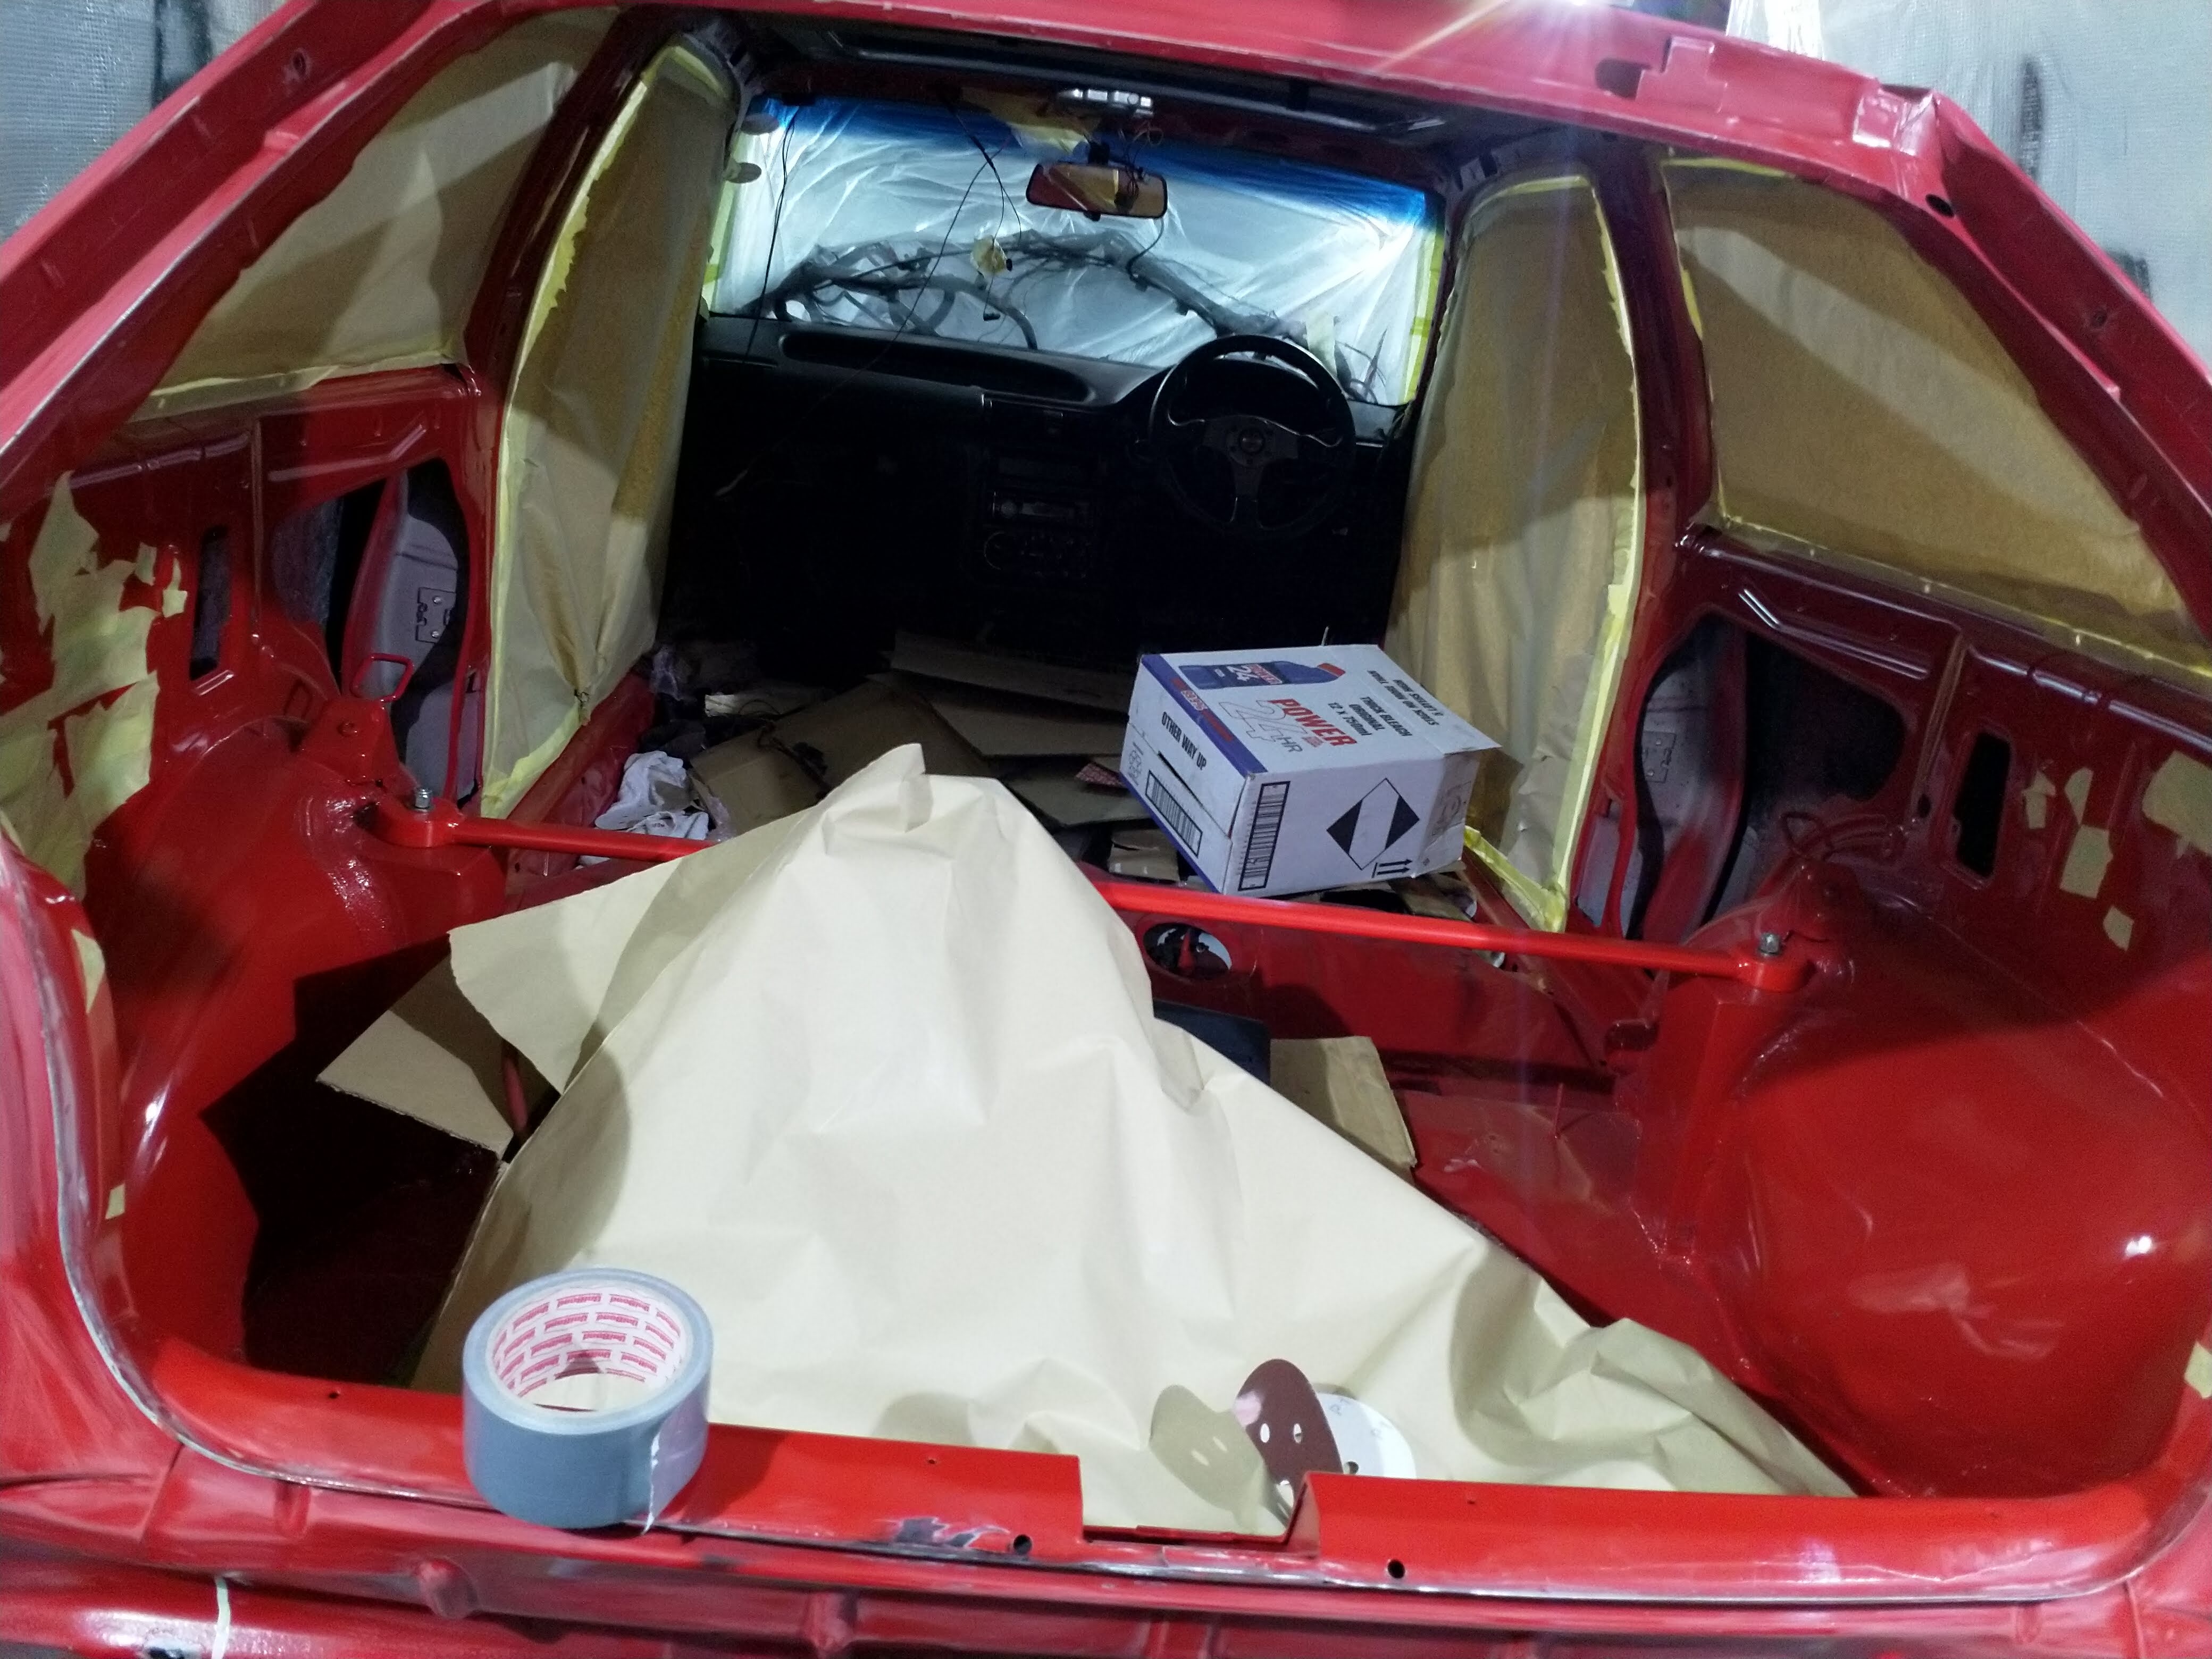
The rachet strap was to support the rear of the gearbox on the strut brace. All mk3 people know how much weight there is on the subframe in a mk3. So held it up so I could fit the subframe etc. Few nights later, subframe, driveshafts etc everything in.
Now a fair while back, I couldn't get the track rod ends out of the knuckle. Tried using an air hammer and everything! No joy! So eventually I thought **** it and left them in, took the arm off the adjuster and left the rod end in etc.
Well right at the end of rebuilding the suspension, I went to put the wheel on and realised I have never dont the nut back up on the track rod! Lucky!!
So gave it a zap with the impact gun...

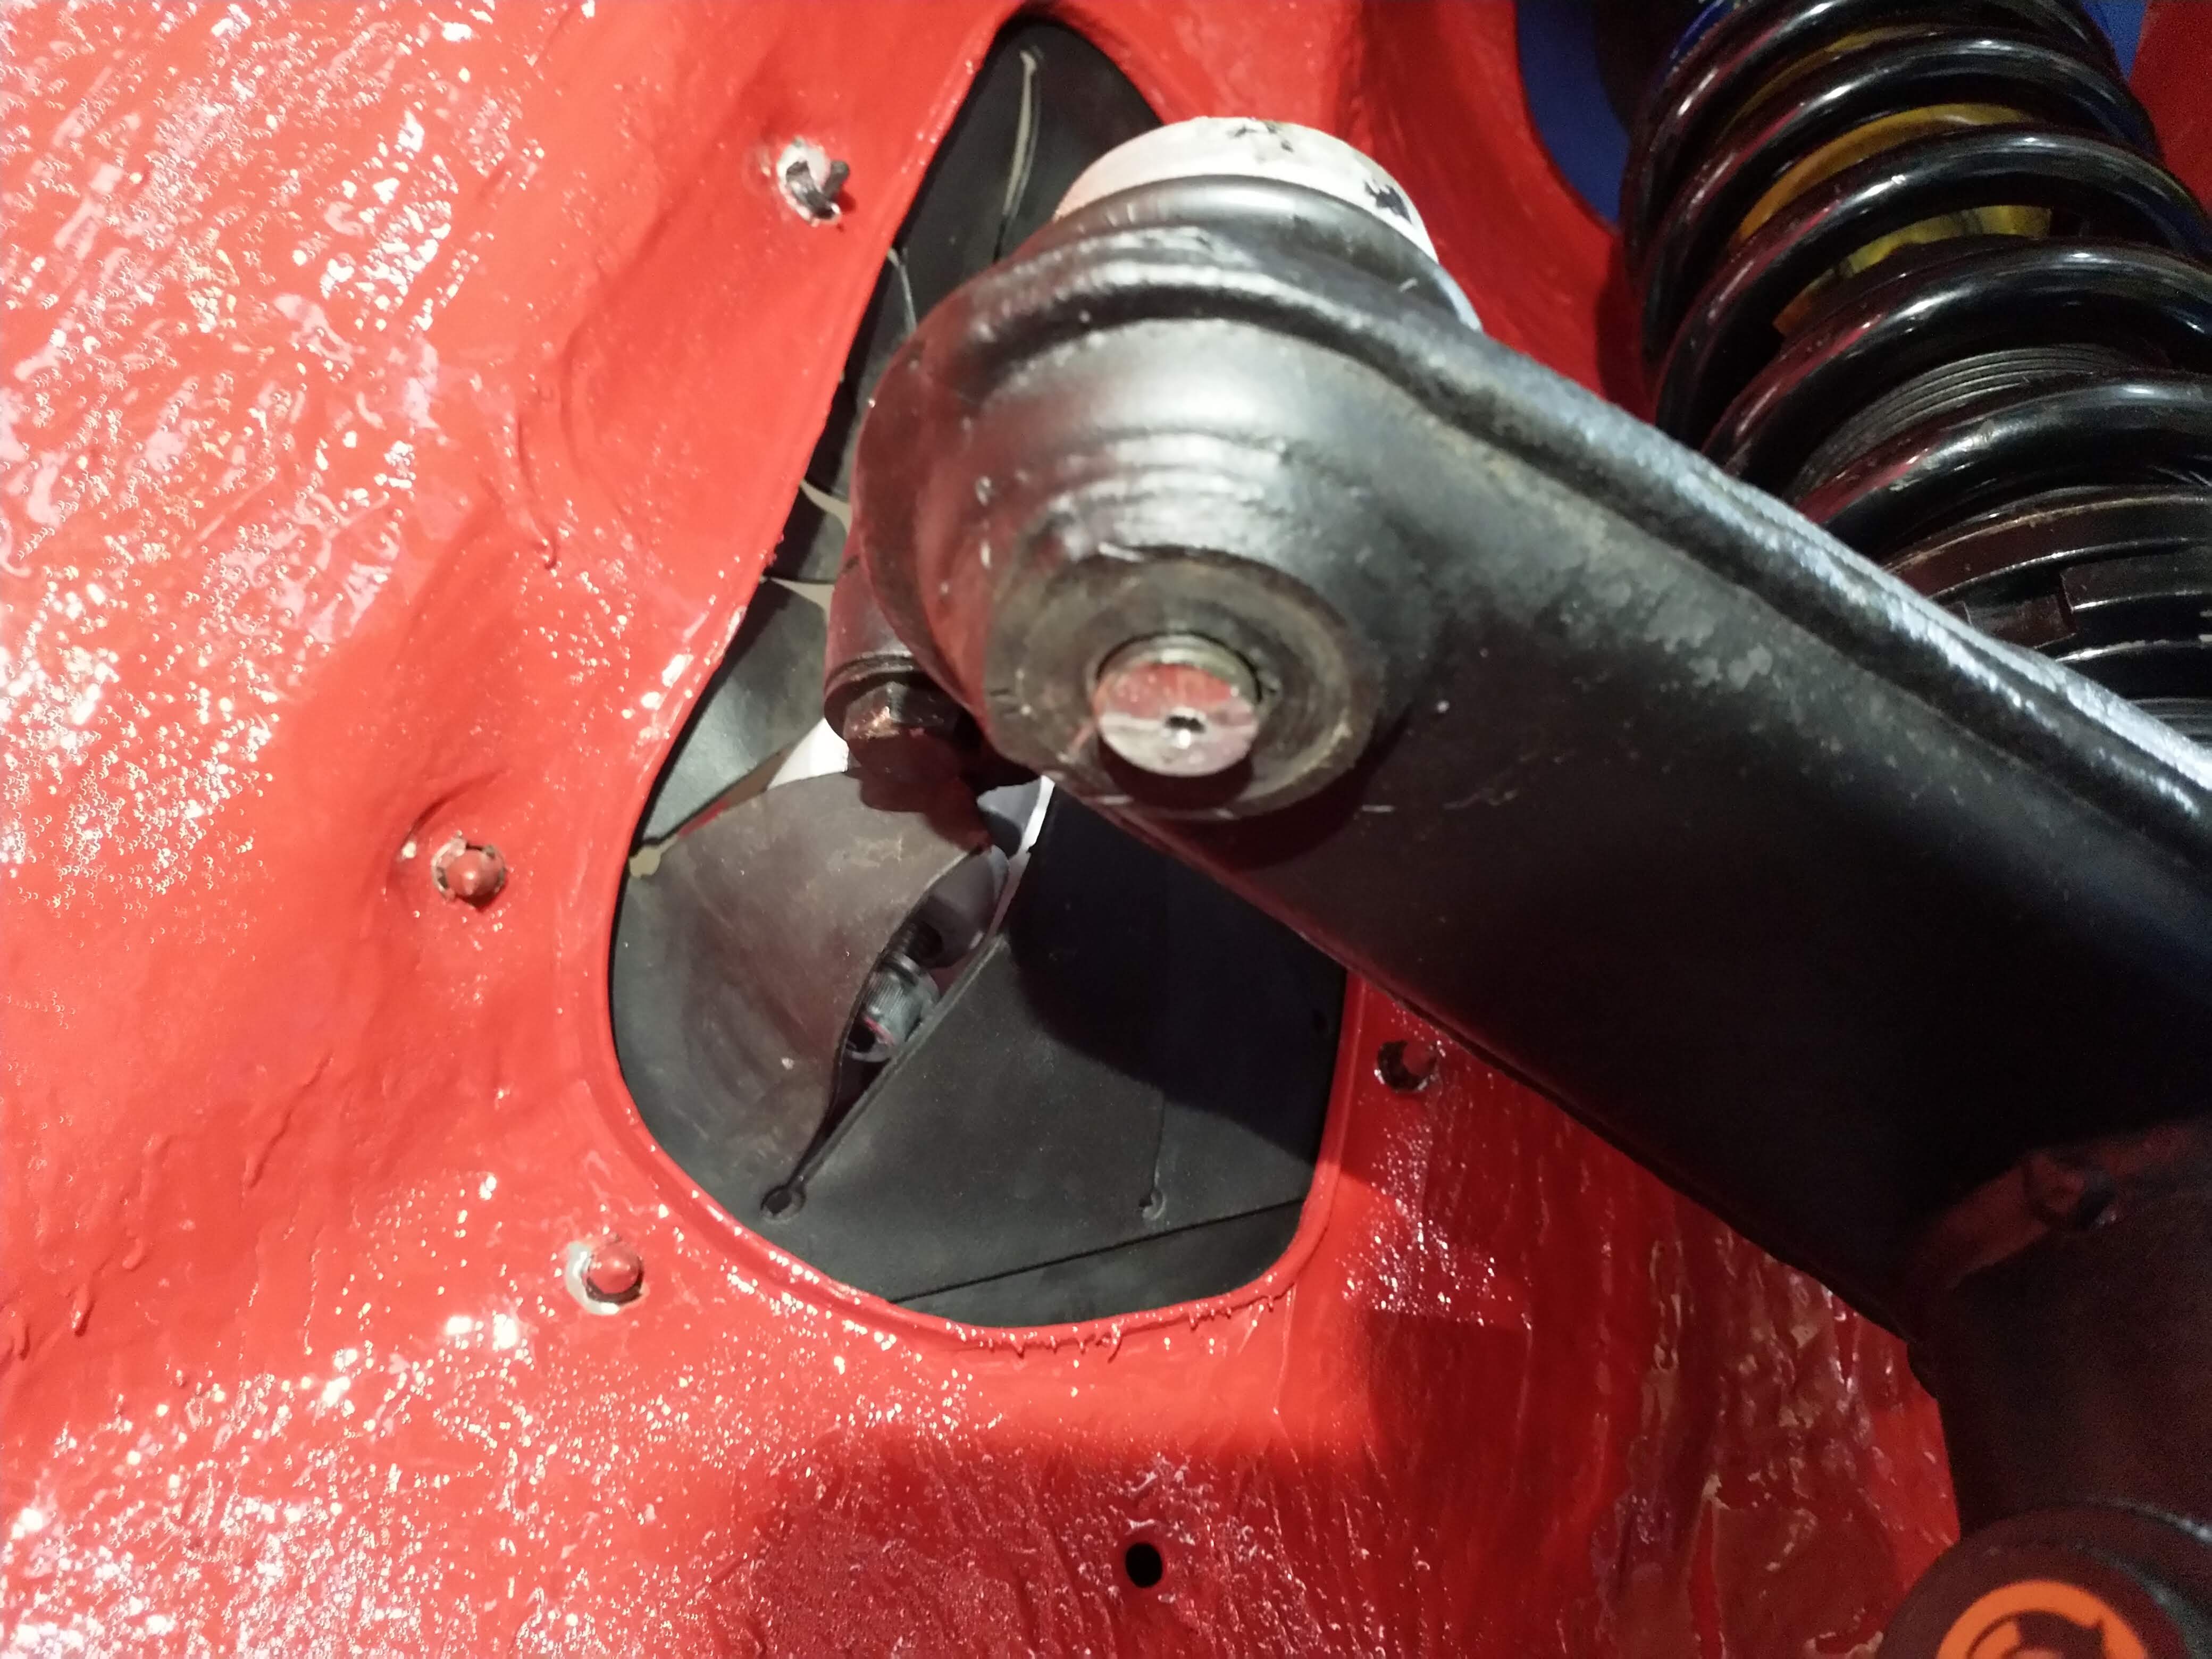
How boring is that! I had to drill the thing out to get it out the knuckle! Madness, but when i inspected it, this side sheered and the other side had a crack all the way up it! scary! Remeber kids, if u air hammer something, IT NEEDS REPLACING!
I'll get more picture when I get a chance, the new rack ends need to go on and then the wheels can go on! Pretty exctiing!
So I was there, ready for the gearbox to go in. I toyed with the idea of respraying the gearbox again, but I think its not worth it, so I bought some touch up paint for now and will attack that with it in the car. I threw some hammerite inside the bellhousing though to make it easy to clean
Gearbox on, and engine ready to go in!
Now the ides behind this is everything forward of the A pillar doesn't need spraying, but also I'm running short on room, I want to work on the megane track car over the winter etc. So engine is going to go in, and why not! wrapped in plastic, fit everything else, shafts etc get the car on it wheels, roll it out, clean the workshop and flat the car outside, keep the dust outside etc. A challenge now its winter lol. But i should be good to spray in a few weeks if i do before the bitter cold appears.
So in went the engine...
gearbox mount is brand new OE with poly insert
Finally got it to this stage
then I could drop the car onto the engine. this too about 4 hours all this update haha. But I got it in without a single scratch. And that is priceless!!
The rachet strap was to support the rear of the gearbox on the strut brace. All mk3 people know how much weight there is on the subframe in a mk3. So held it up so I could fit the subframe etc. Few nights later, subframe, driveshafts etc everything in.
Now a fair while back, I couldn't get the track rod ends out of the knuckle. Tried using an air hammer and everything! No joy! So eventually I thought **** it and left them in, took the arm off the adjuster and left the rod end in etc.
Well right at the end of rebuilding the suspension, I went to put the wheel on and realised I have never dont the nut back up on the track rod! Lucky!!
So gave it a zap with the impact gun...
How boring is that! I had to drill the thing out to get it out the knuckle! Madness, but when i inspected it, this side sheered and the other side had a crack all the way up it! scary! Remeber kids, if u air hammer something, IT NEEDS REPLACING!
I'll get more picture when I get a chance, the new rack ends need to go on and then the wheels can go on! Pretty exctiing!
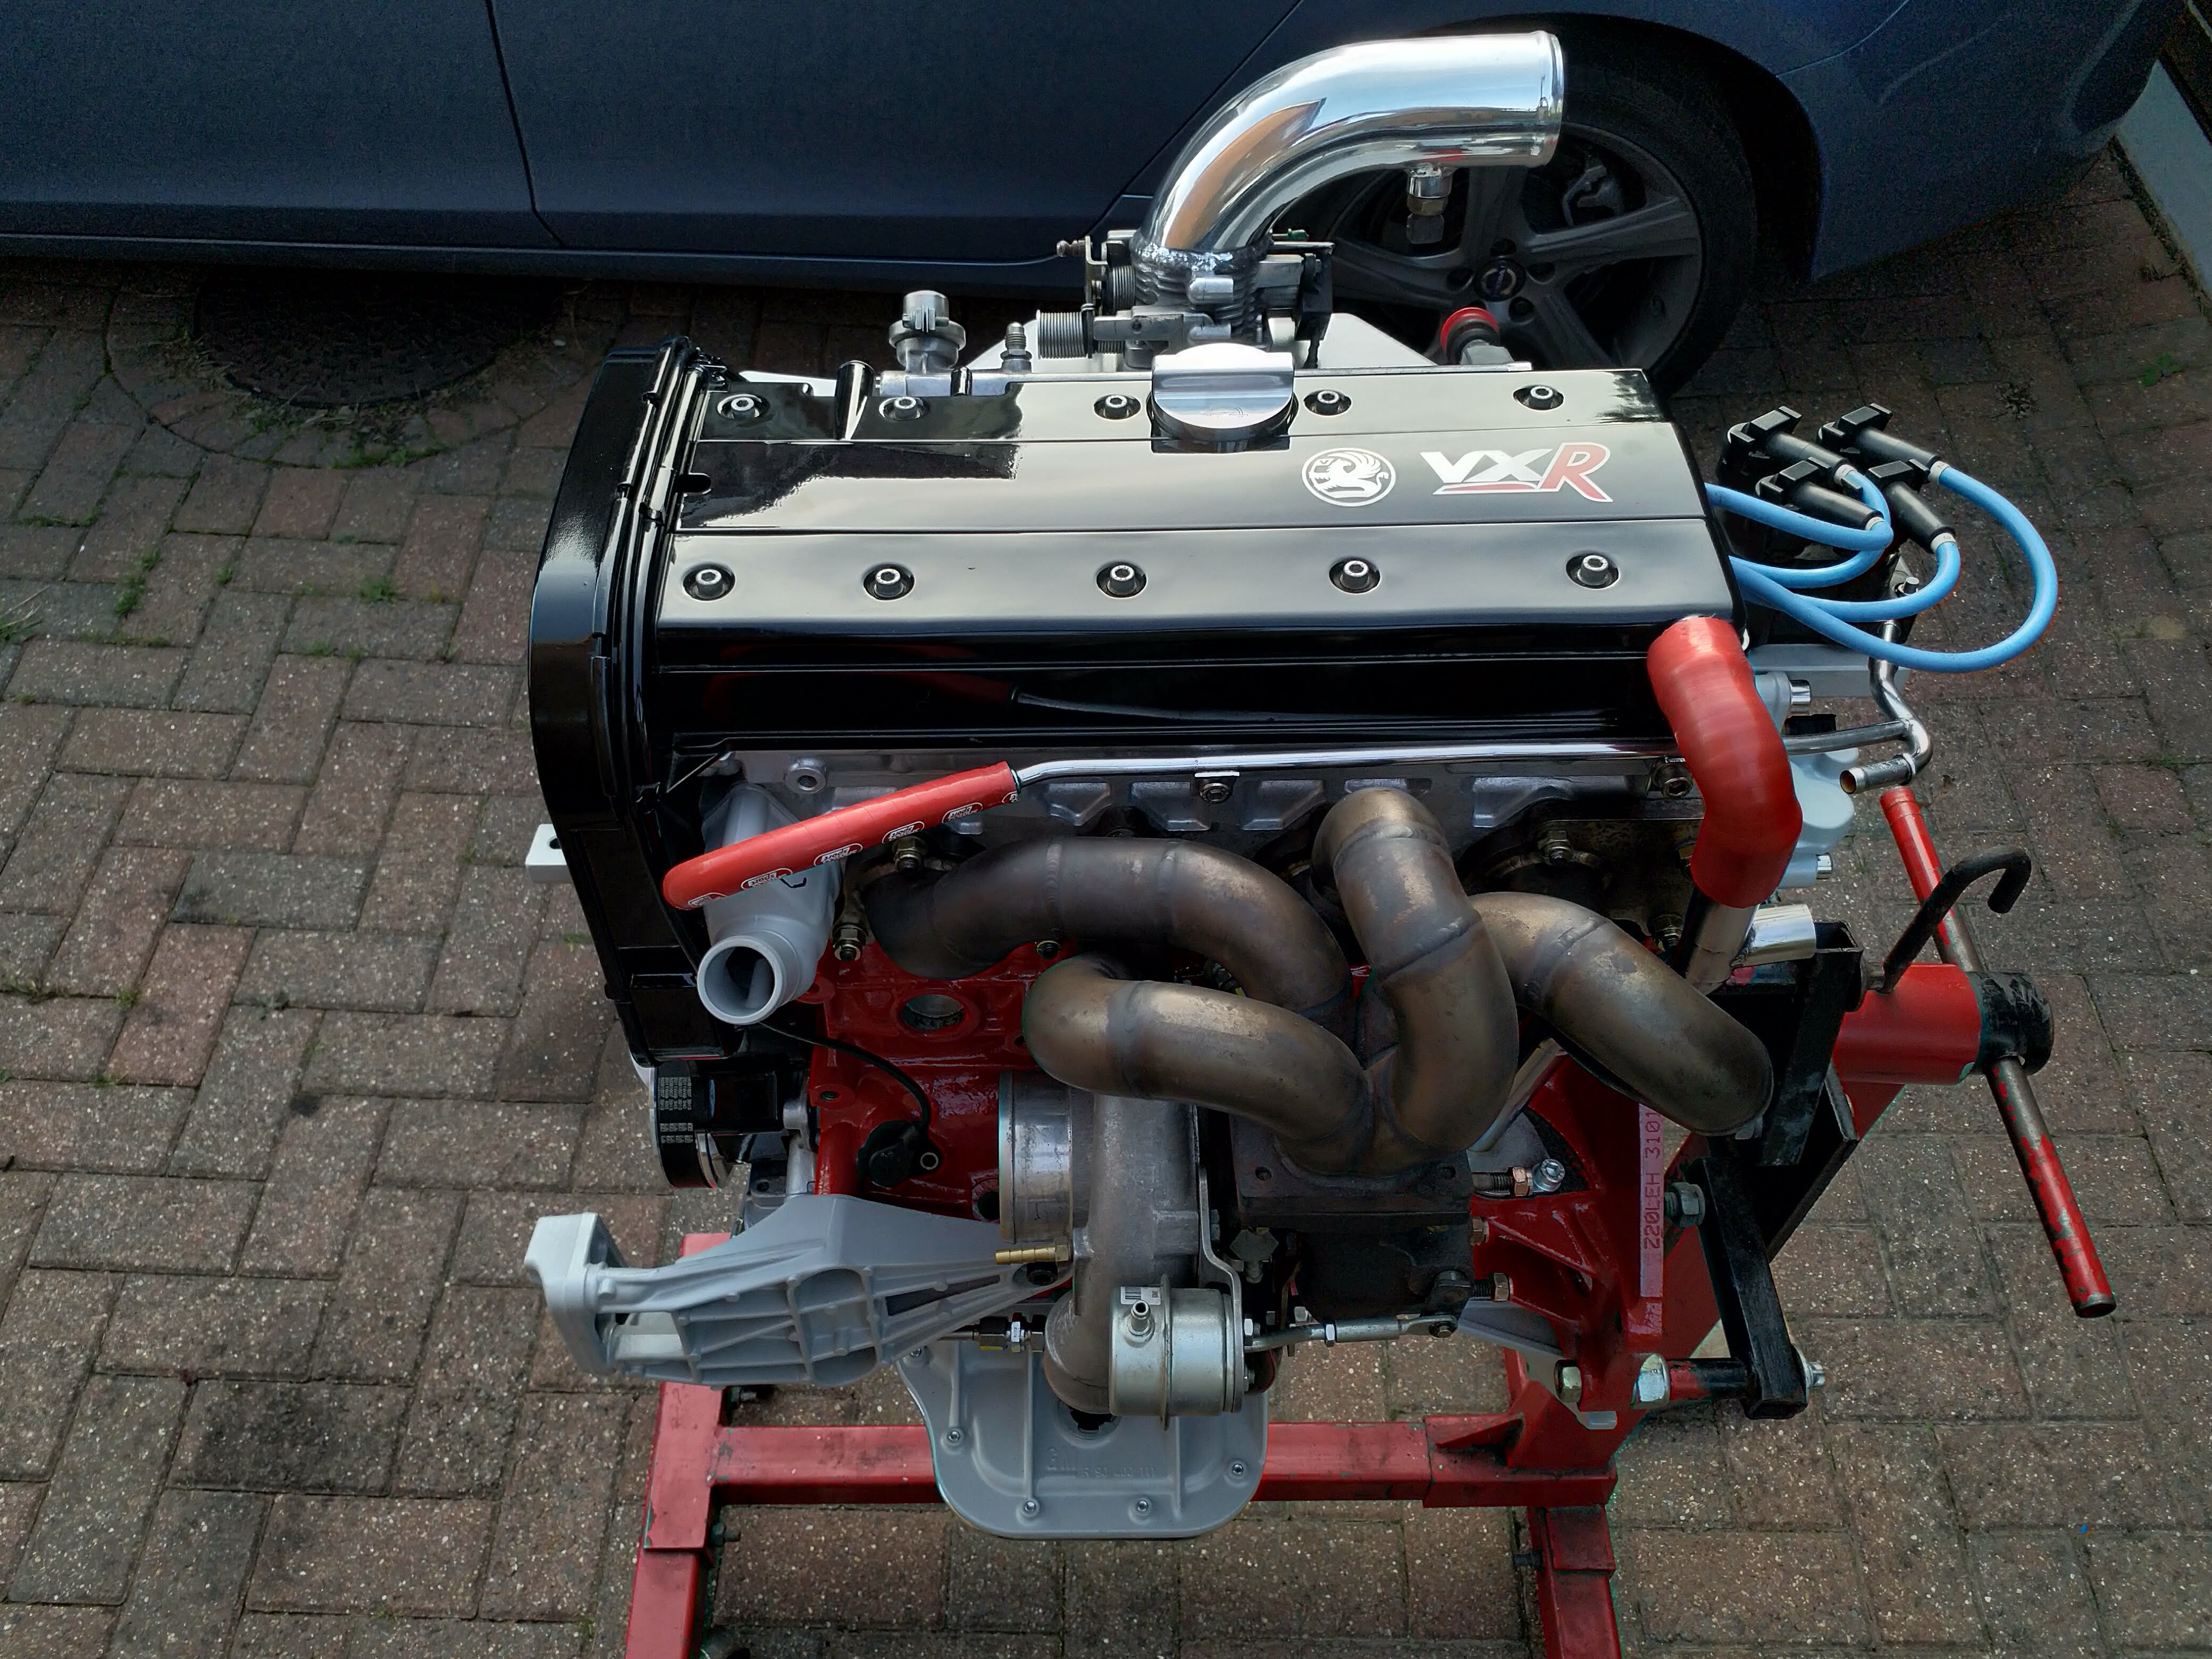
I also got this done, standard thermostat housing, had a boss welded on it so I could fit a dry break connector for an engine heater.
This sounds kinda sad and pointless but bear with me. I got the idea from the touring cars I work on.
The idea is have an engine pre- heater i can stick on the engine when i get home, powered off a WIFI plug. set a timer, pre heat the engine so its ready straight away for a spirited drive, or ready quicker at least! Also helps reduce engine wear and makes the car easier to drive out the garage at 5am and not wake the neighbours up having a high idle etc lol.
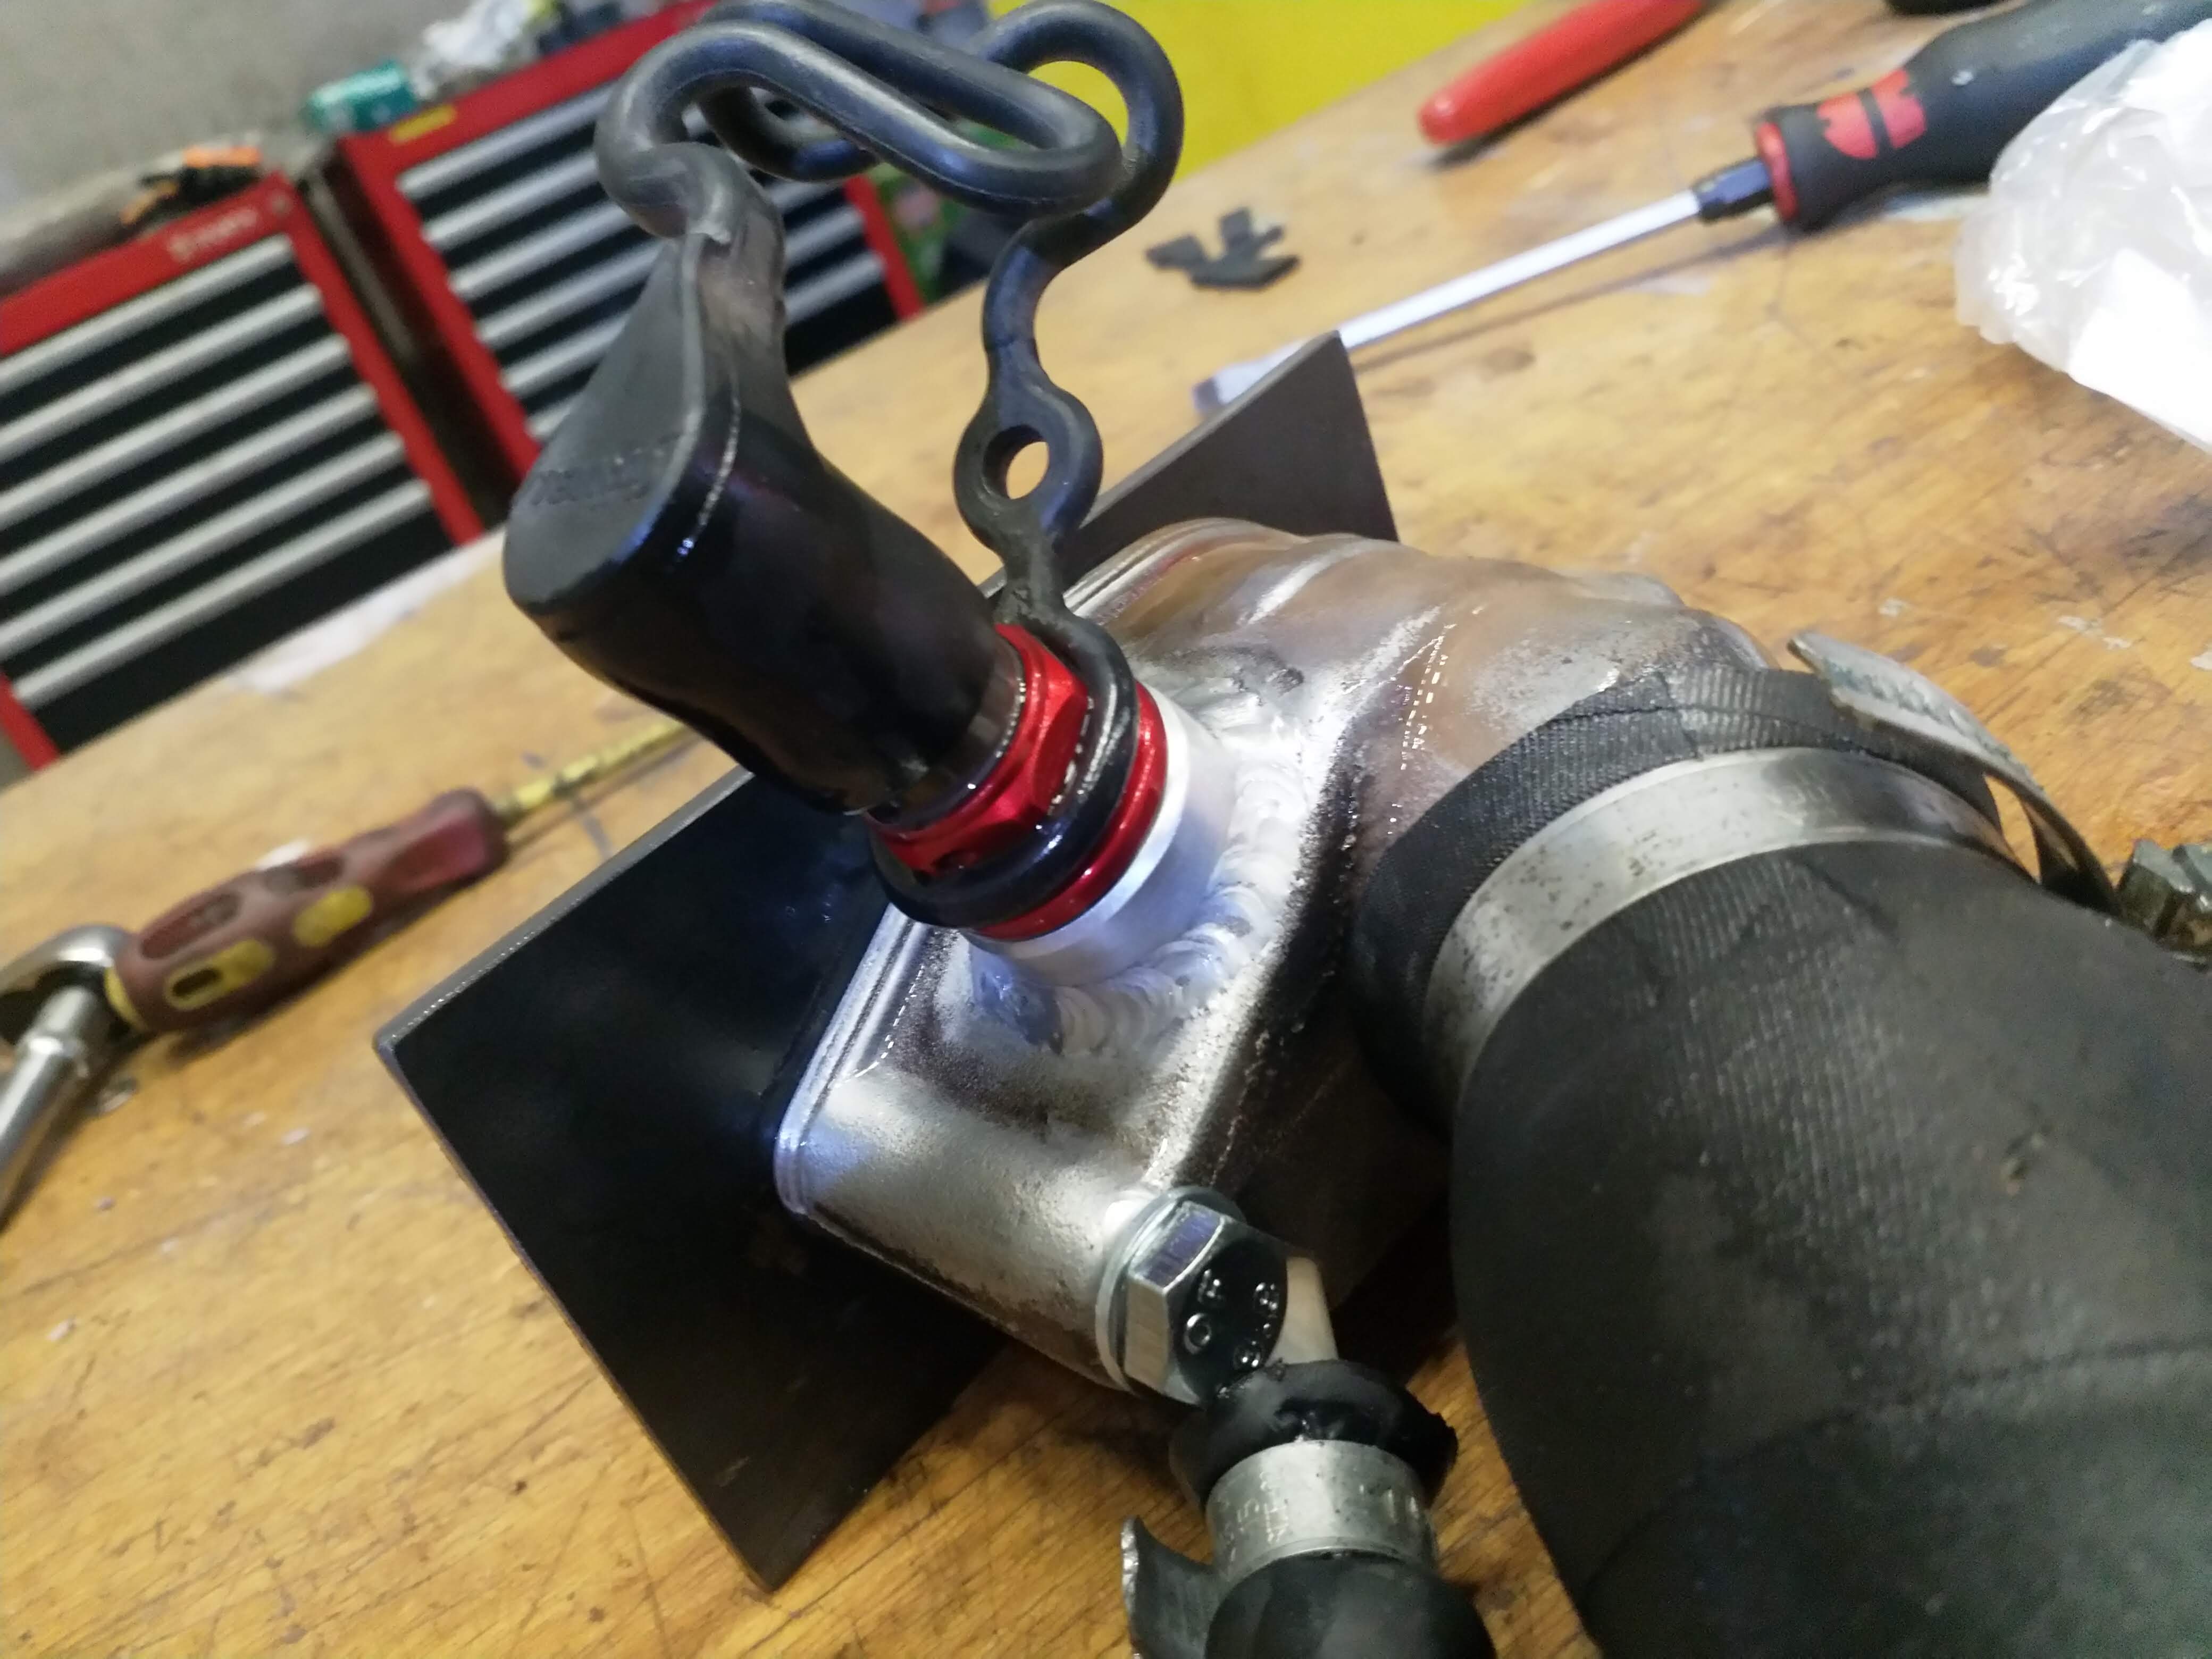
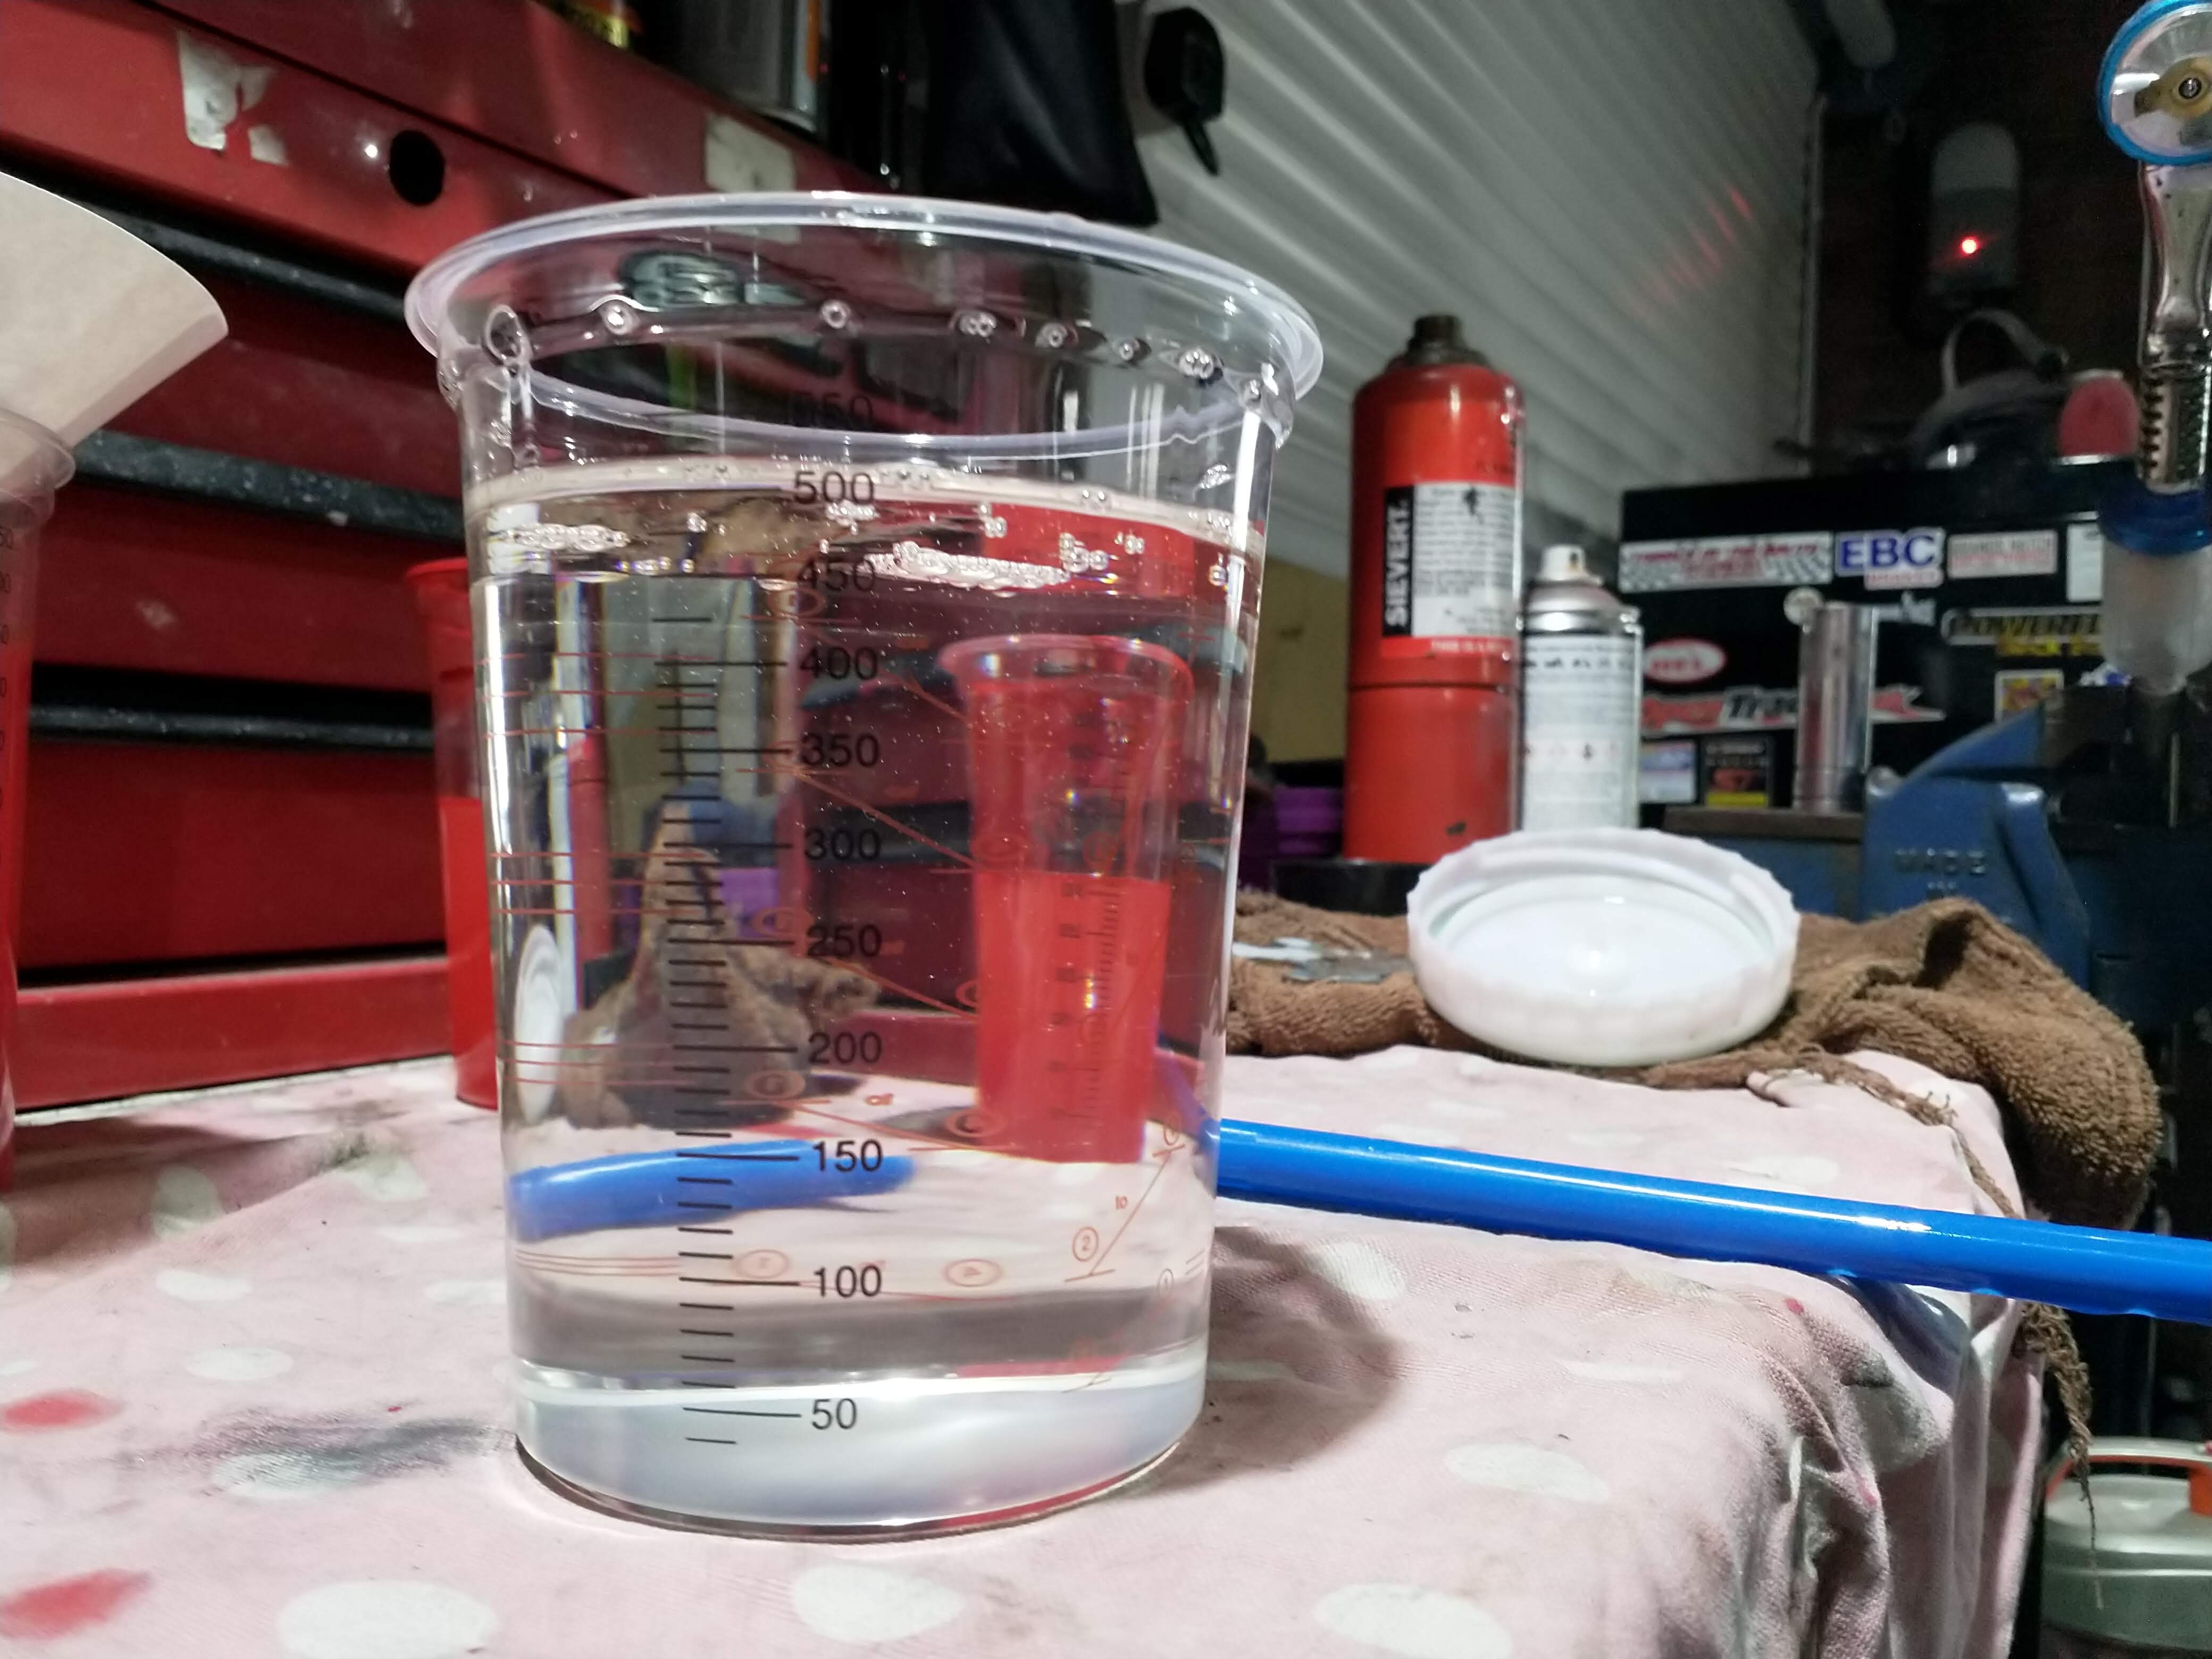
Pressure tested the fitting before powdercoating. Yes I know the big spike is mega random lol
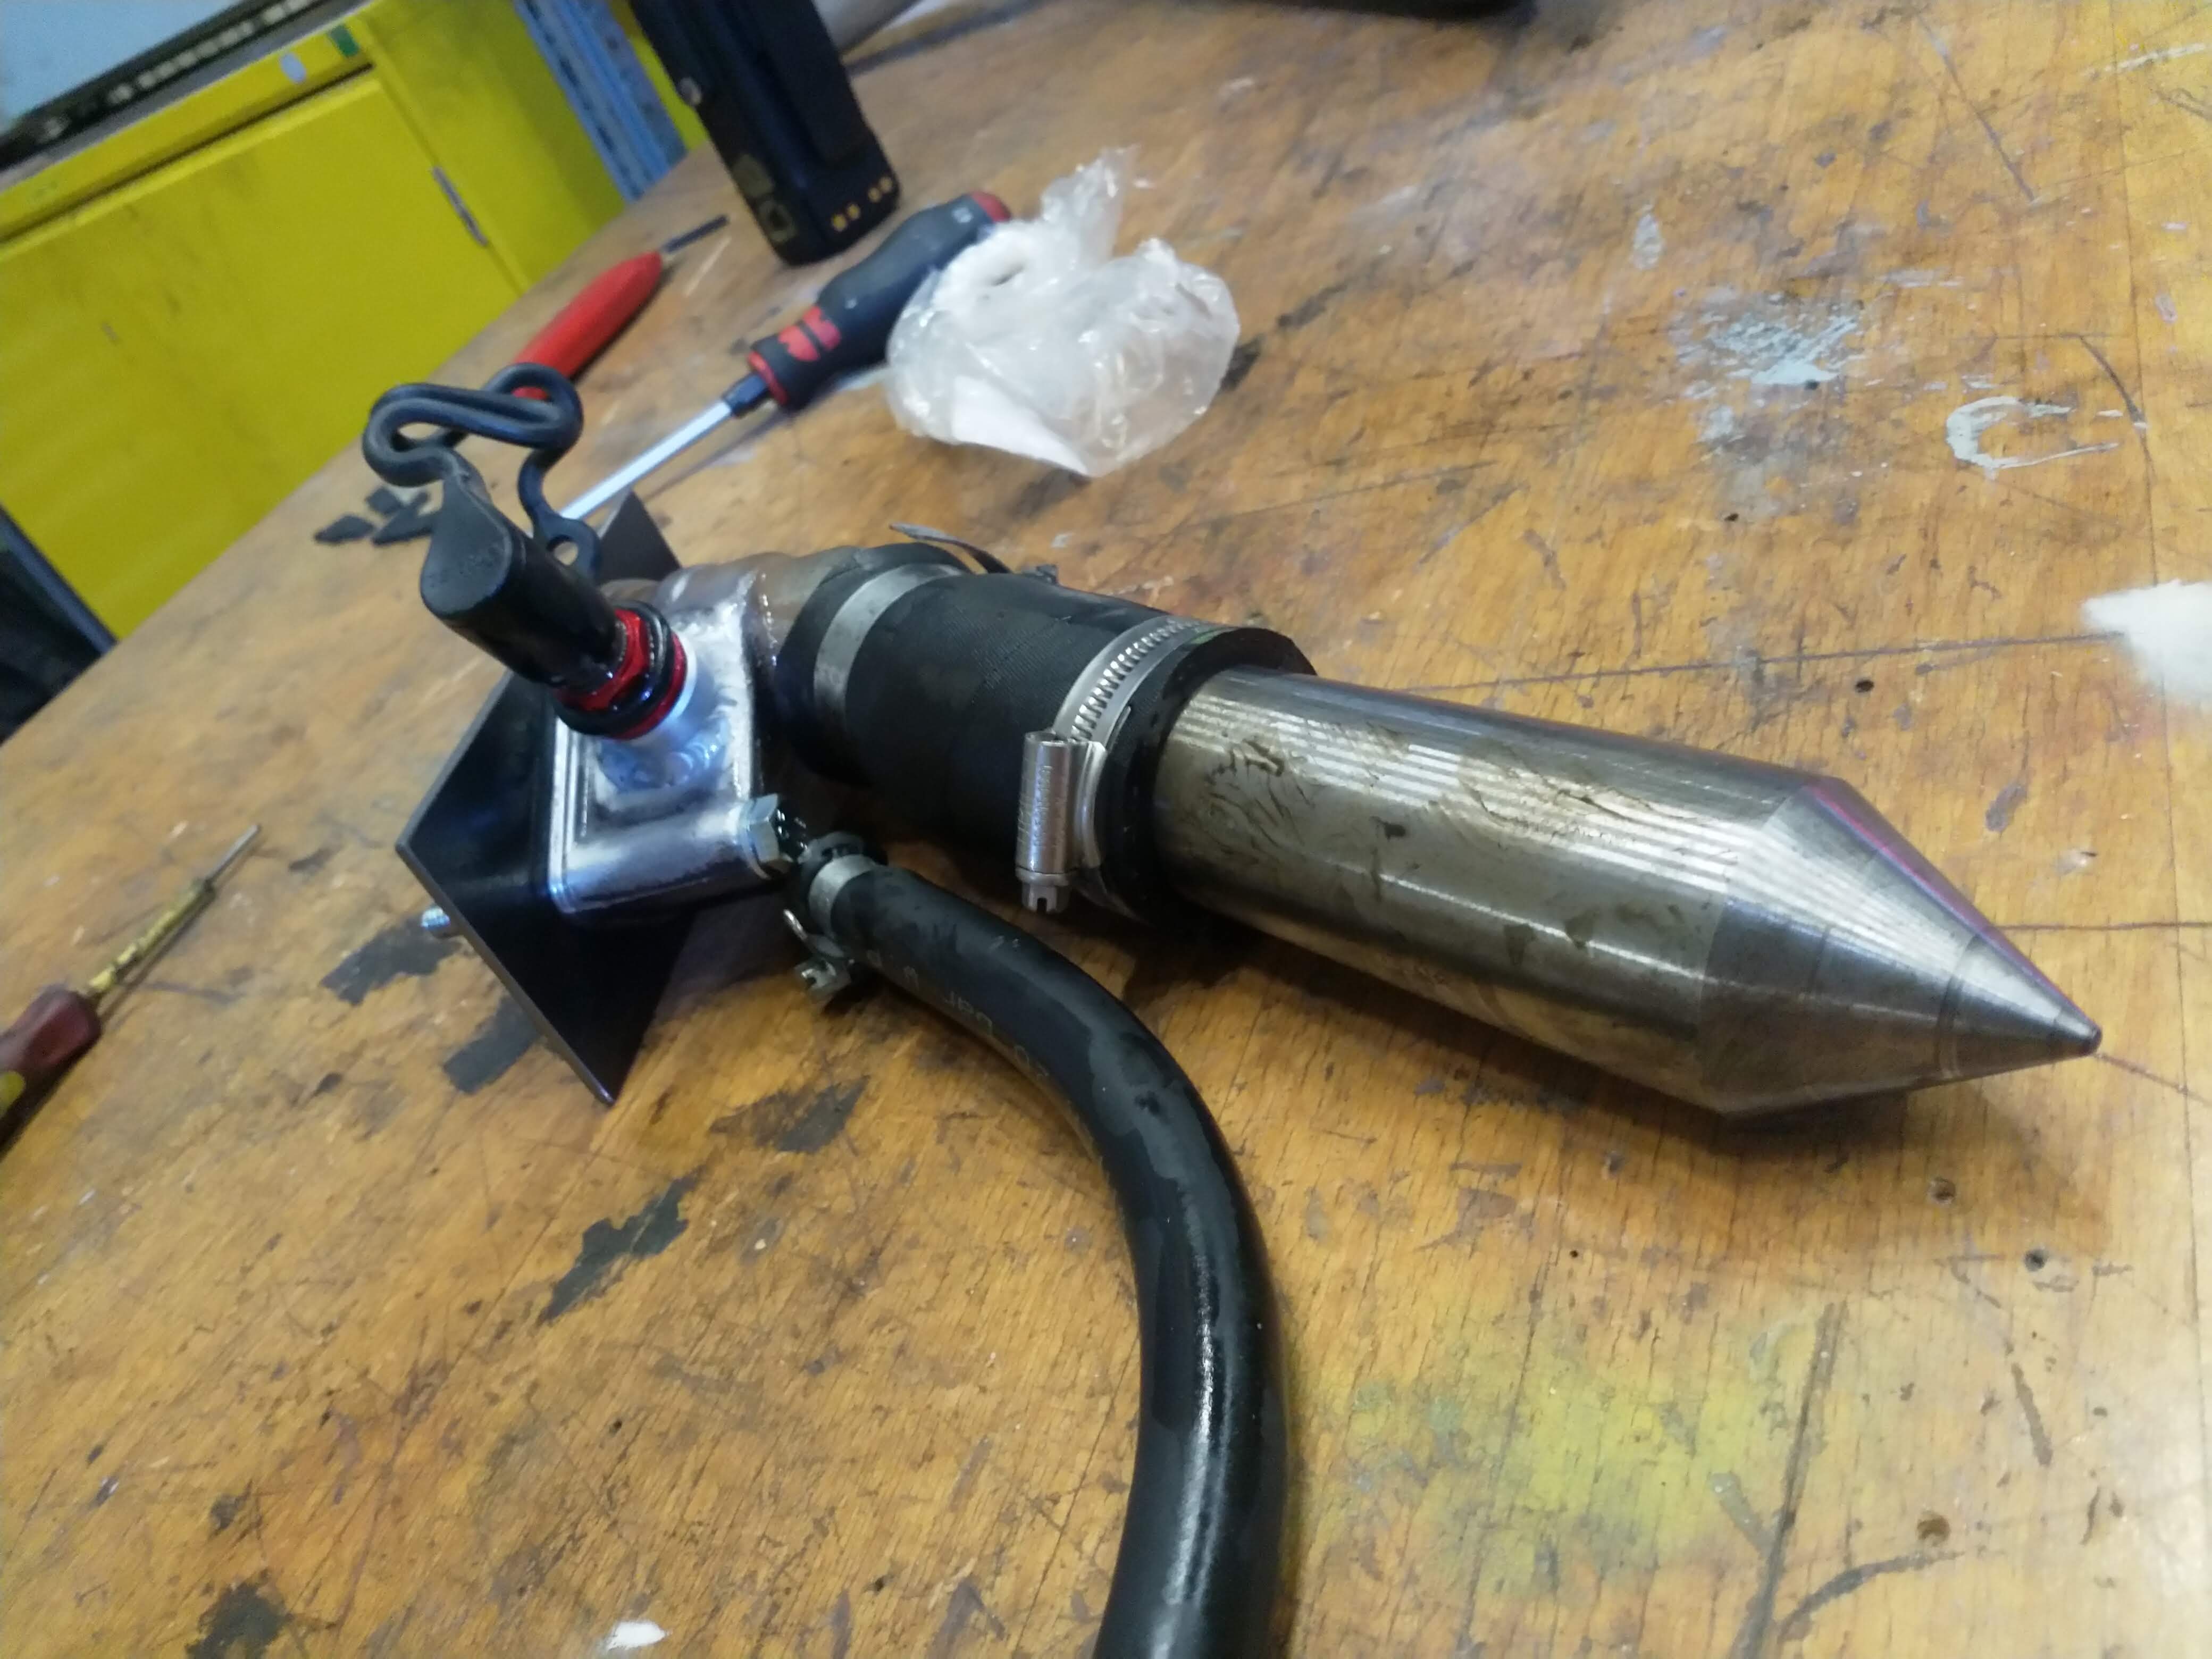
Incase ur wondering, the spike is the centre support off the lathe at work lol
This sounds kinda sad and pointless but bear with me. I got the idea from the touring cars I work on.
The idea is have an engine pre- heater i can stick on the engine when i get home, powered off a WIFI plug. set a timer, pre heat the engine so its ready straight away for a spirited drive, or ready quicker at least! Also helps reduce engine wear and makes the car easier to drive out the garage at 5am and not wake the neighbours up having a high idle etc lol.
Pressure tested the fitting before powdercoating. Yes I know the big spike is mega random lol
Incase ur wondering, the spike is the centre support off the lathe at work lol
More progress on the go, this one is pretty exciting!
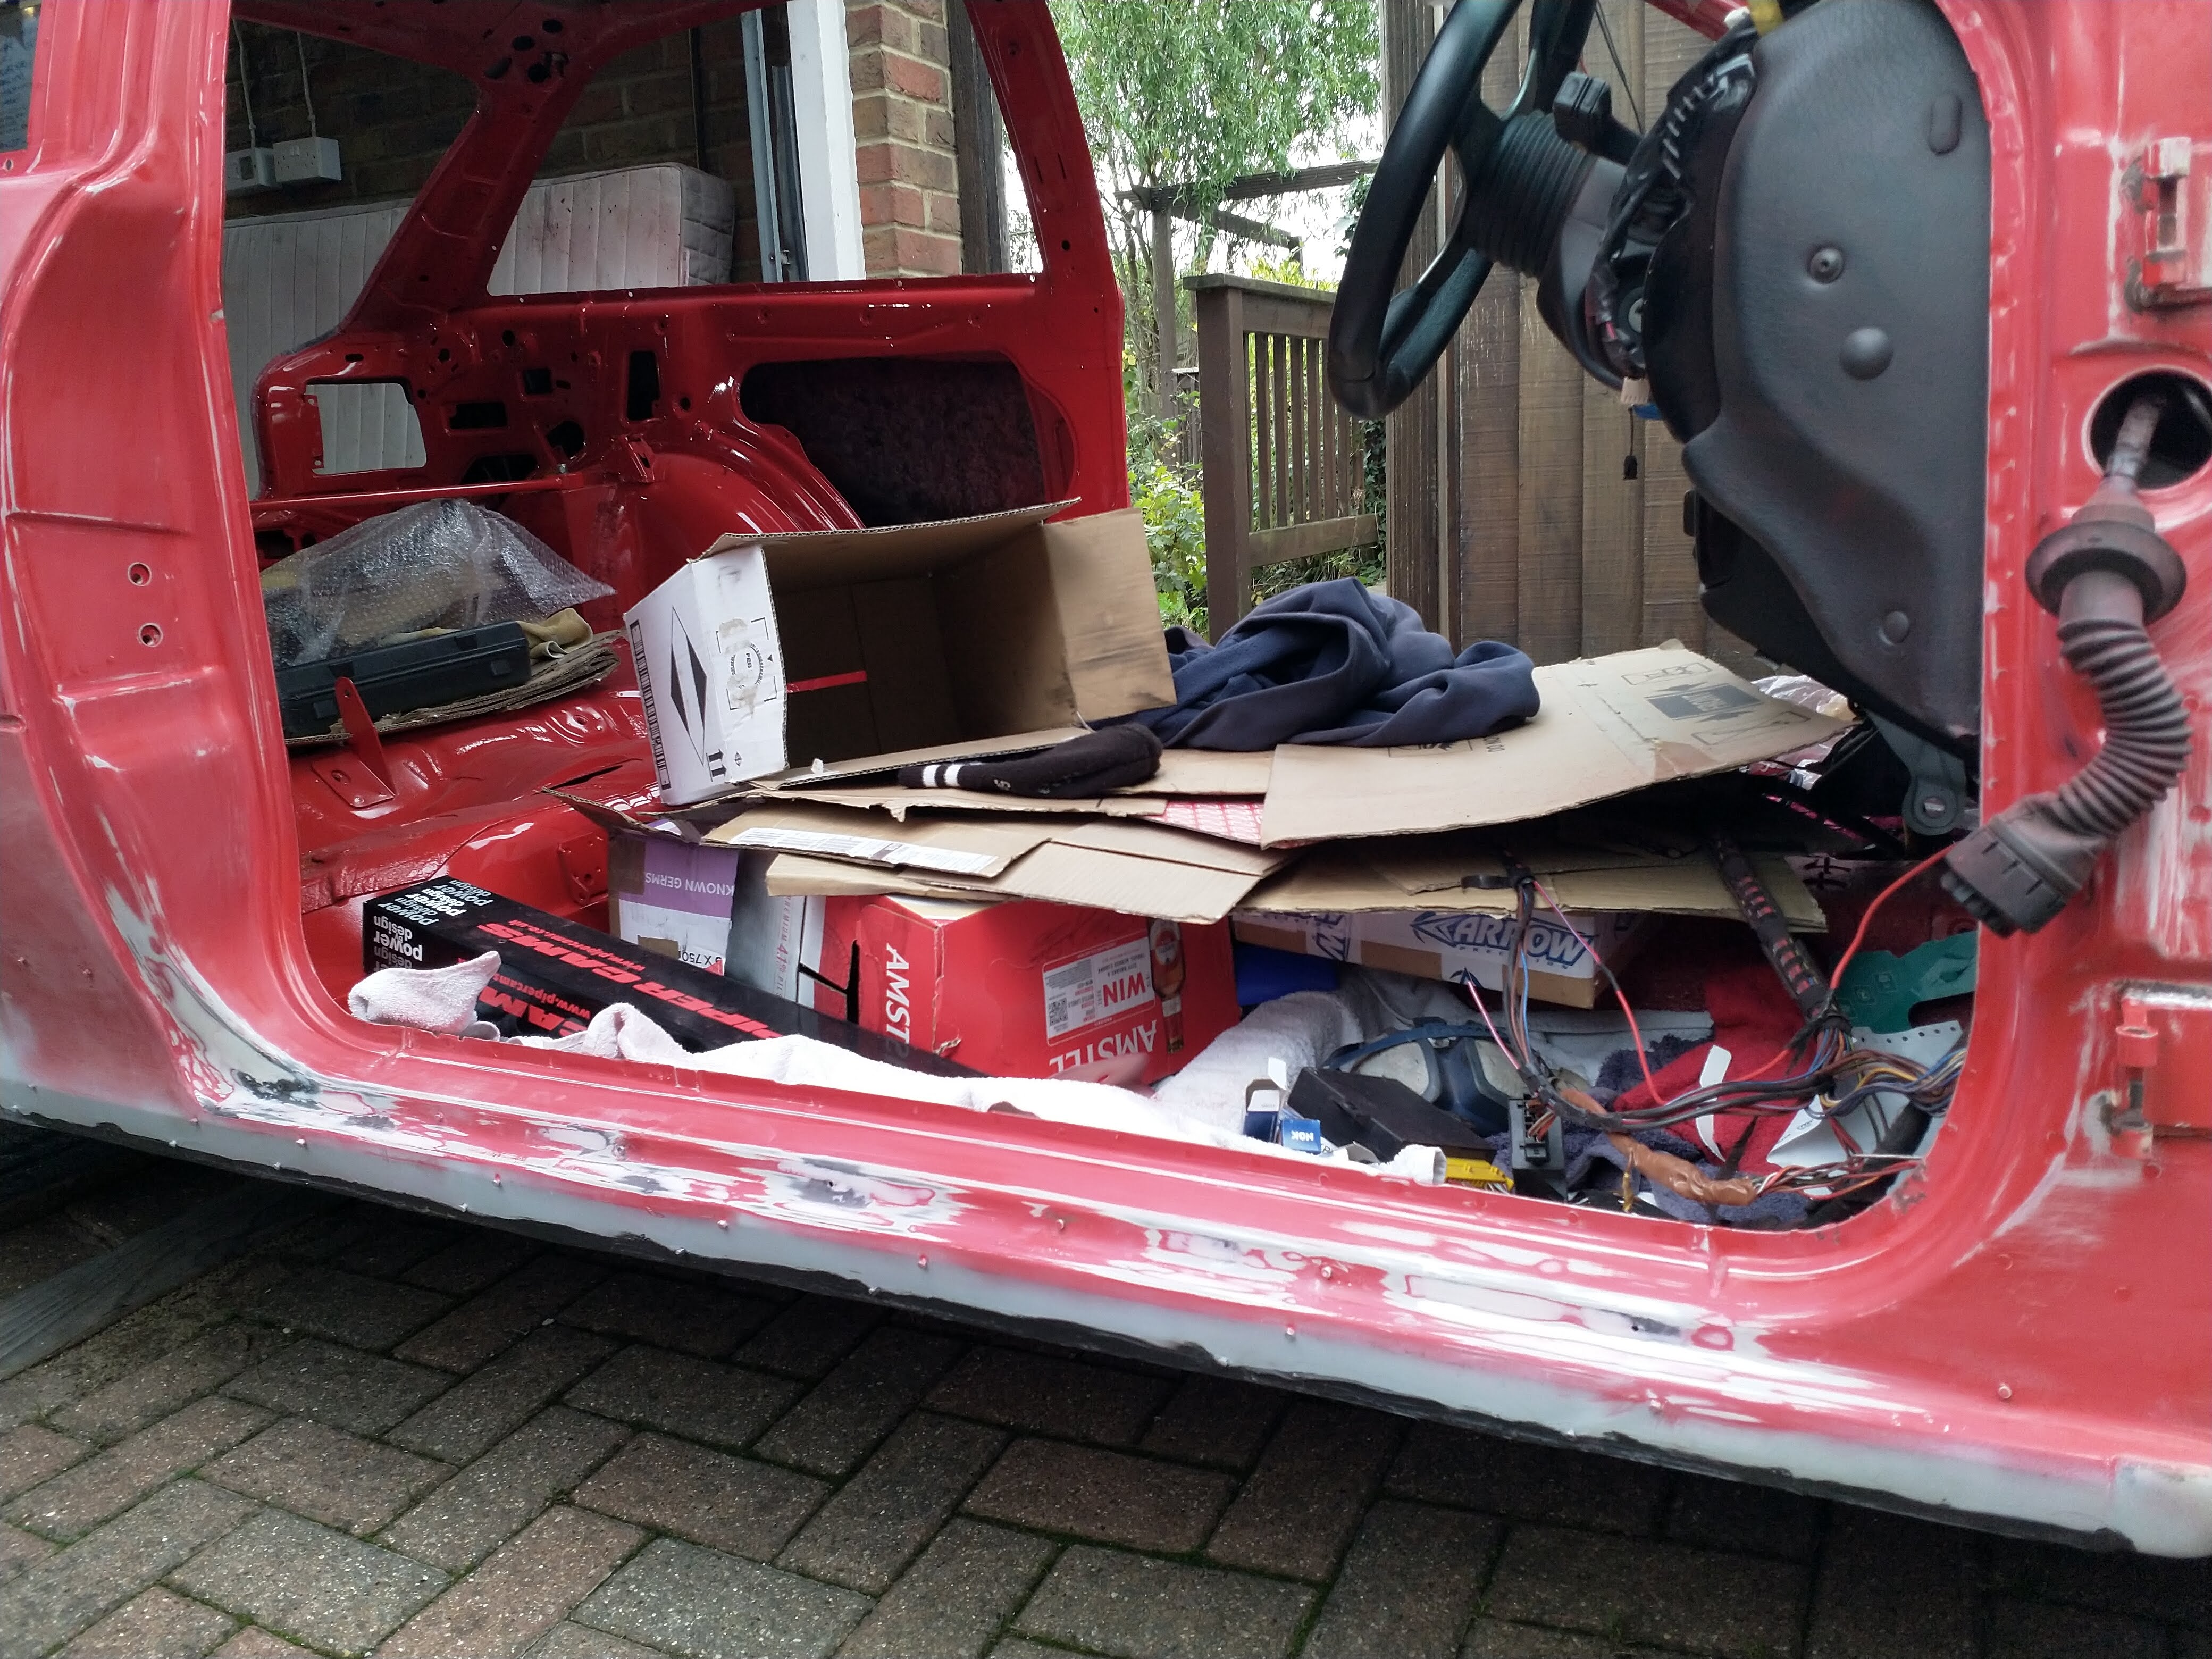
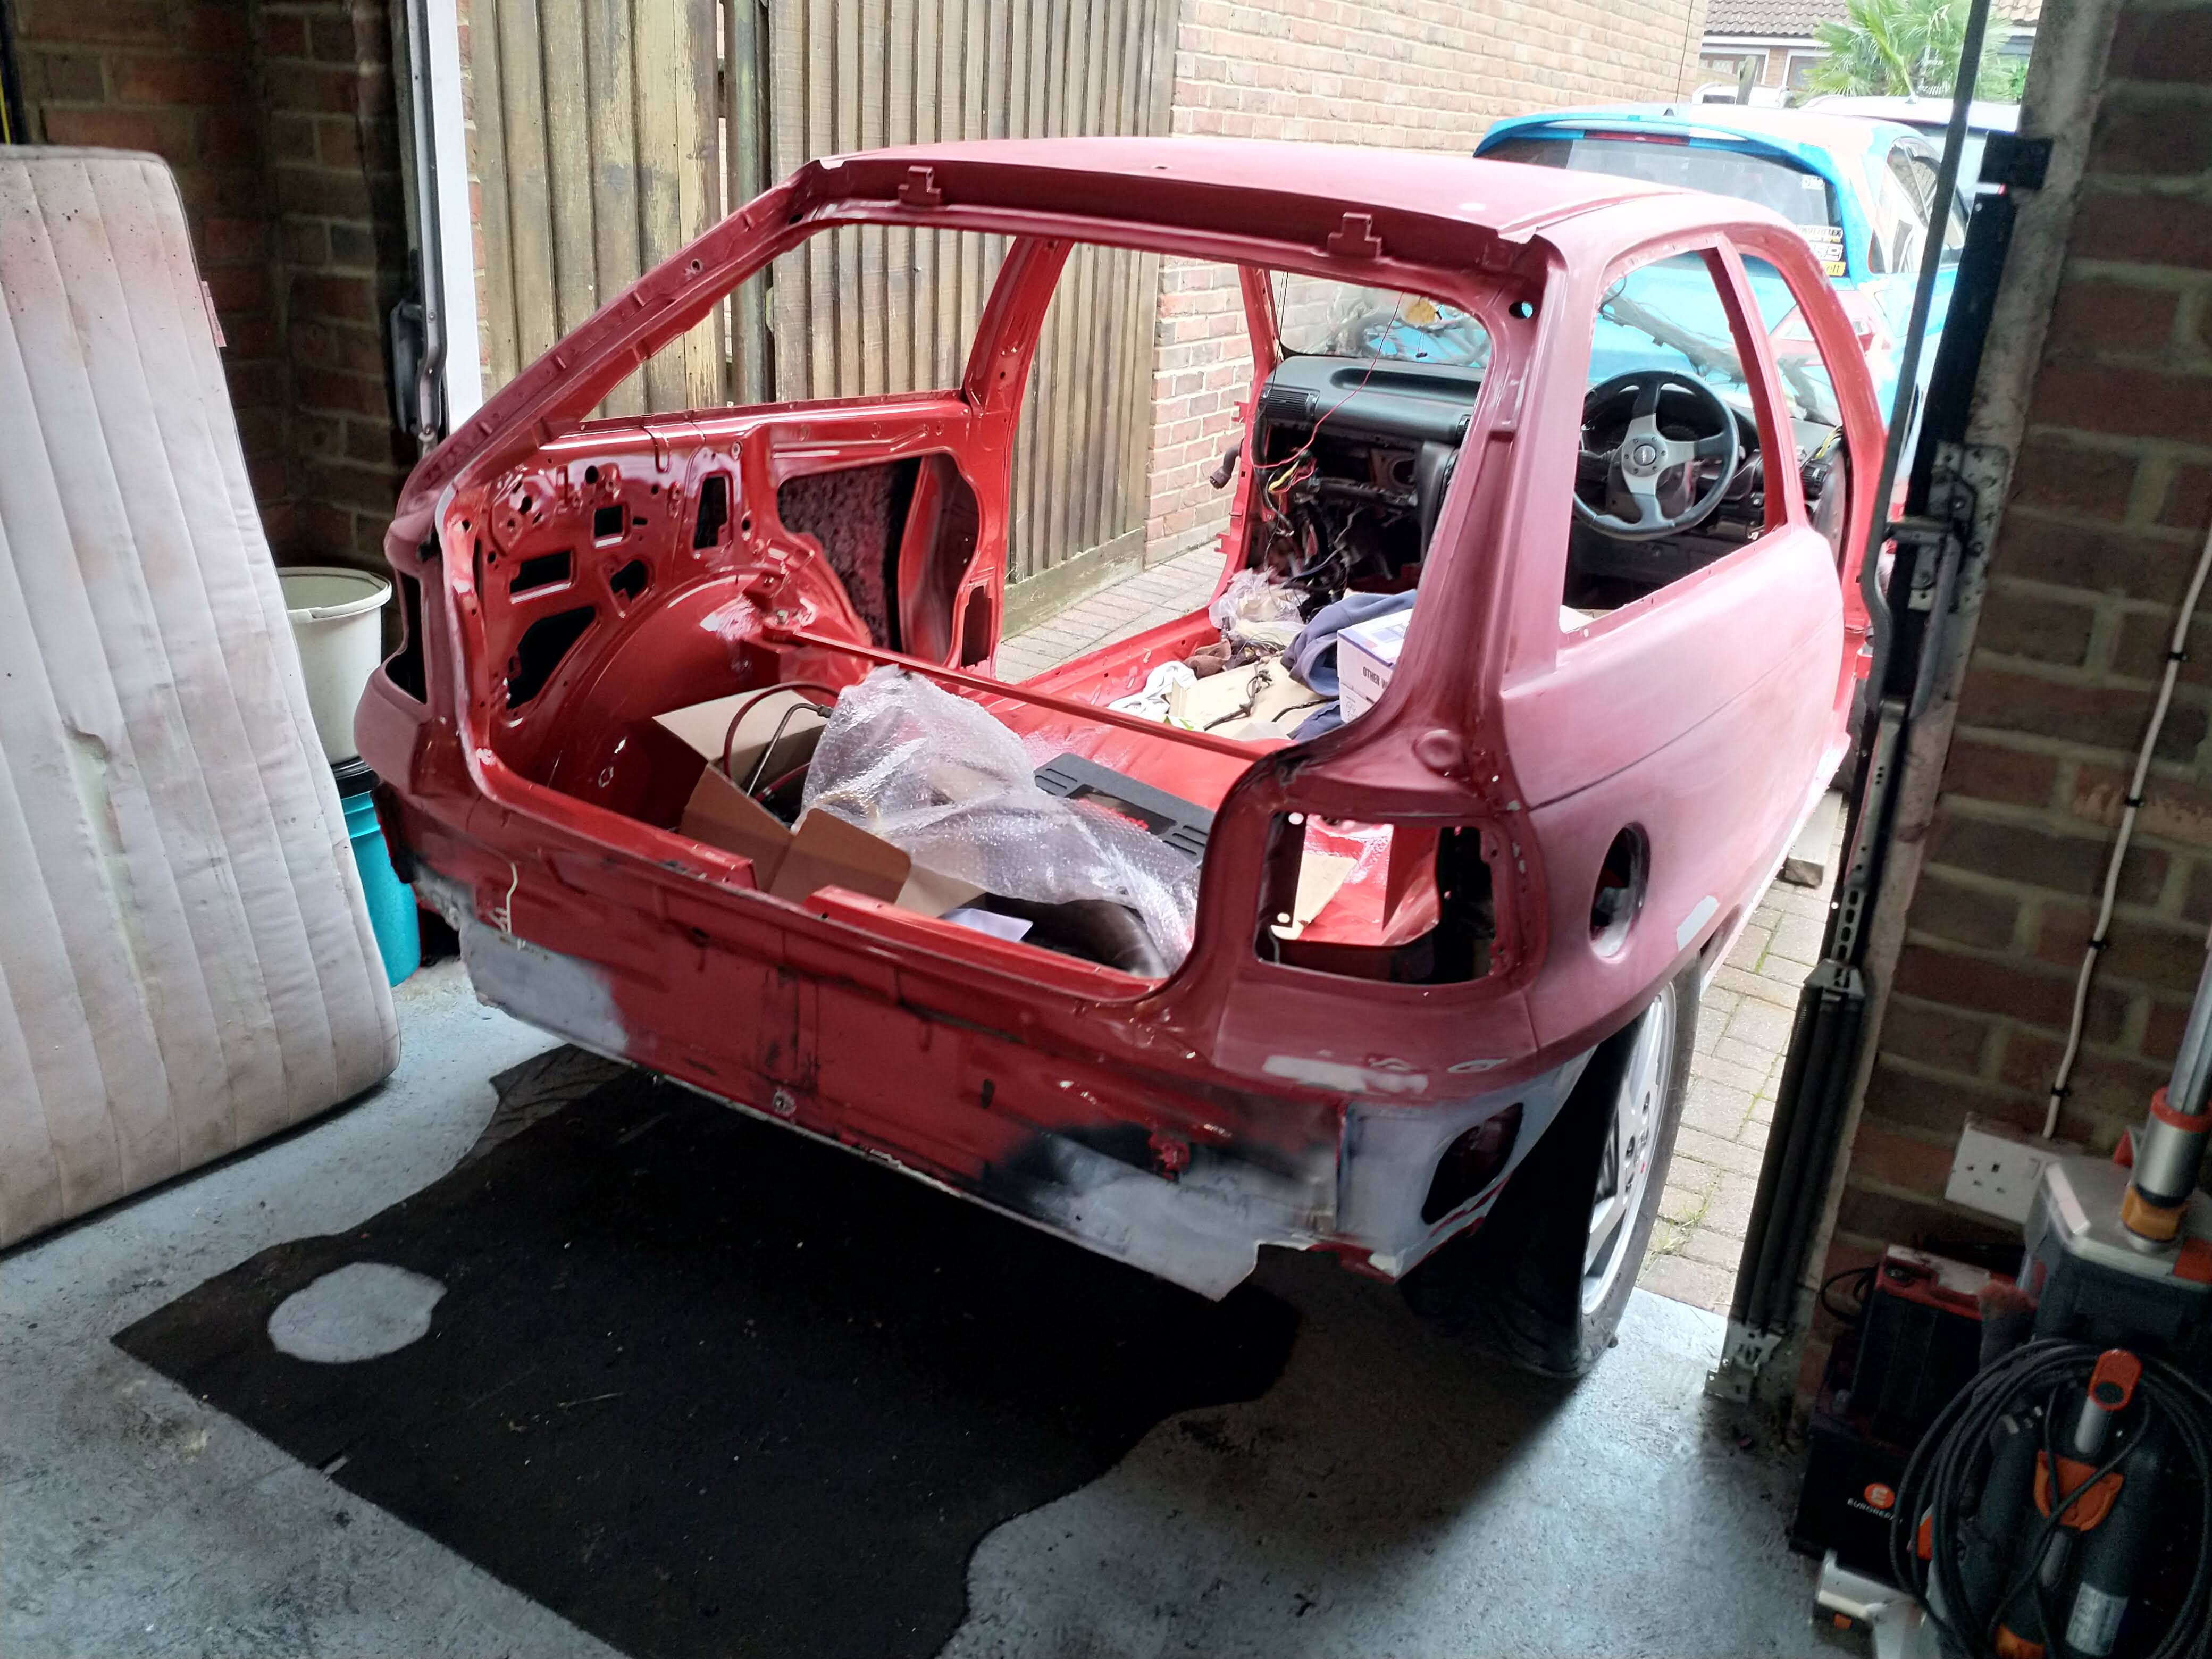
So now the engine is in, after all the welding work that has gone on in the workshop, it is not fit for the final exterior coat . So the car needs to come out, workshop cleaned and put back in again. So i bolted all the suspension up and stuck the wheel on and rolled her out
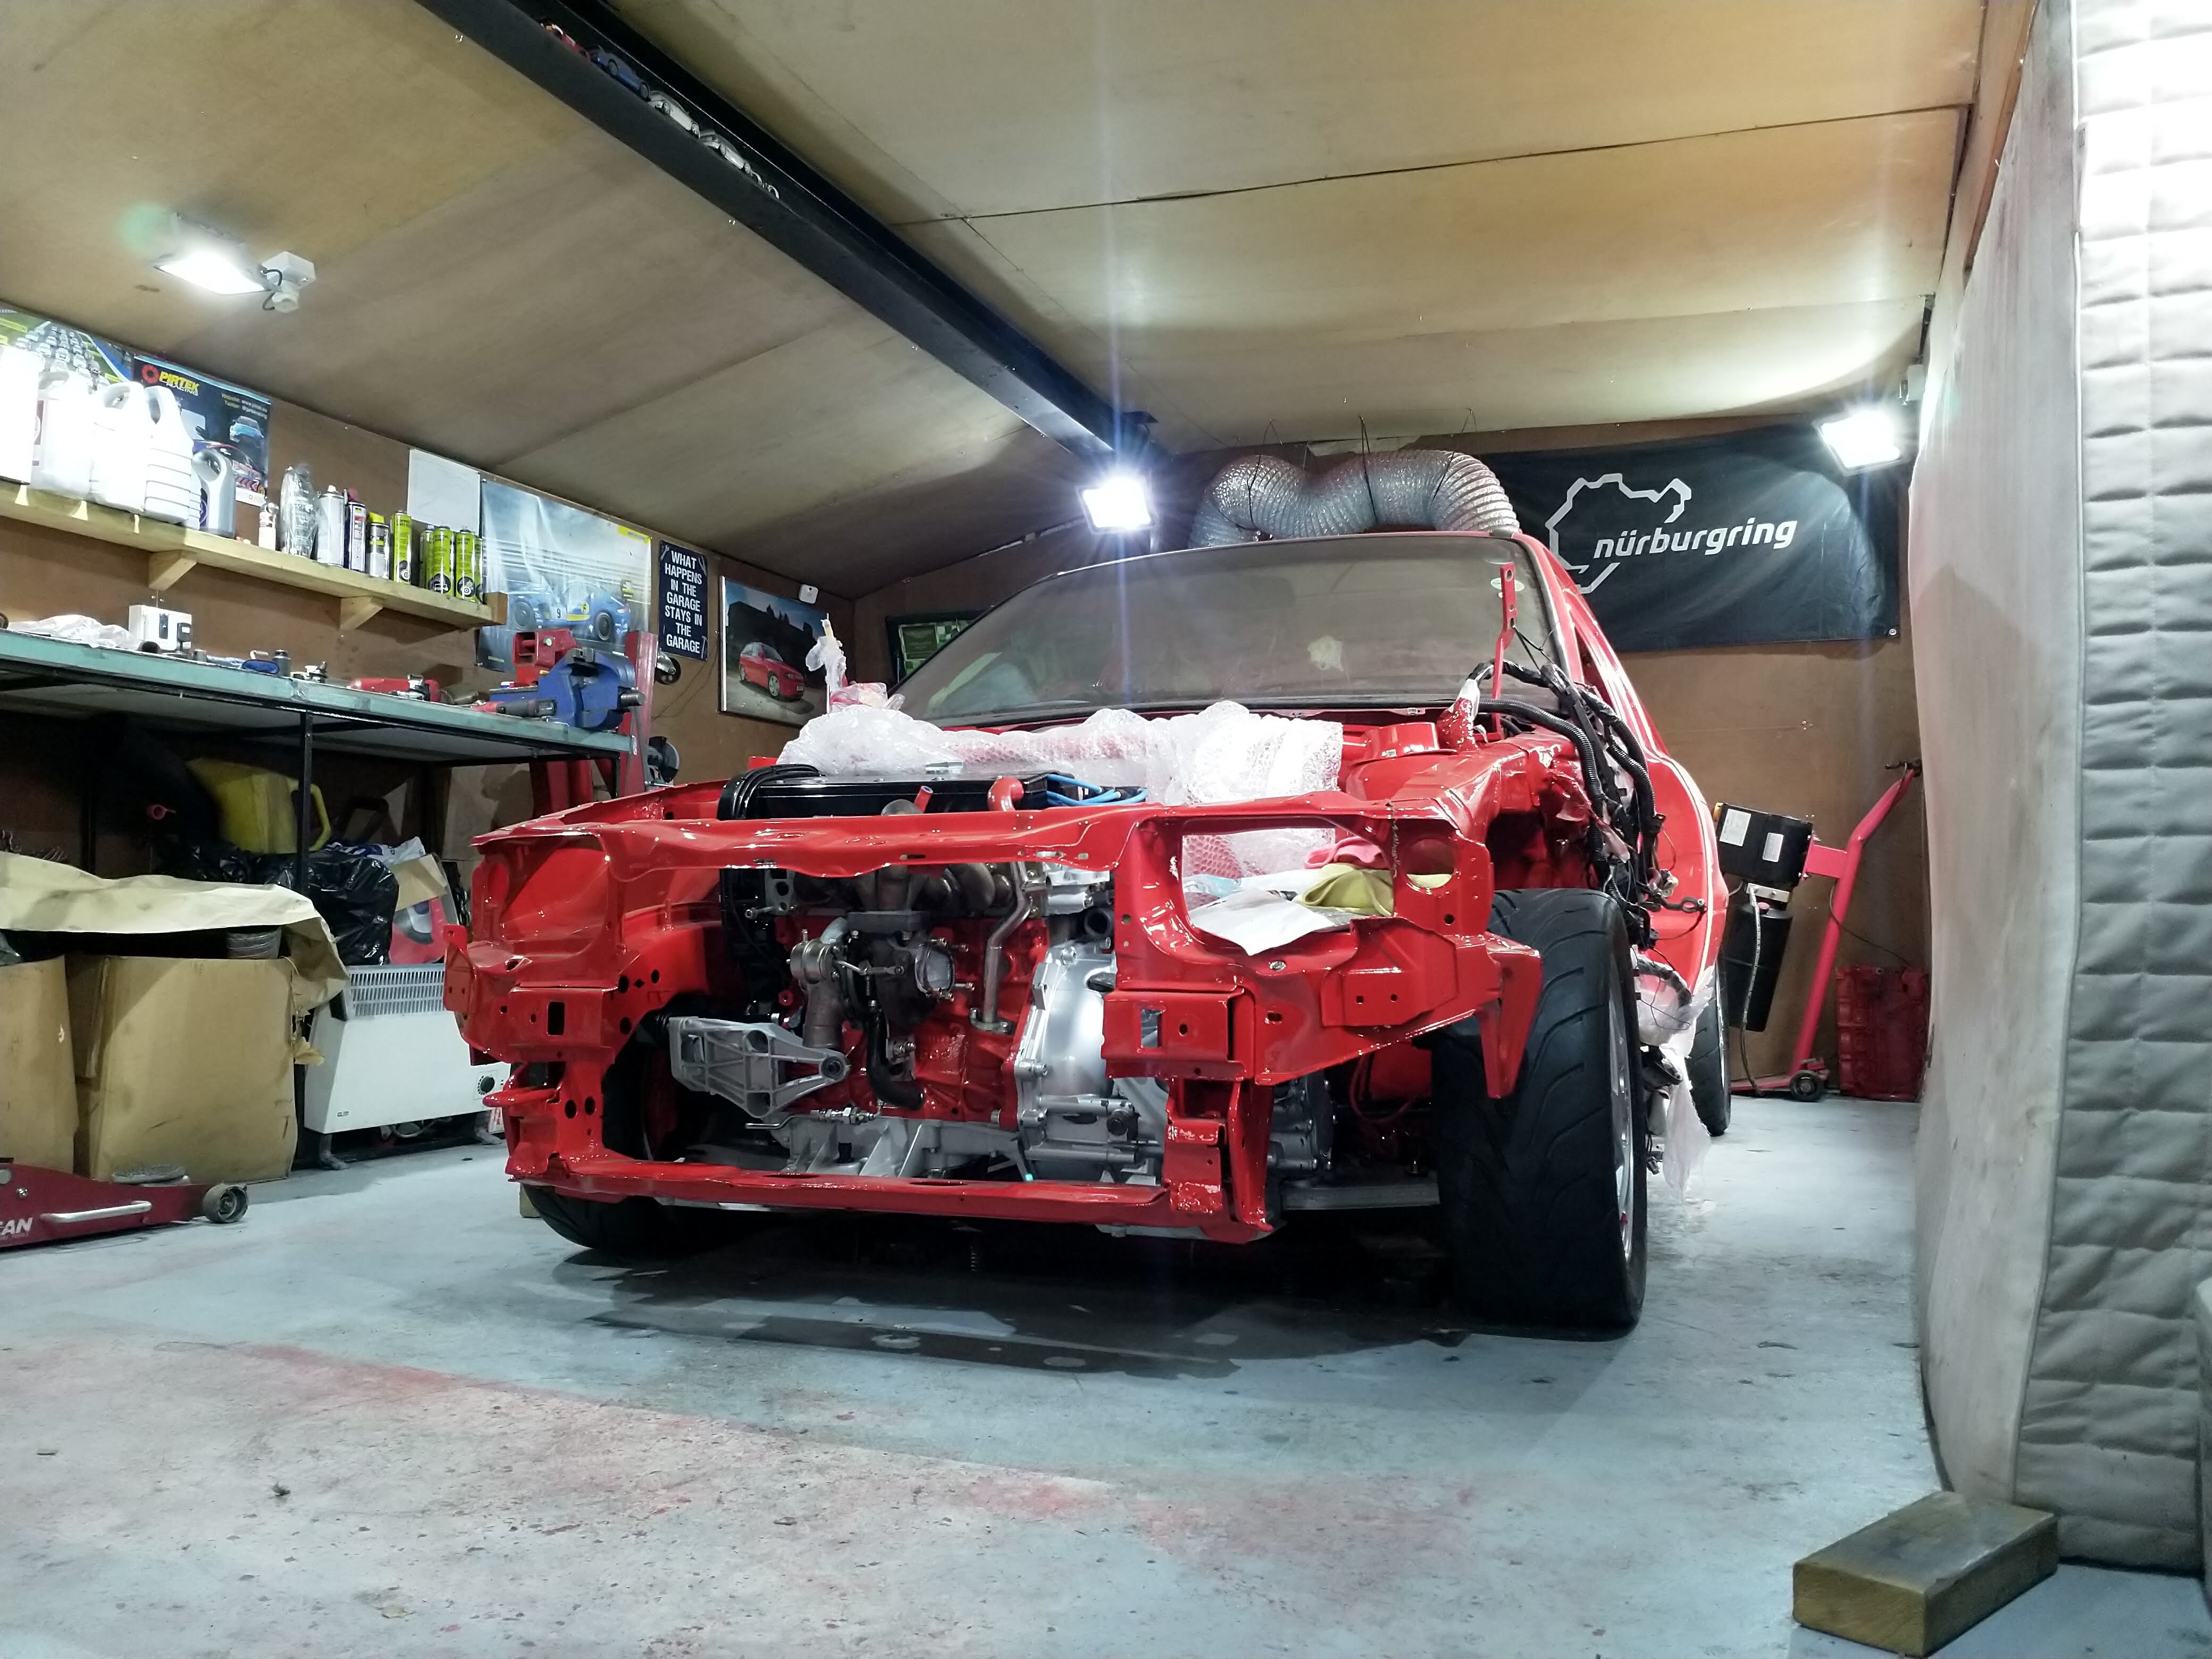
Damn she looks MEAN!!!
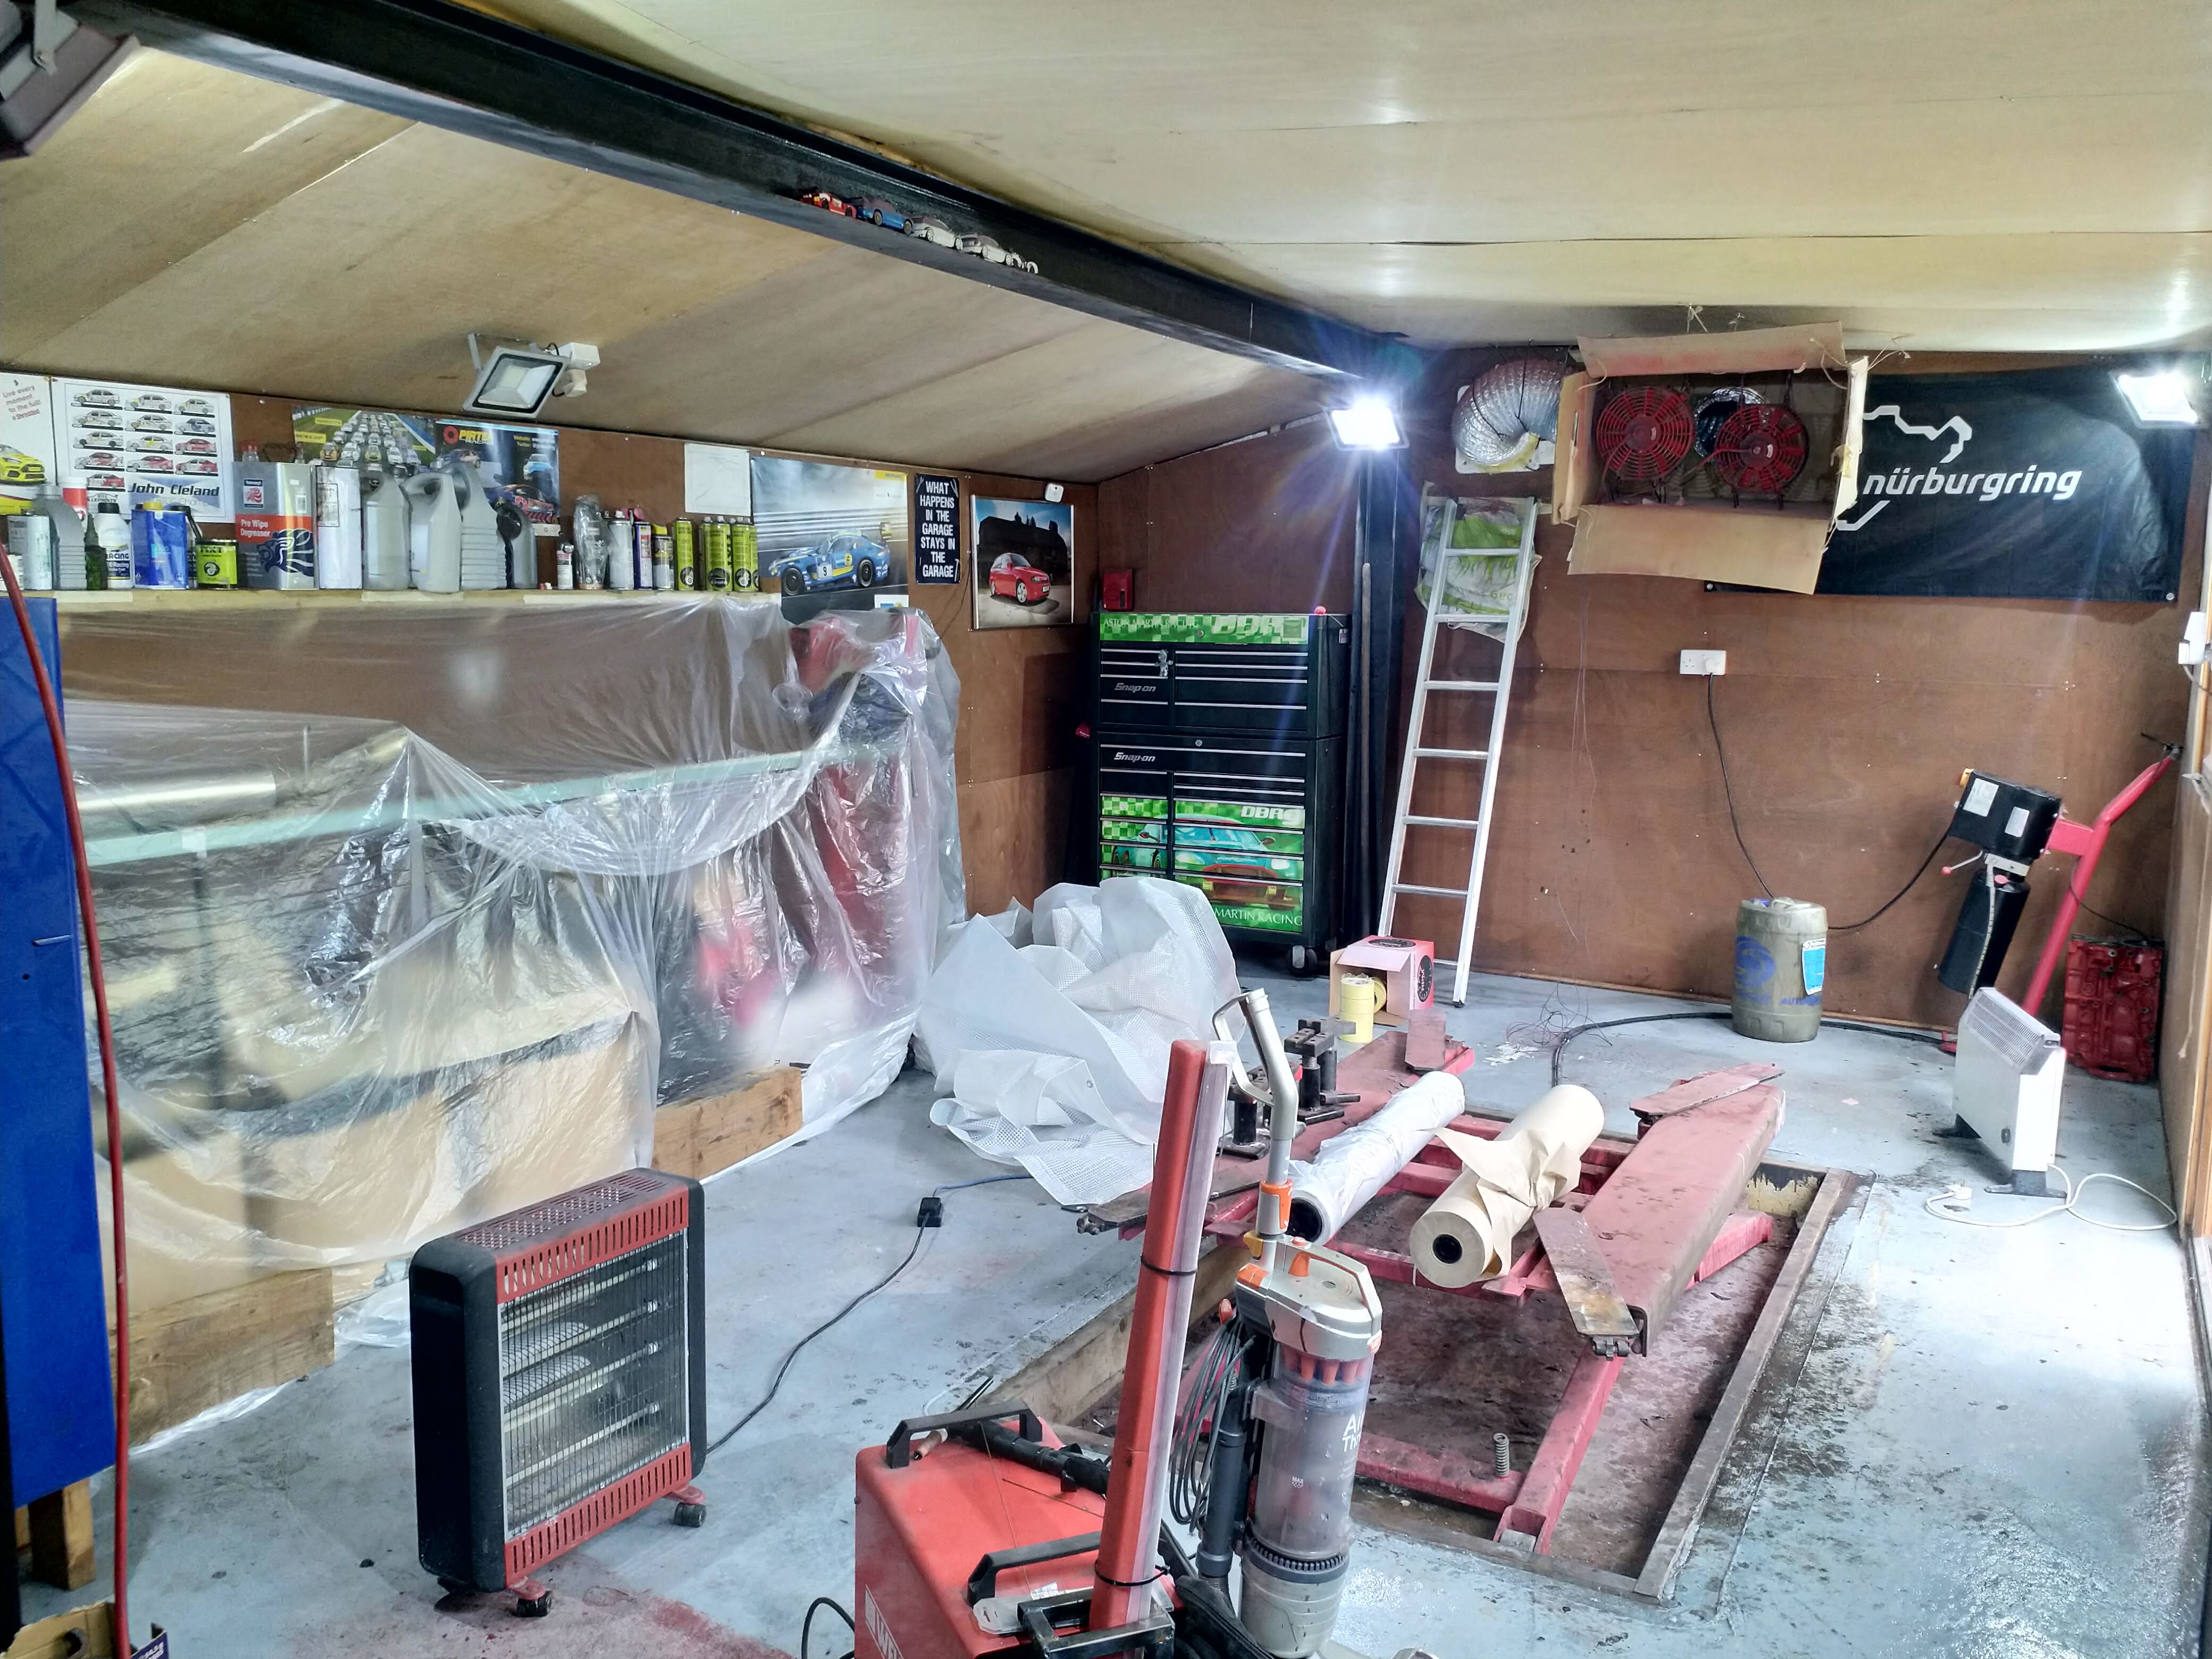
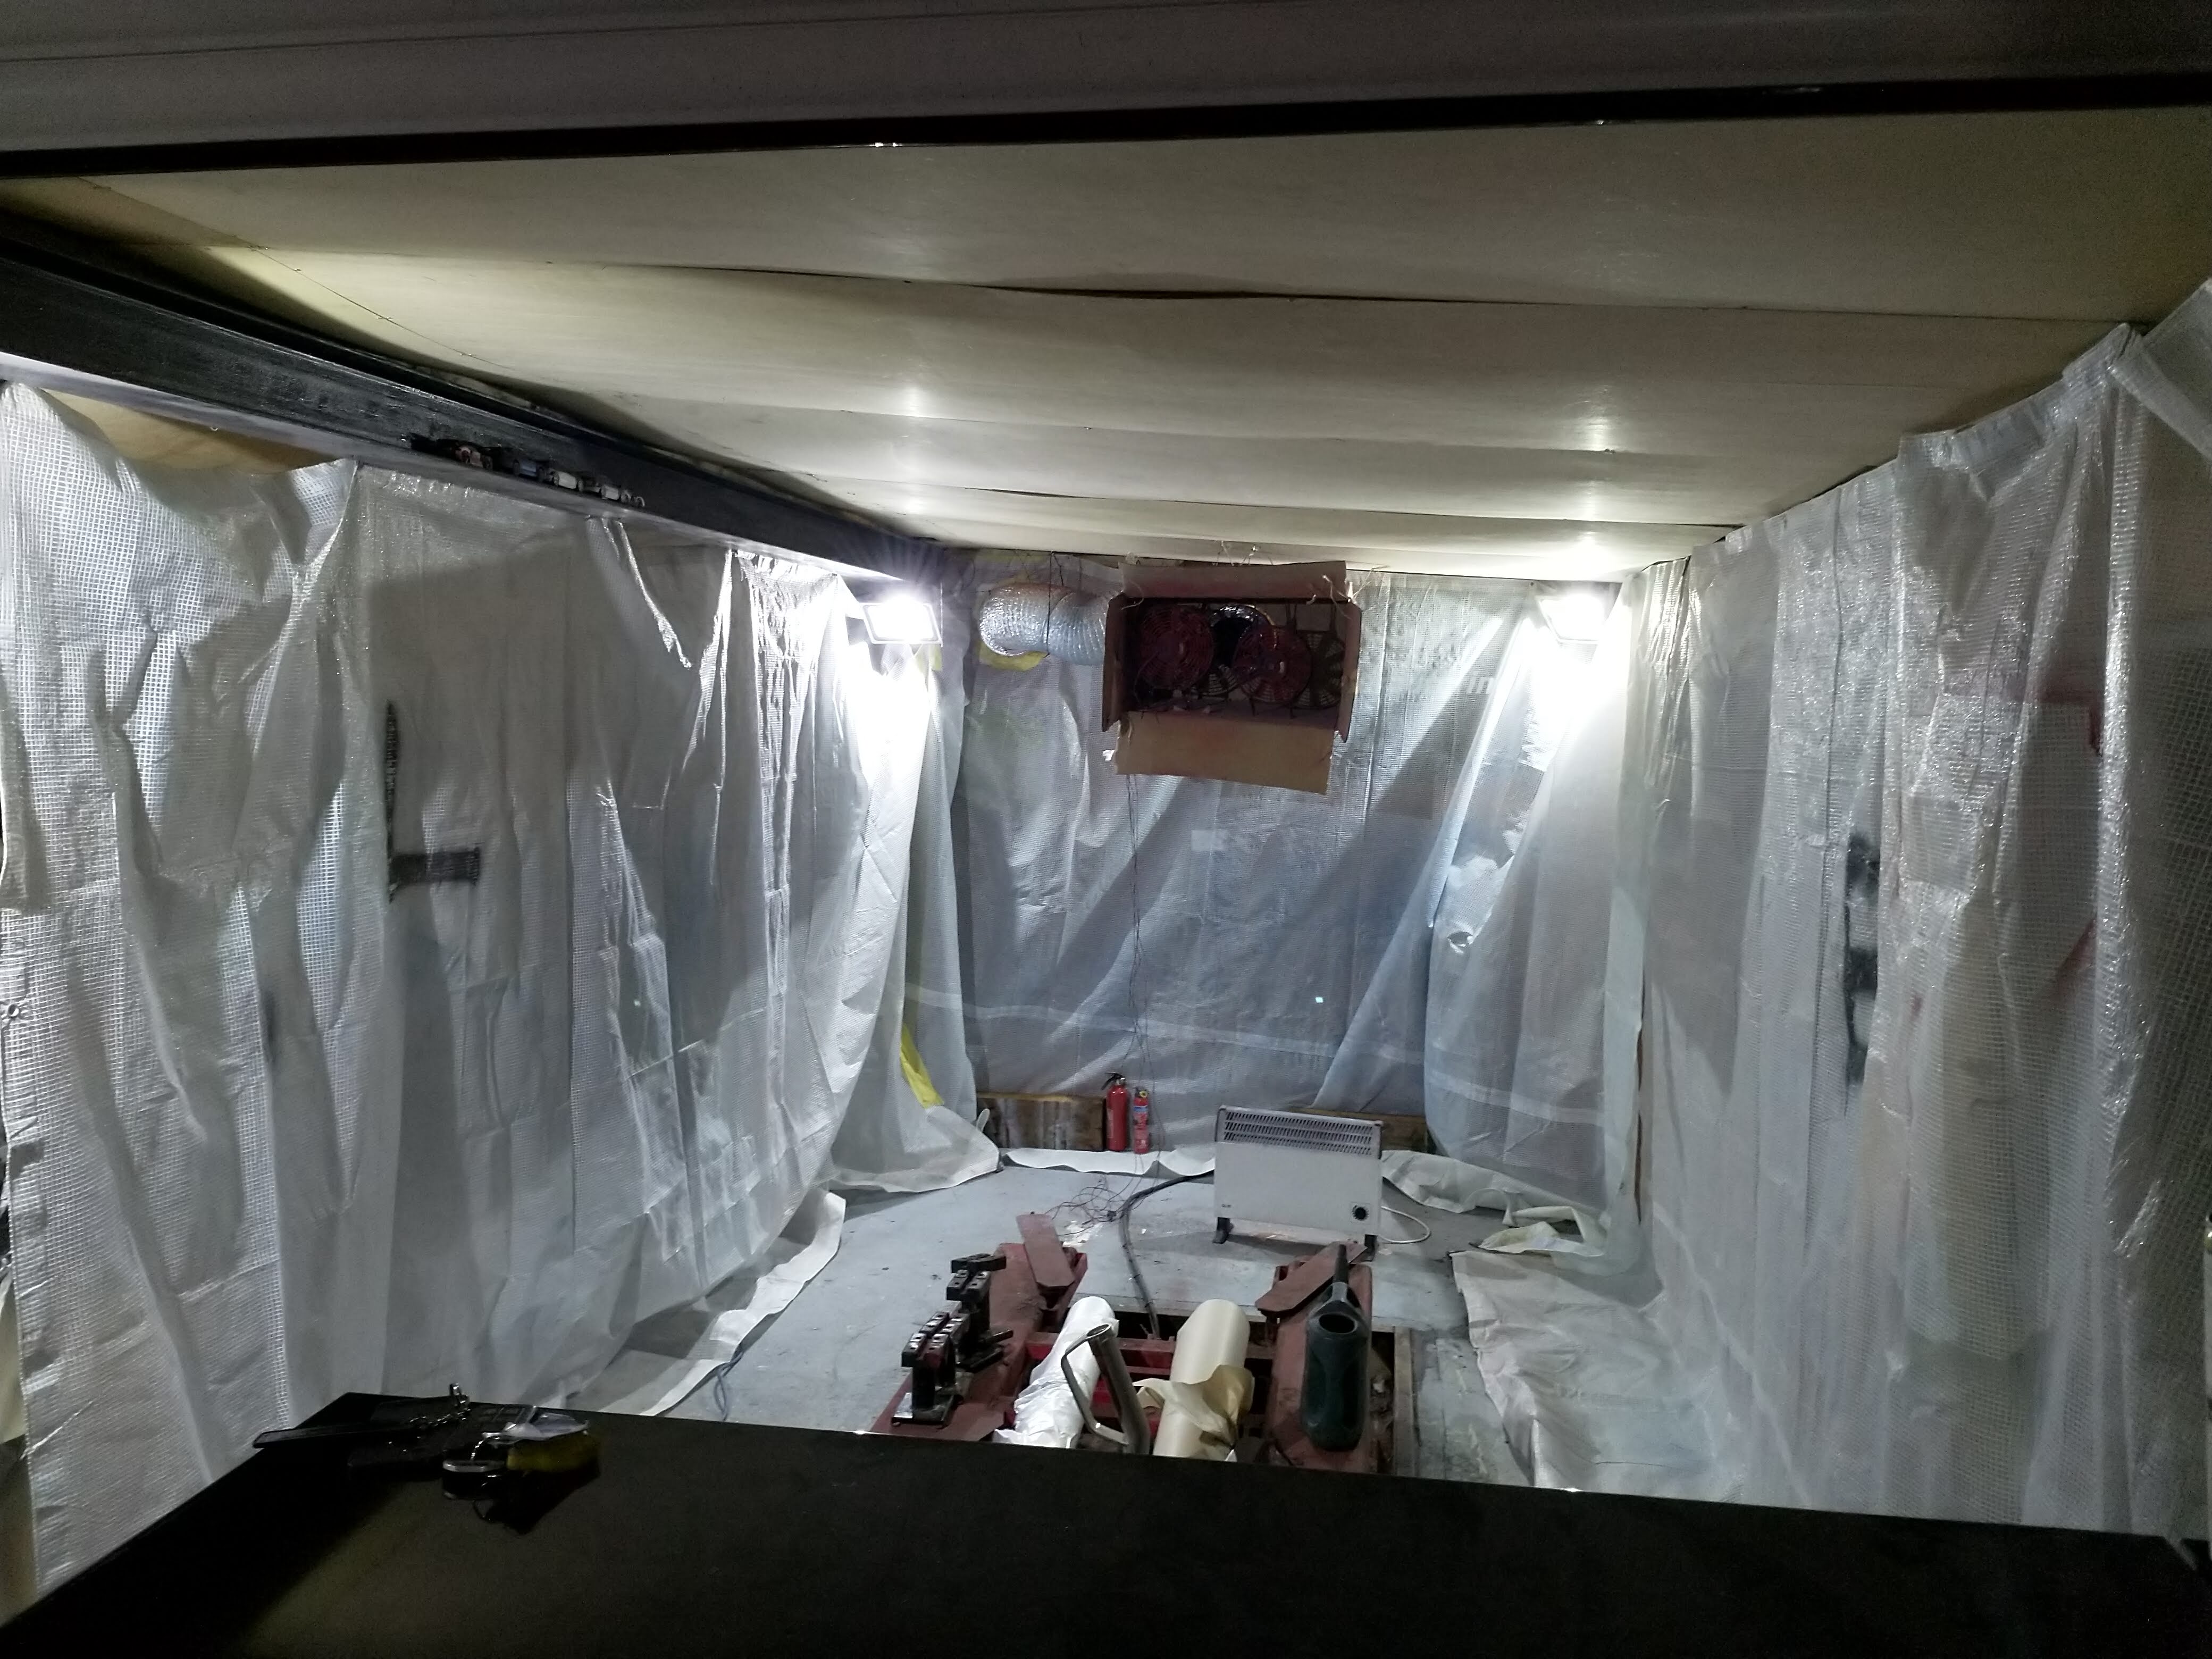
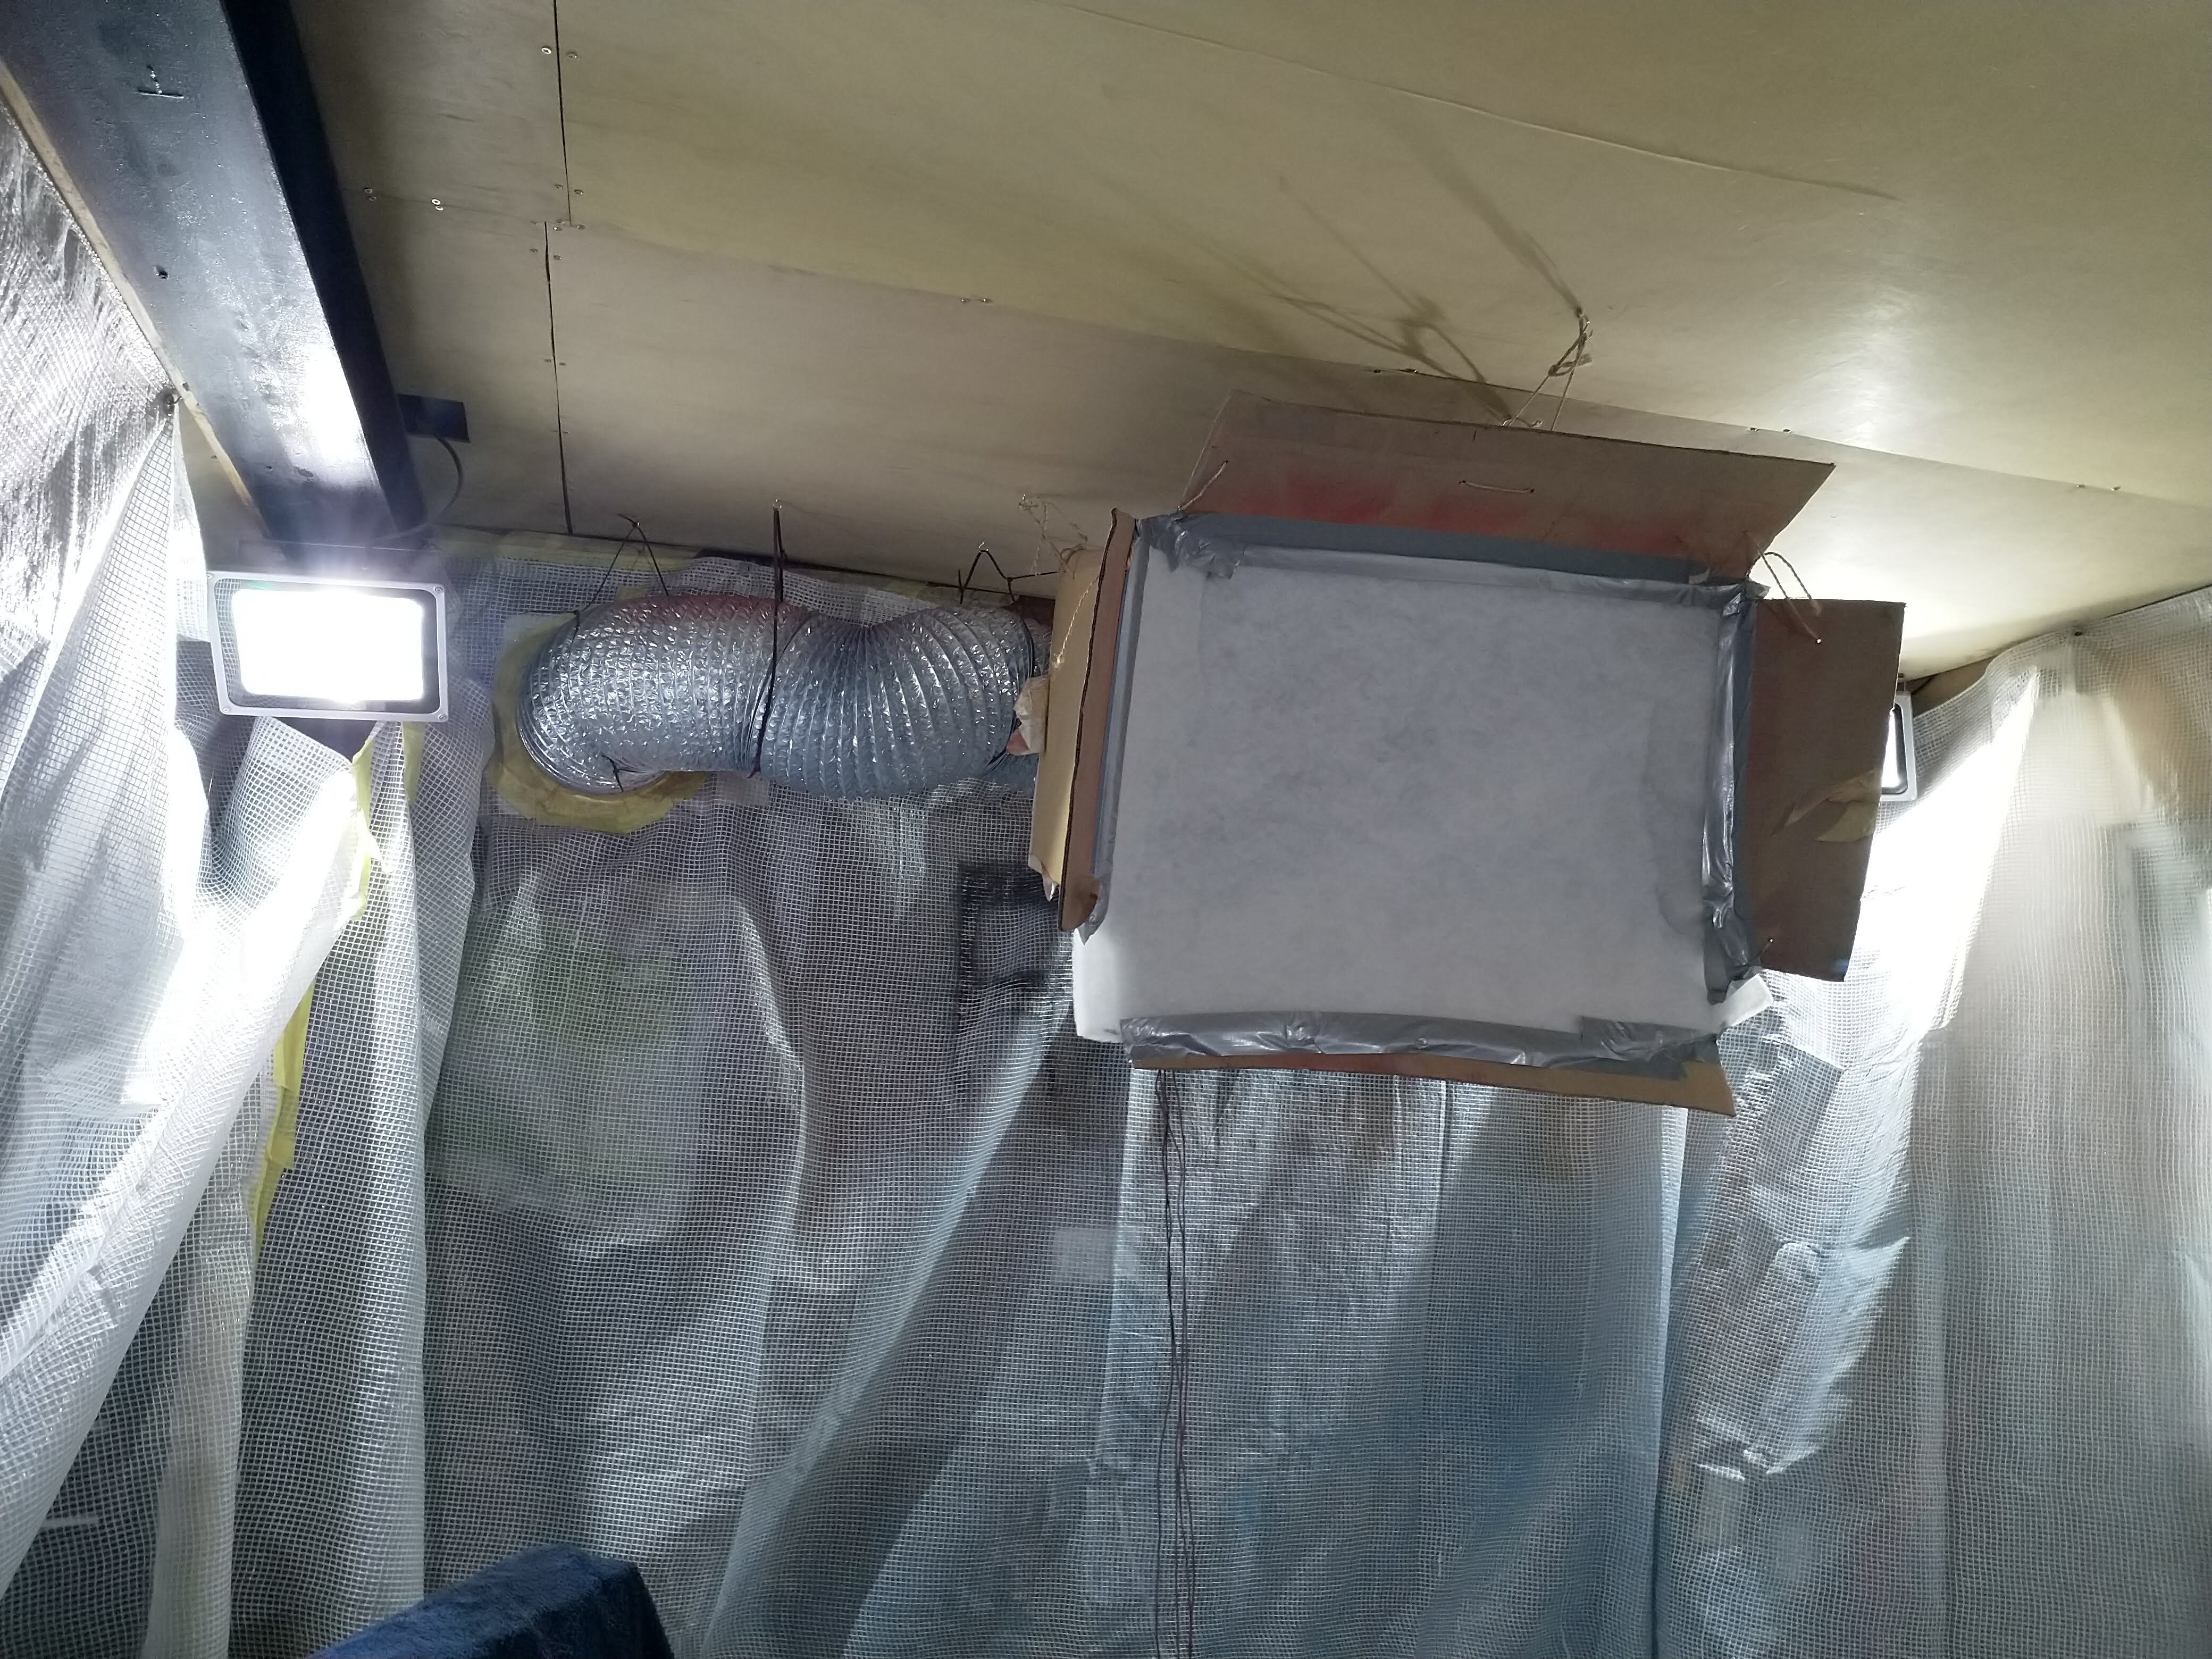
deep clean and then turned back into a spry booth again. The ins and outs aren't that important like under the ramp etc, as you will see, the room gets sealed into a booth anyway. But the floor needed a clean and the ceiling had some cob webs!
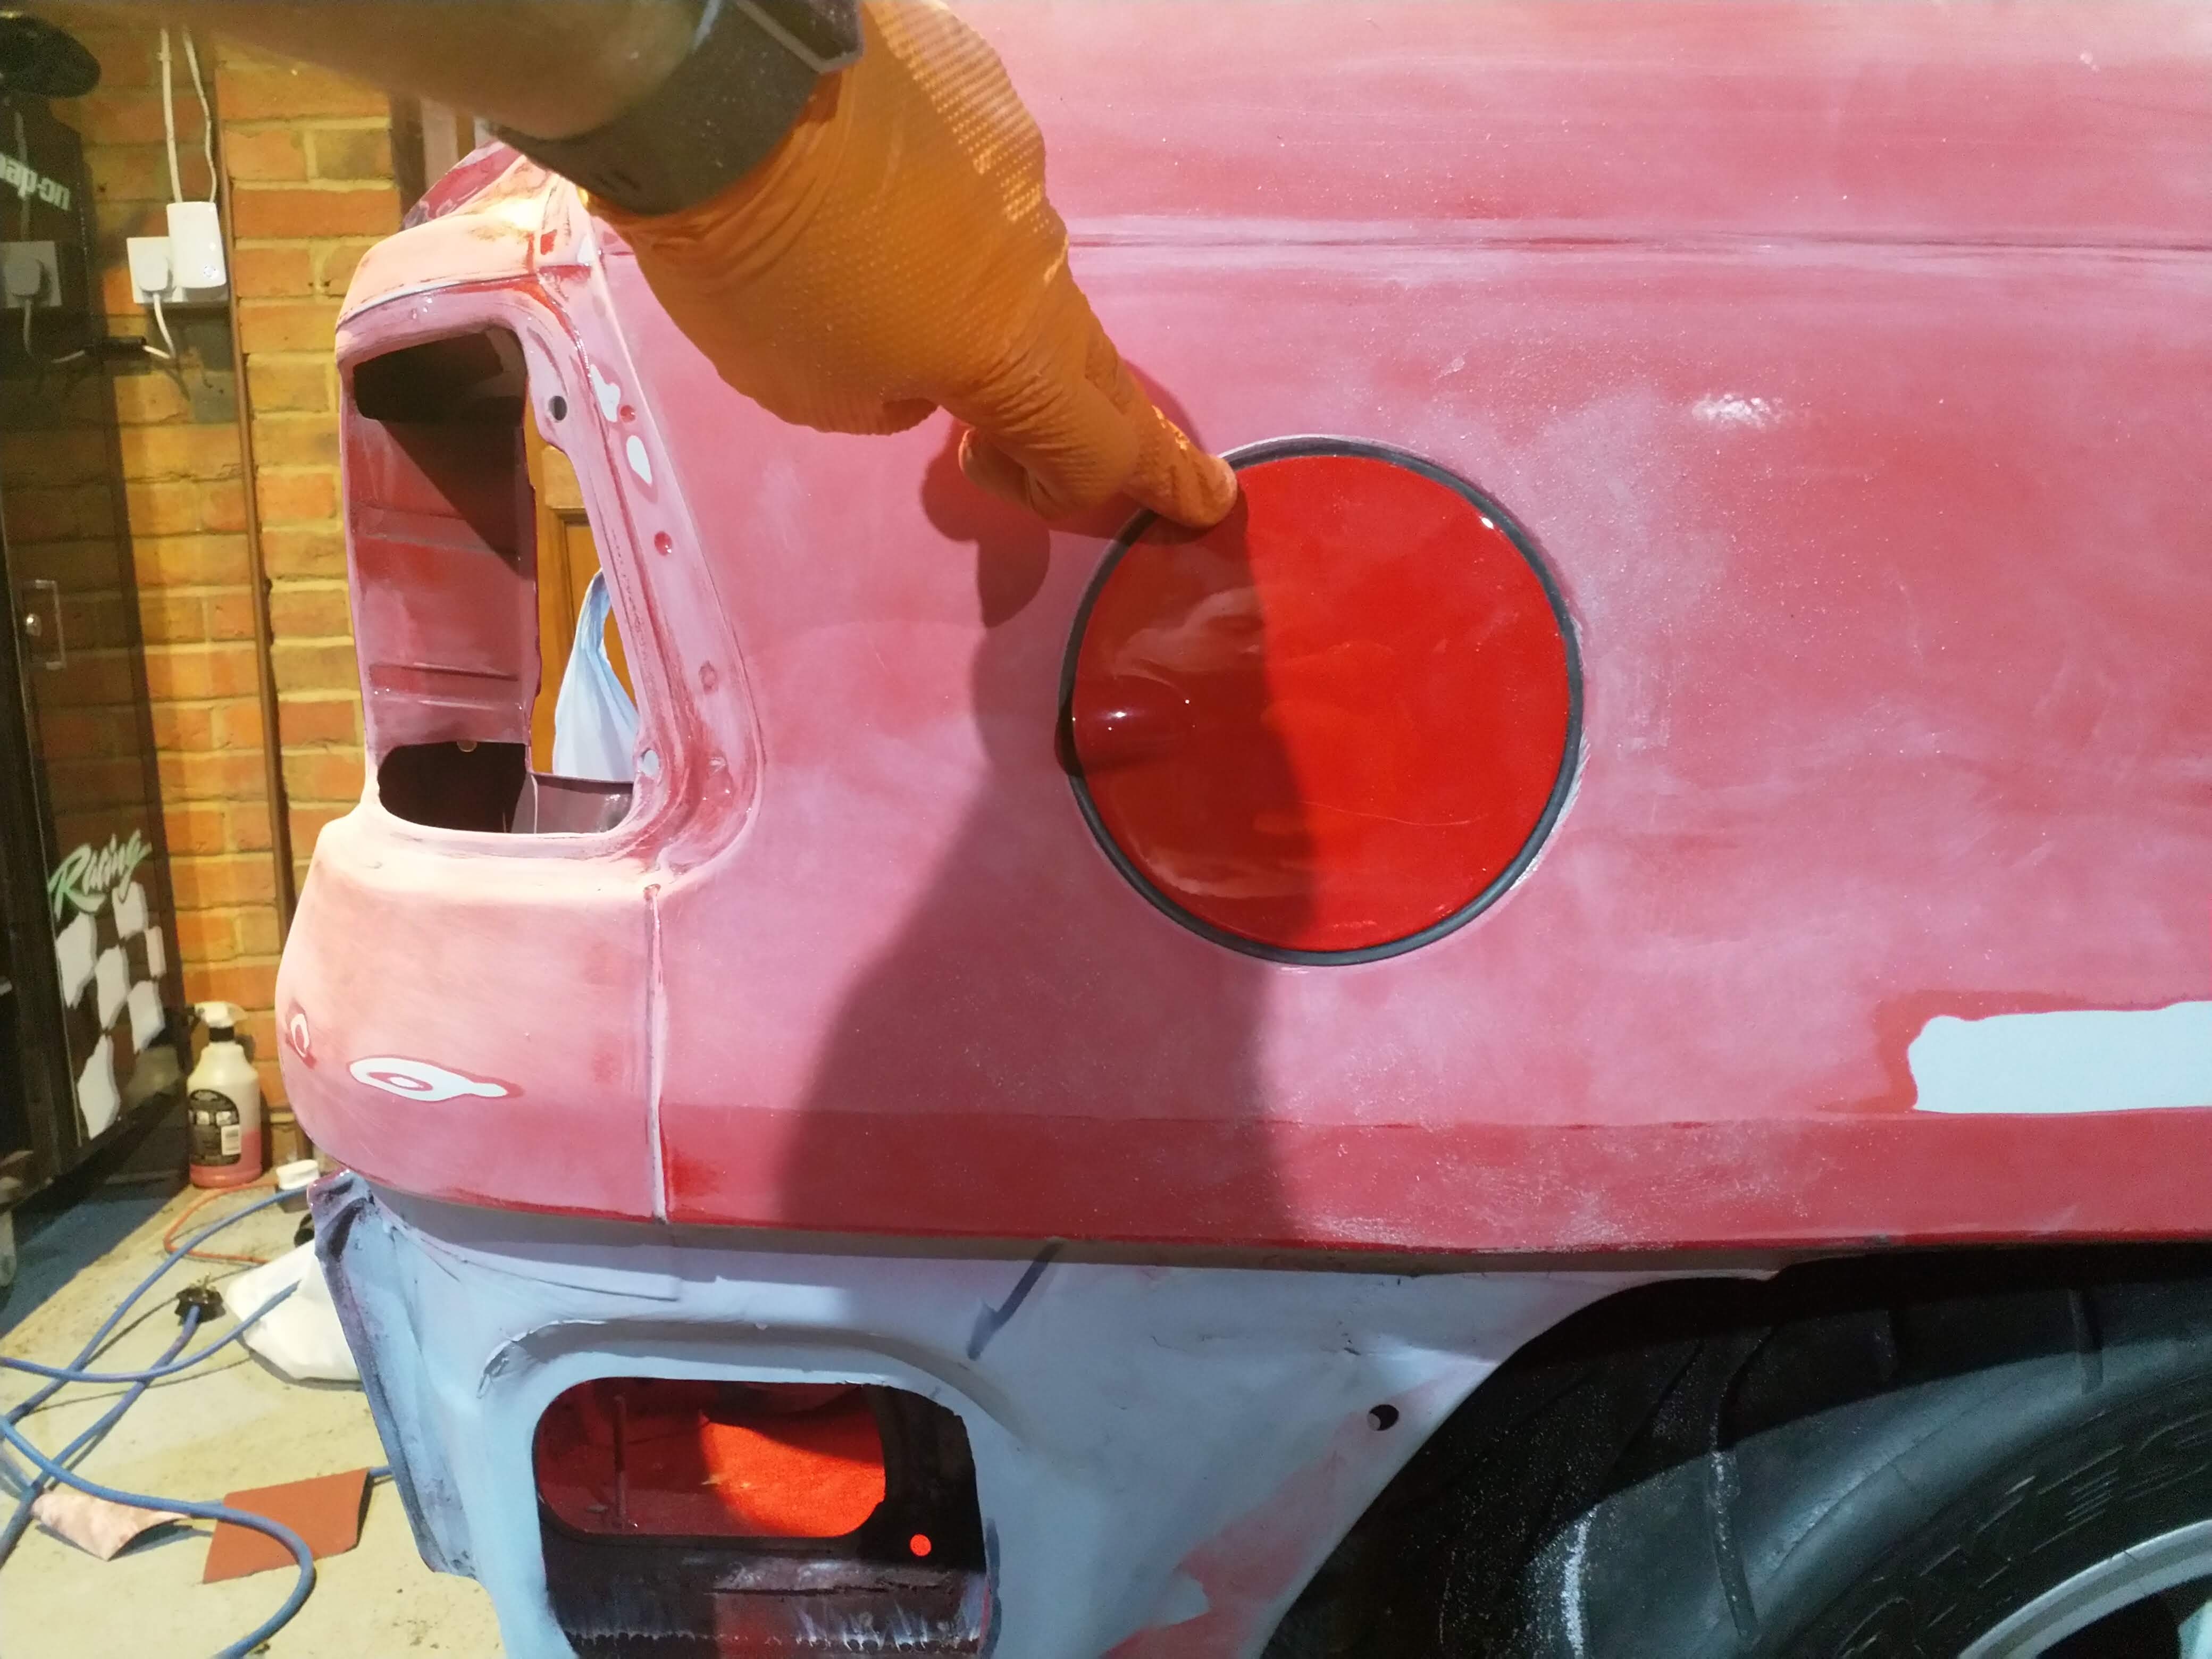
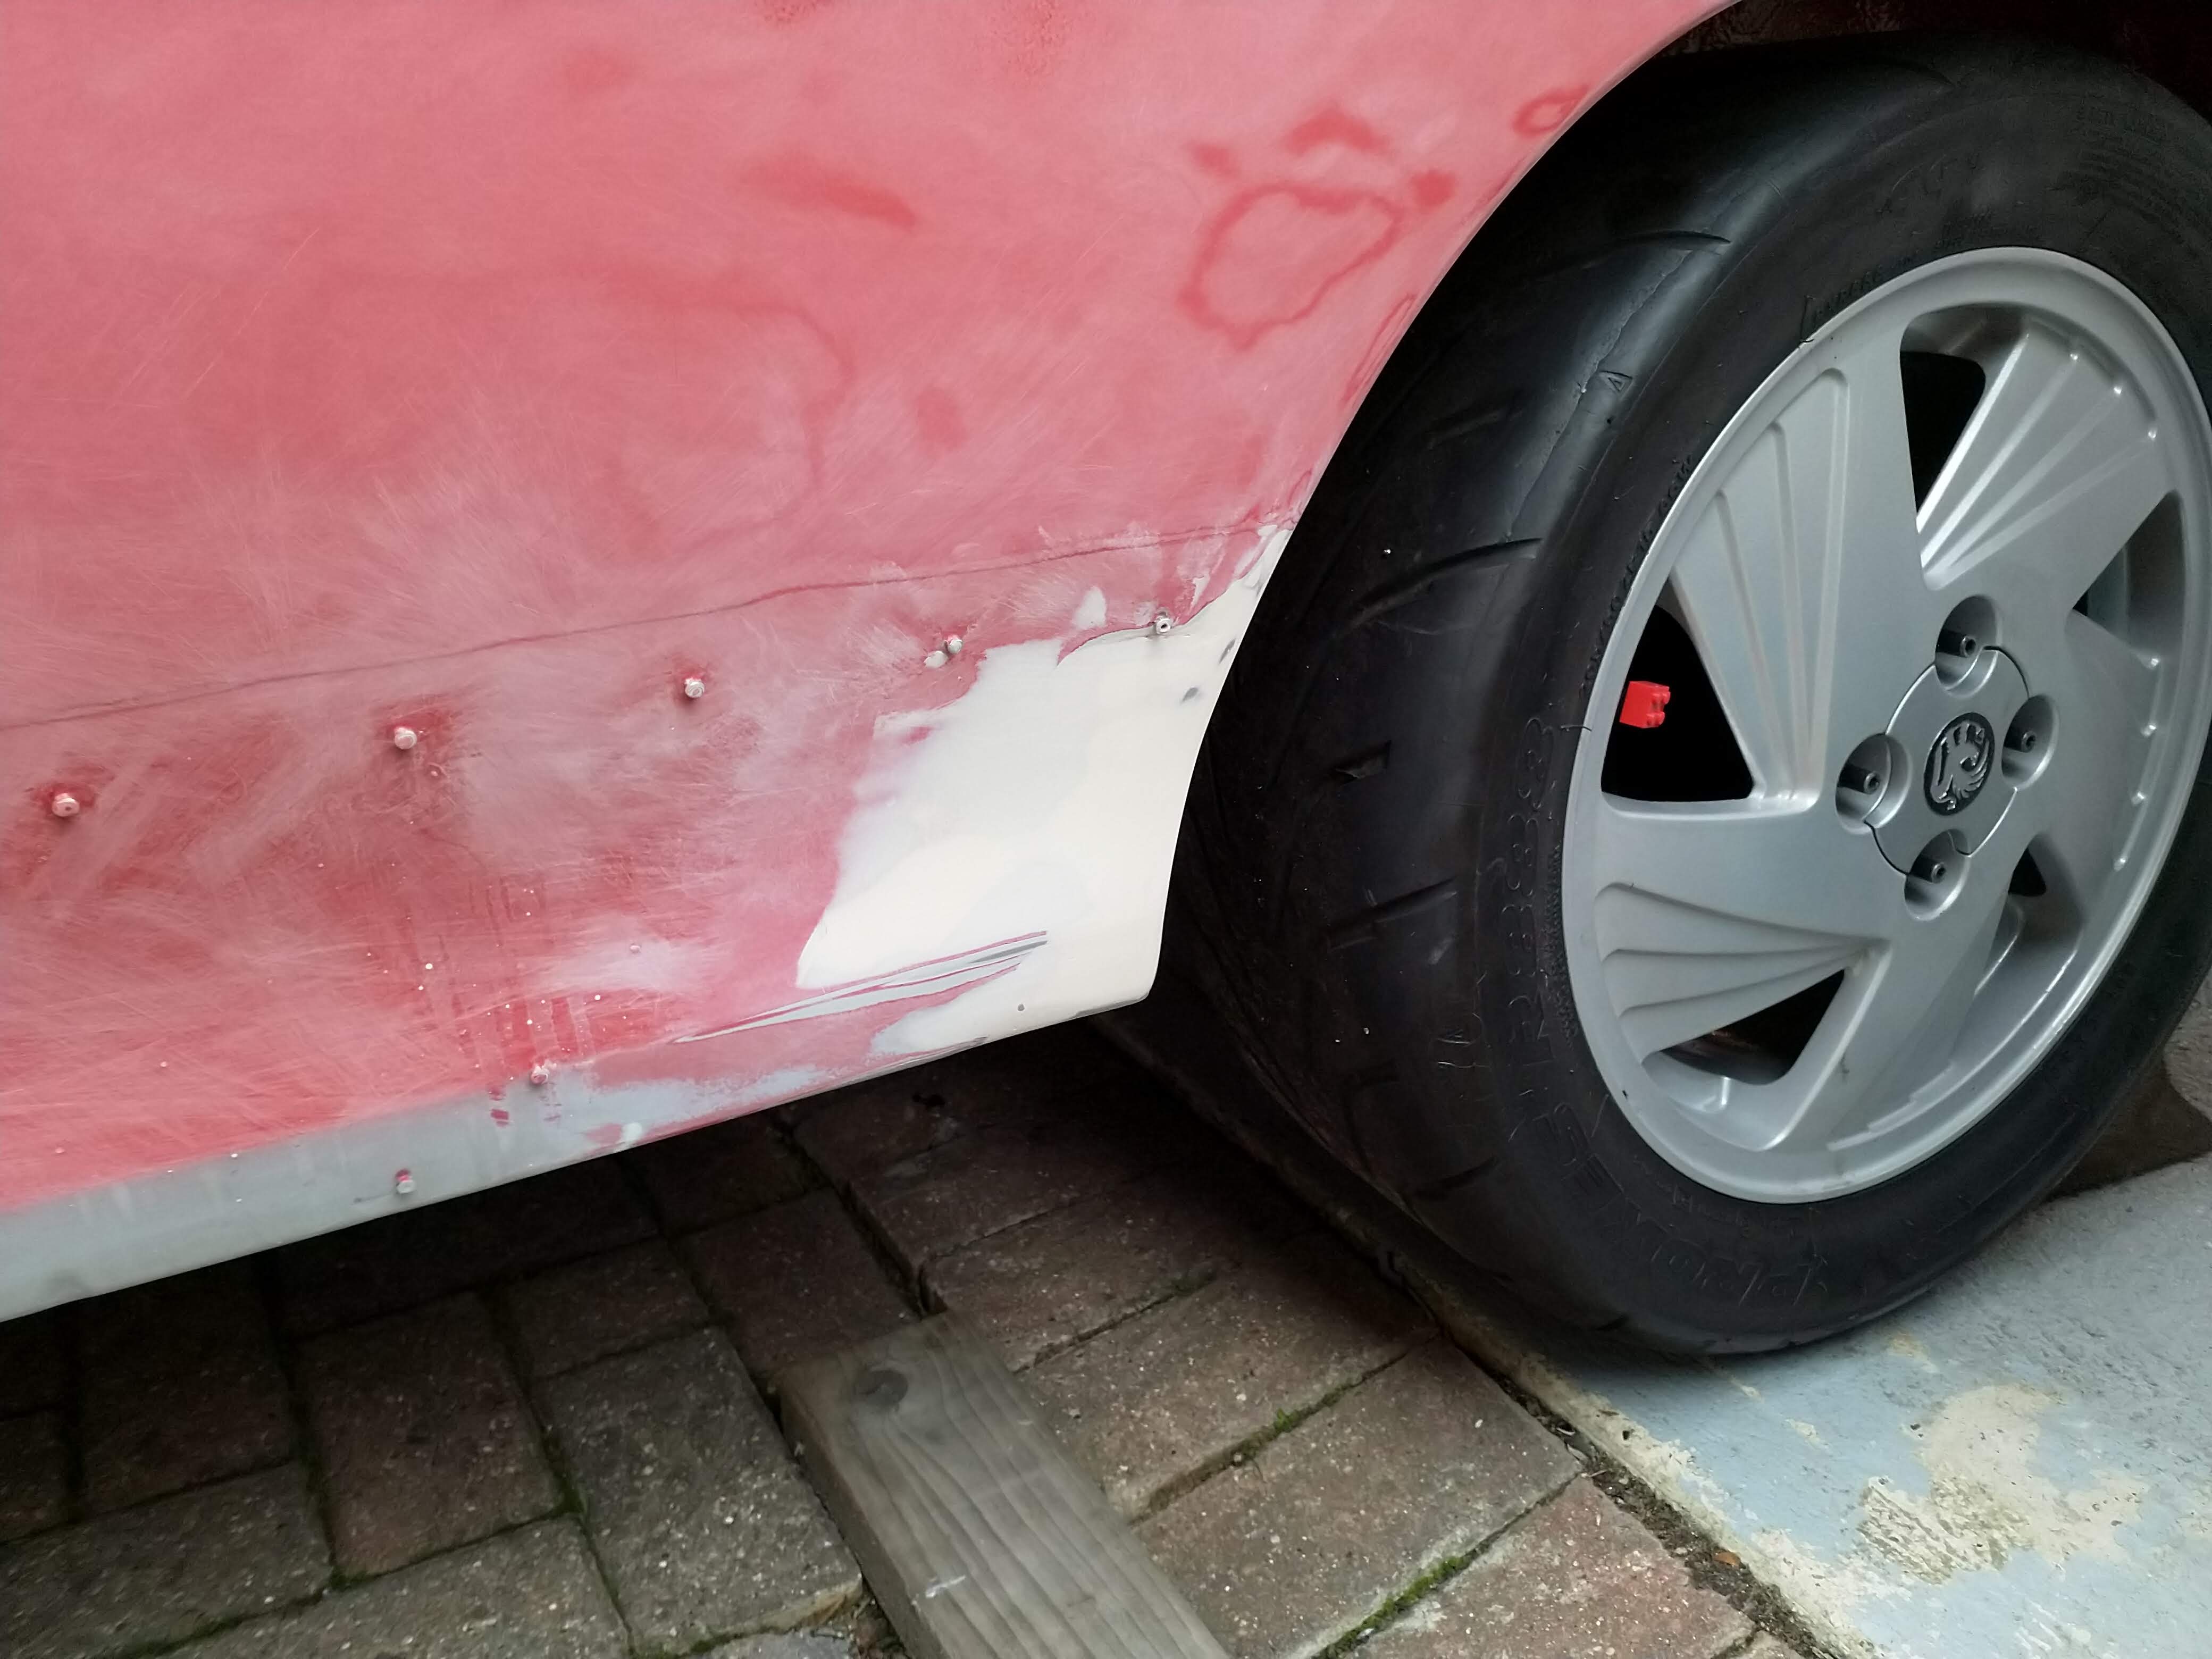
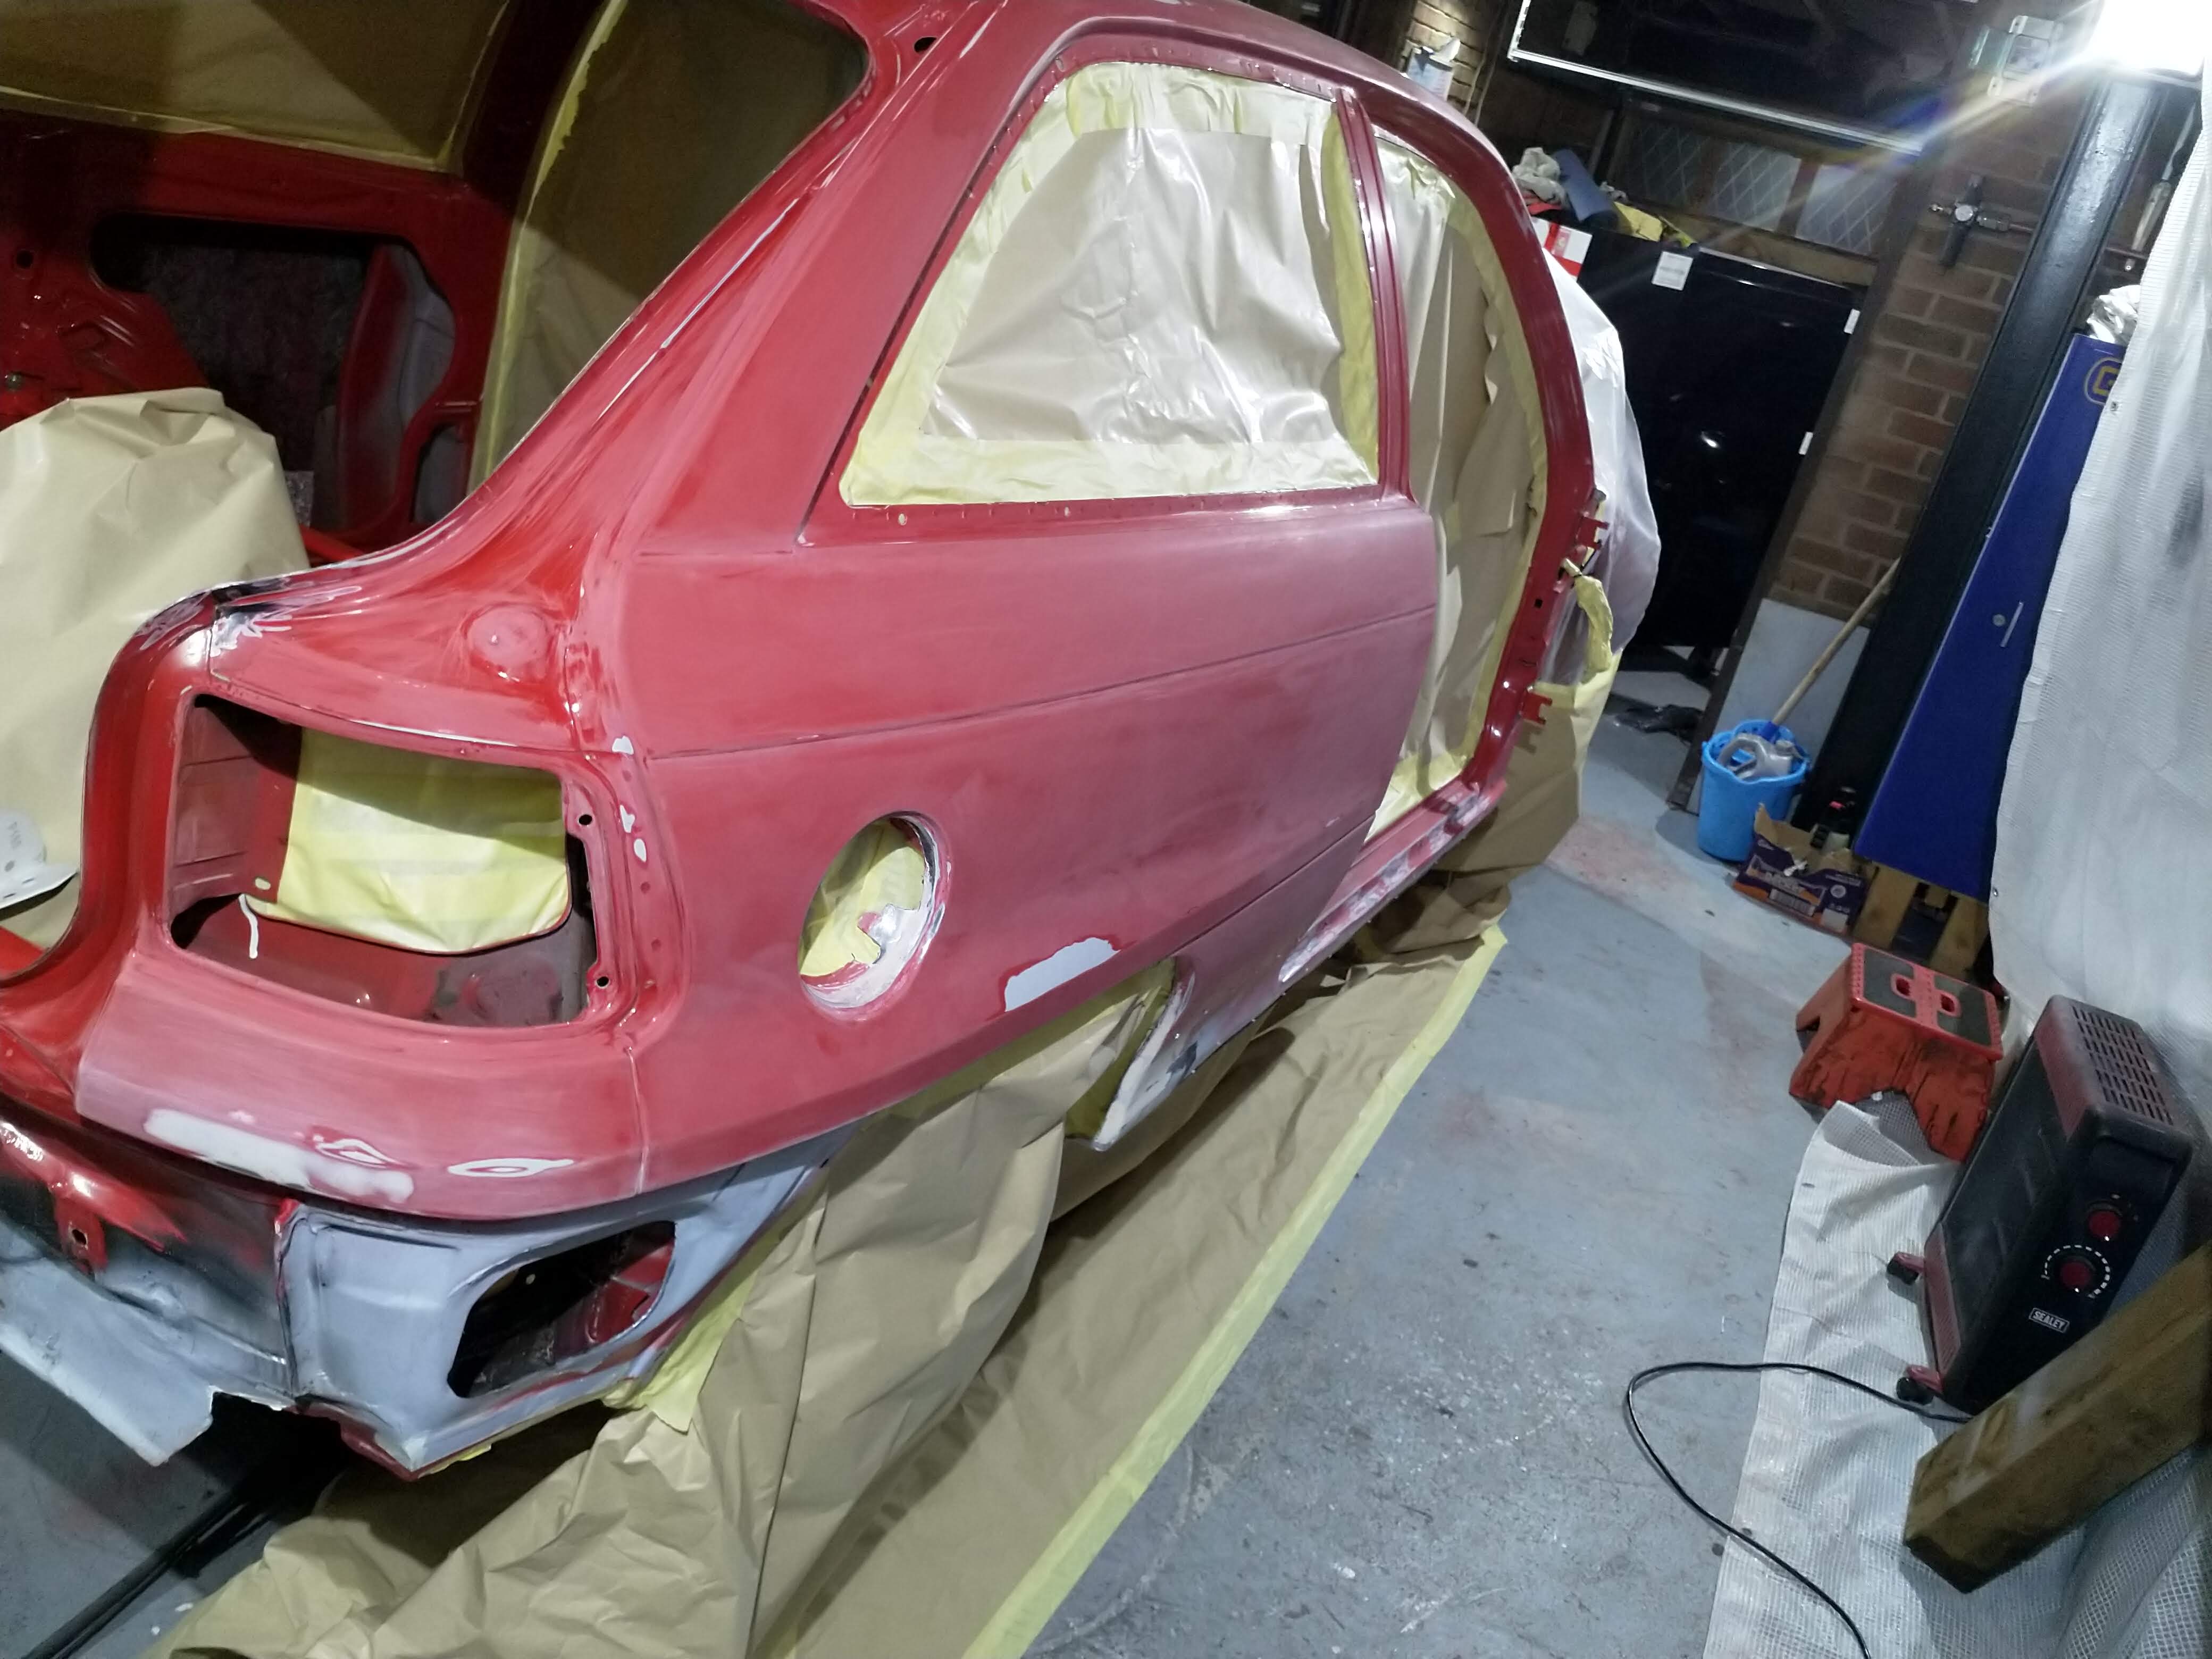
Rubbed back the whole body of the car ready for some filler work
Thanks to help from Gareth I checked the angle and fitment of my fuel flap as I have welded a new inner in. Turns out the opening handle points down slightly as normal! who would of known!
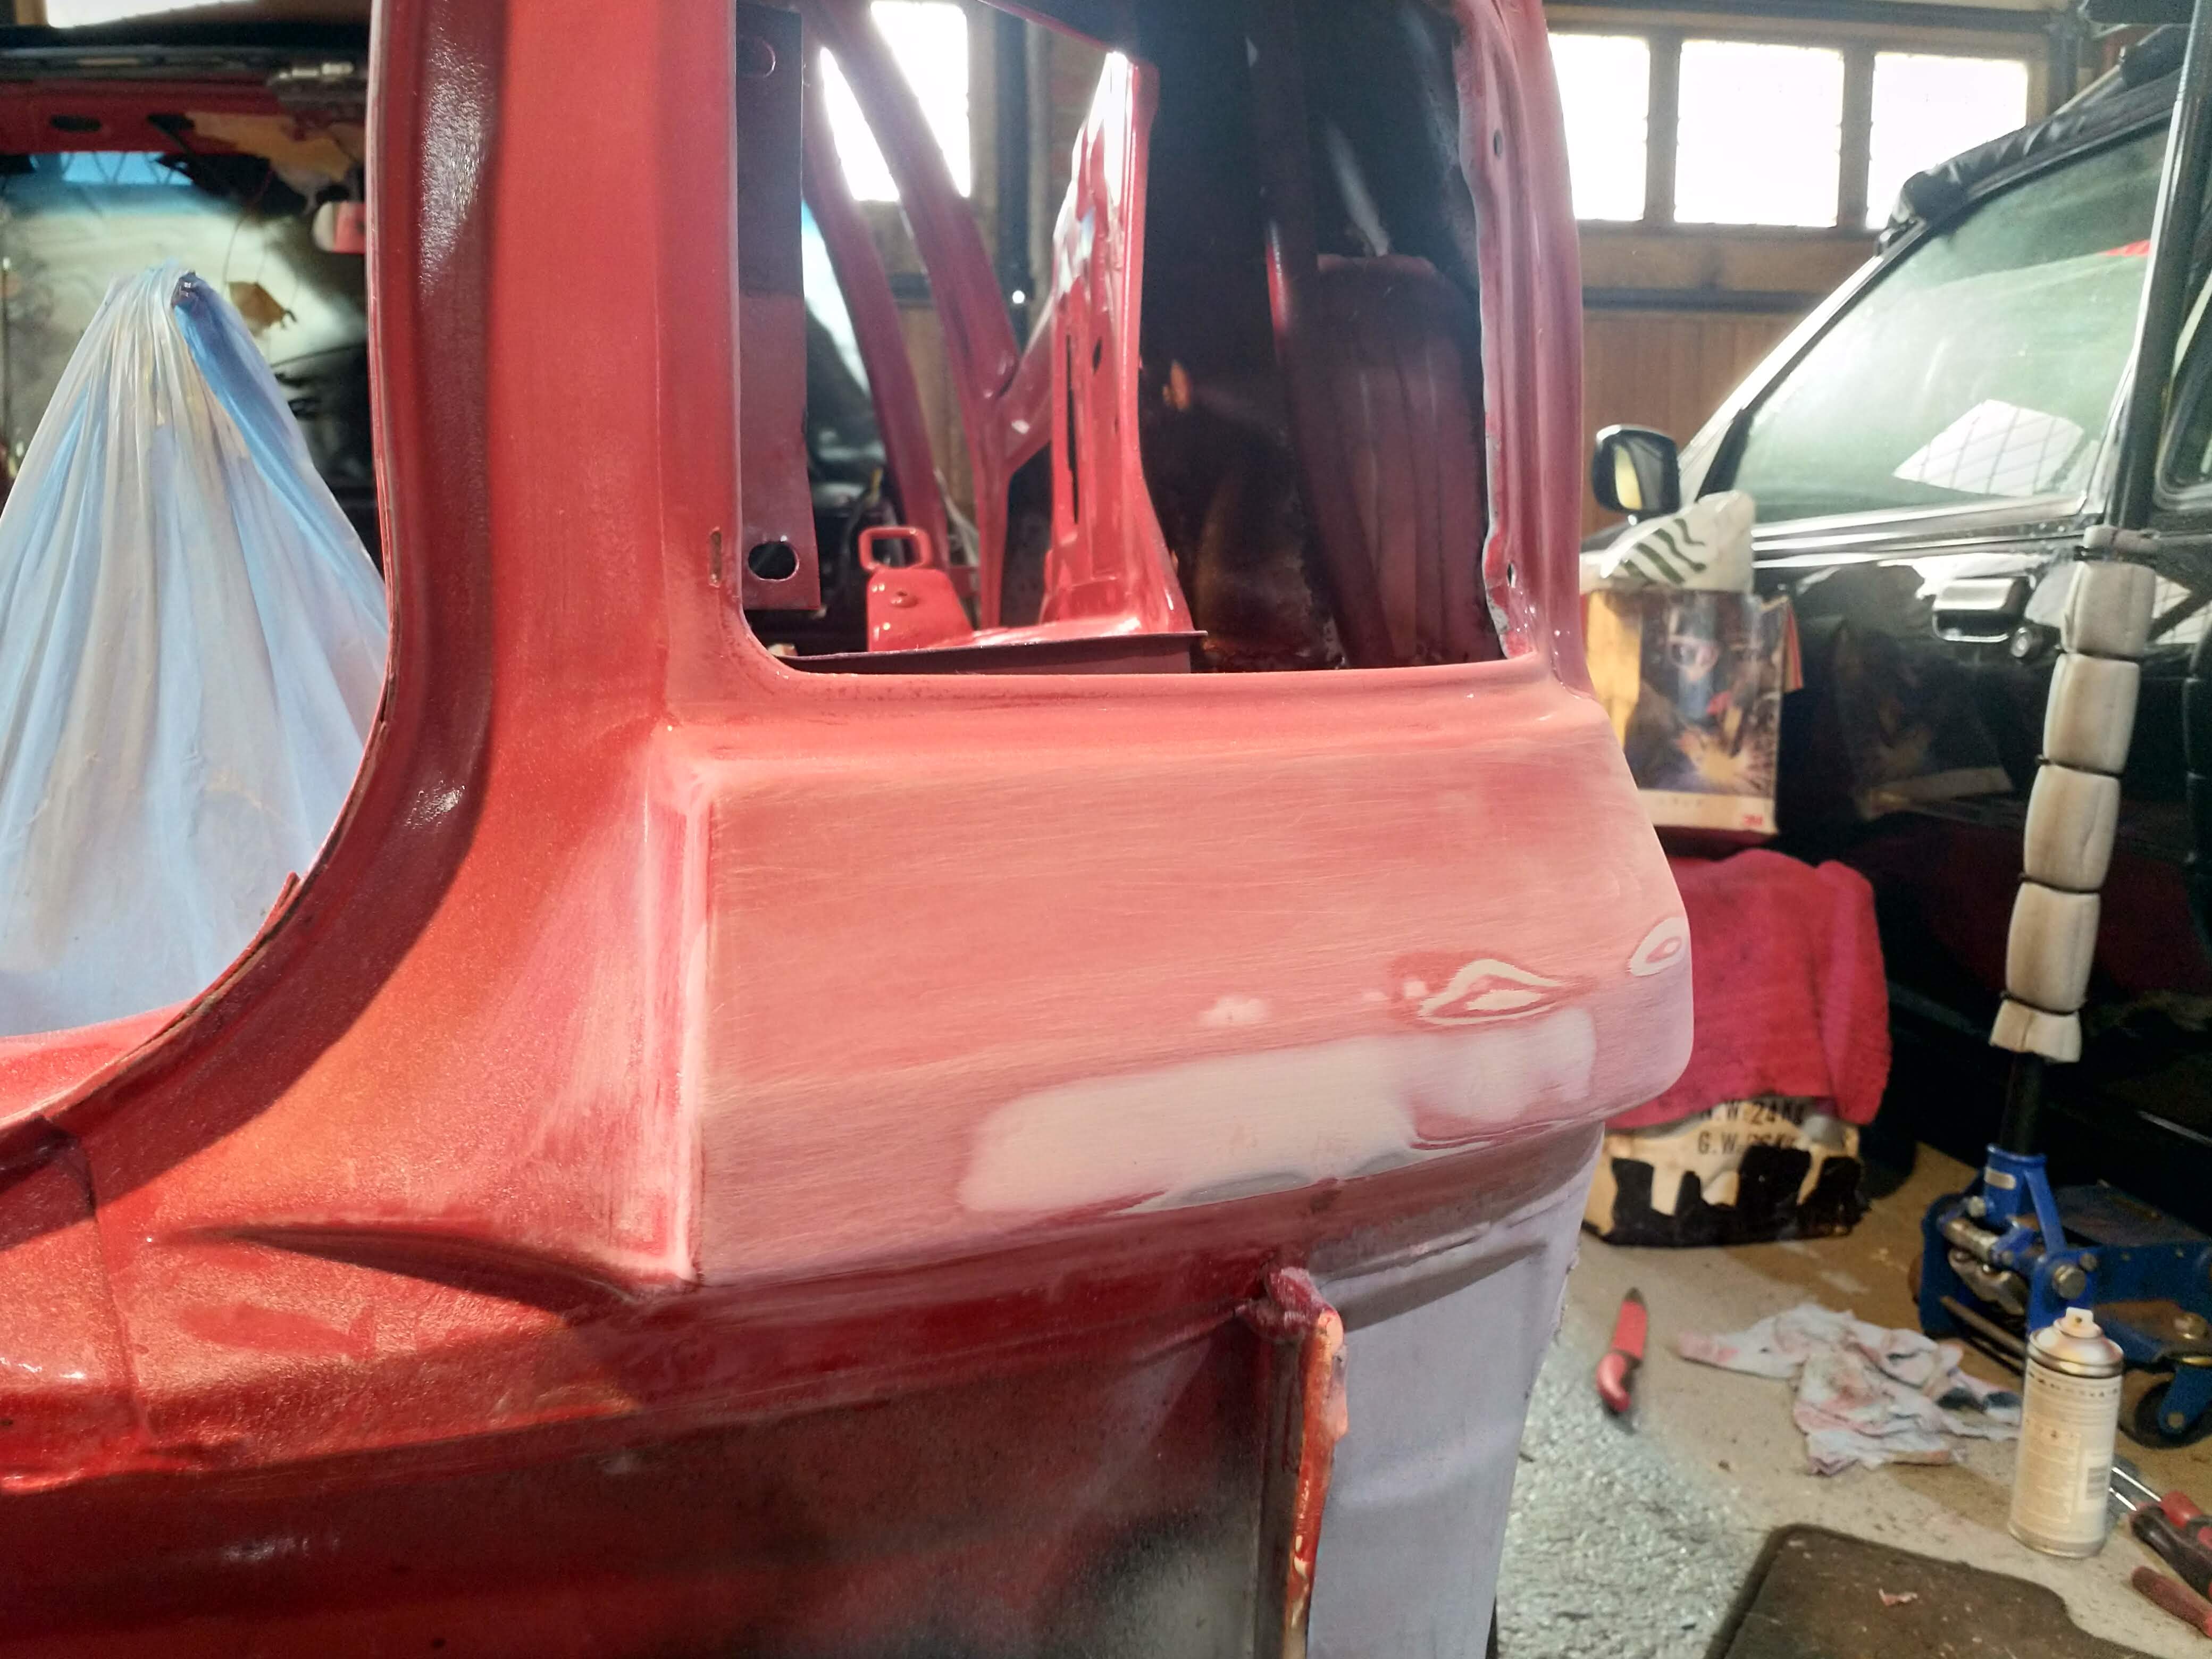
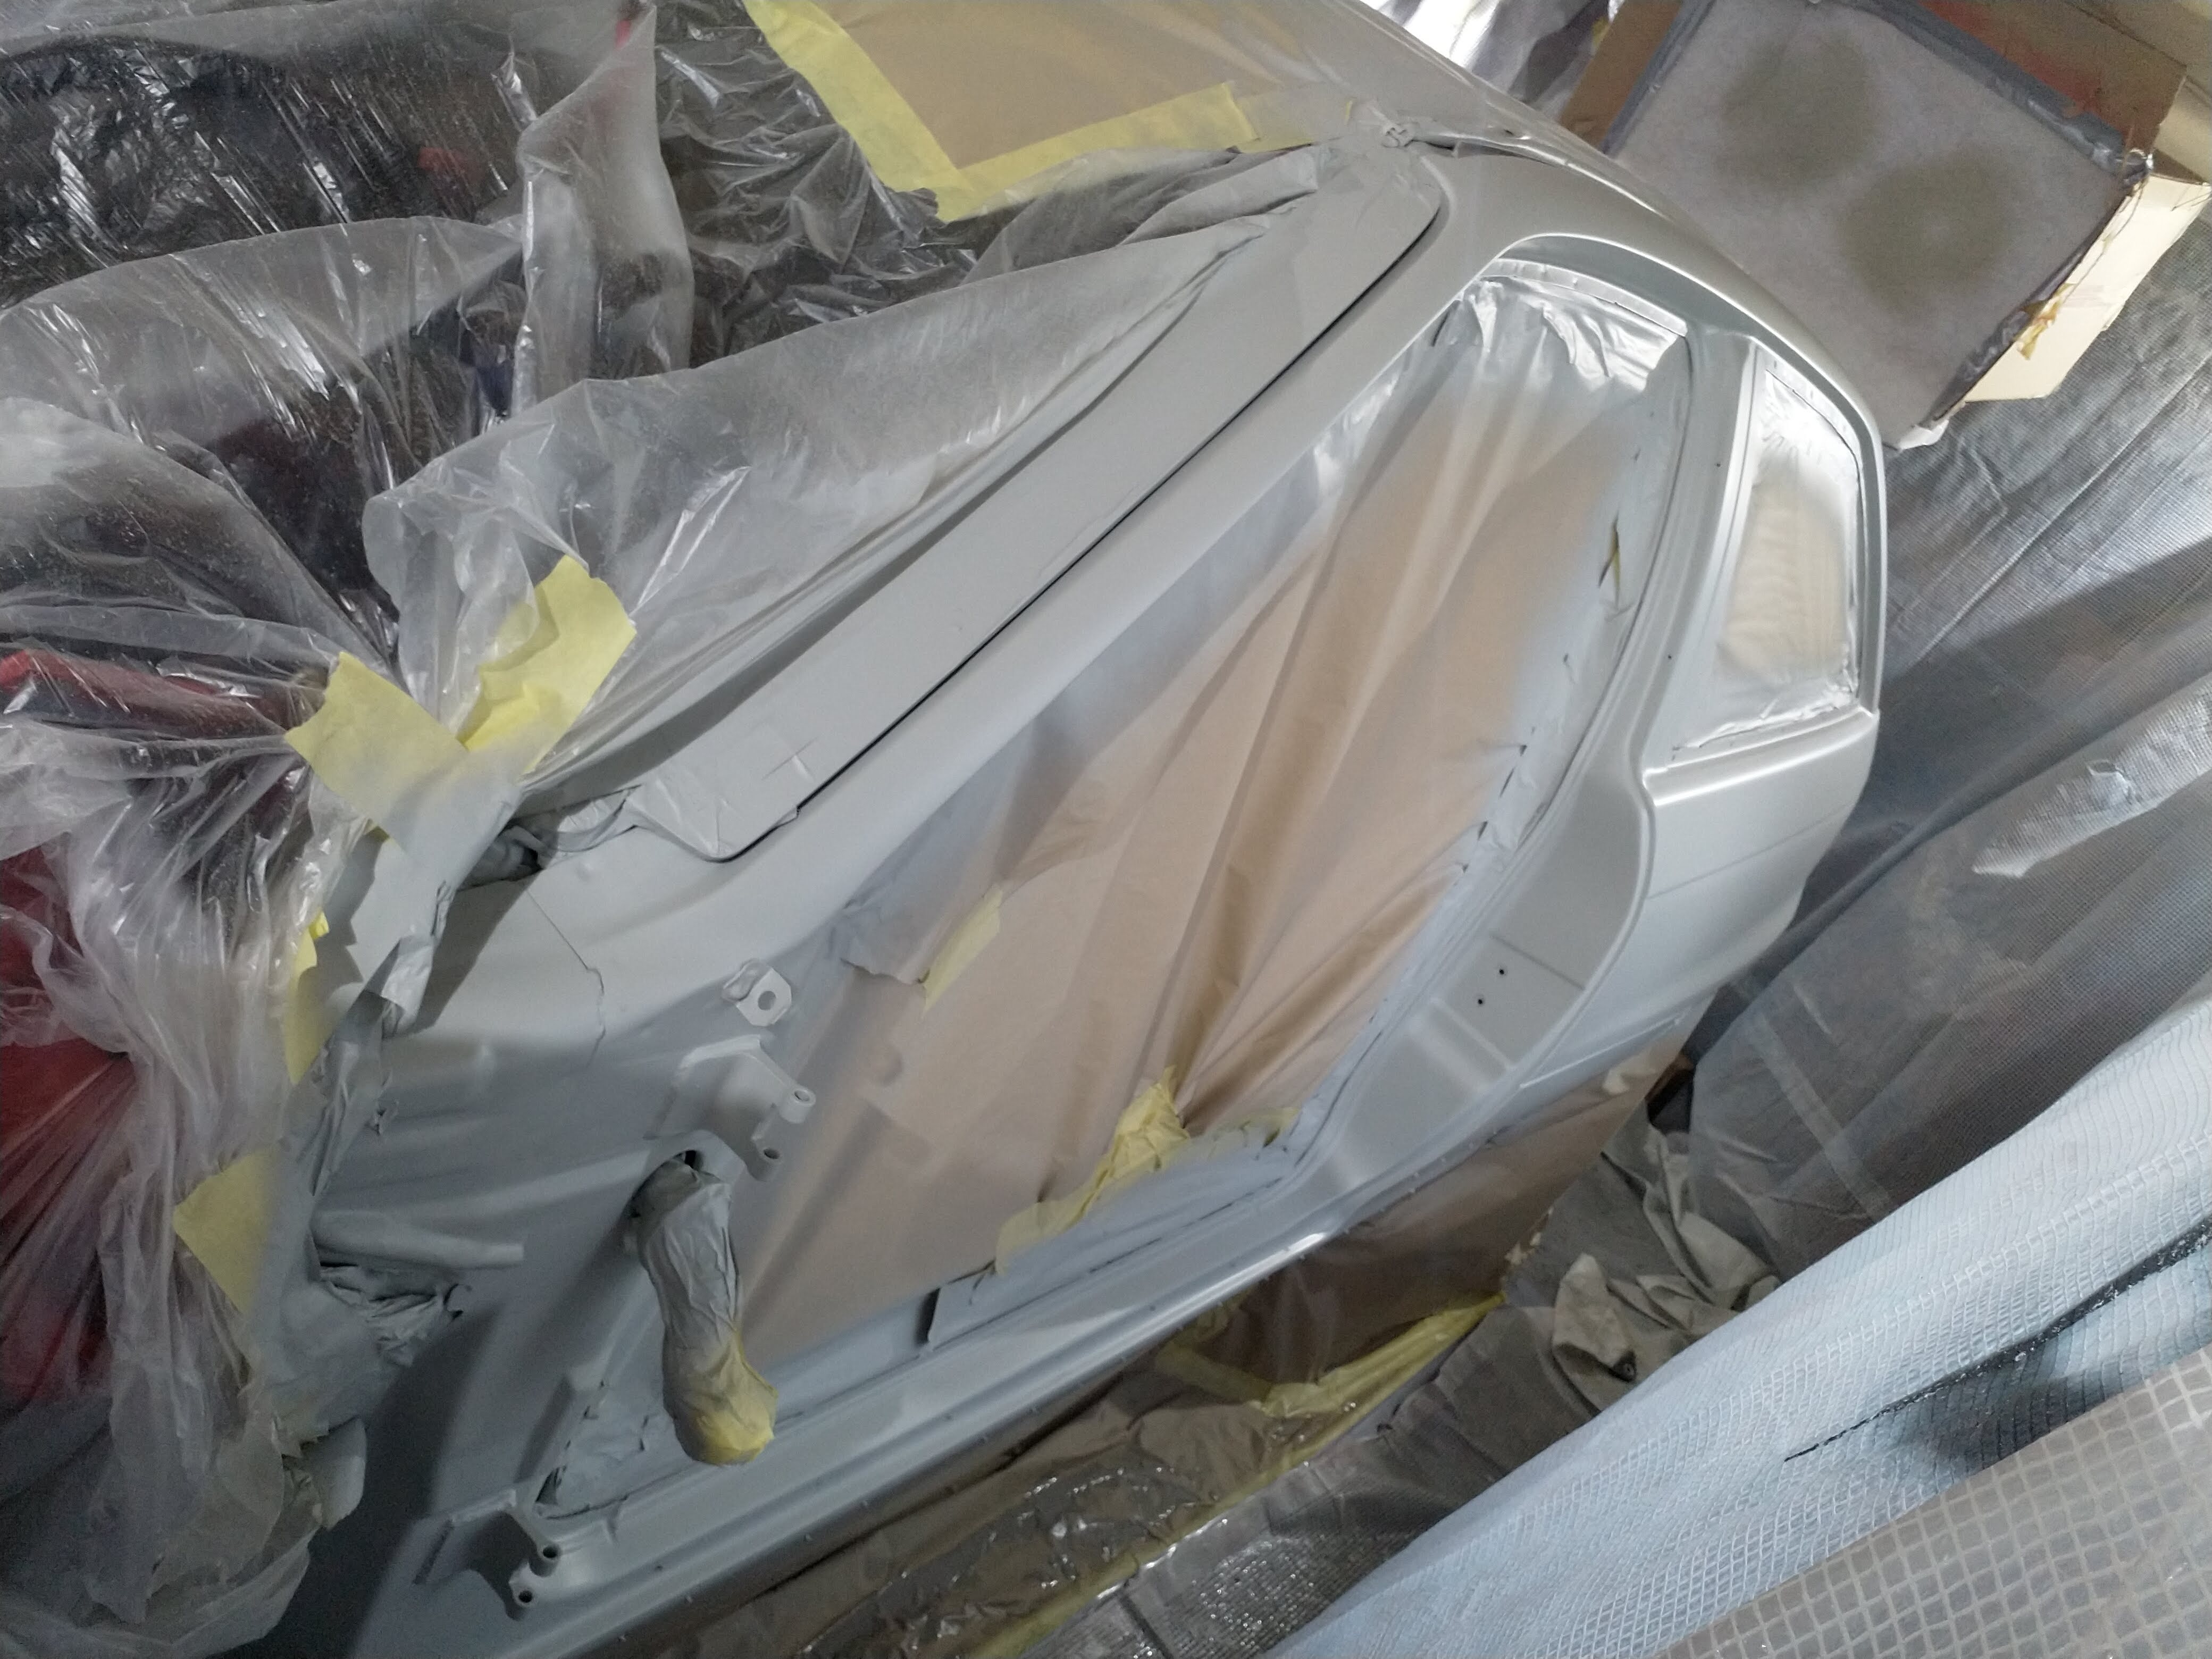
The main parts of the body that needed work were the door shuts, right rear corner had a dent and the bottom of the quarters where the new door sills has been welded on. Although this is covered by the skirts, I thought I would give them the filler treatment anyways. If anything it acts as another barrier!
Now I'm not very good with filler. Probably due to a lack of practice so I end up puttin too much on, having to take a load off and doing several passes aswell to get a halp decent finish. But I spent a day doing this and got there in the end!
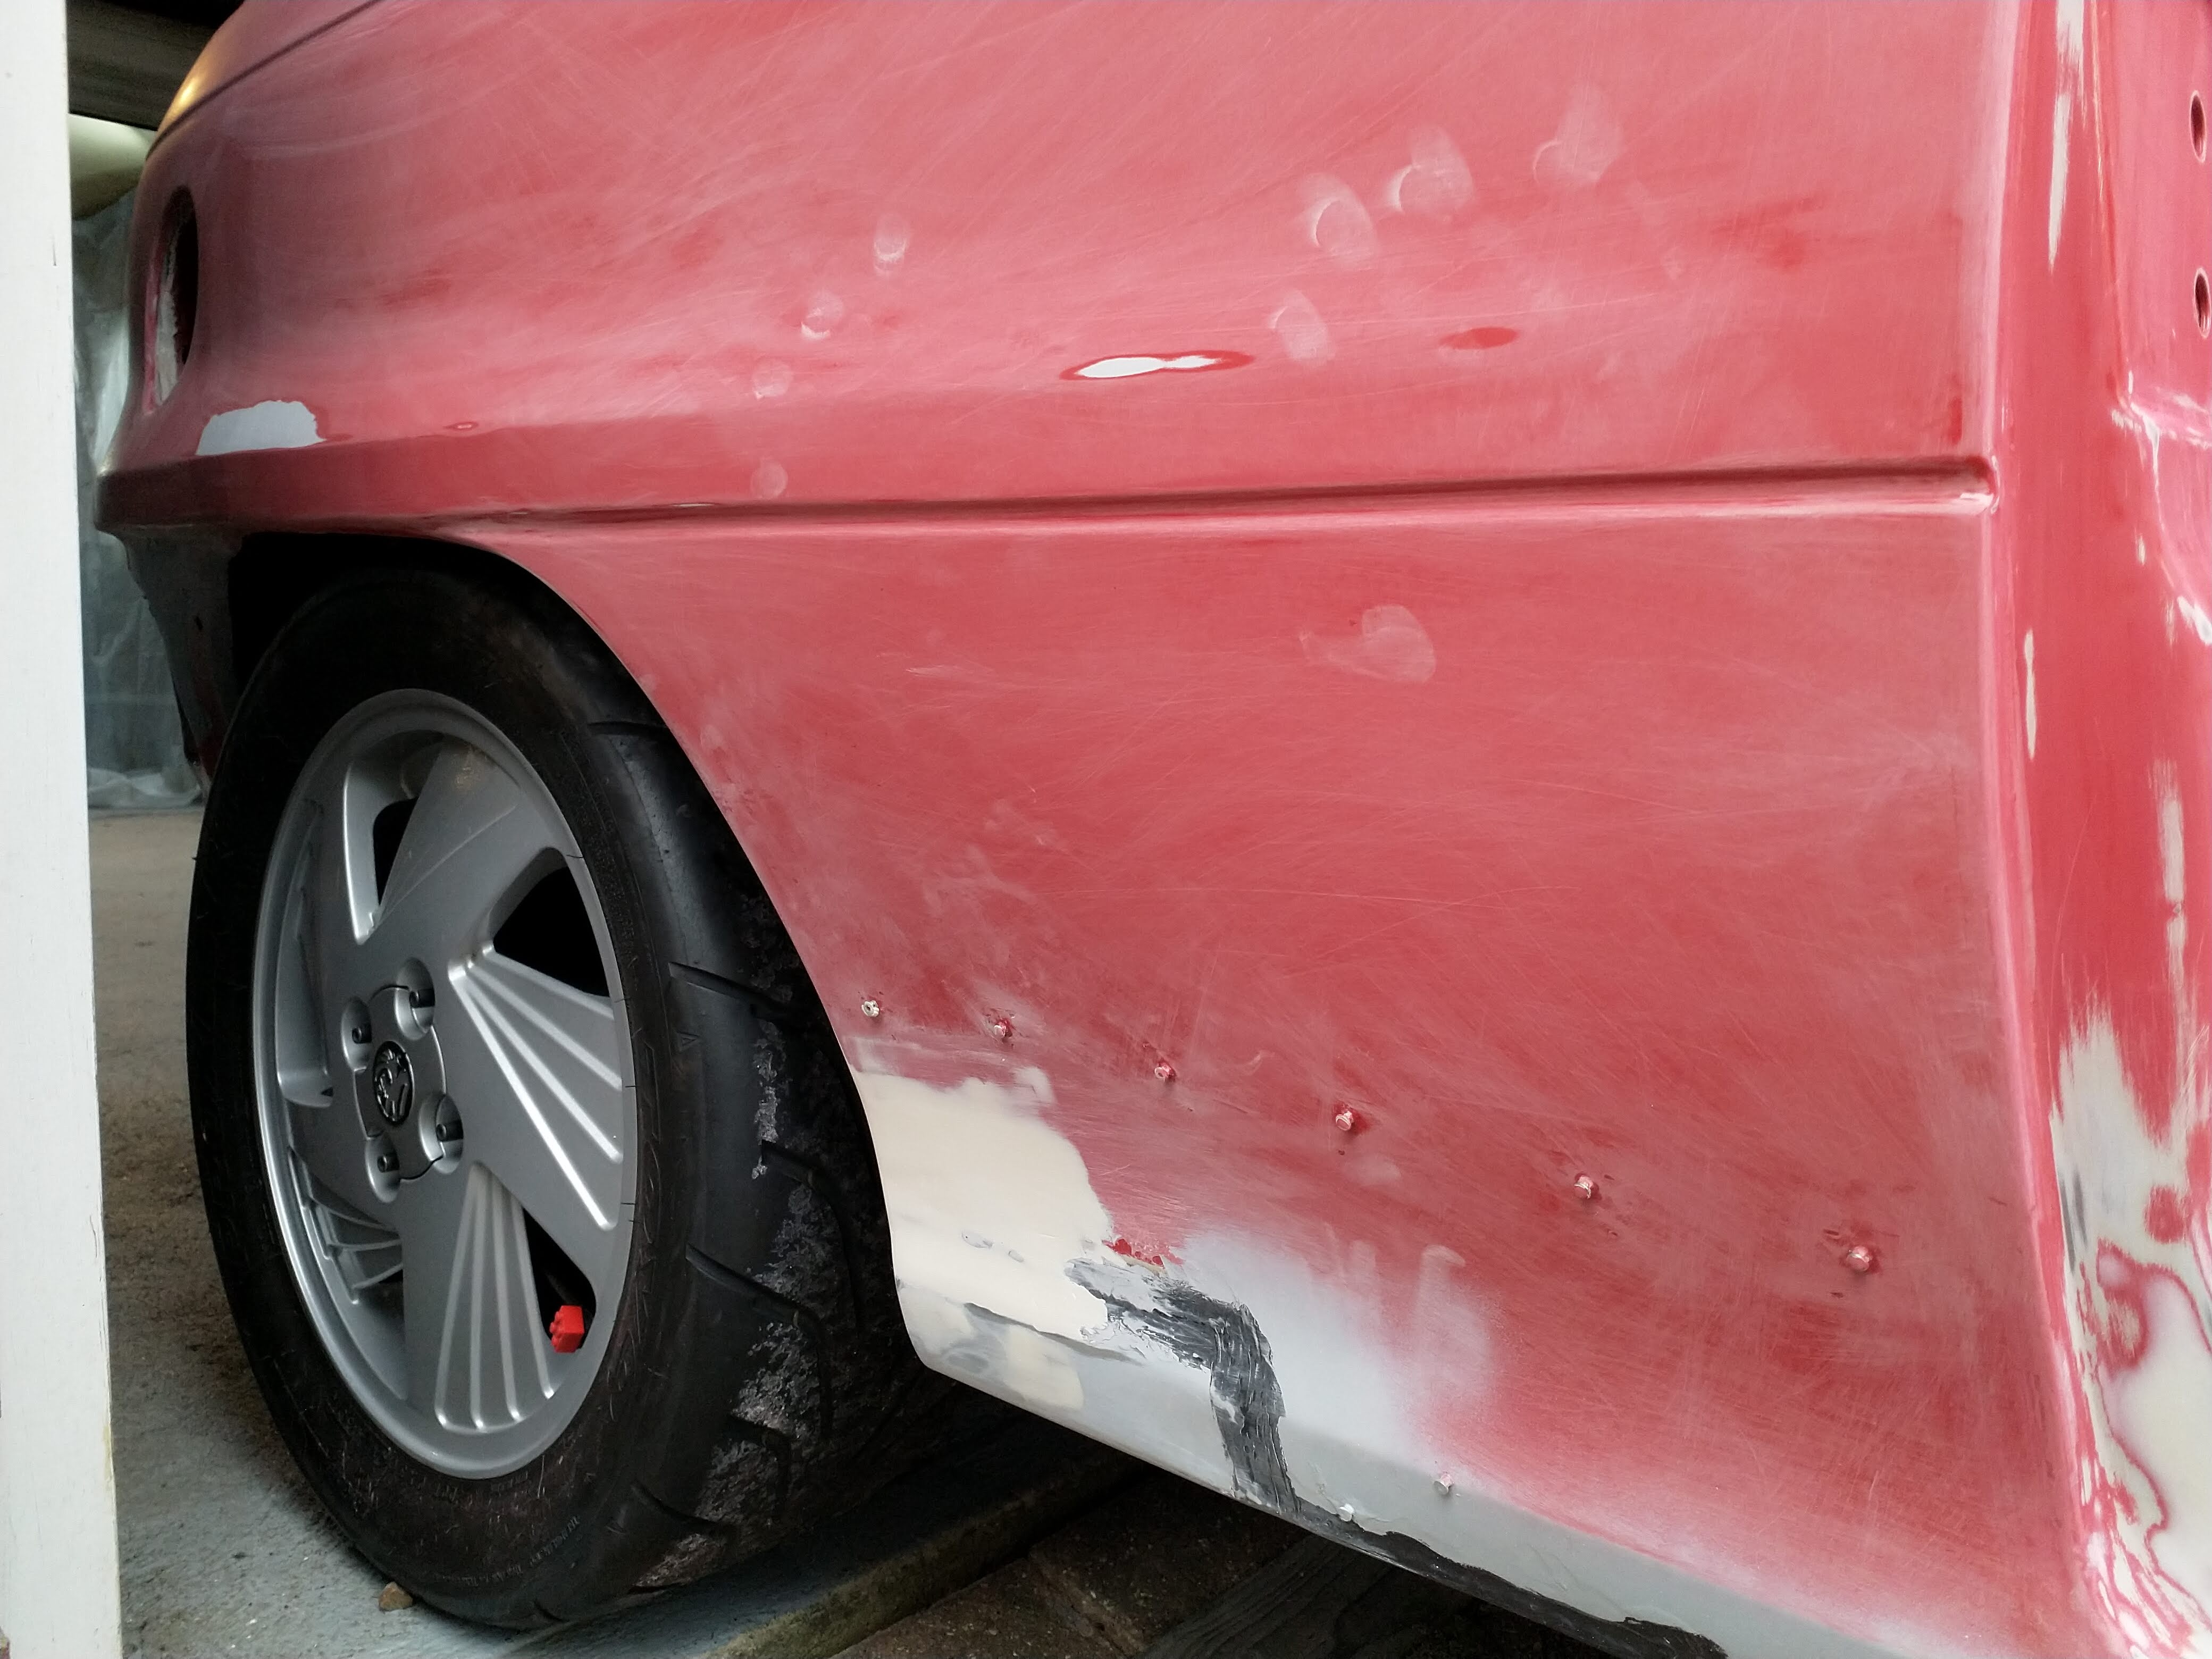

Pretty pleased with that. Gave the shell a bloody good blow off with the airline and a wipe over with panel wipe then rolled it back in the workshop
Then spent 5 hours, yep, 5 hours! Masking it off haha
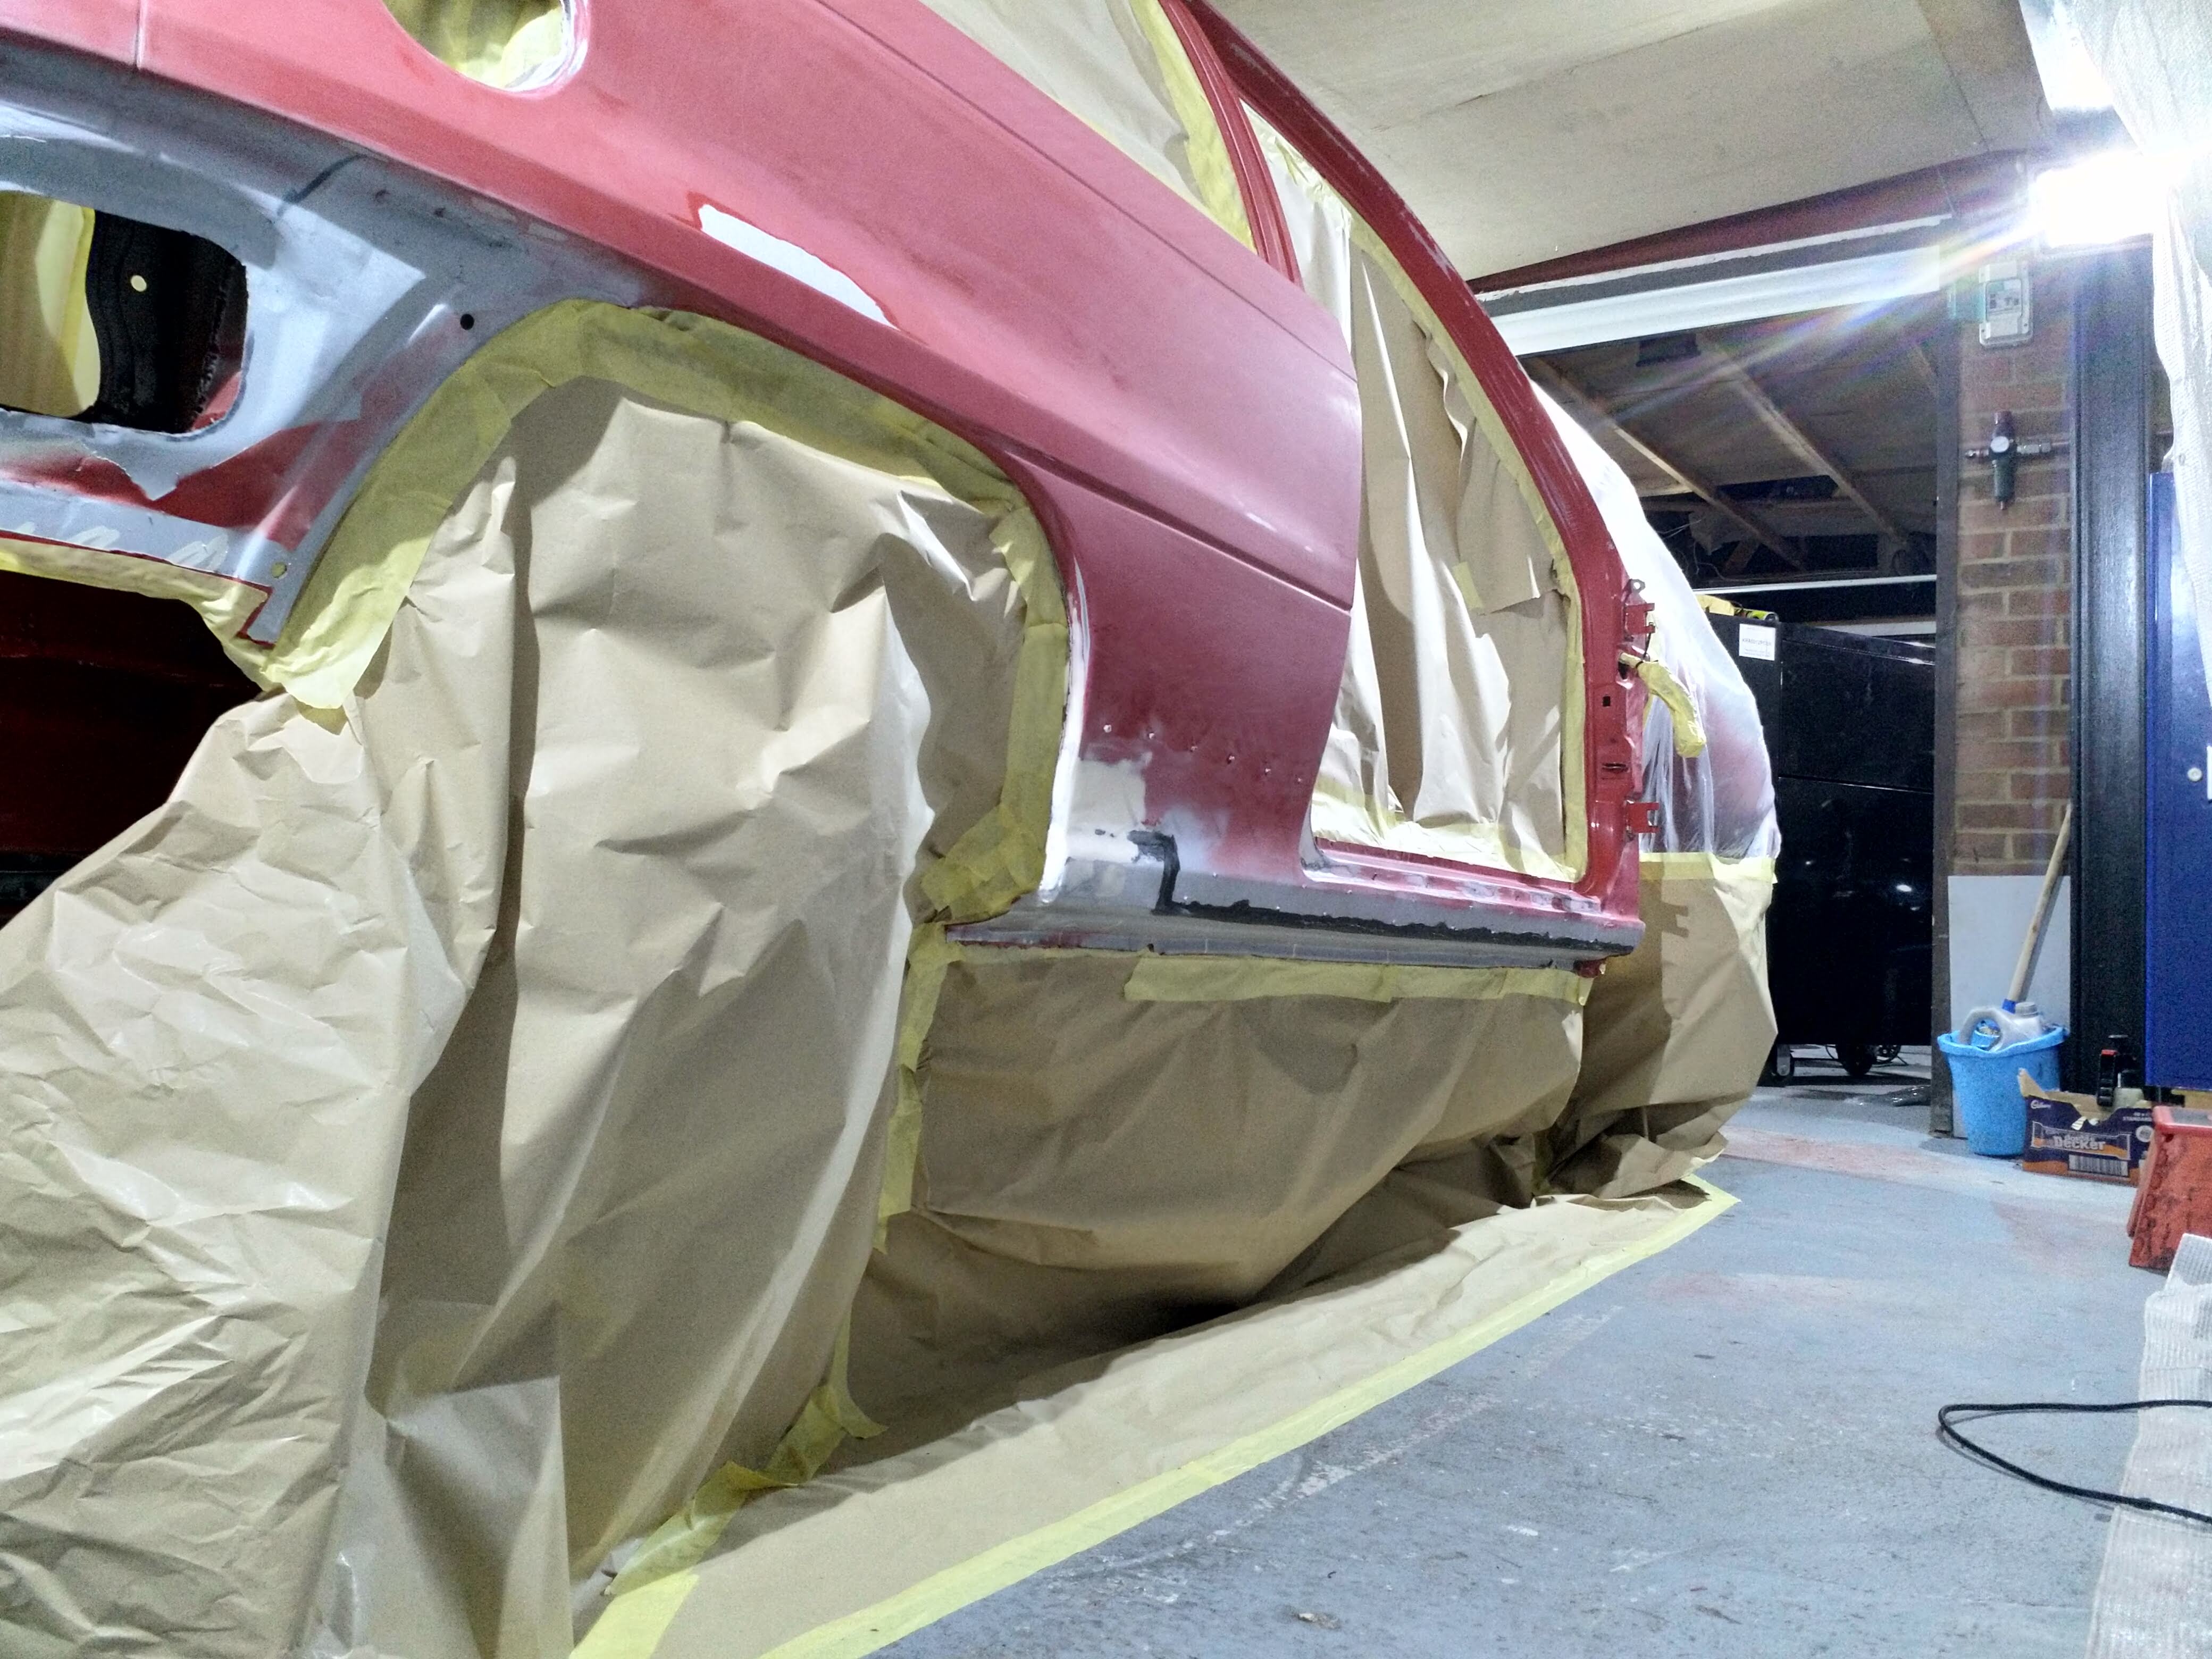
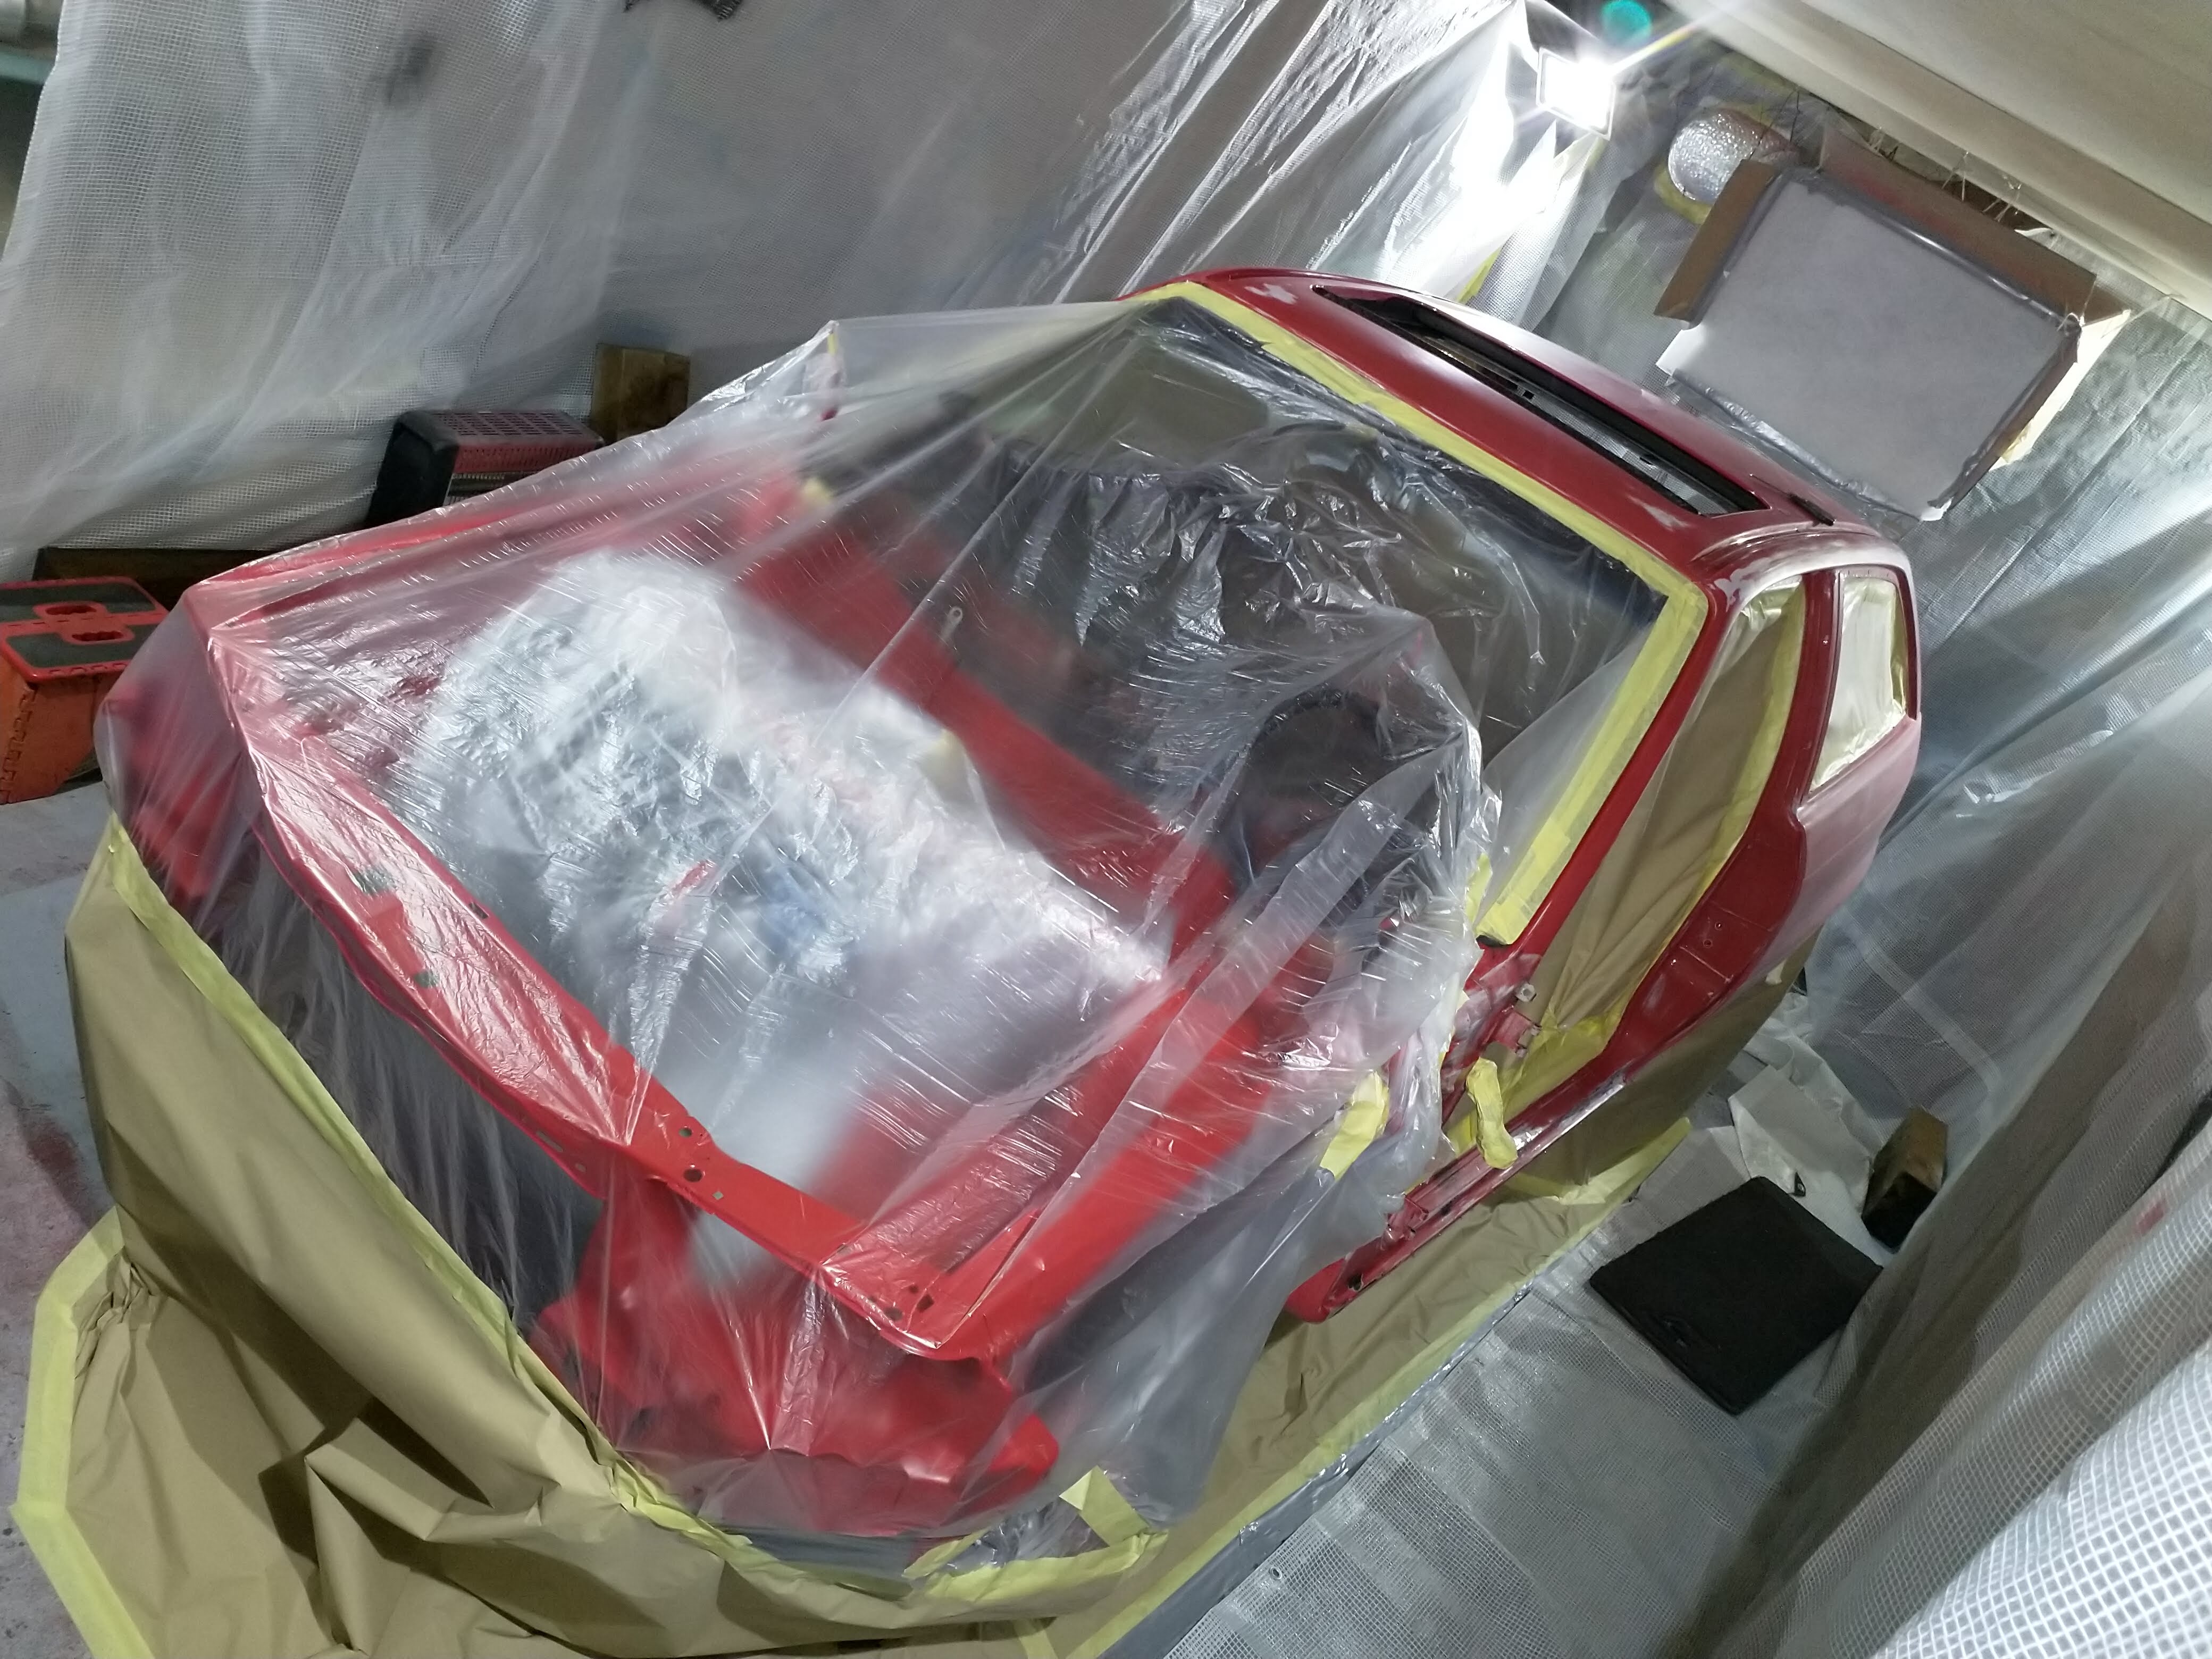
Then threw some super super thick high build primer around
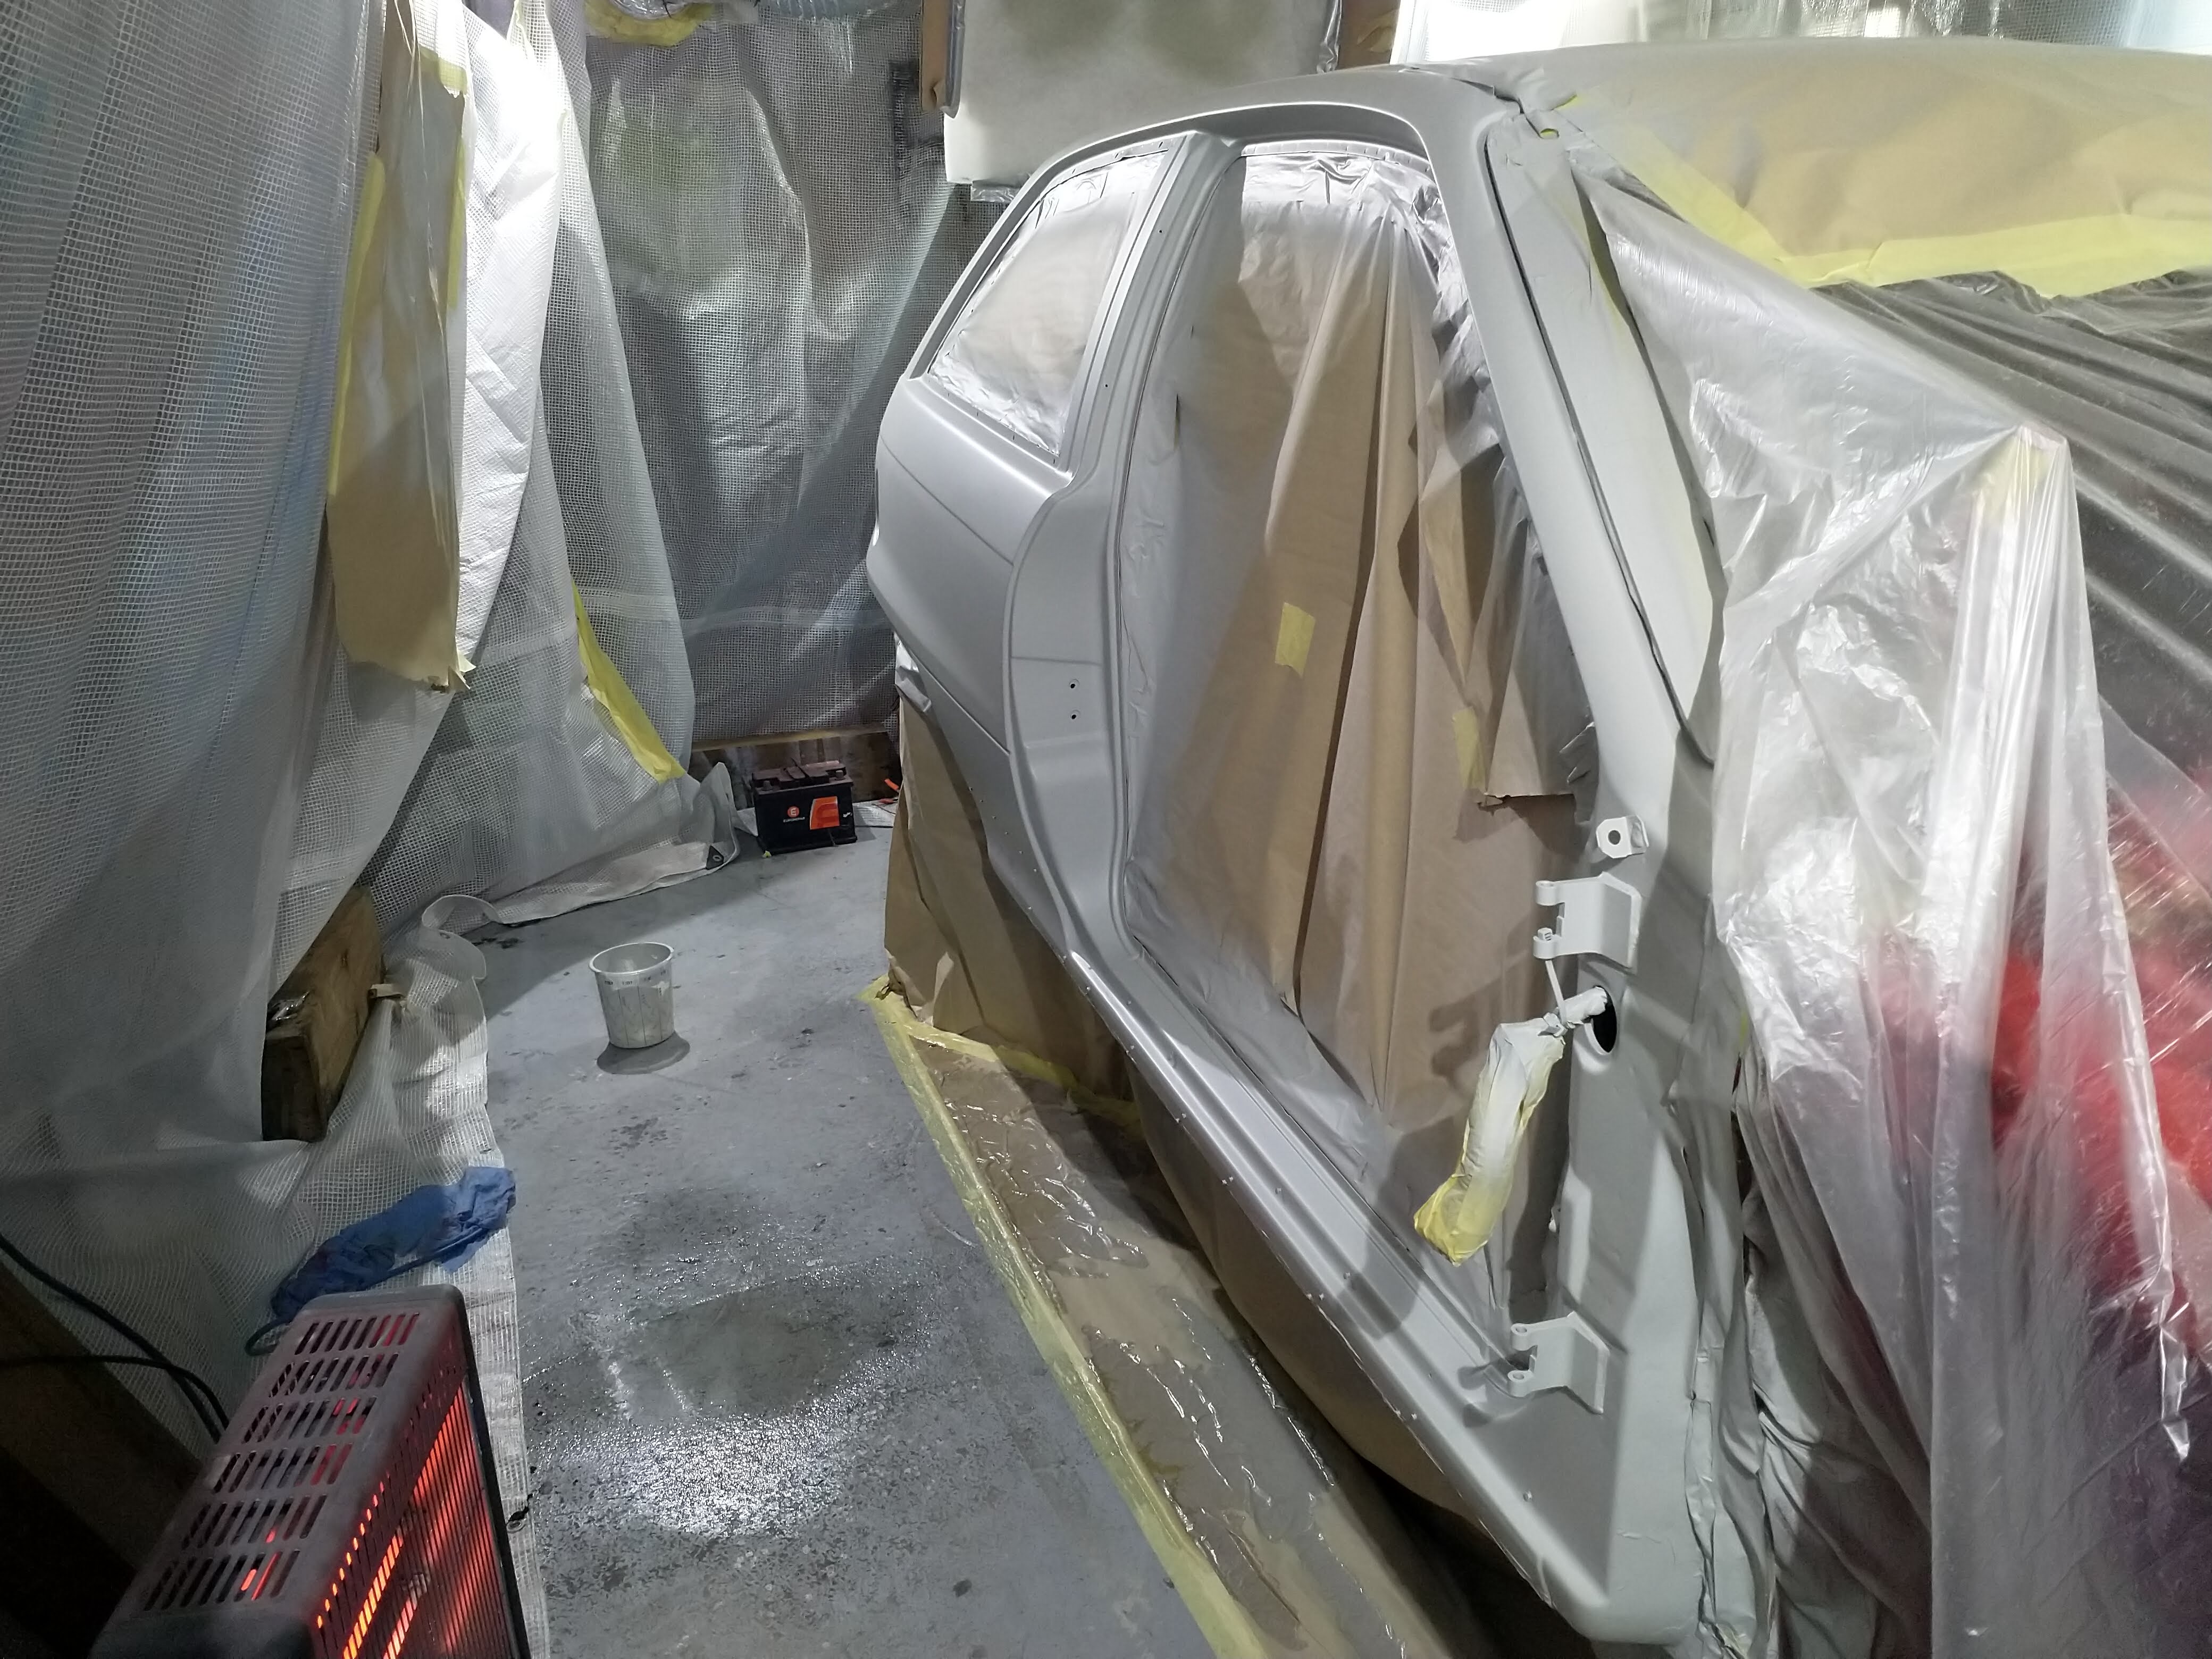
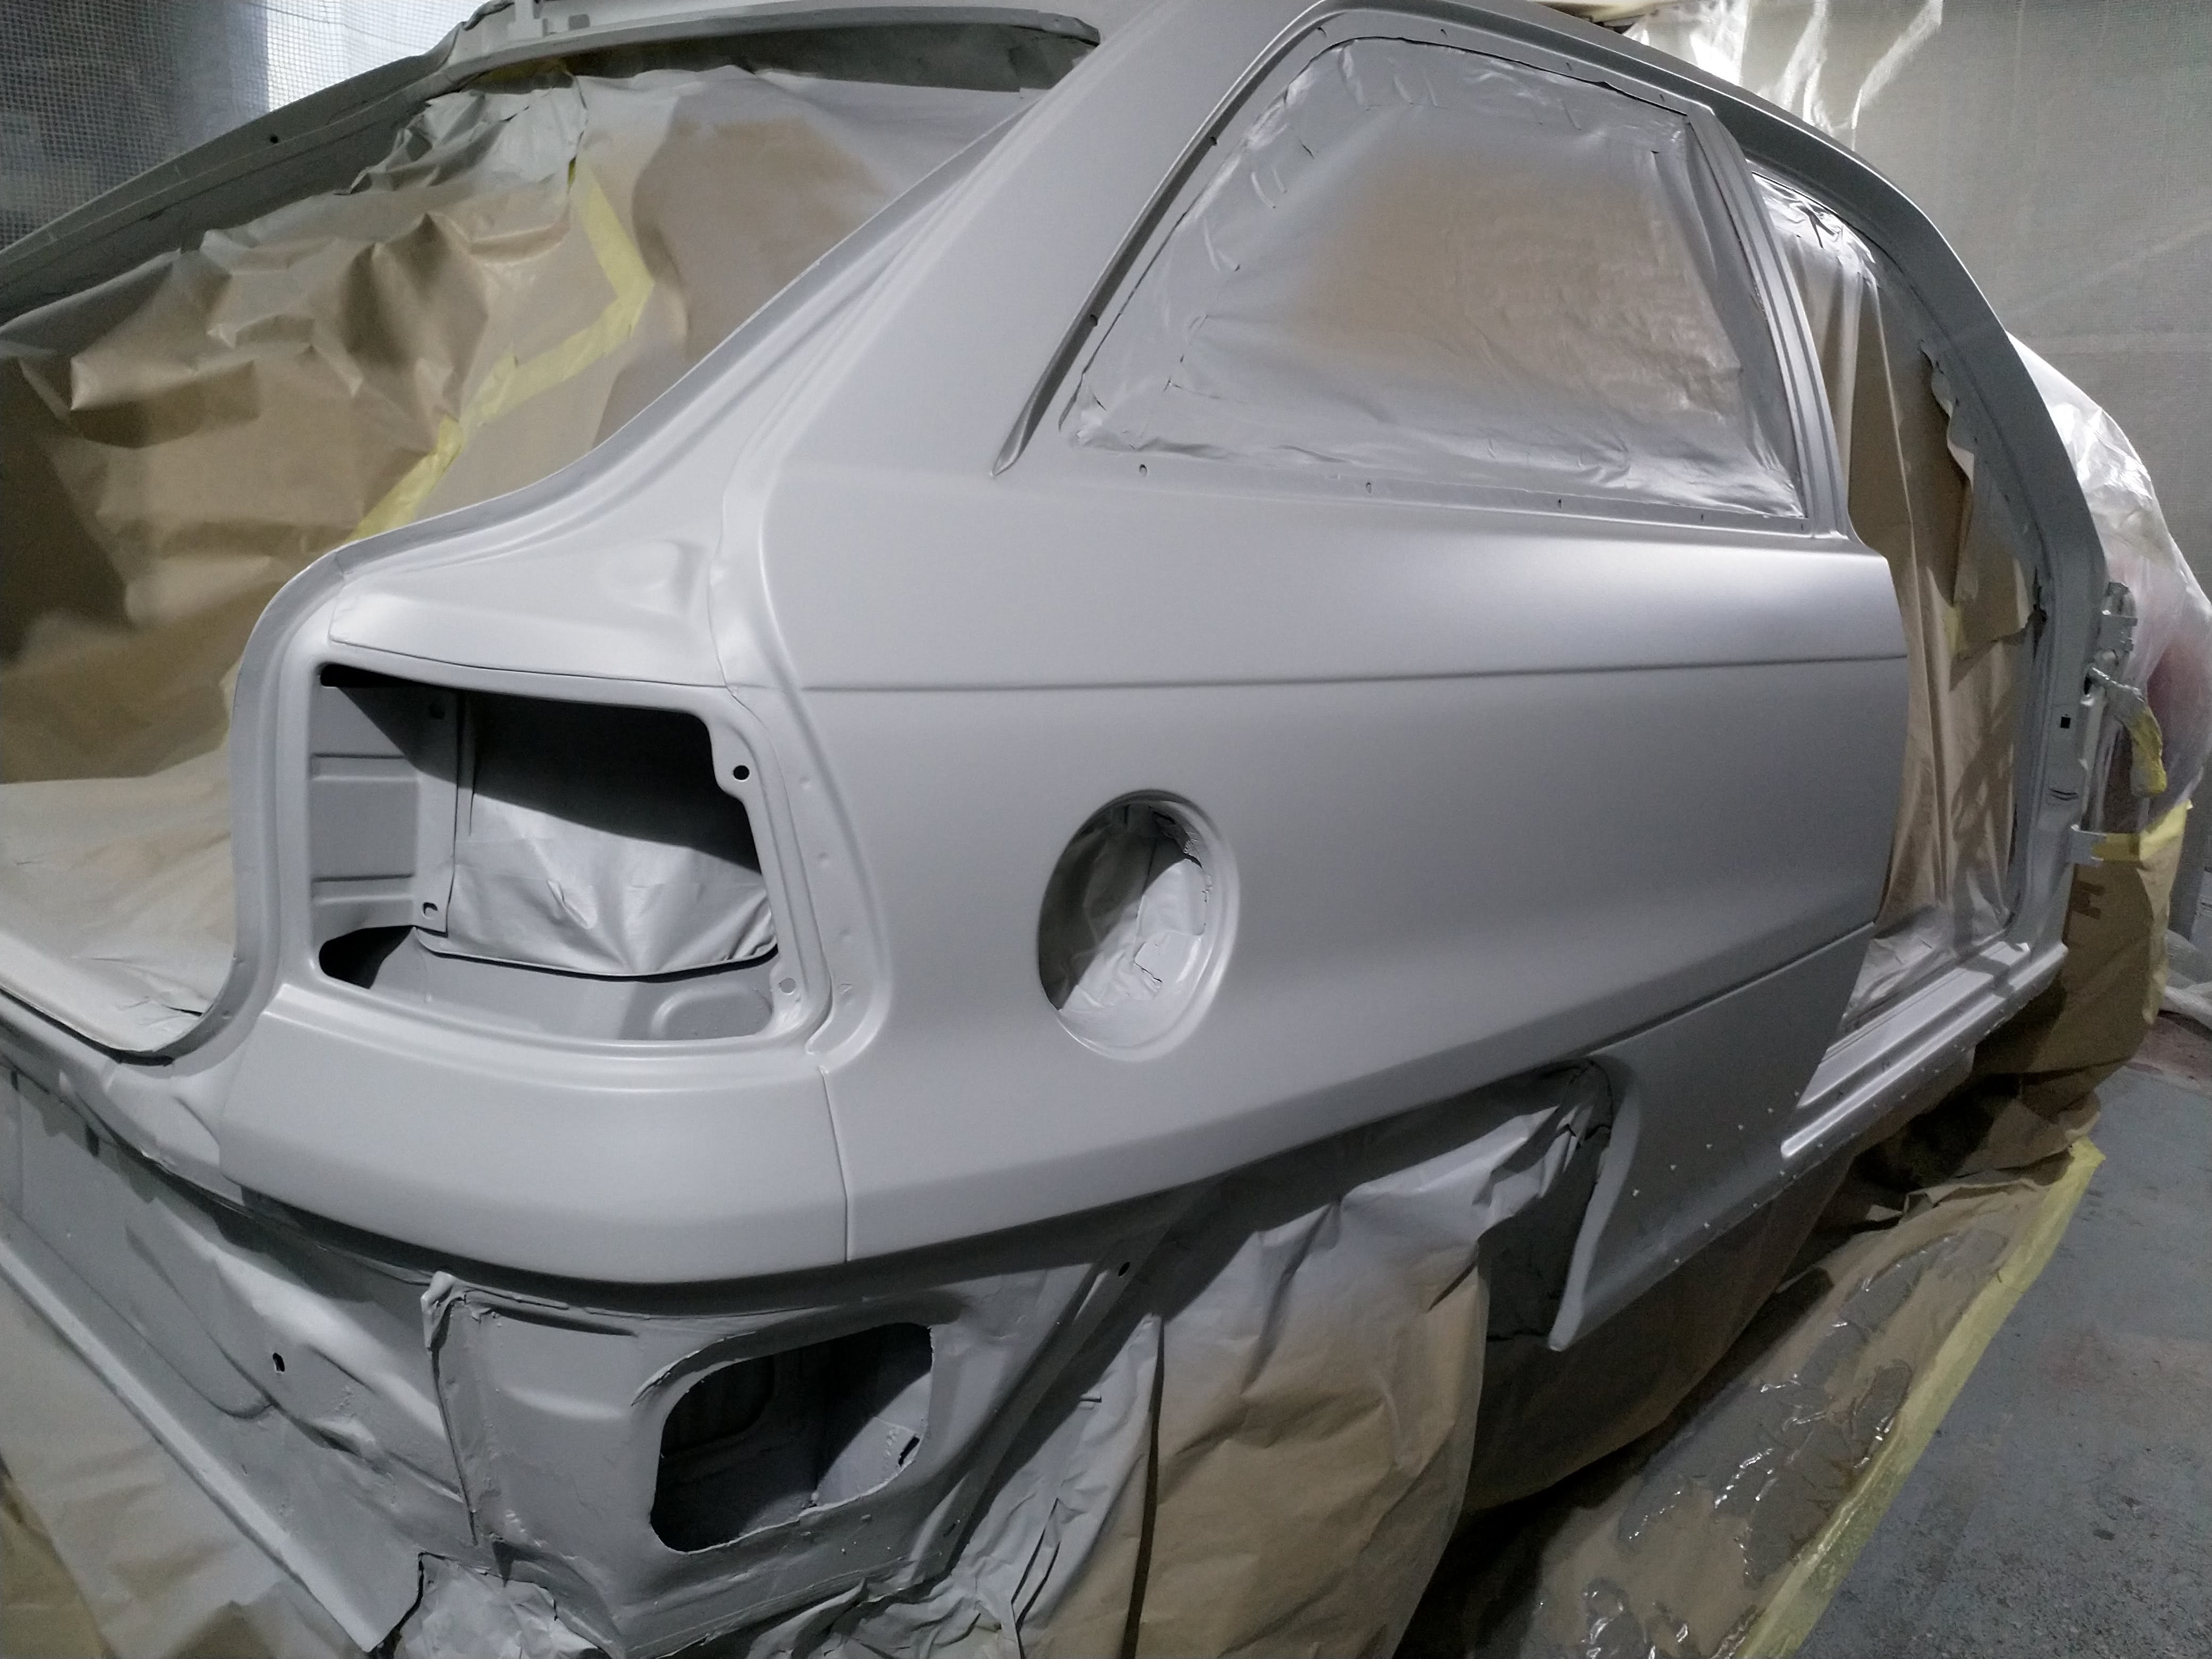
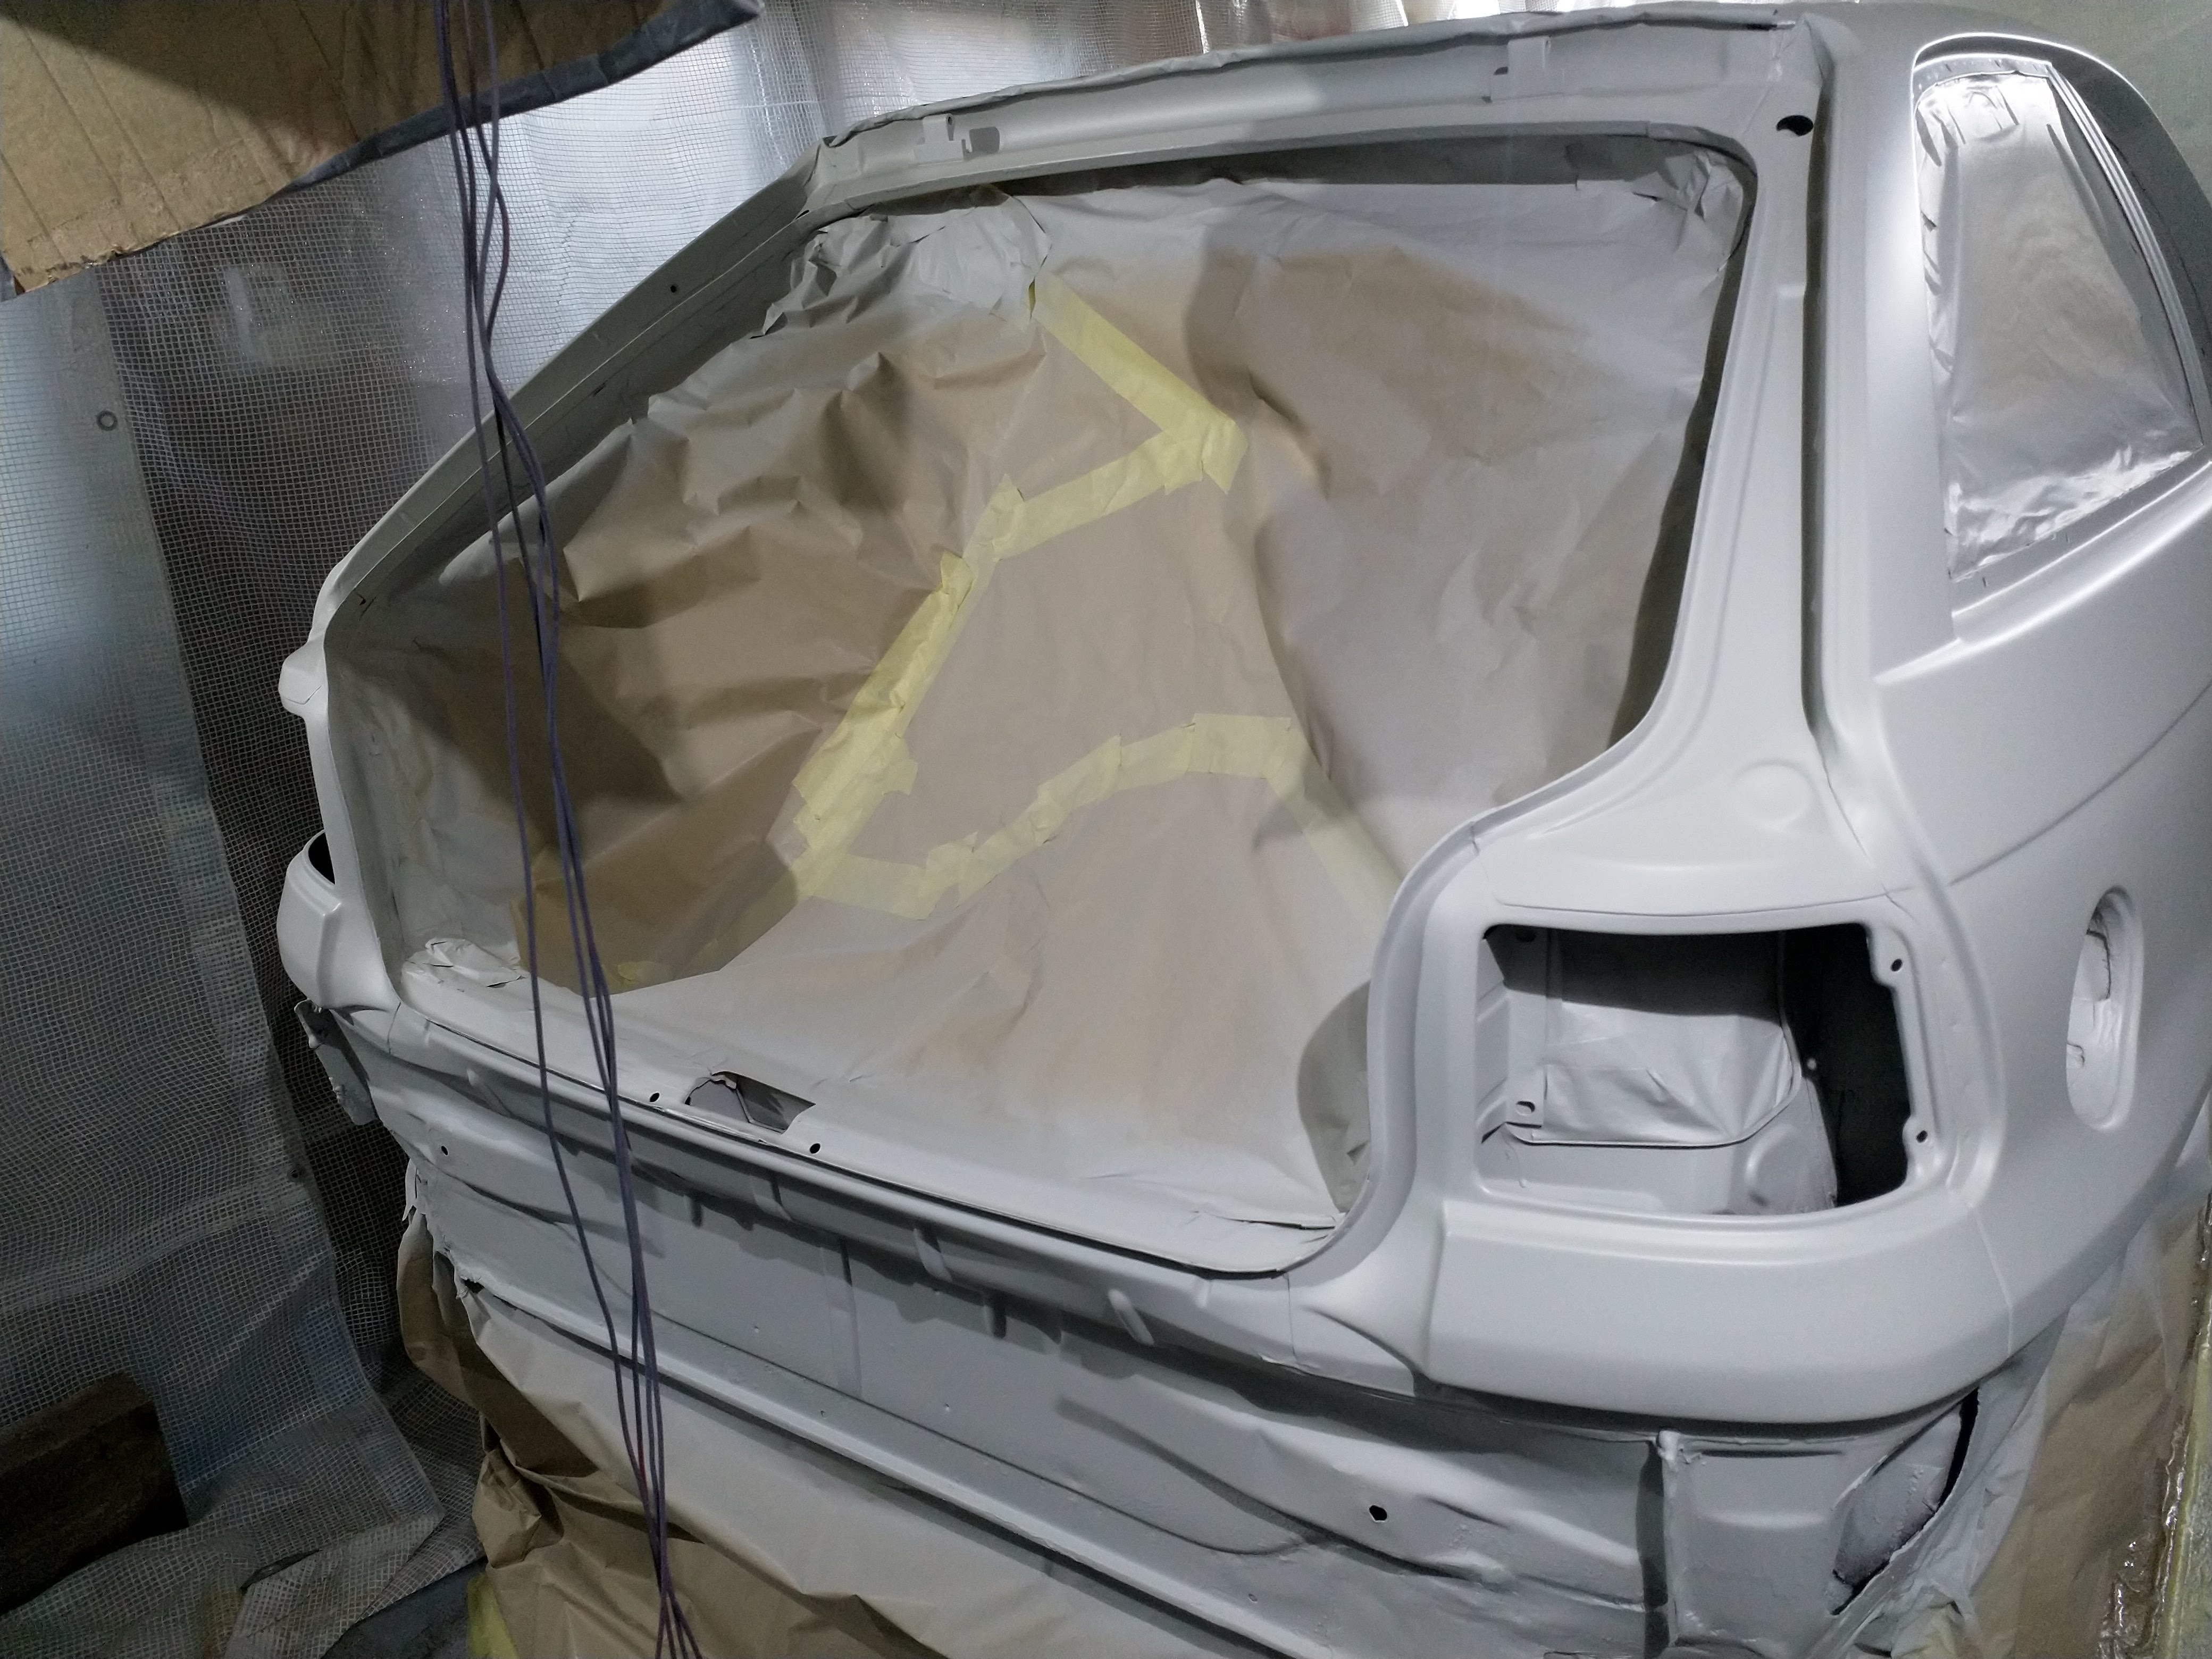
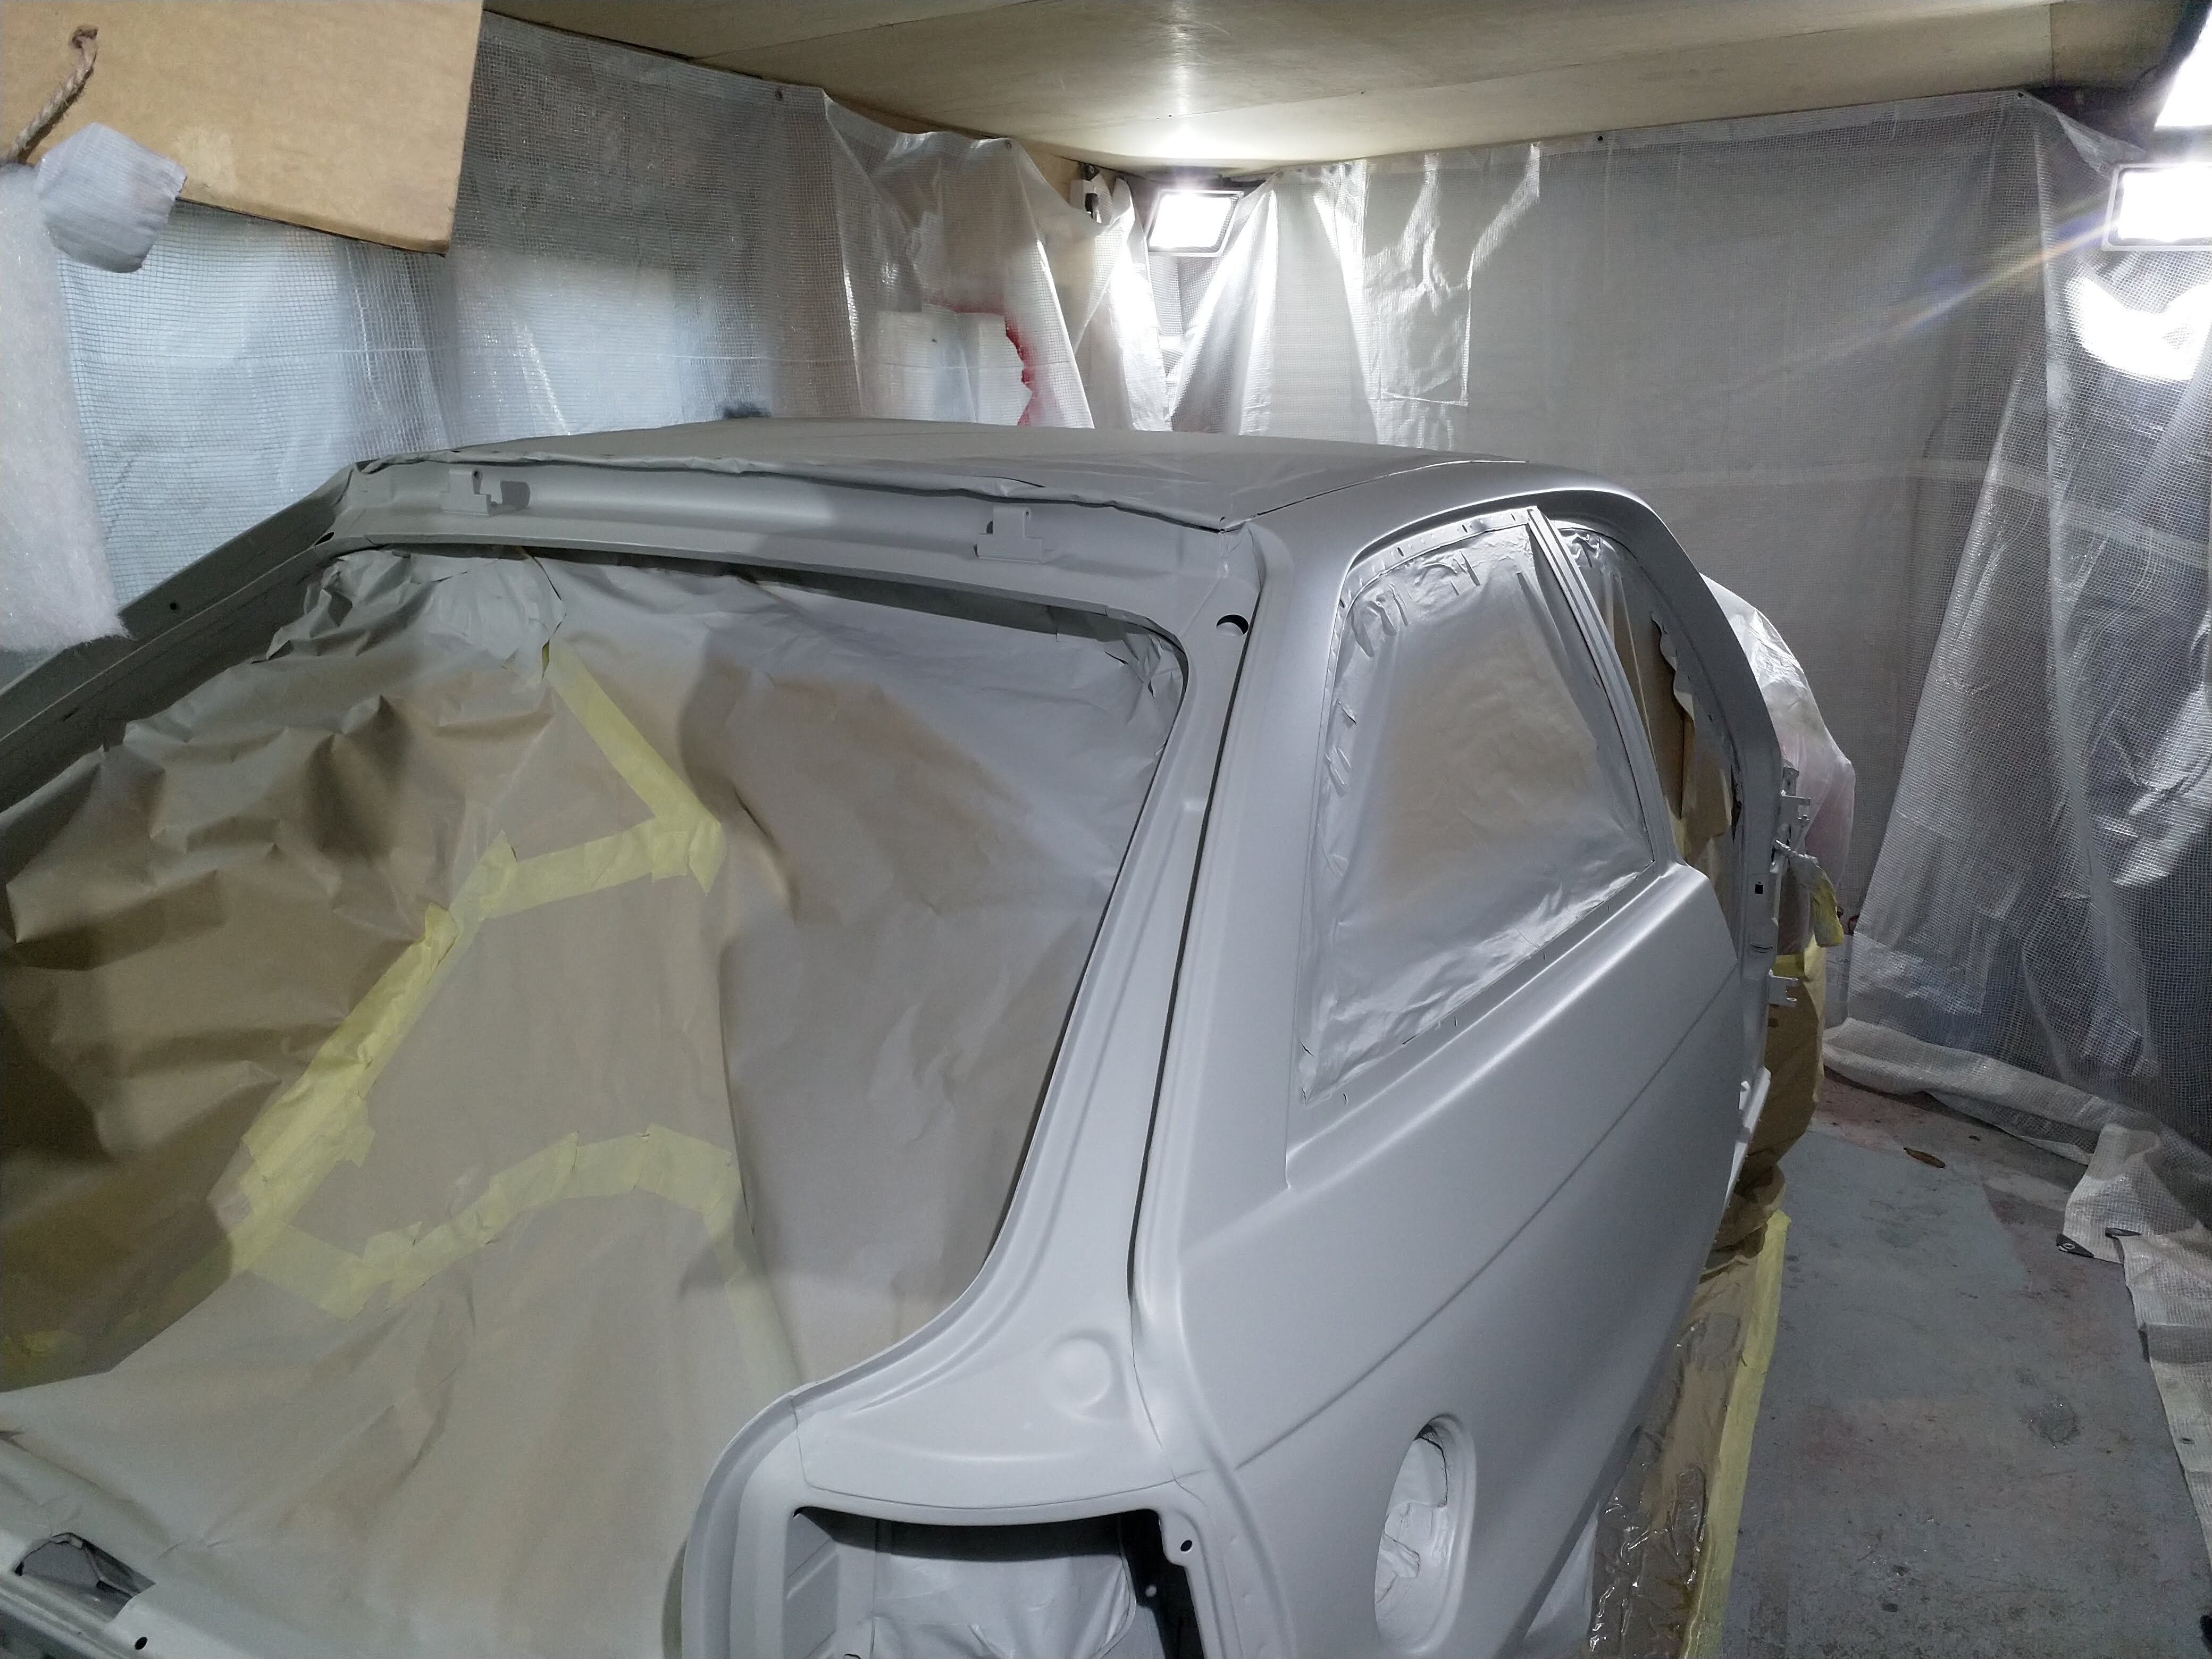
A few days to dry, flat it back then time for colour
So now the engine is in, after all the welding work that has gone on in the workshop, it is not fit for the final exterior coat . So the car needs to come out, workshop cleaned and put back in again. So i bolted all the suspension up and stuck the wheel on and rolled her out
Damn she looks MEAN!!!
deep clean and then turned back into a spry booth again. The ins and outs aren't that important like under the ramp etc, as you will see, the room gets sealed into a booth anyway. But the floor needed a clean and the ceiling had some cob webs!
Rubbed back the whole body of the car ready for some filler work
Thanks to help from Gareth I checked the angle and fitment of my fuel flap as I have welded a new inner in. Turns out the opening handle points down slightly as normal! who would of known!
The main parts of the body that needed work were the door shuts, right rear corner had a dent and the bottom of the quarters where the new door sills has been welded on. Although this is covered by the skirts, I thought I would give them the filler treatment anyways. If anything it acts as another barrier!
Now I'm not very good with filler. Probably due to a lack of practice so I end up puttin too much on, having to take a load off and doing several passes aswell to get a halp decent finish. But I spent a day doing this and got there in the end!
Pretty pleased with that. Gave the shell a bloody good blow off with the airline and a wipe over with panel wipe then rolled it back in the workshop
Then spent 5 hours, yep, 5 hours! Masking it off haha
Then threw some super super thick high build primer around
A few days to dry, flat it back then time for colour
Todd100
Club Member
Nice one mate, it will be finished before you know it!
Paint day. I'll let the picture do the talking. All went reasonably well. 3 coats of base coat. let them dry then found some fluff in the C pillar passenger side. This is probably caused by me sneaking out the door after spraying, this part is closest to the sheet. So i took the time to scotch pad the fluff out and do a quick blow over with the base again in that area. It was well worth it as it gave me a great looking base coat
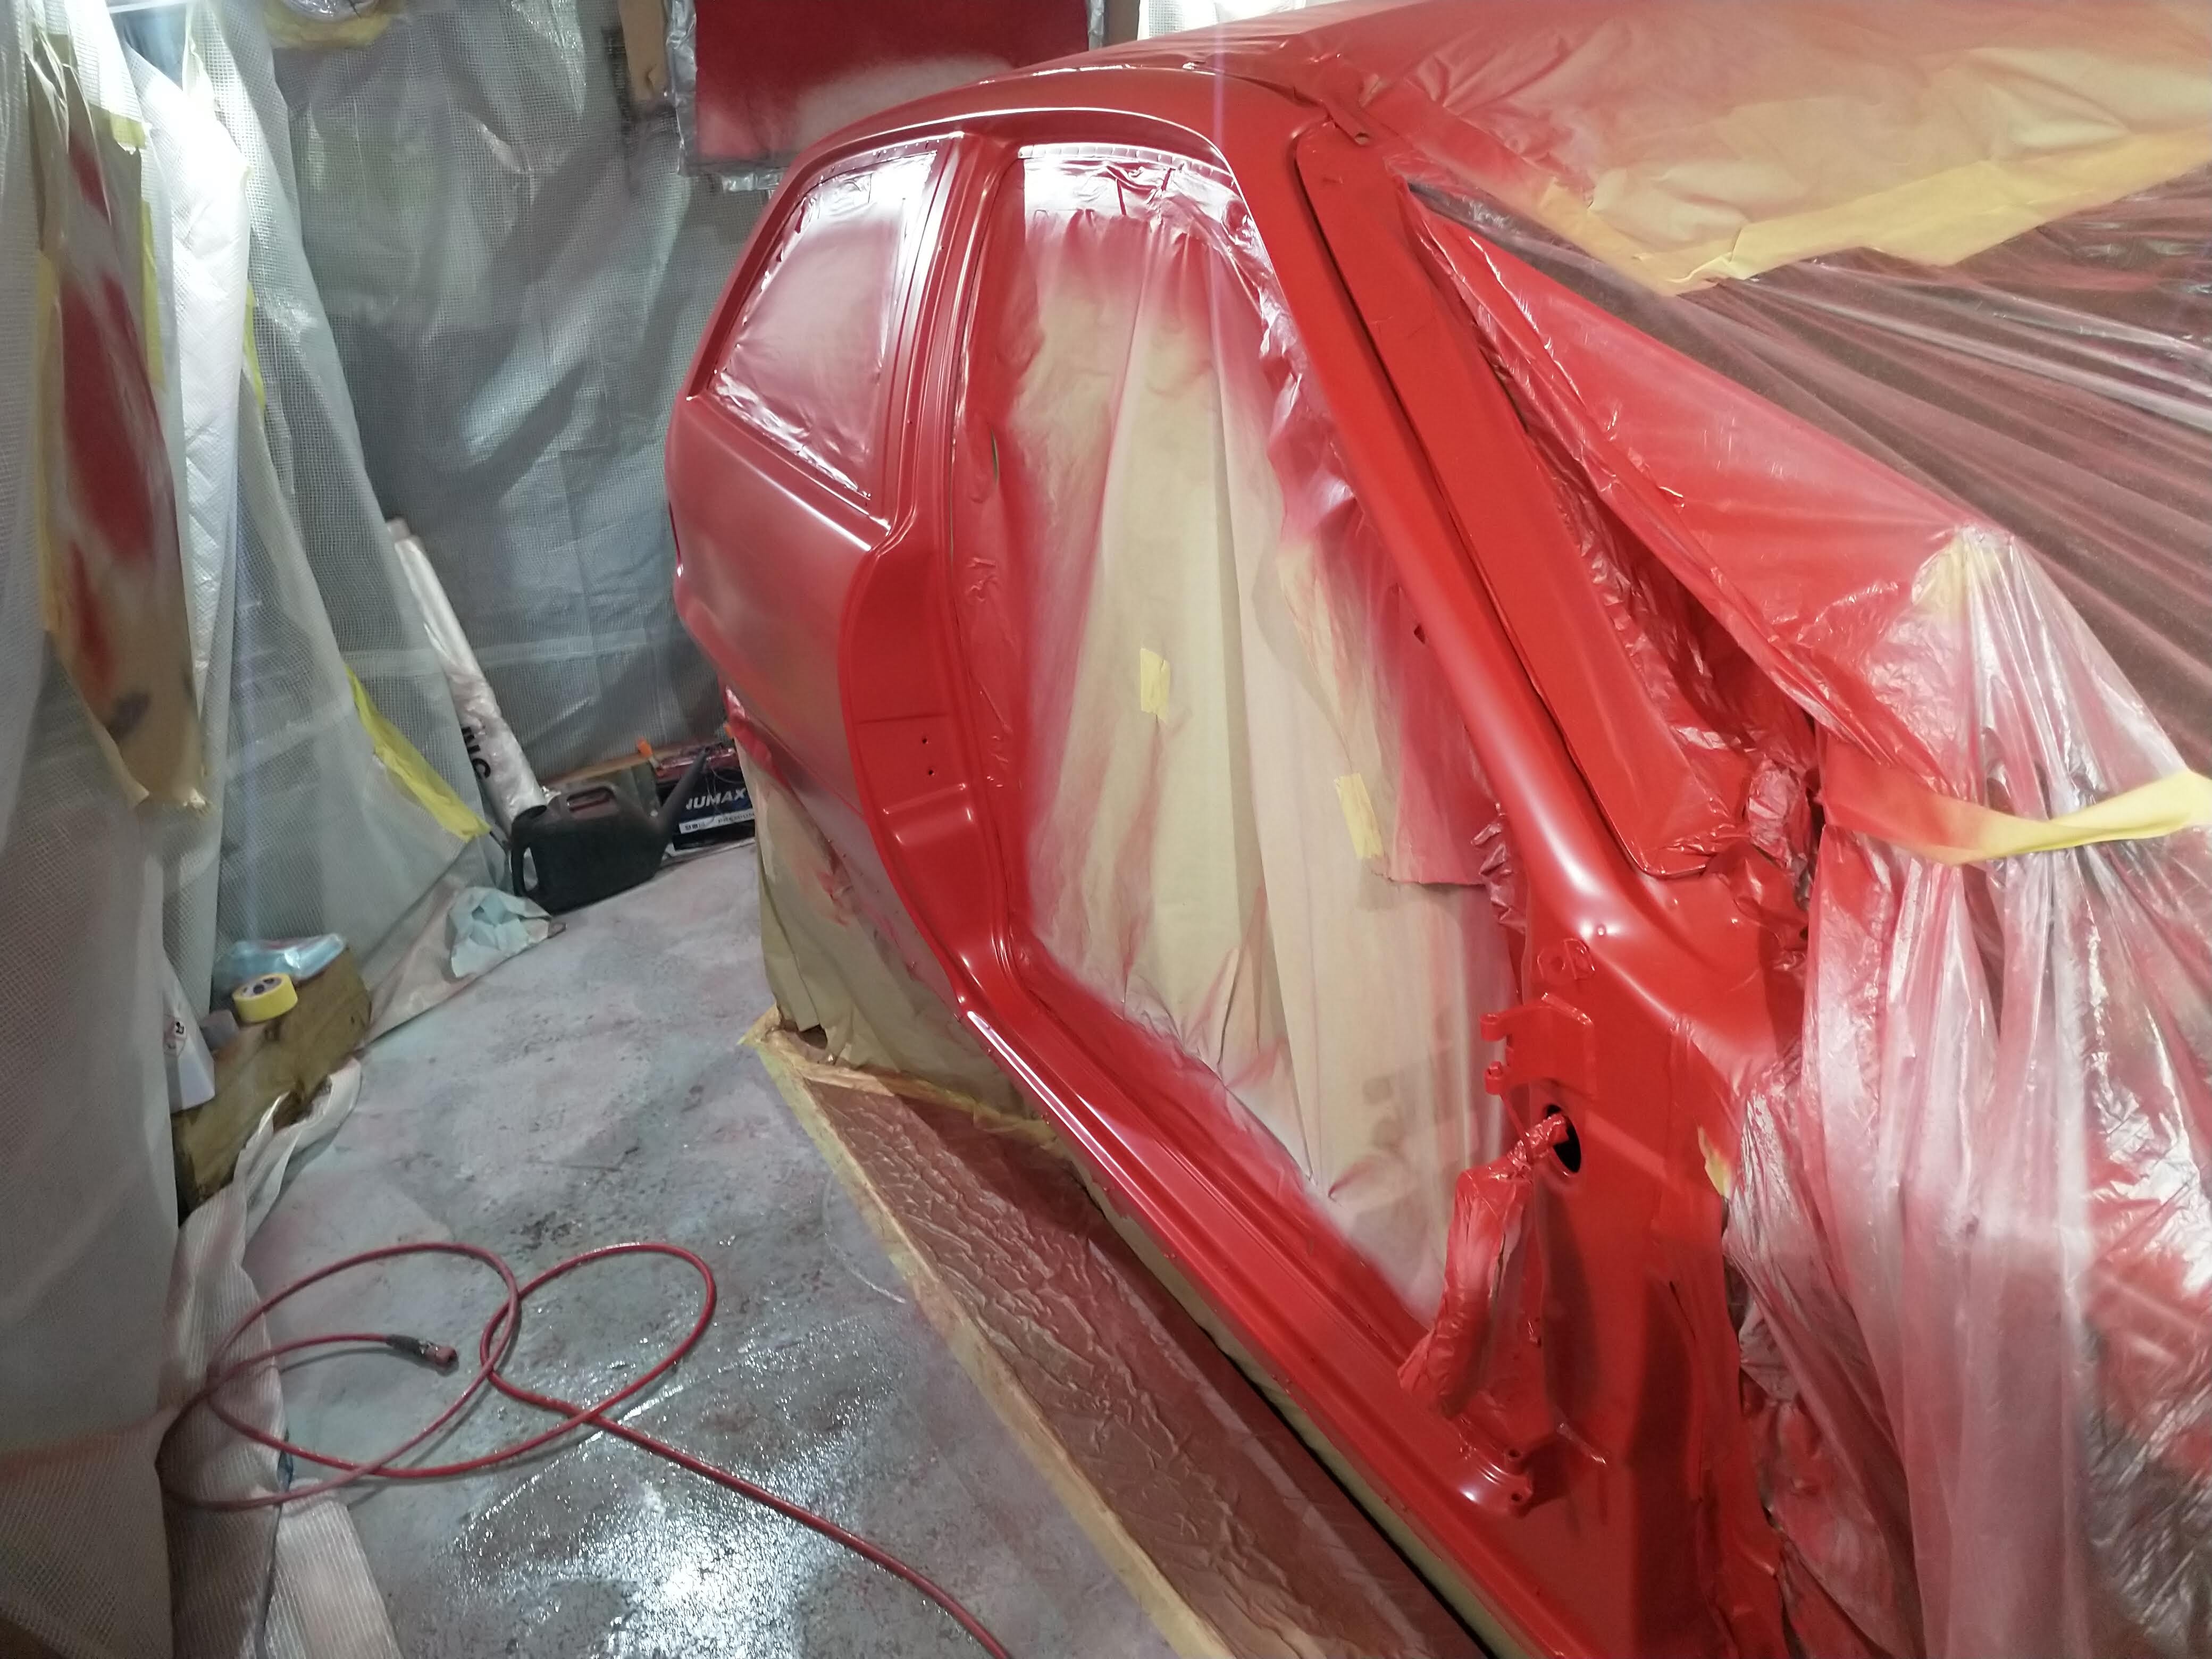
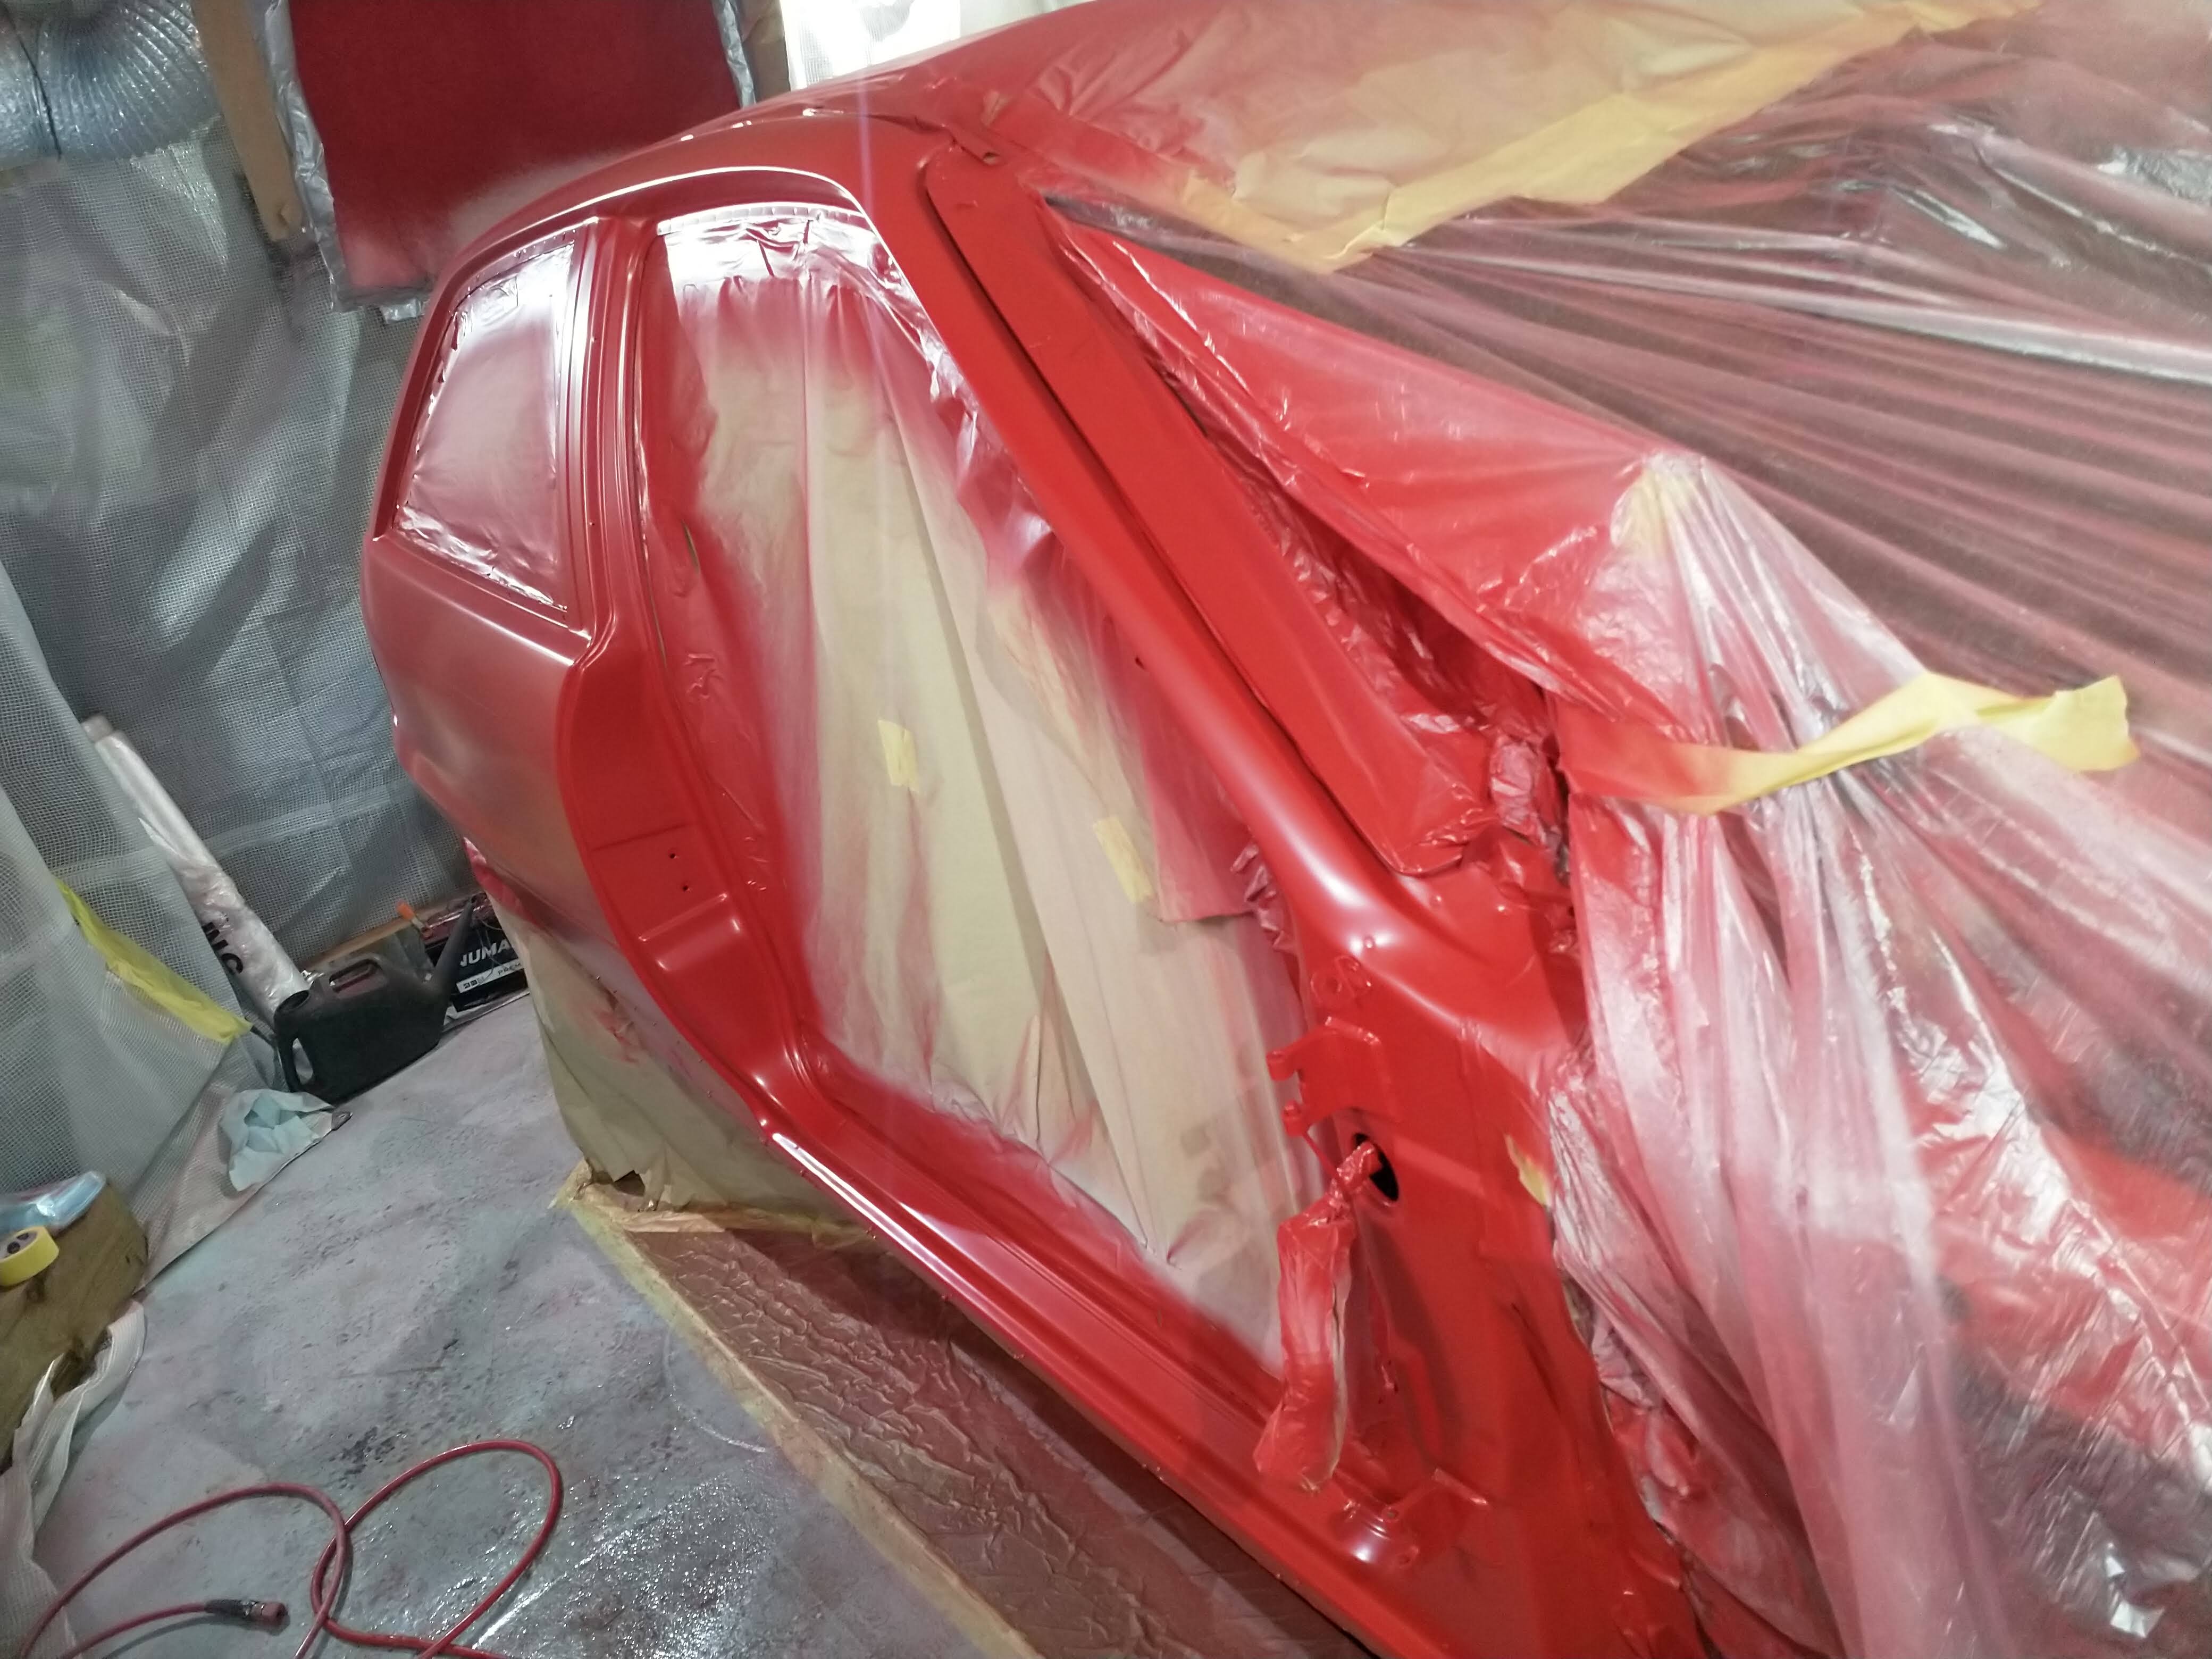

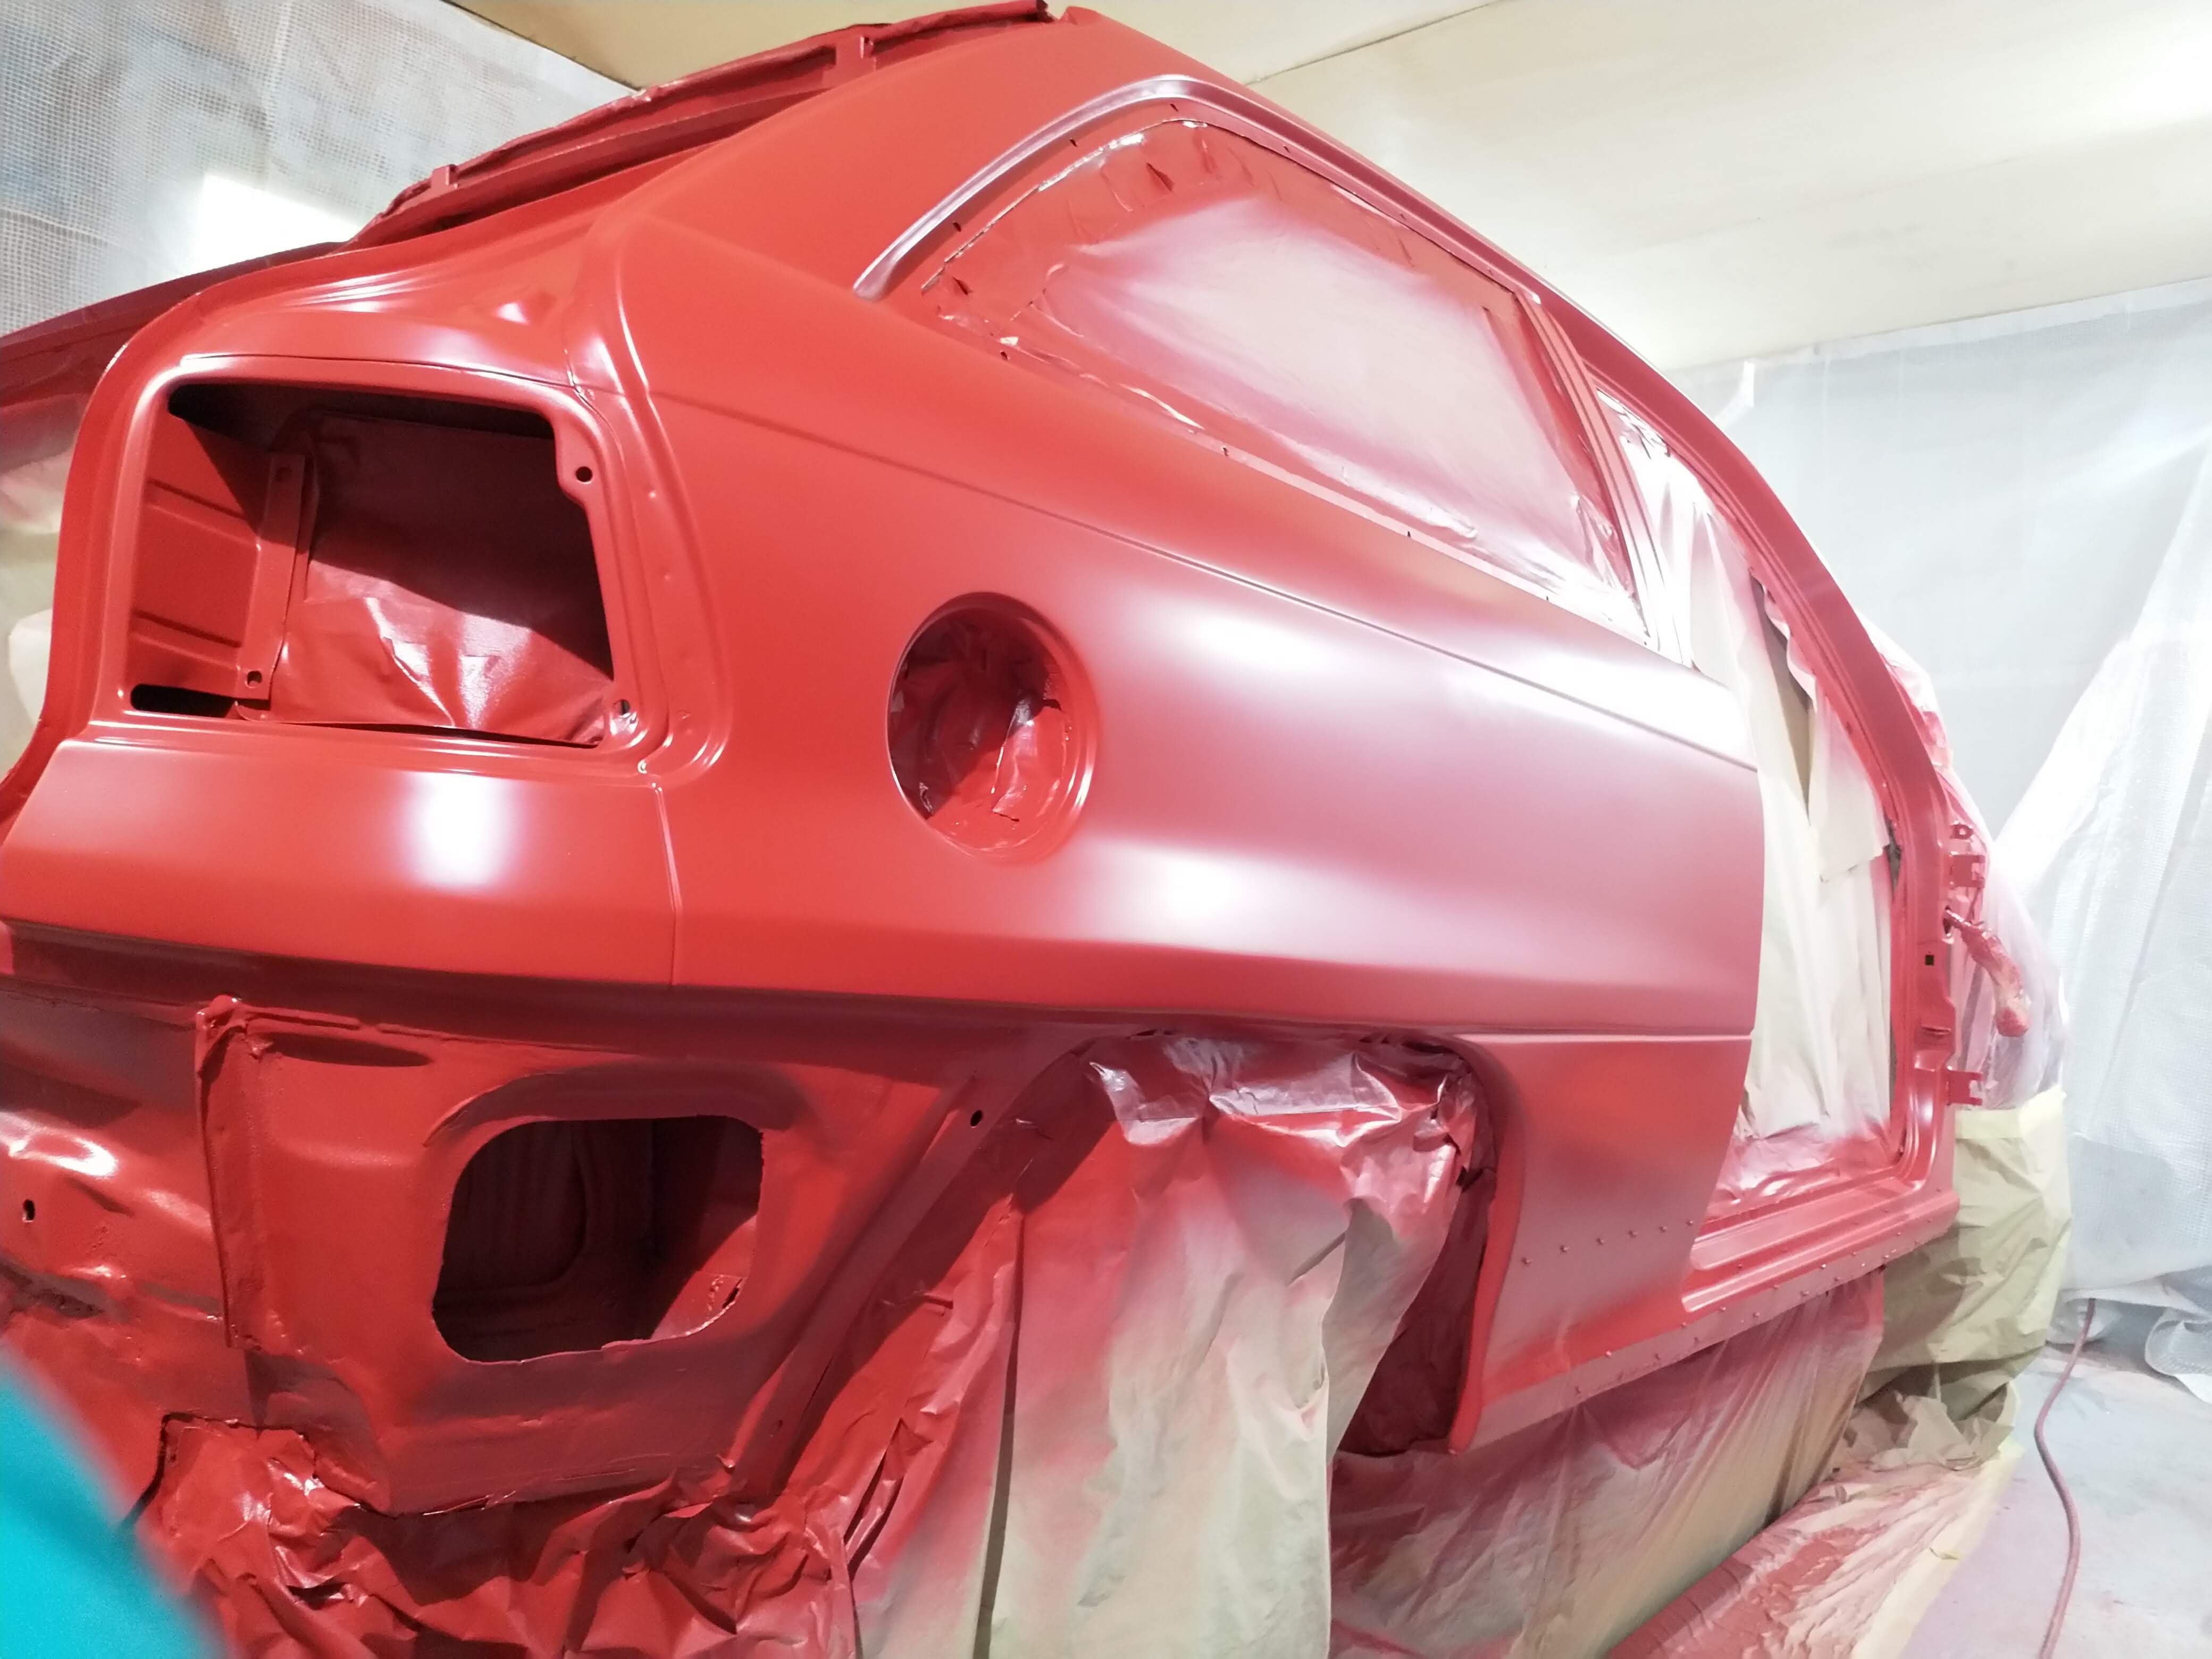
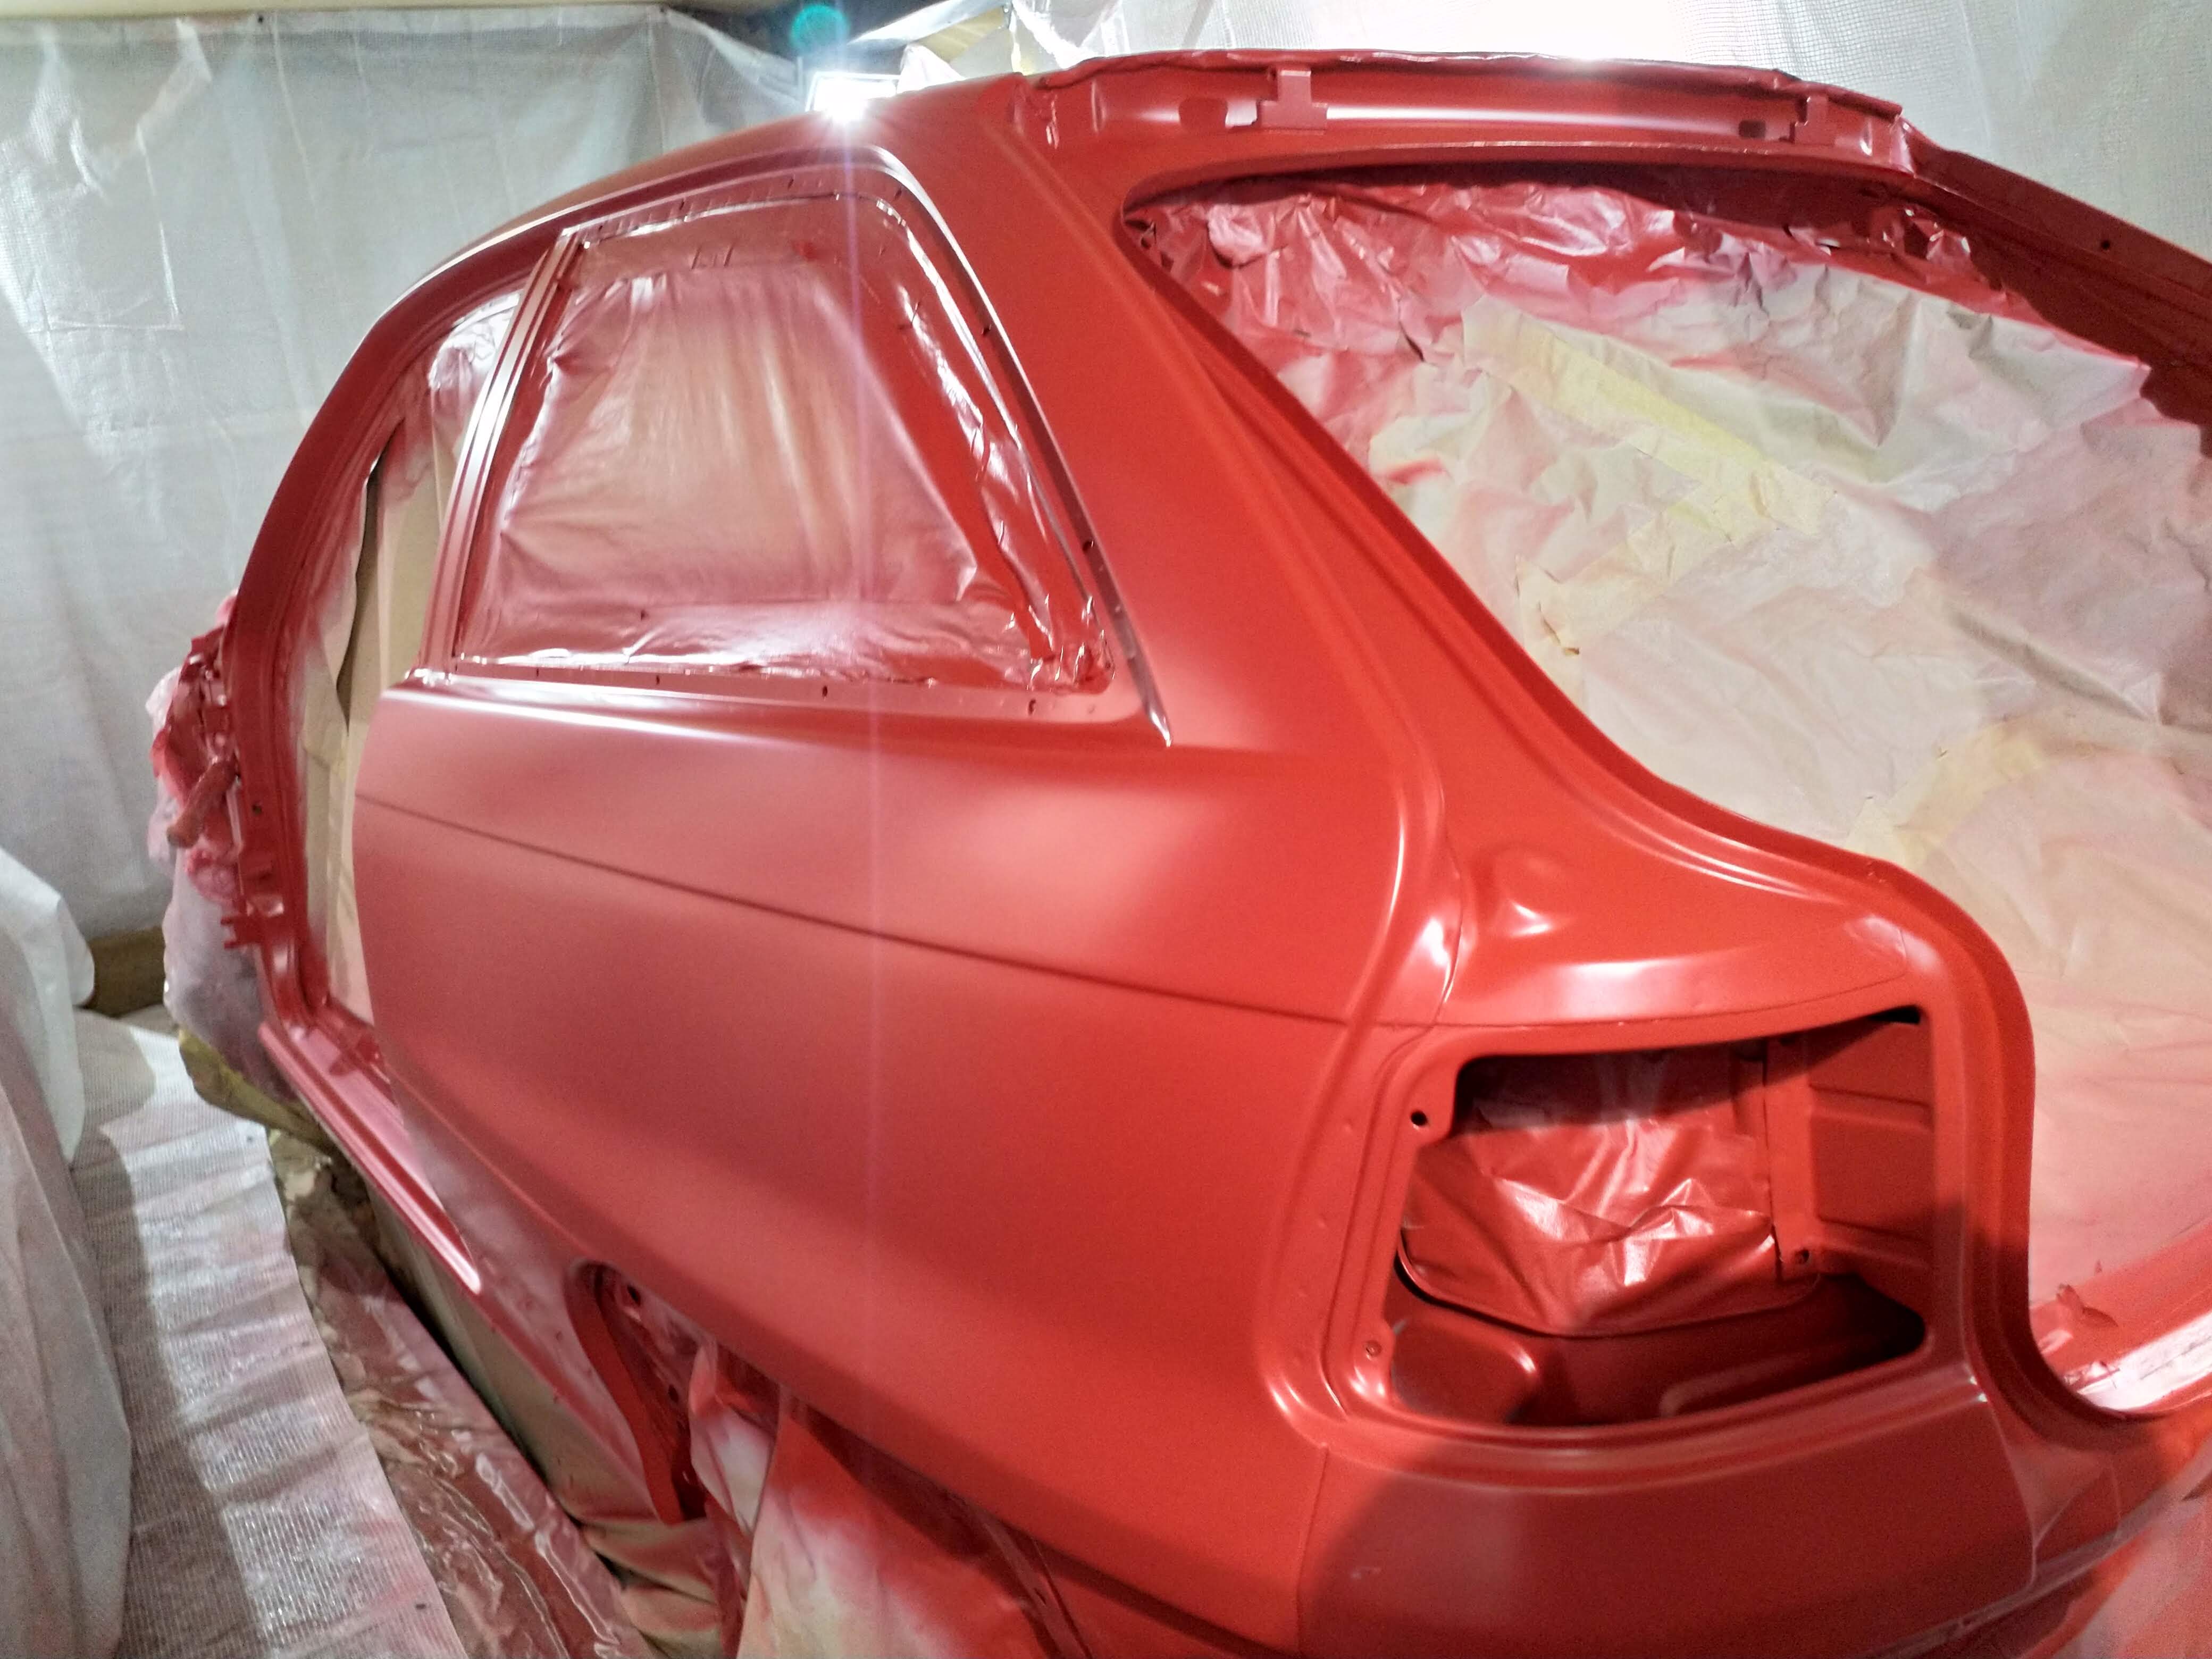
Let it set for 40mins, then mixed some clear and went at it. Very light spray, wait 5 mins, then 3 thick coats 15mins apart.
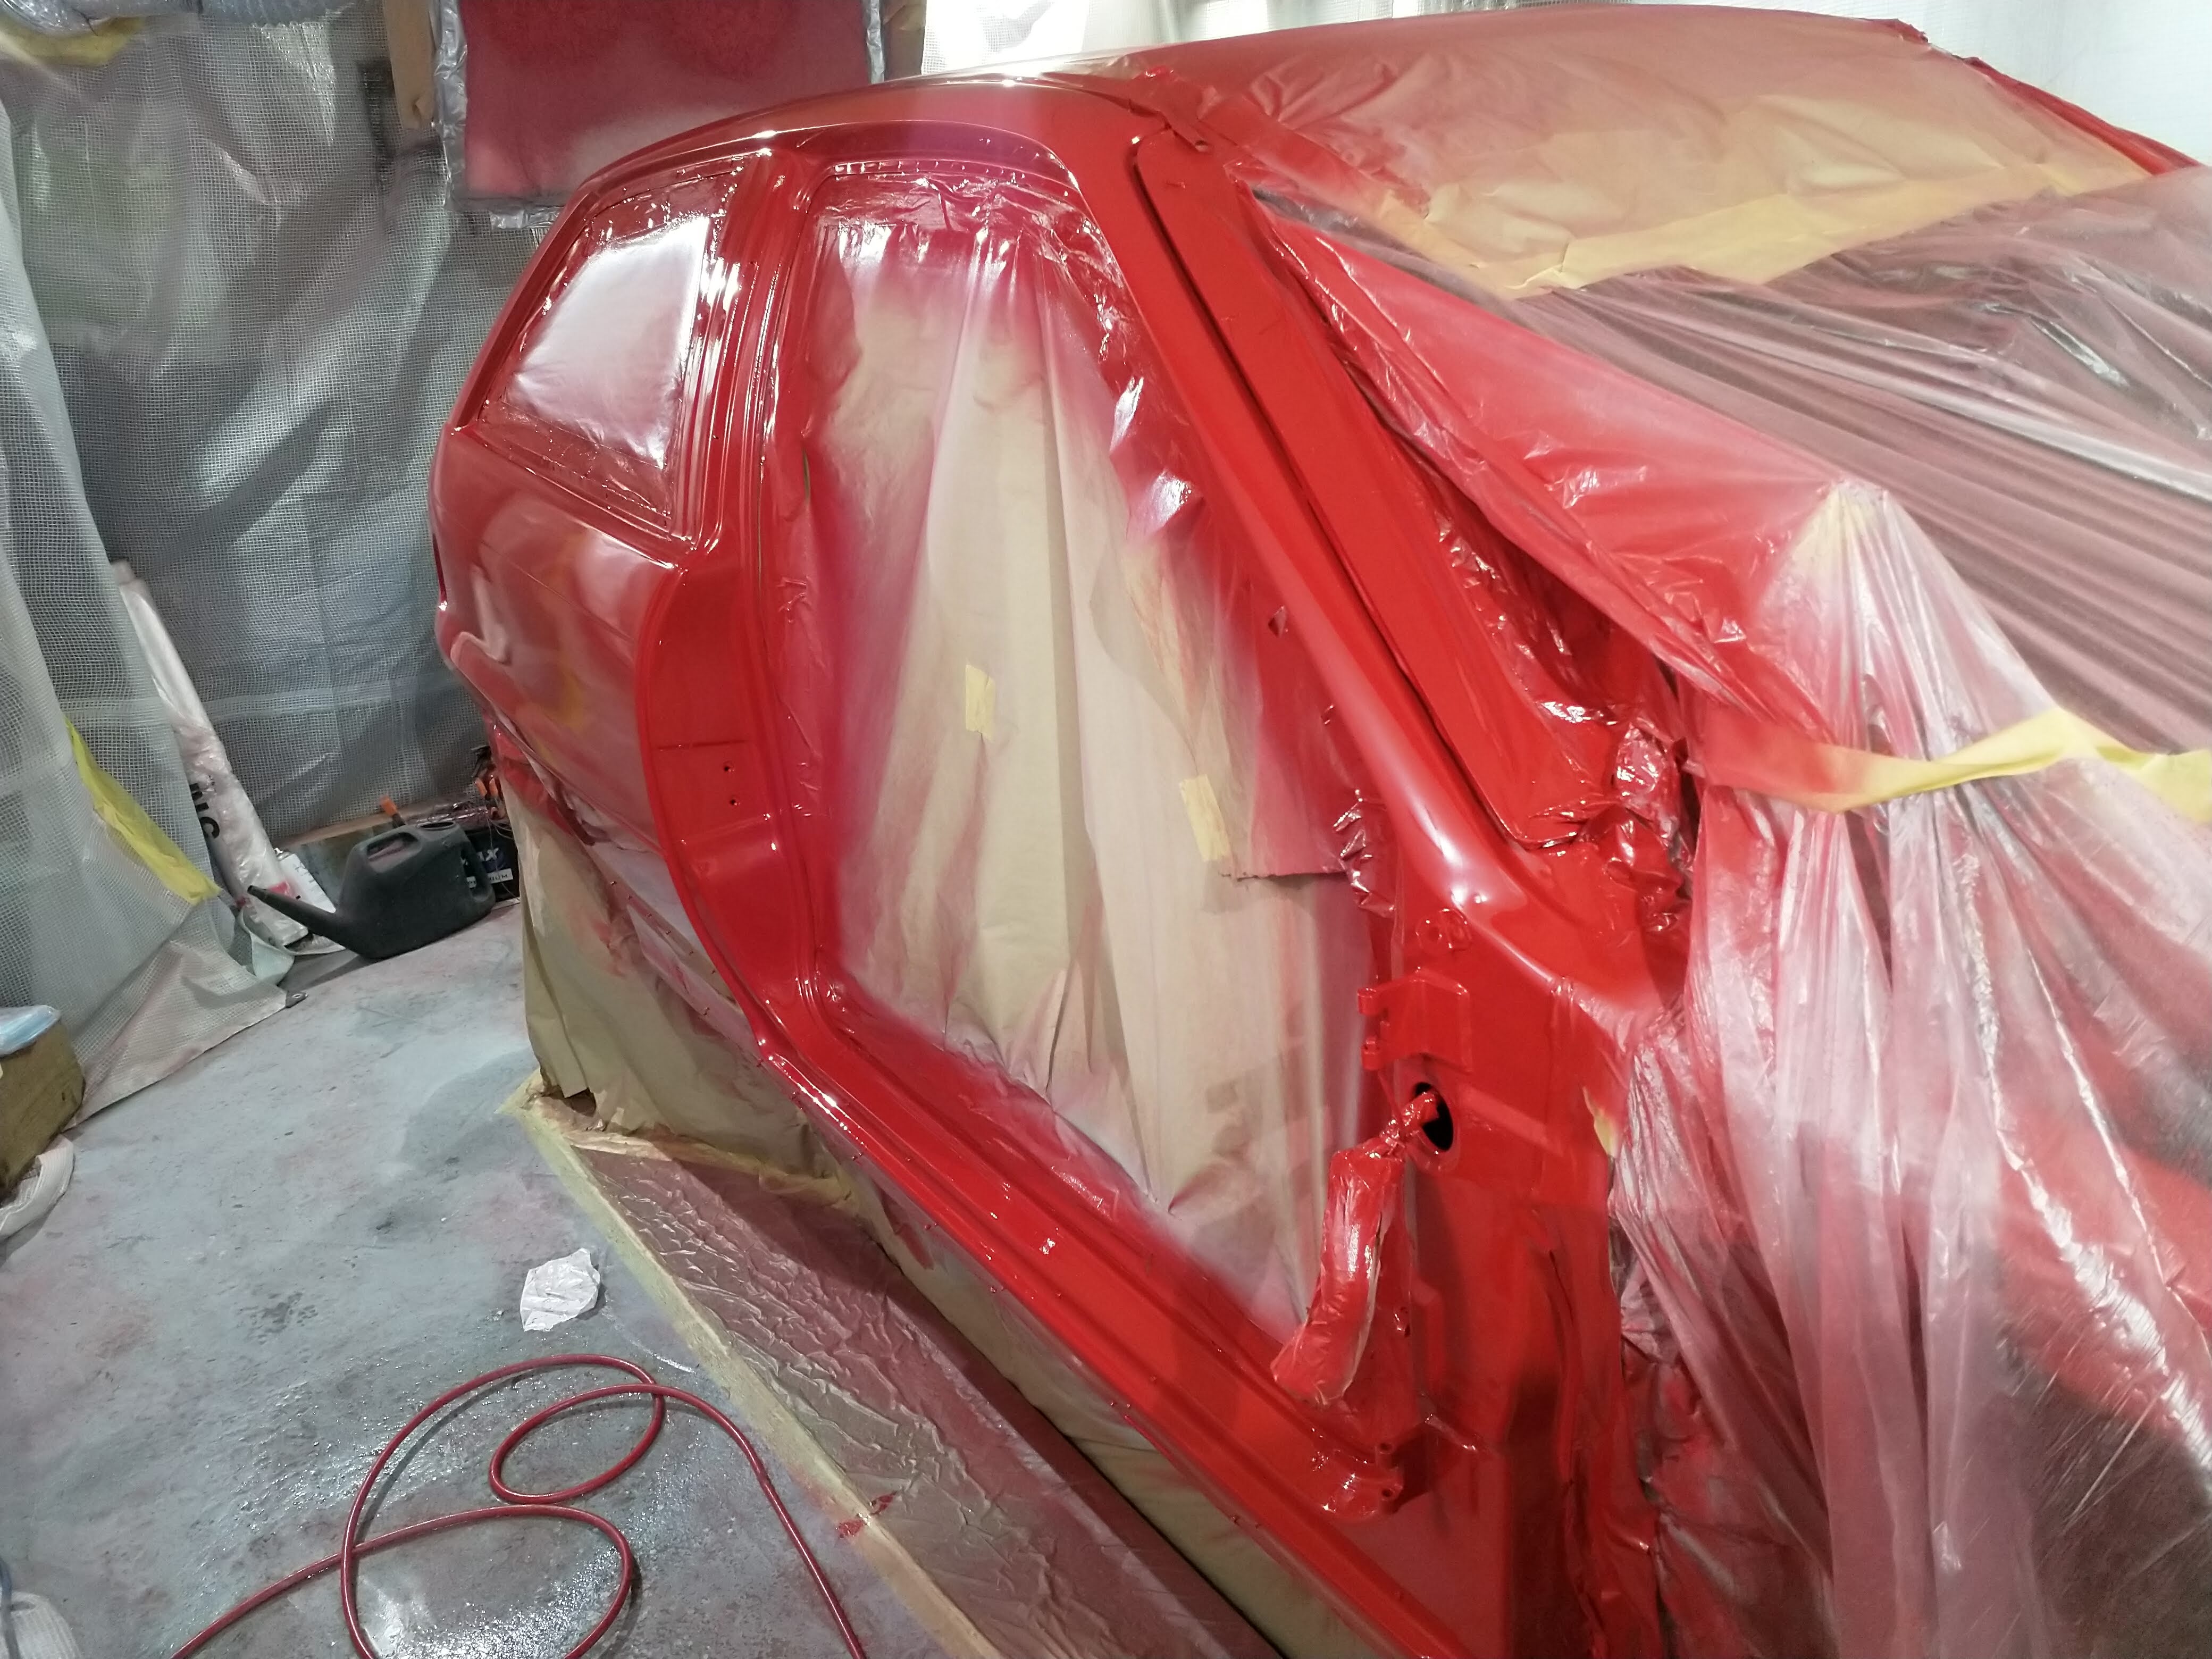
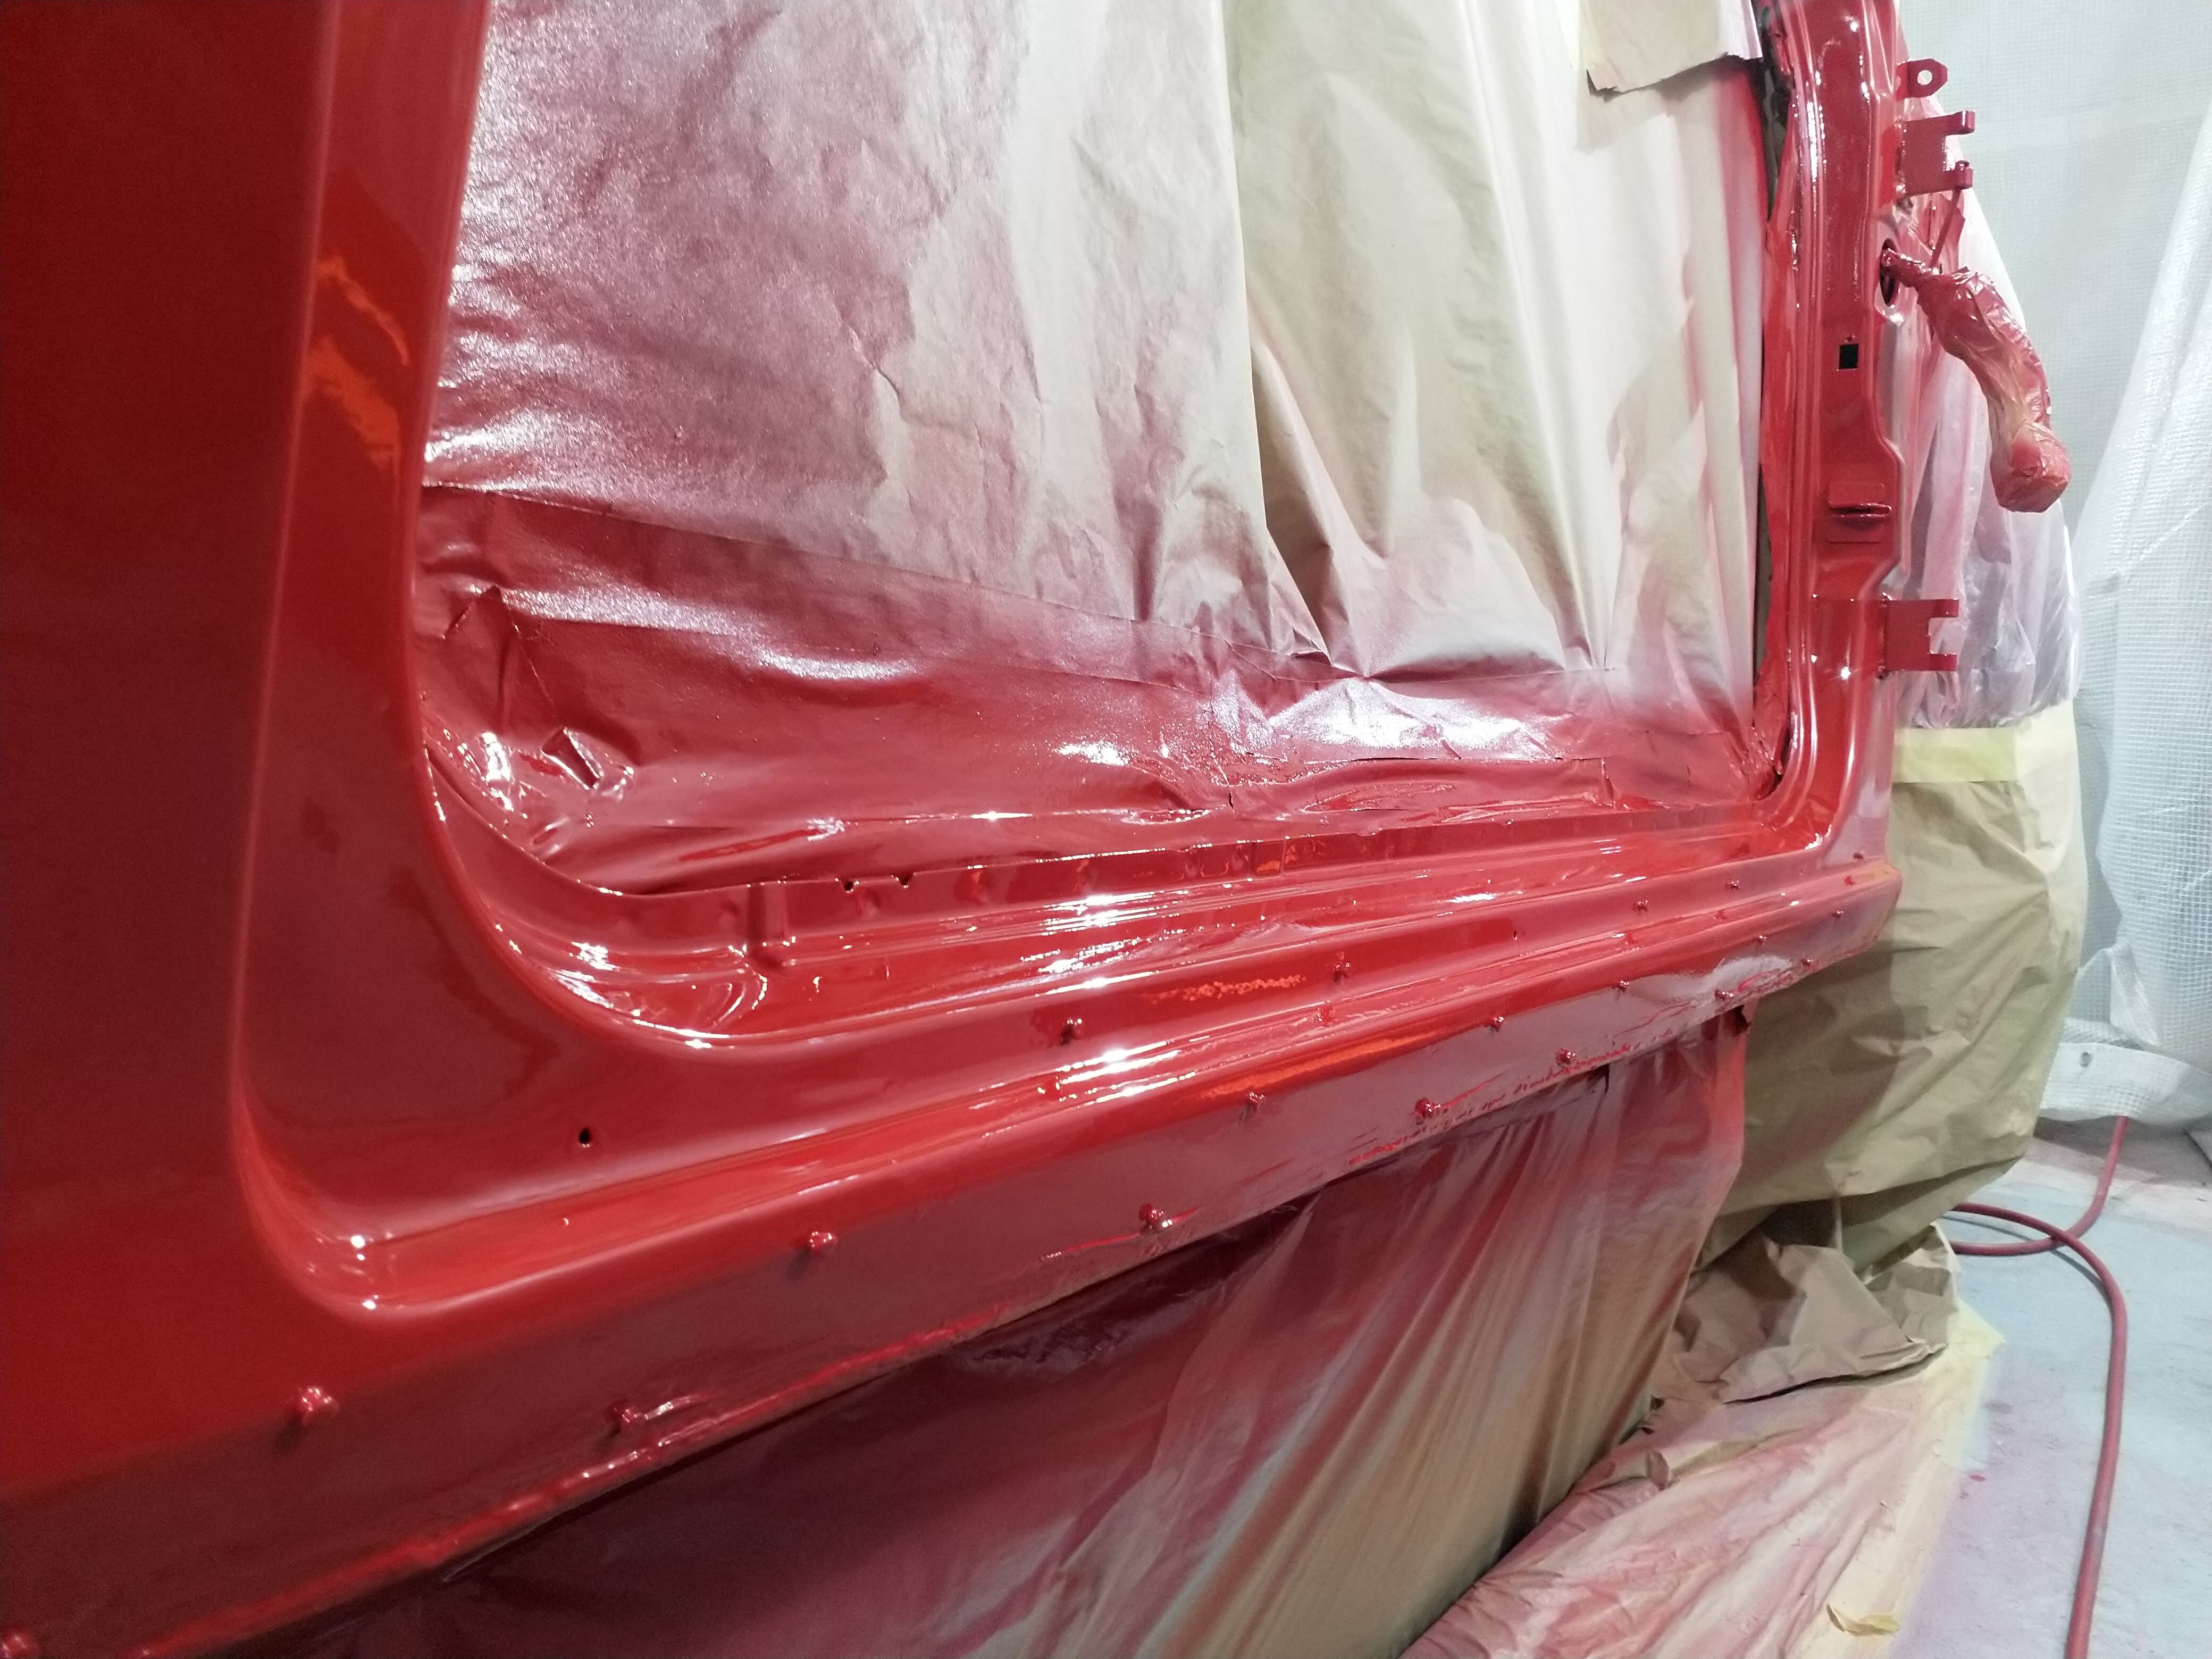
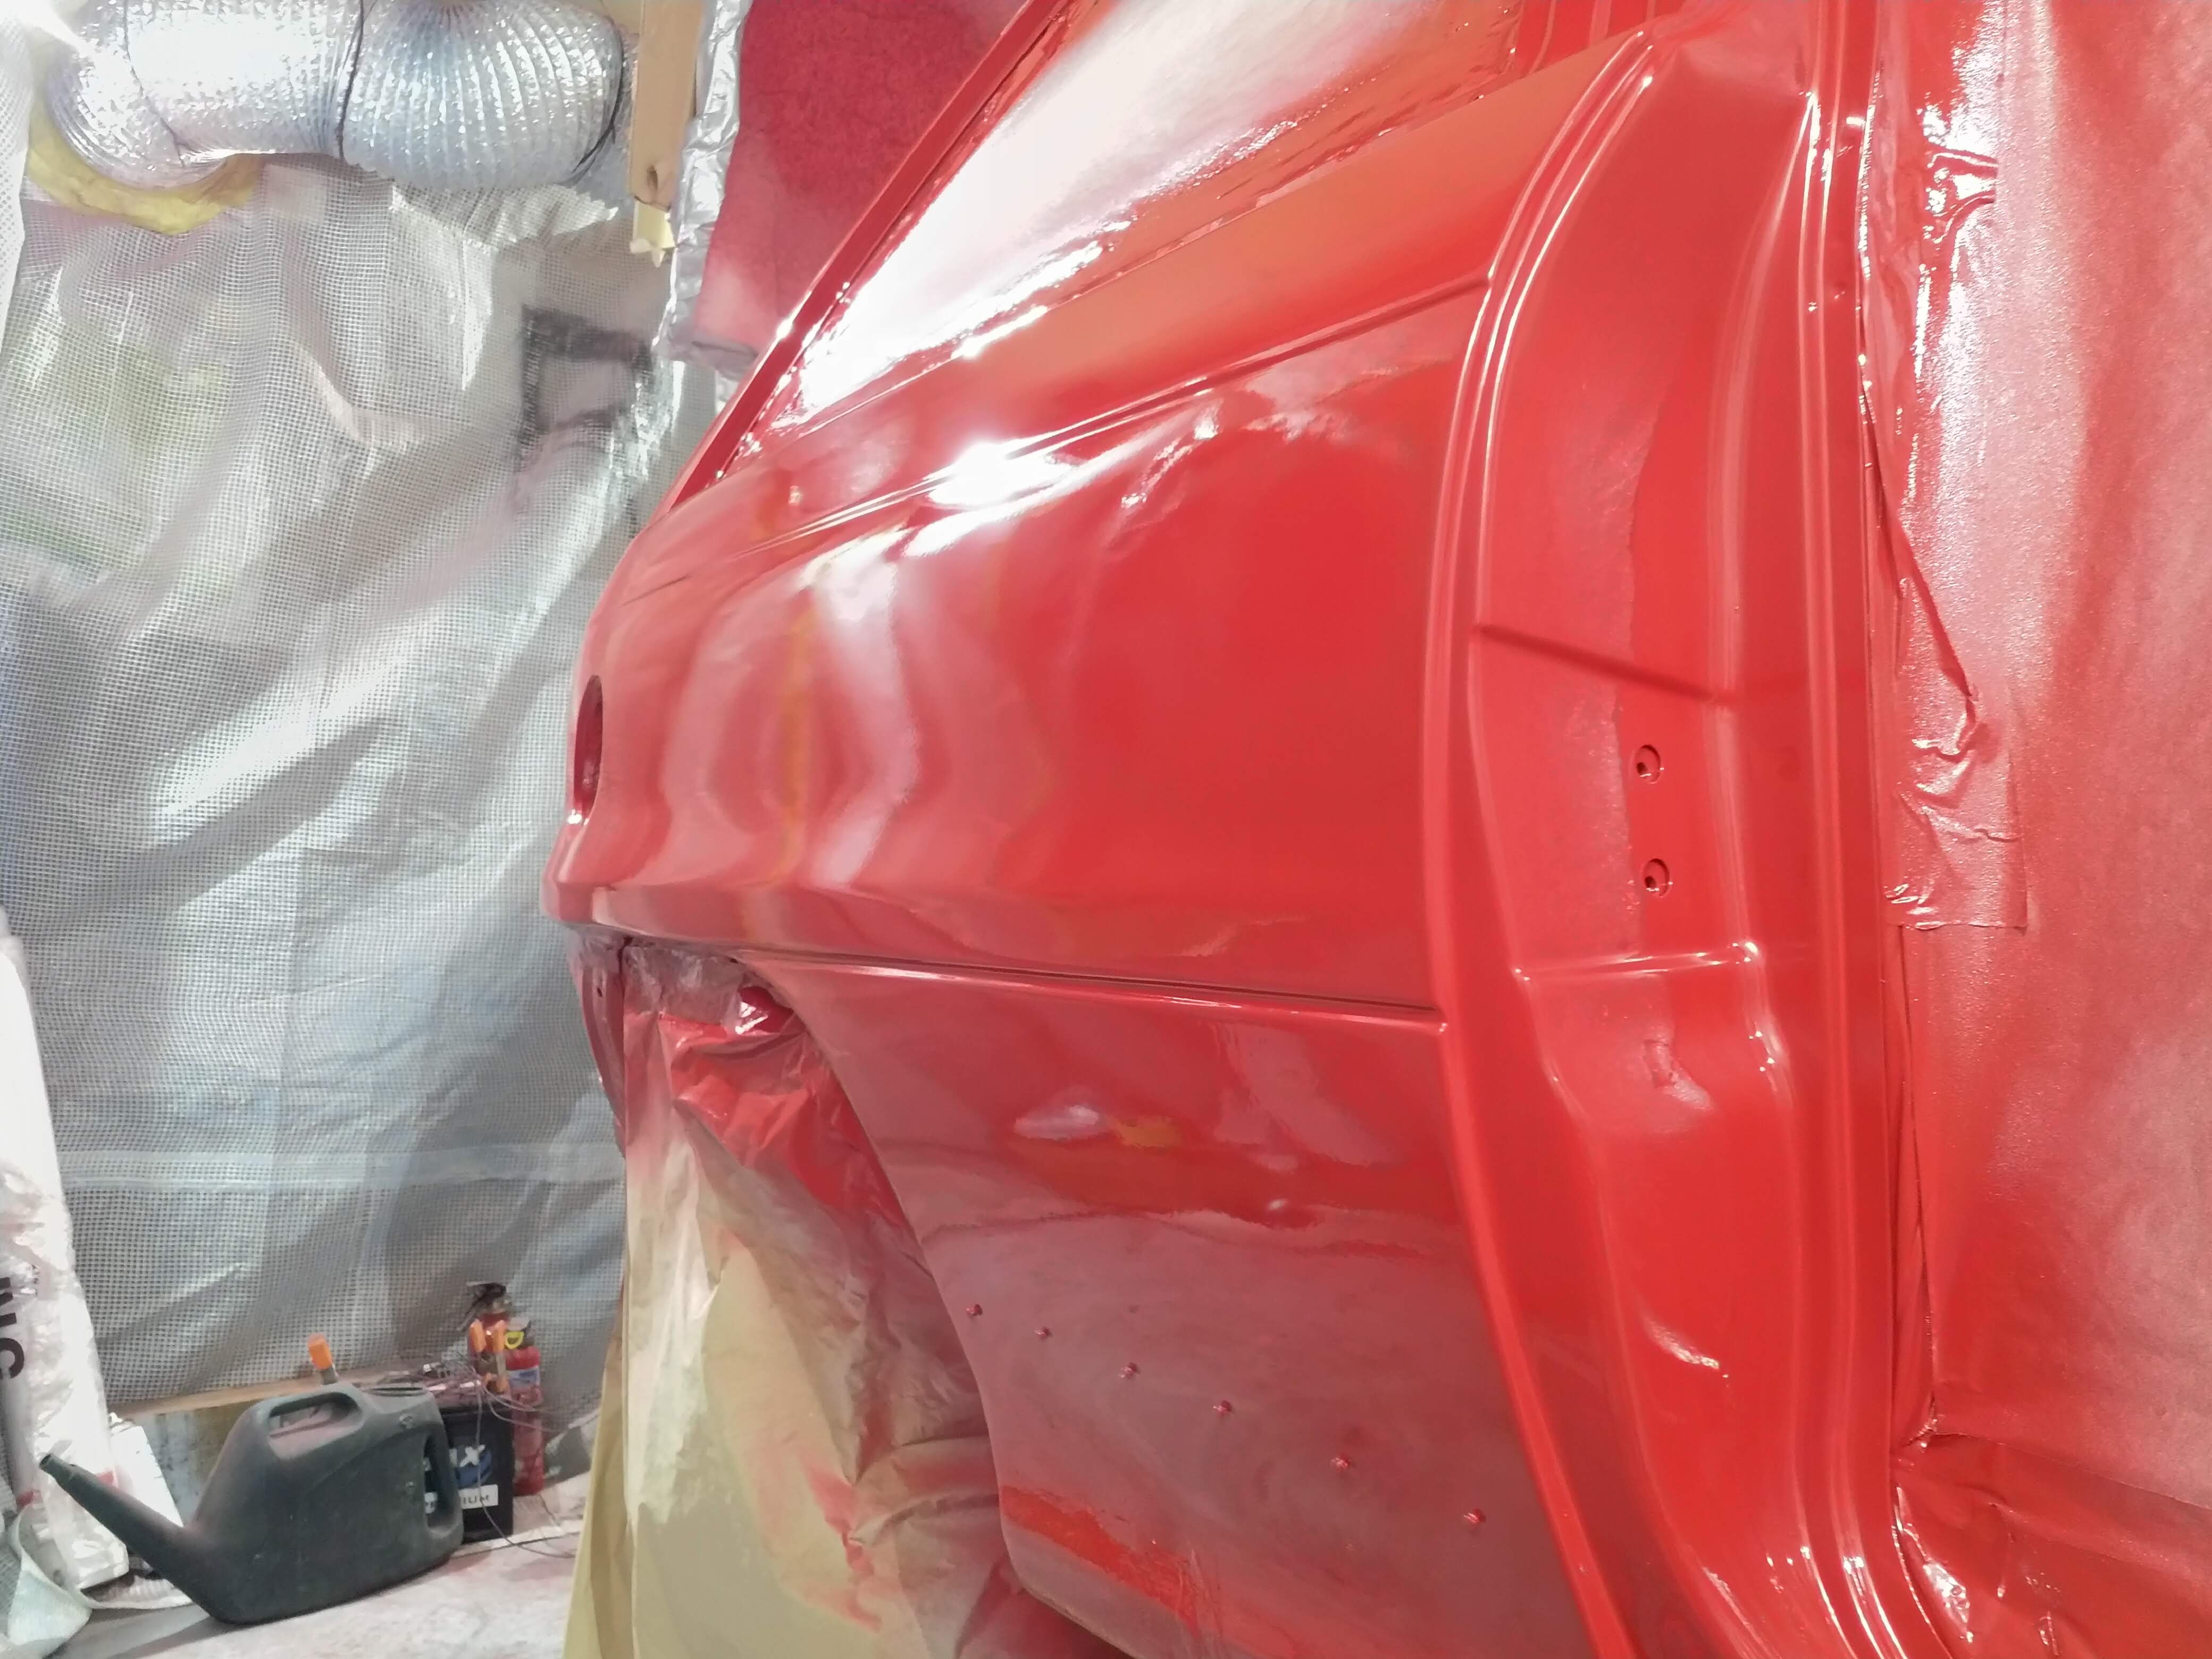
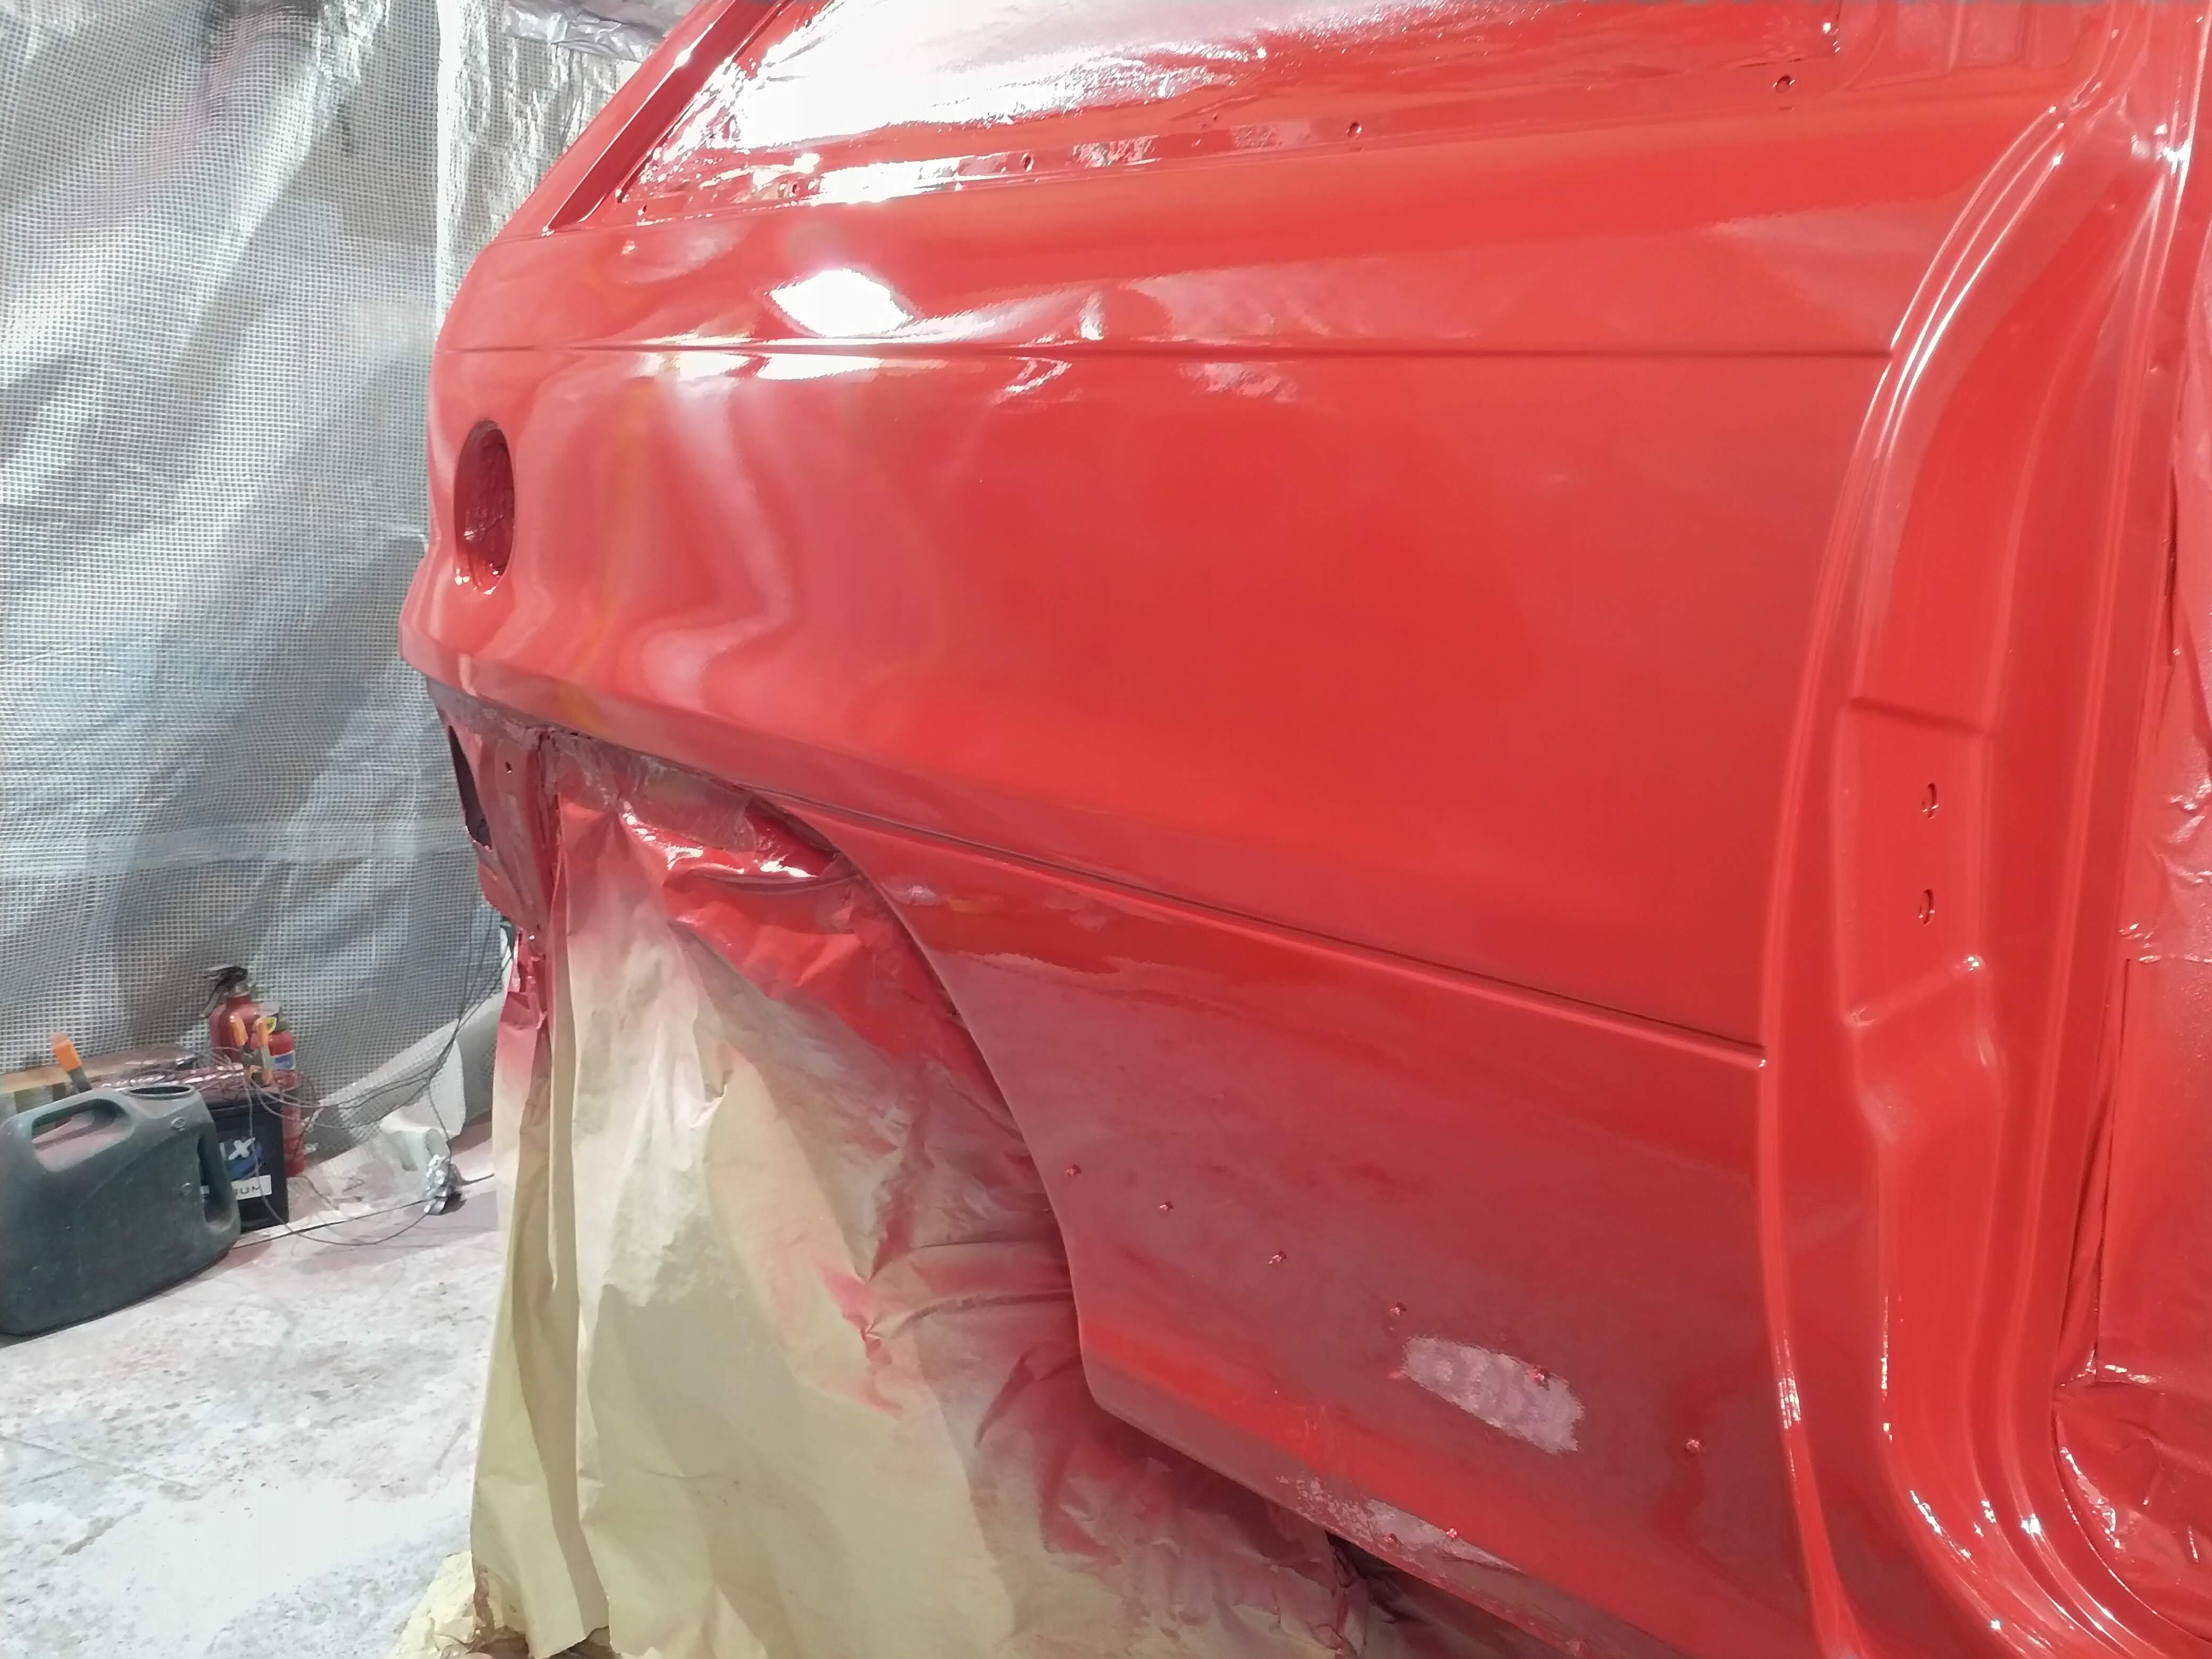
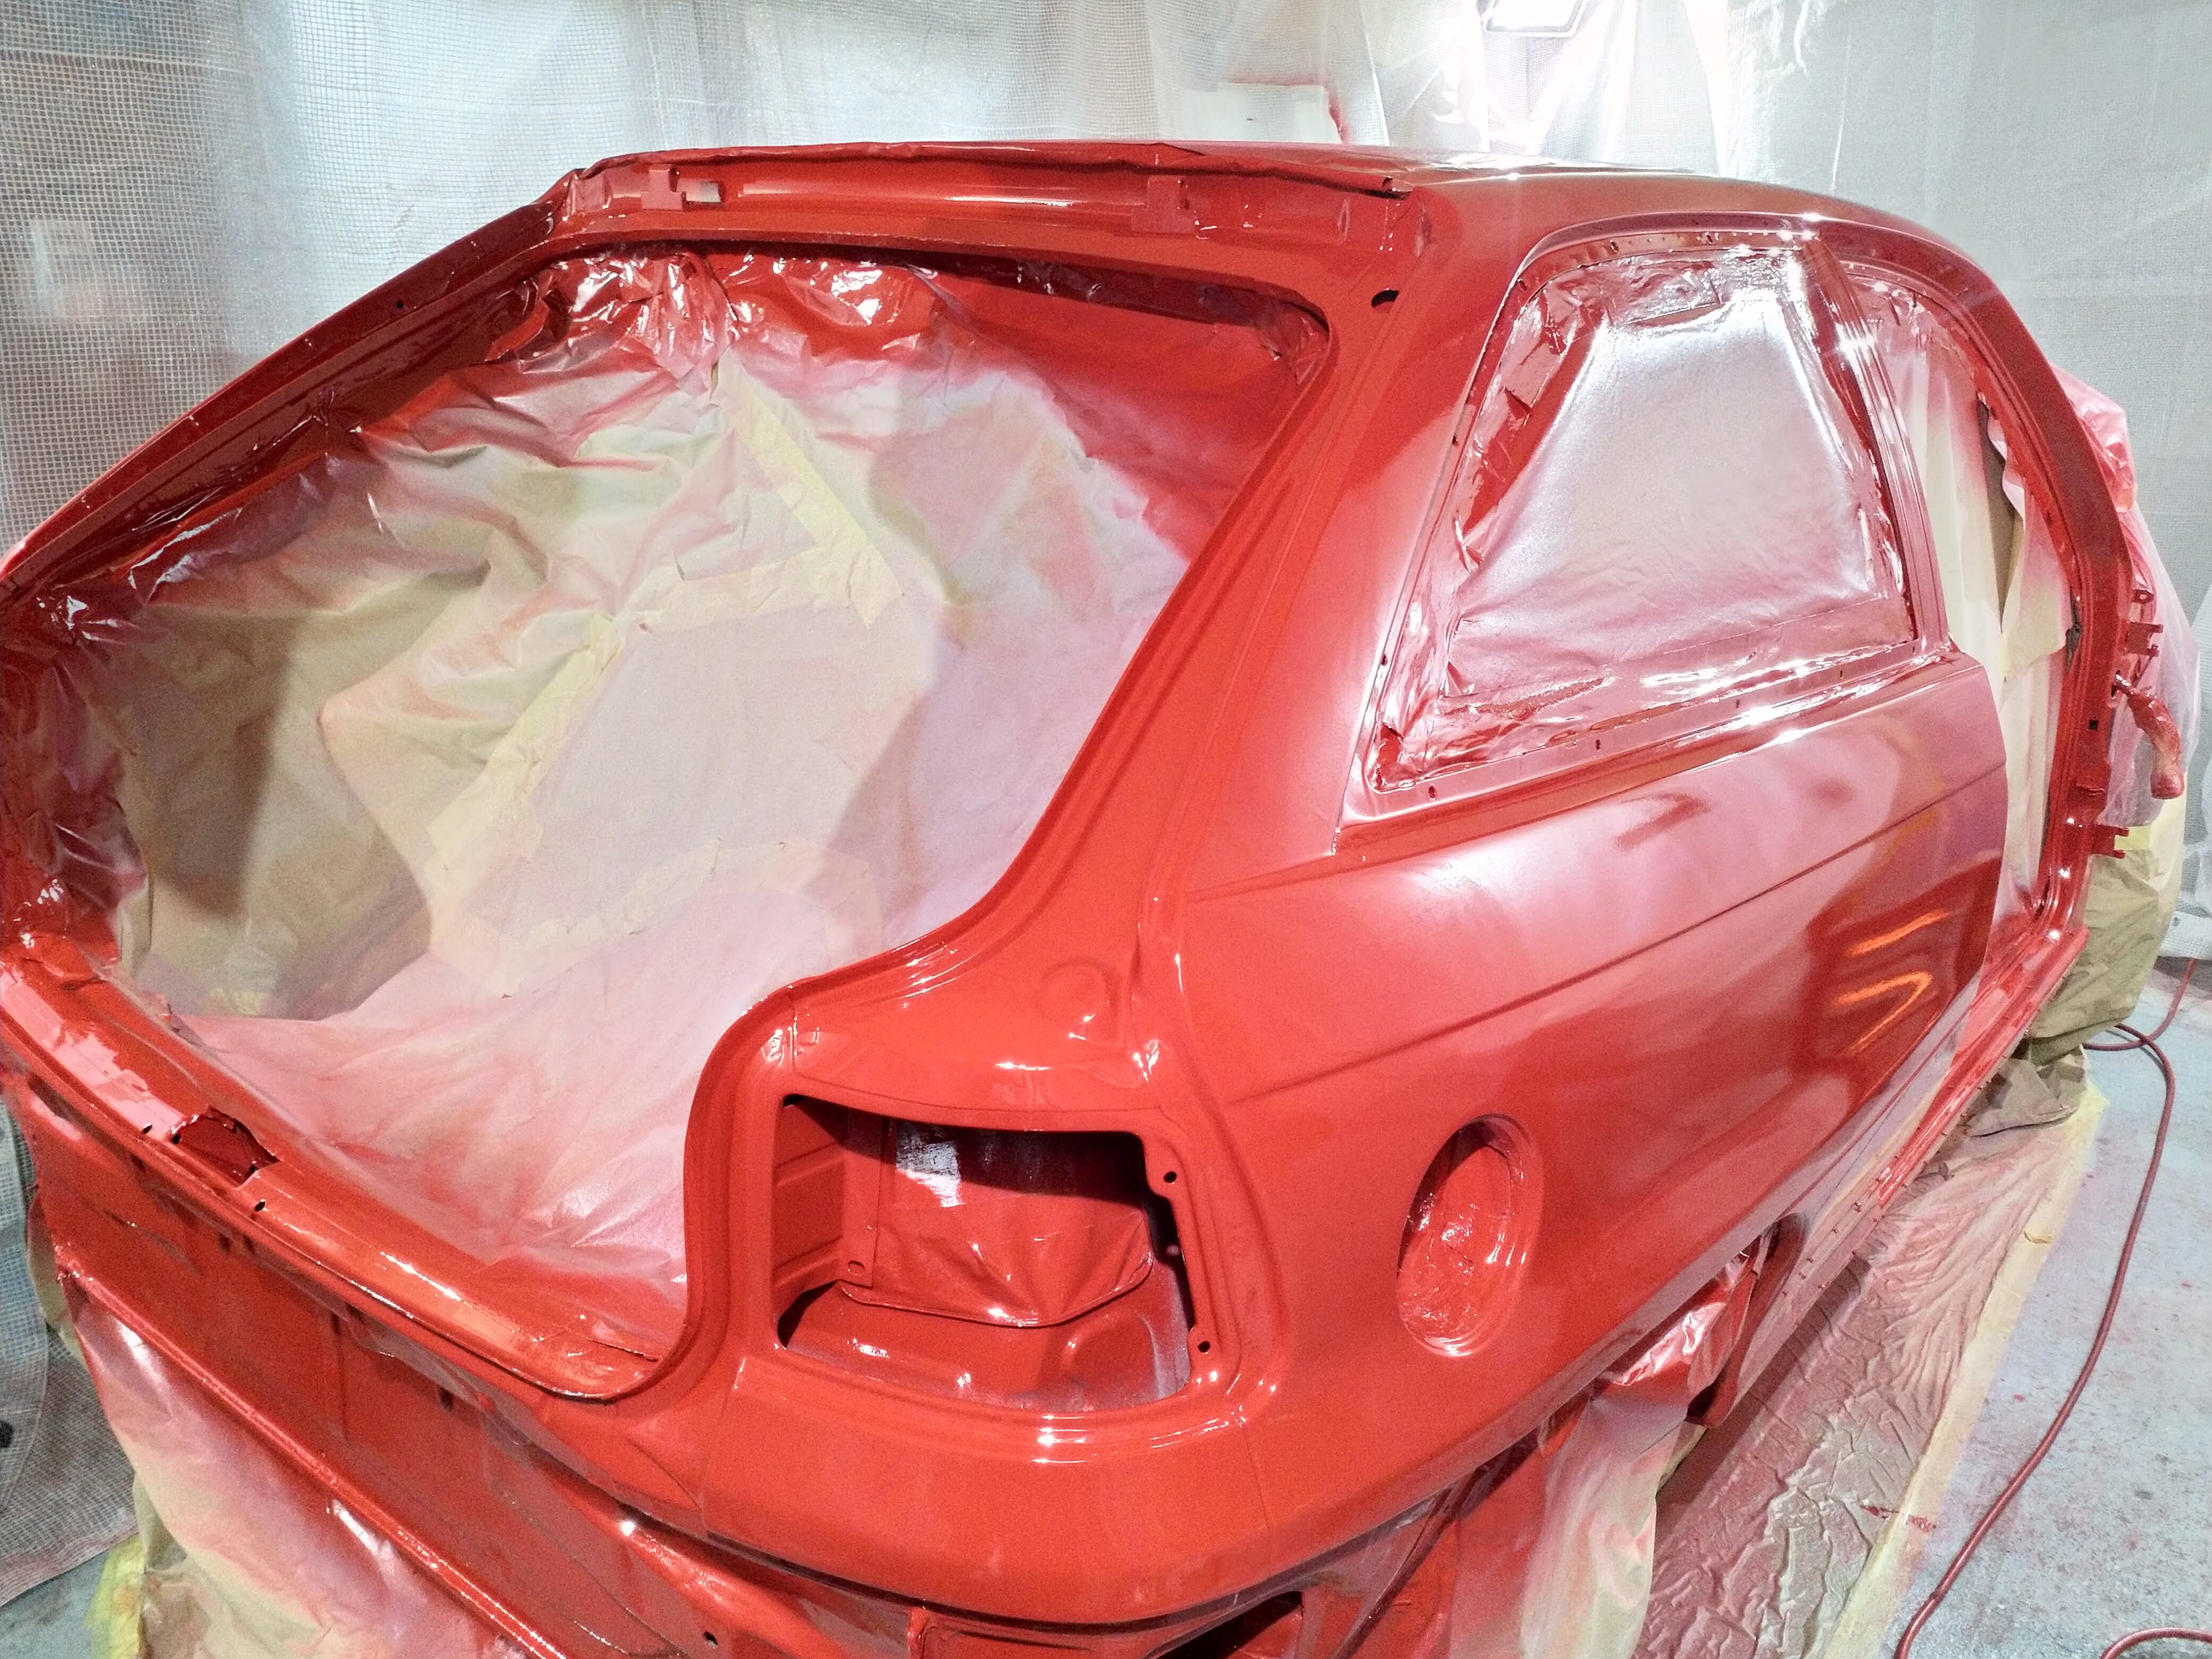


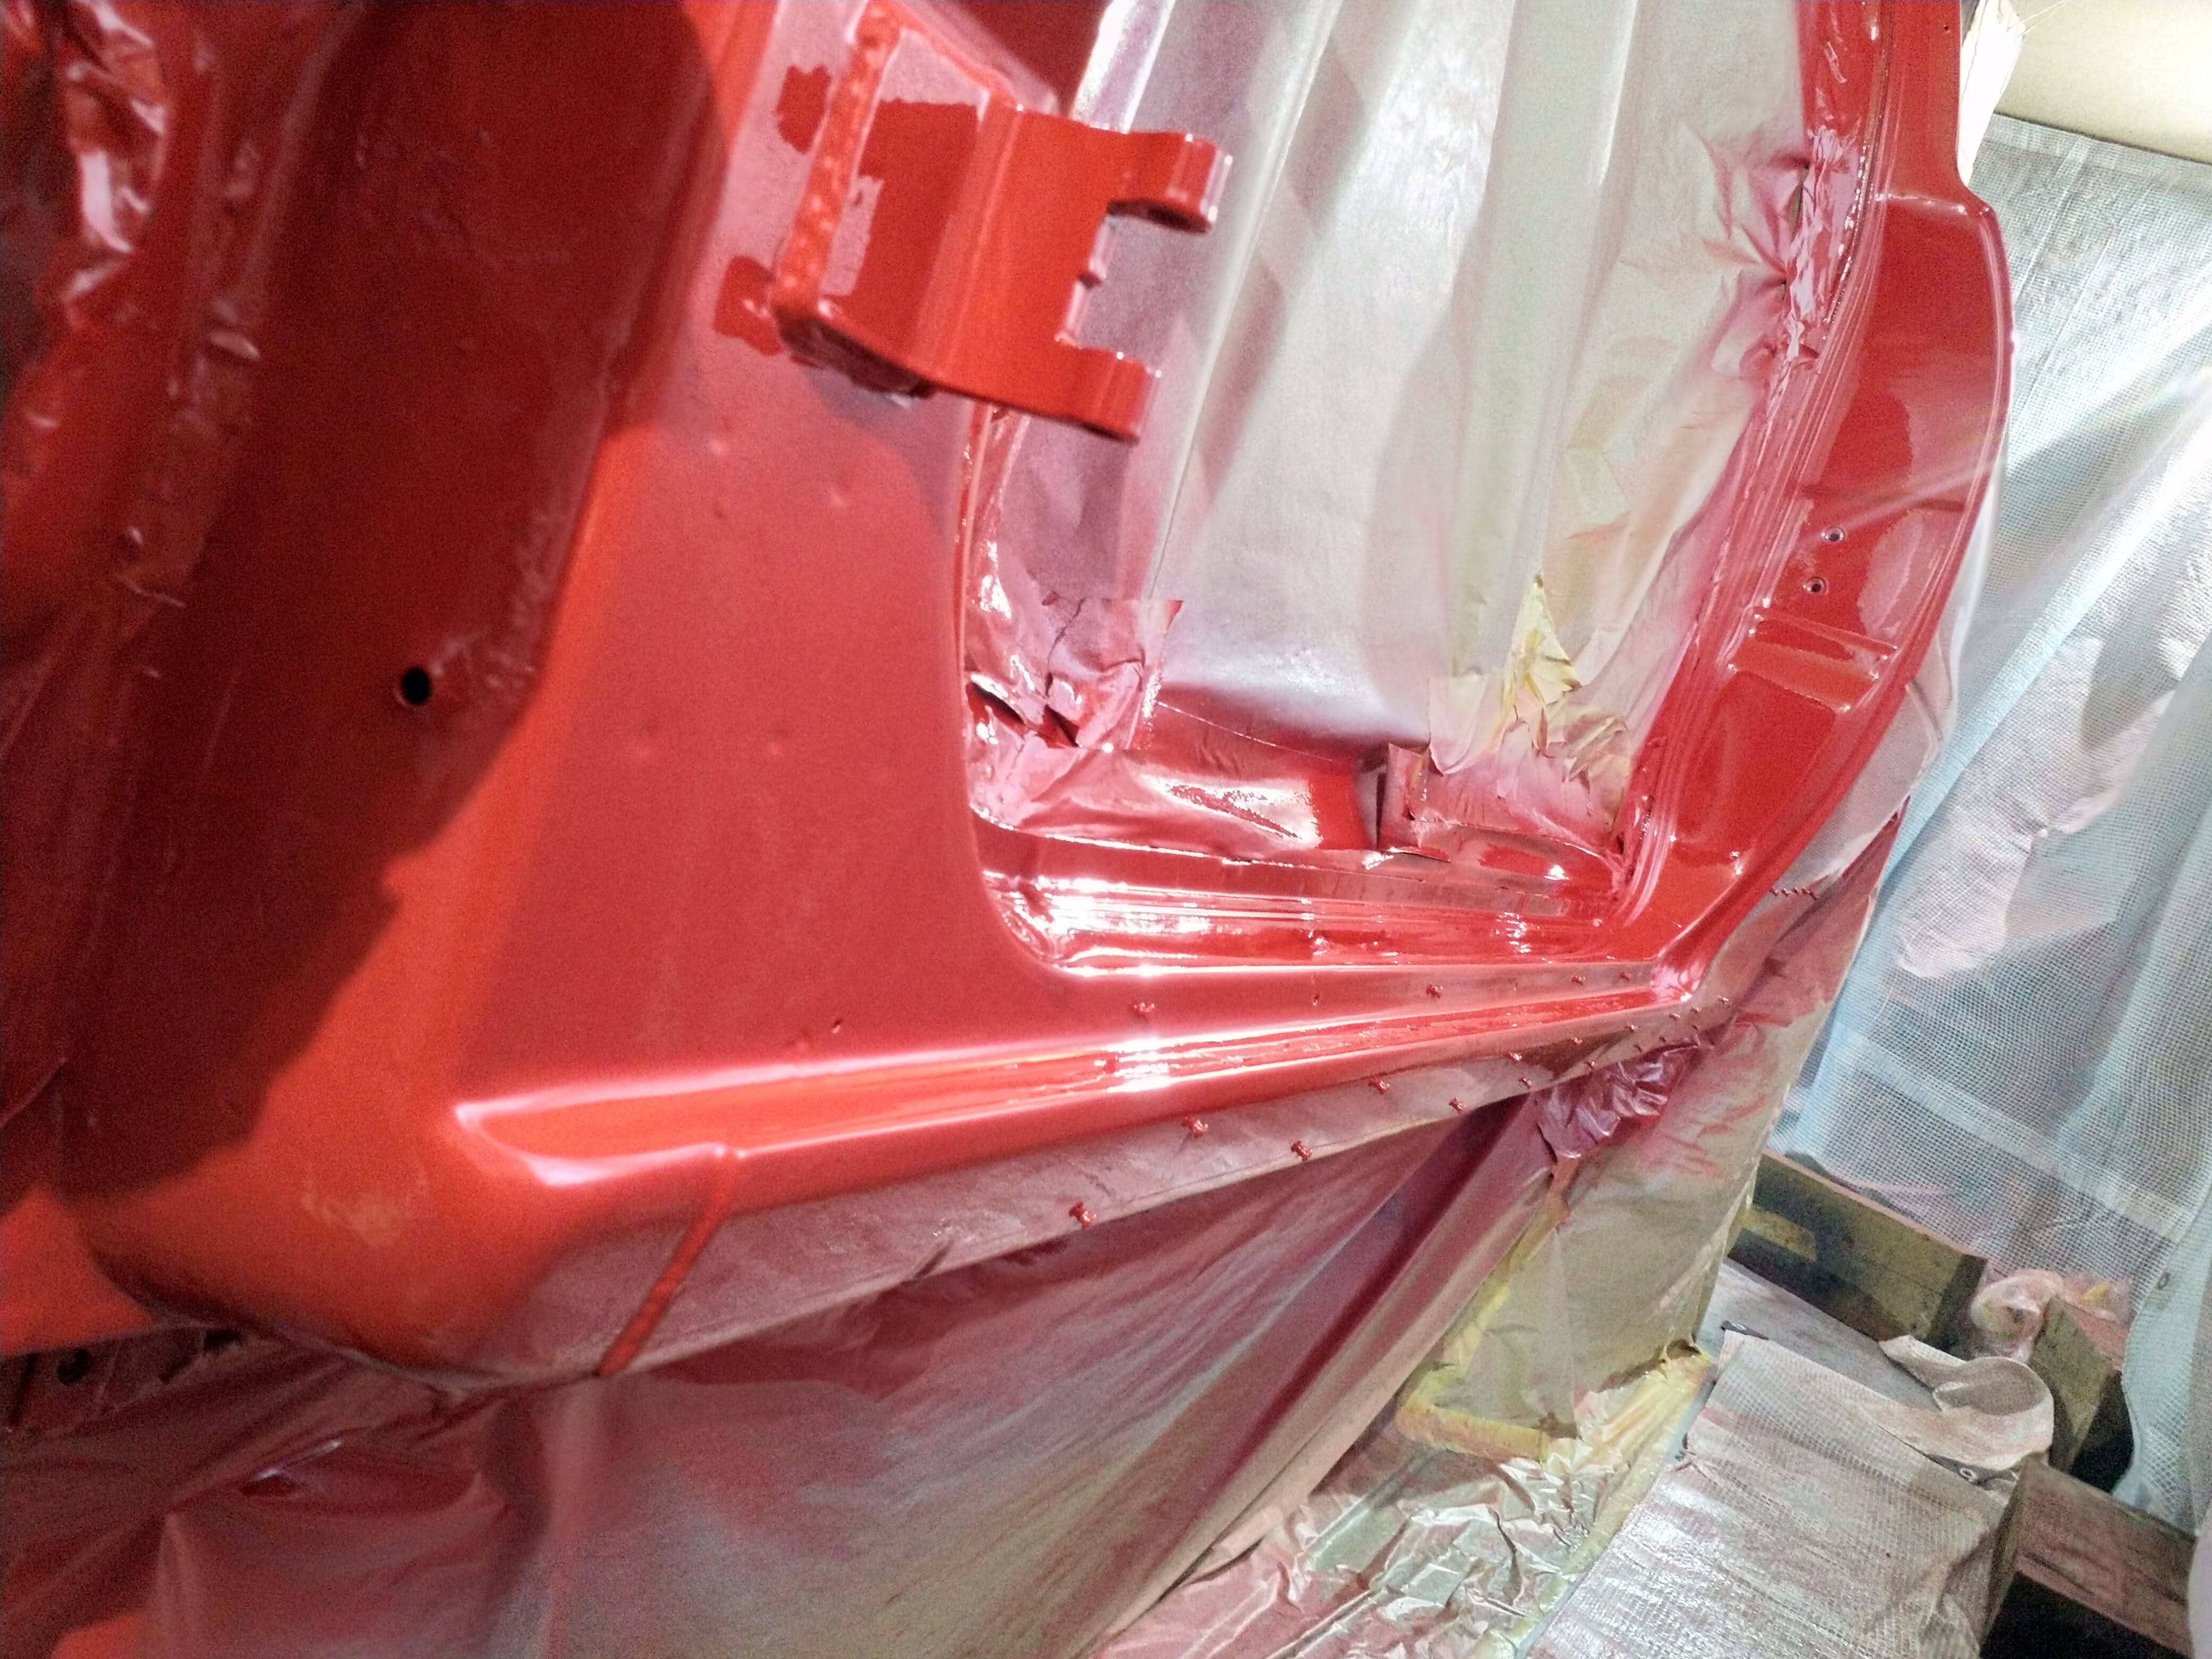
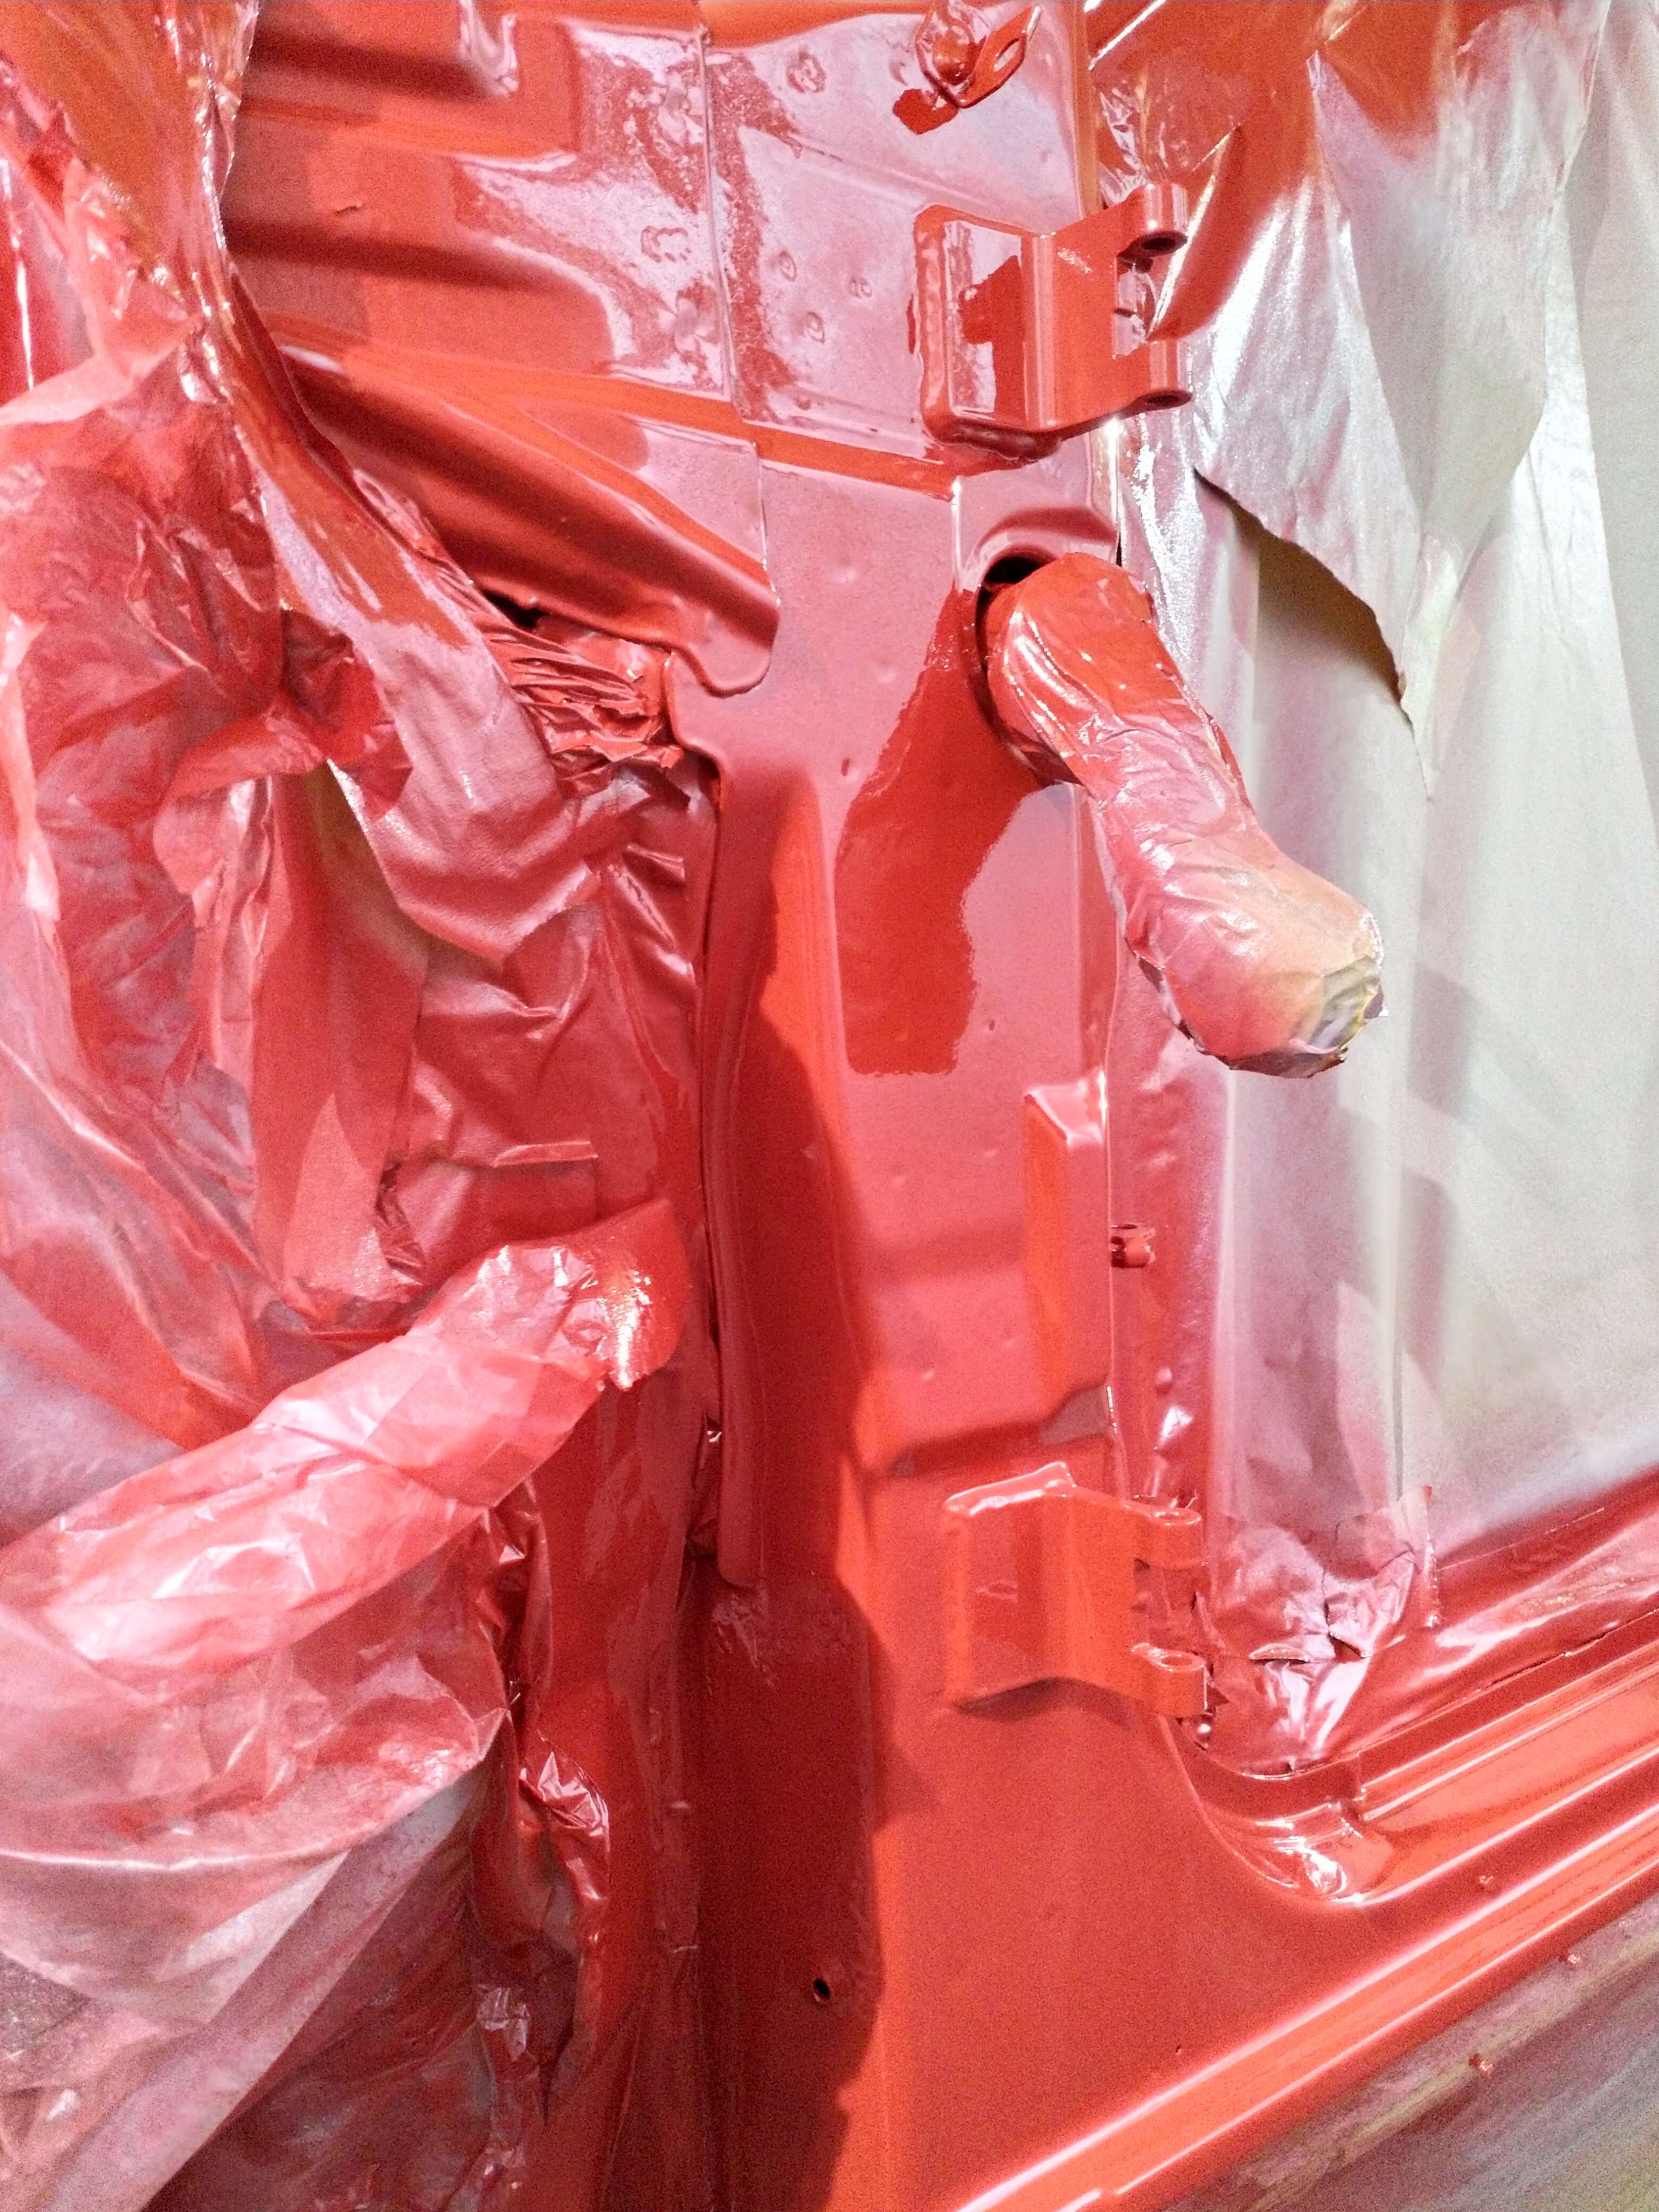
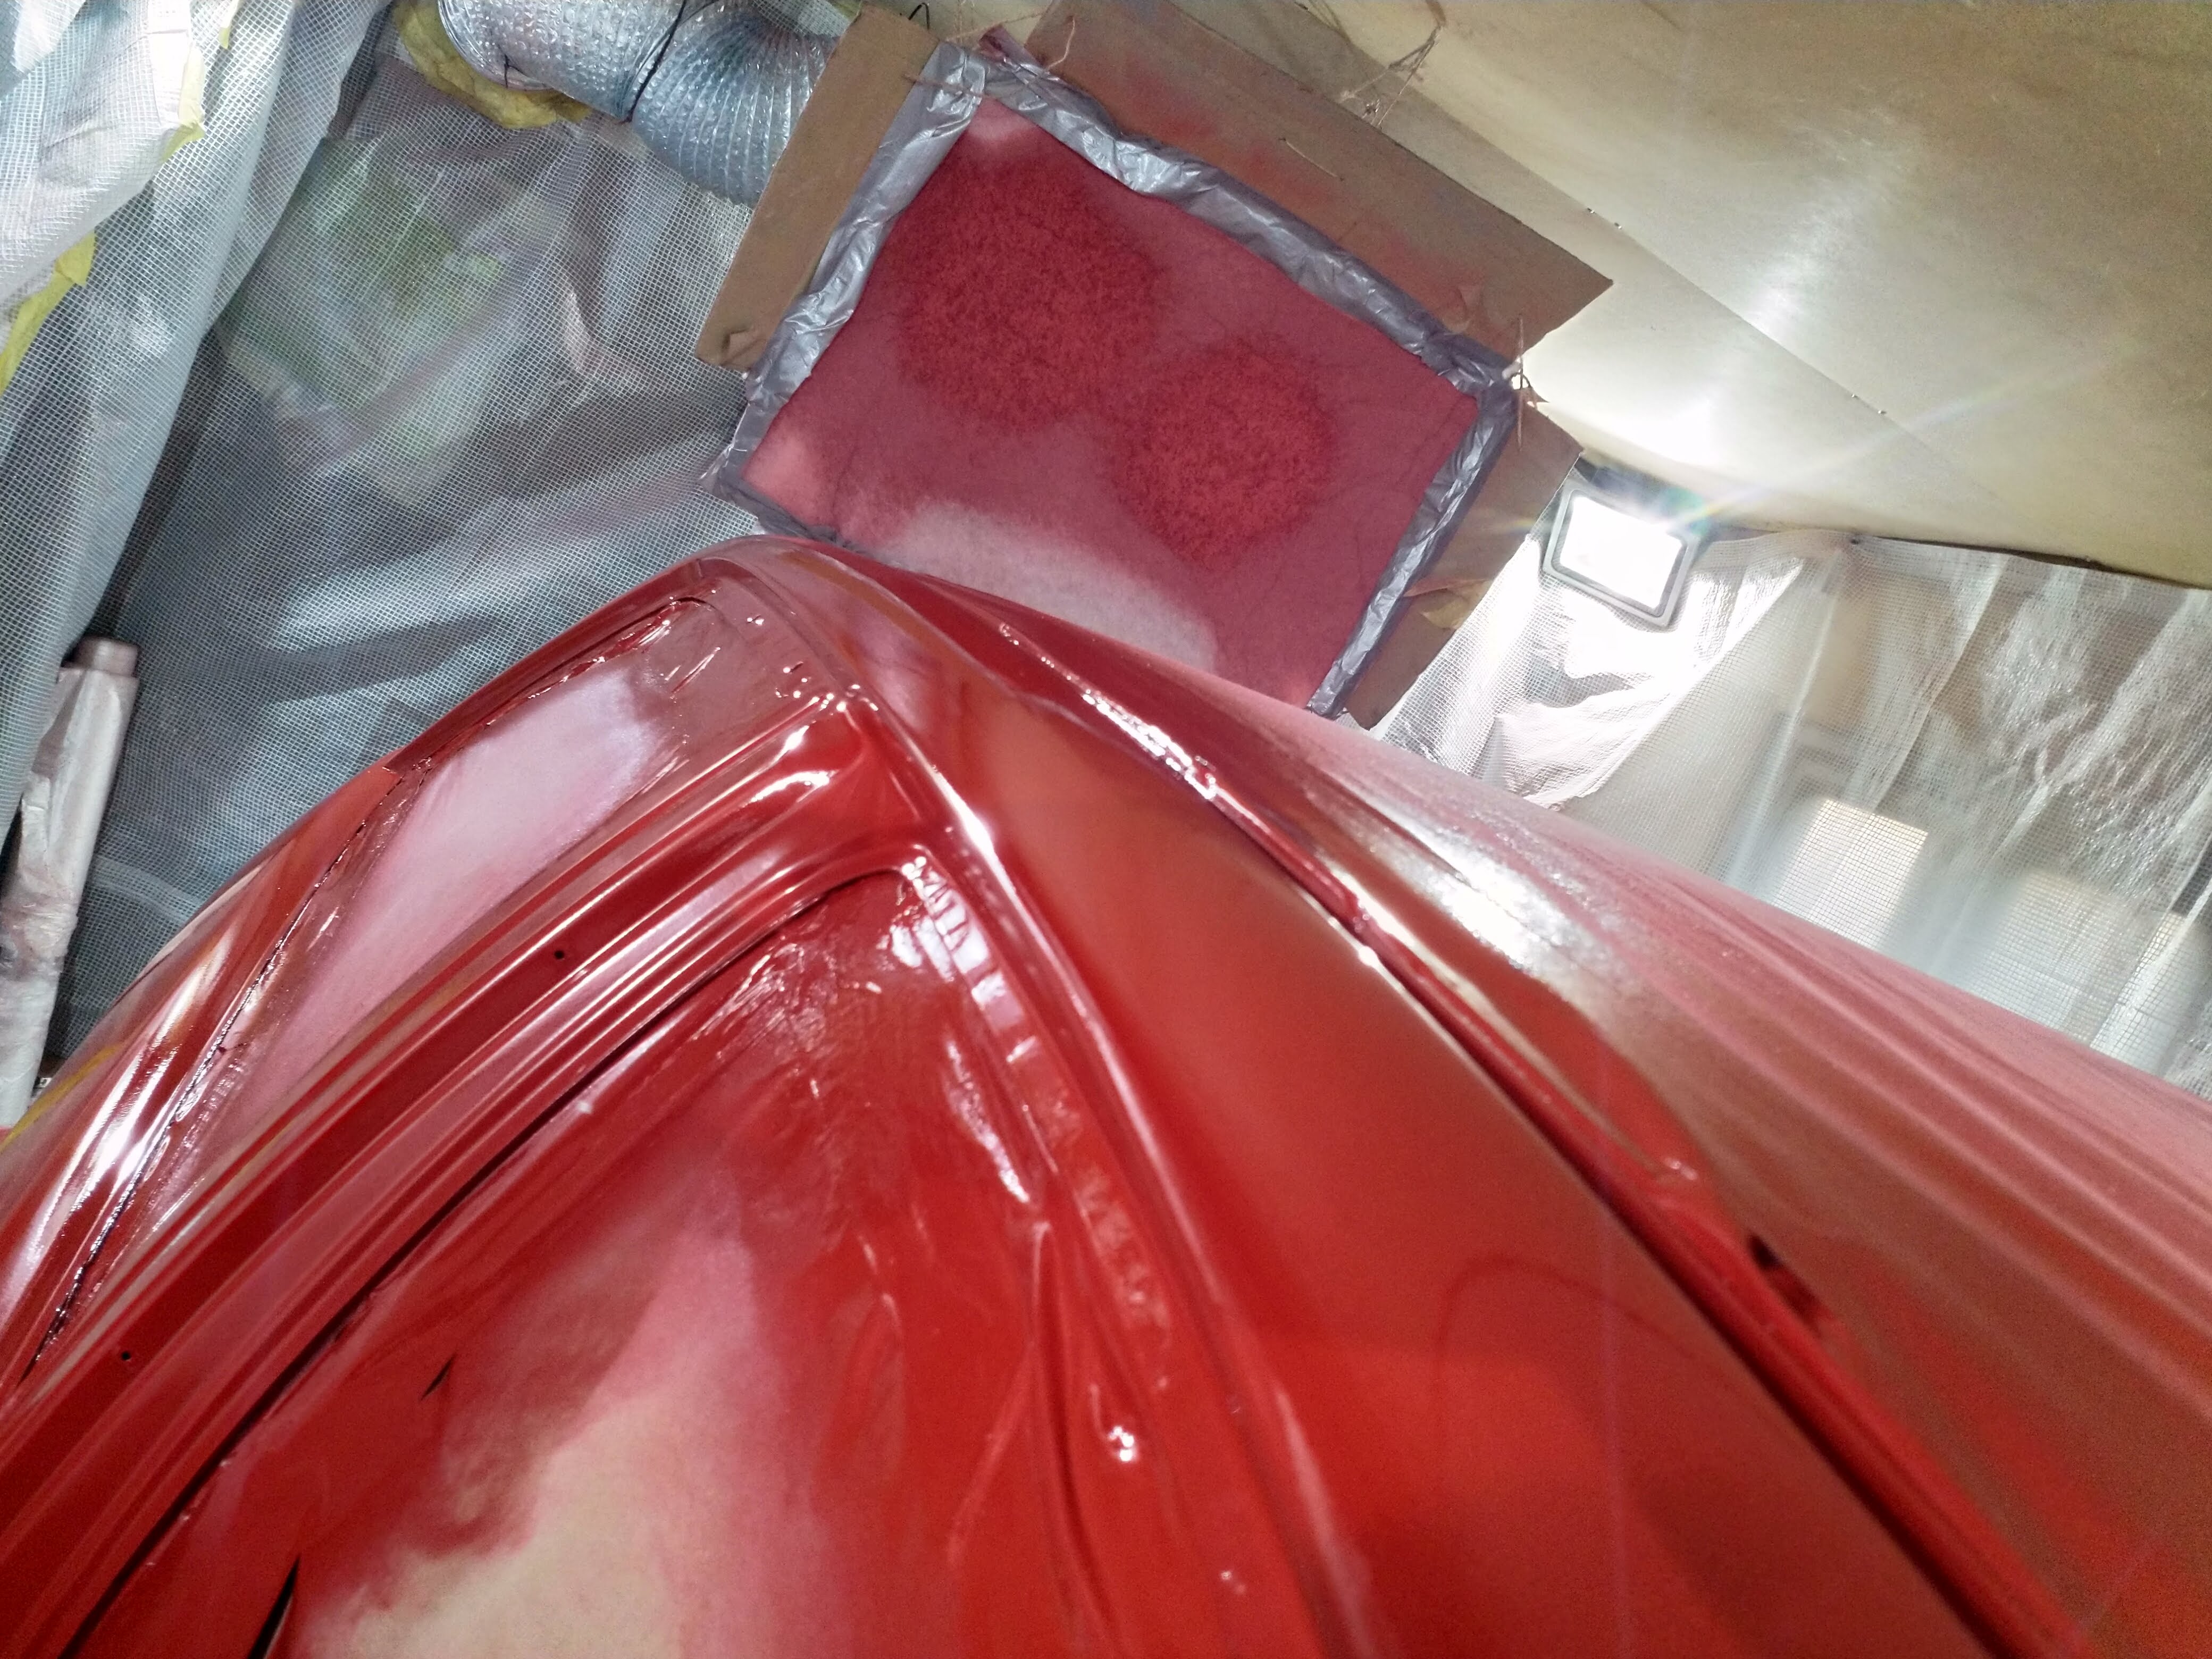
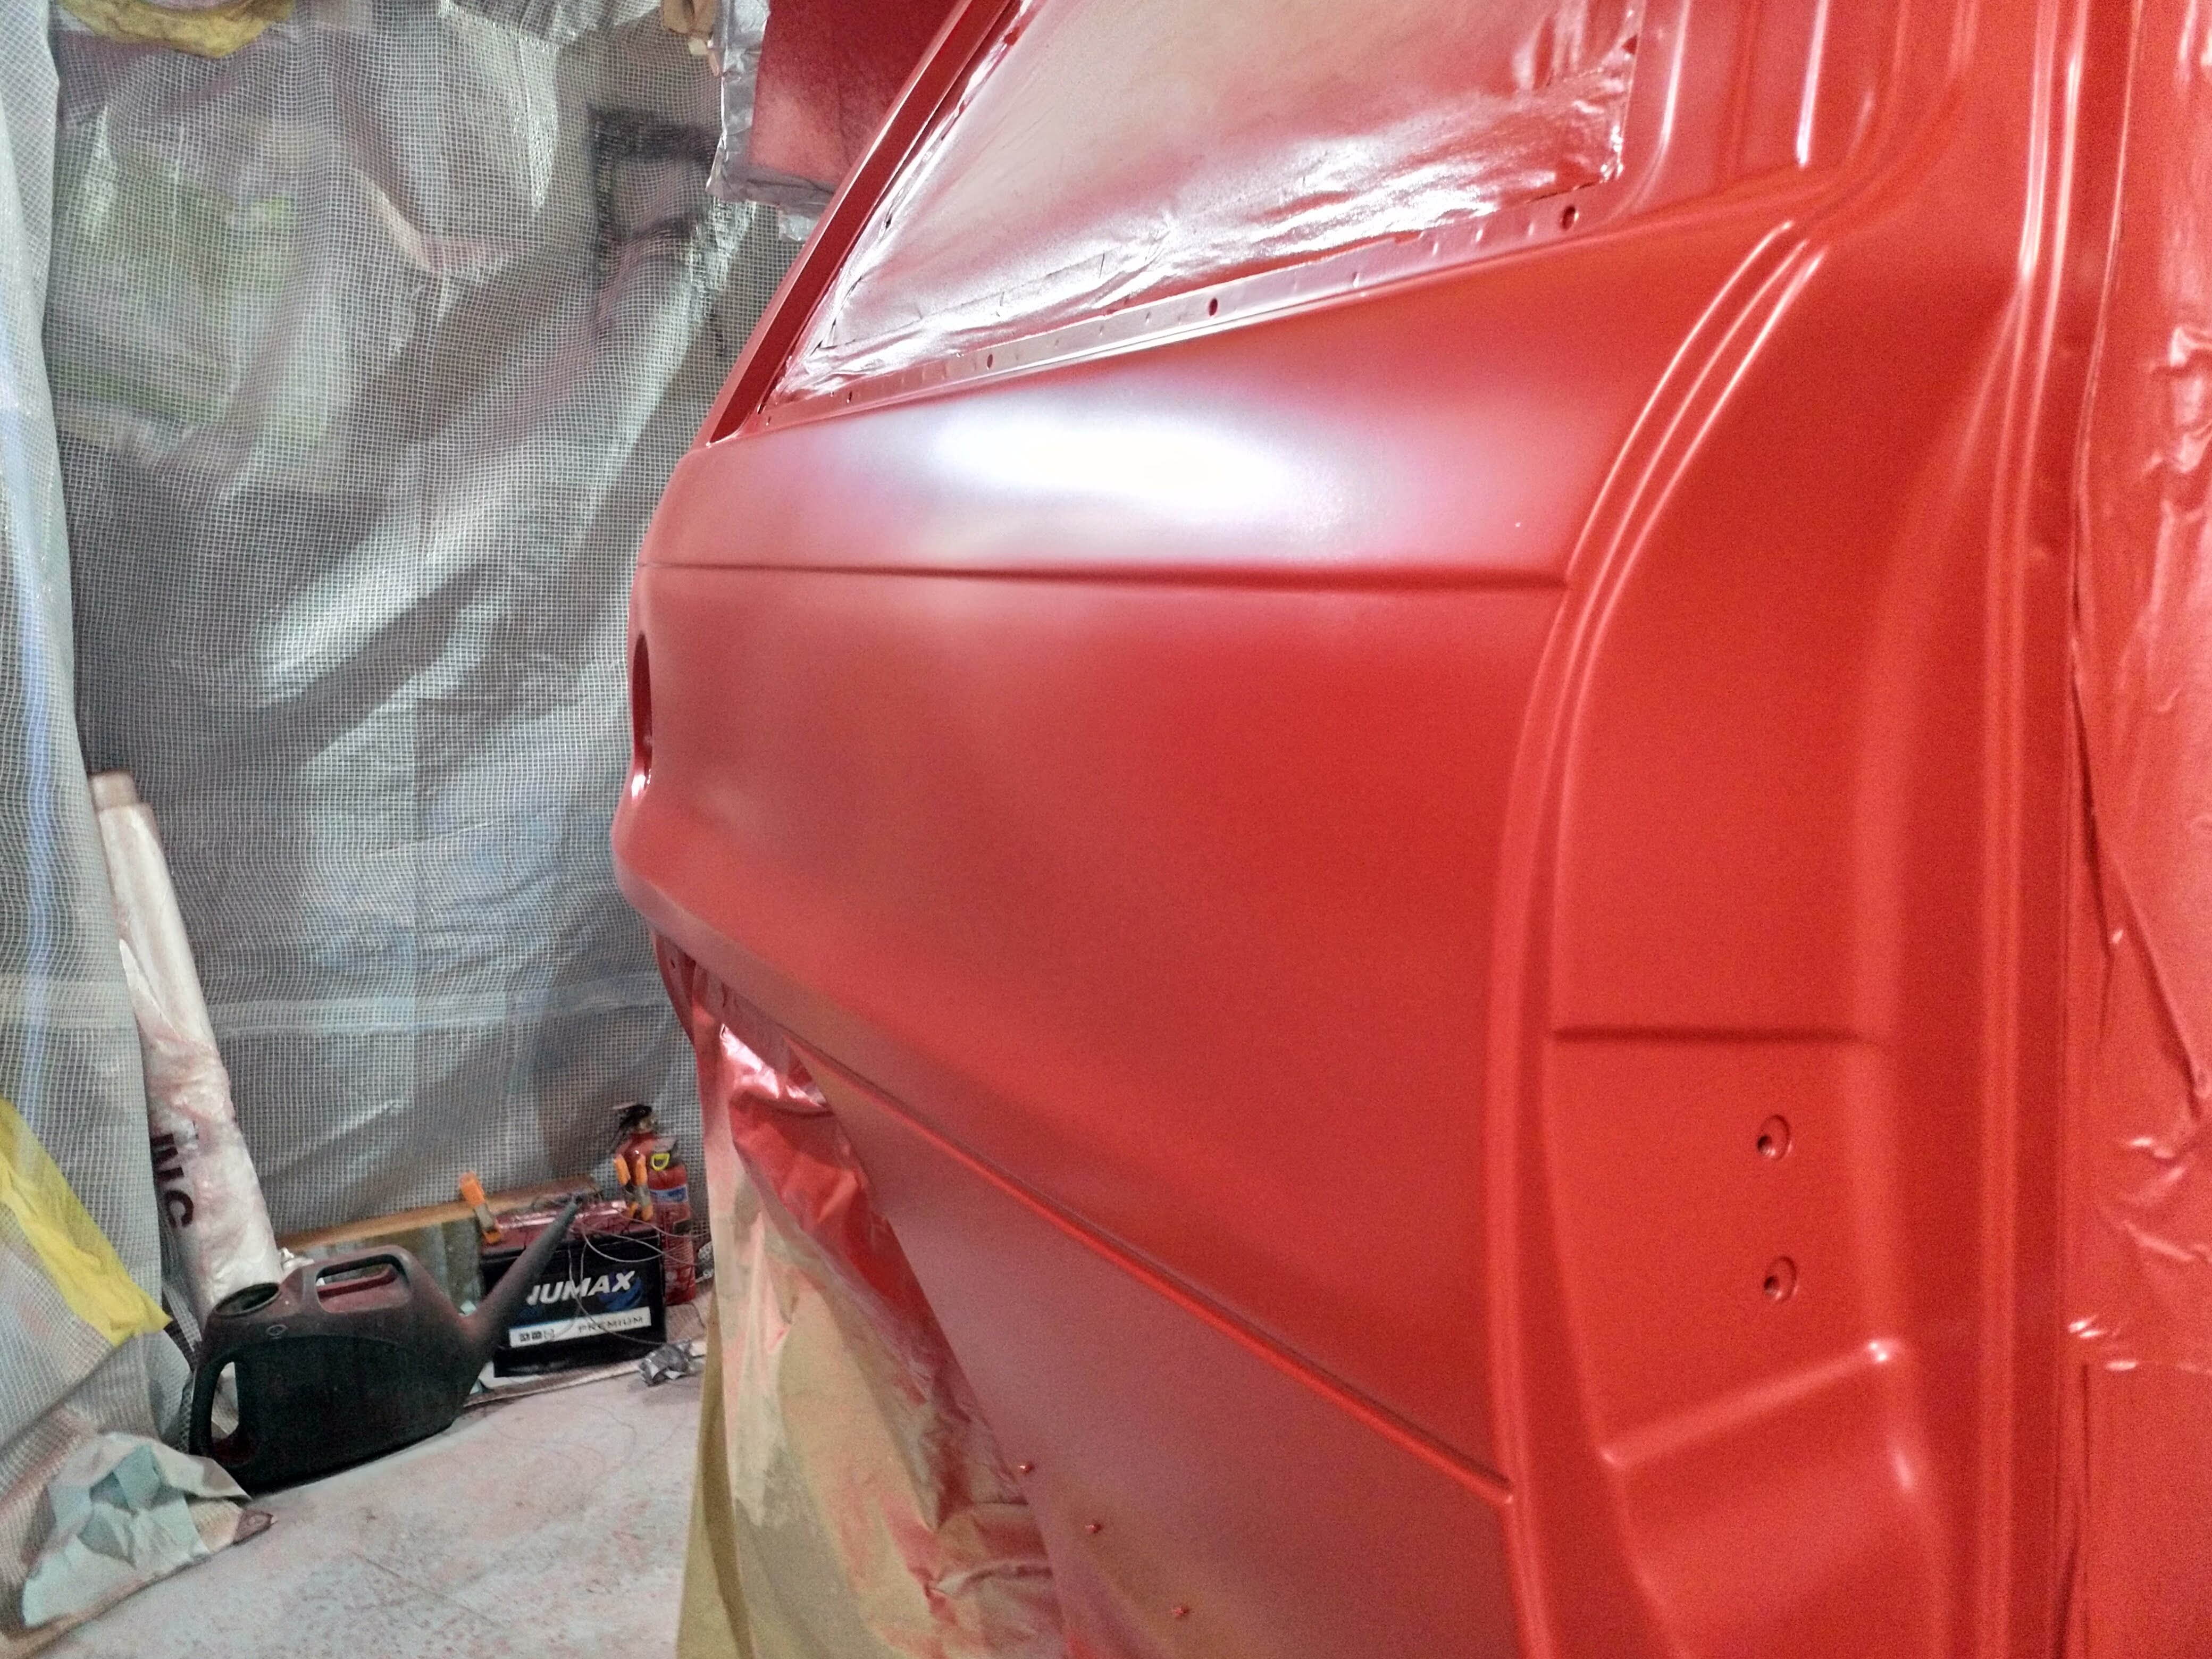
So all in all mega pleased. The clear went on well, nice and thick which is the main thing, the odd small run which can be dealt with. But more important the majority has an awesome finish and no reactions.
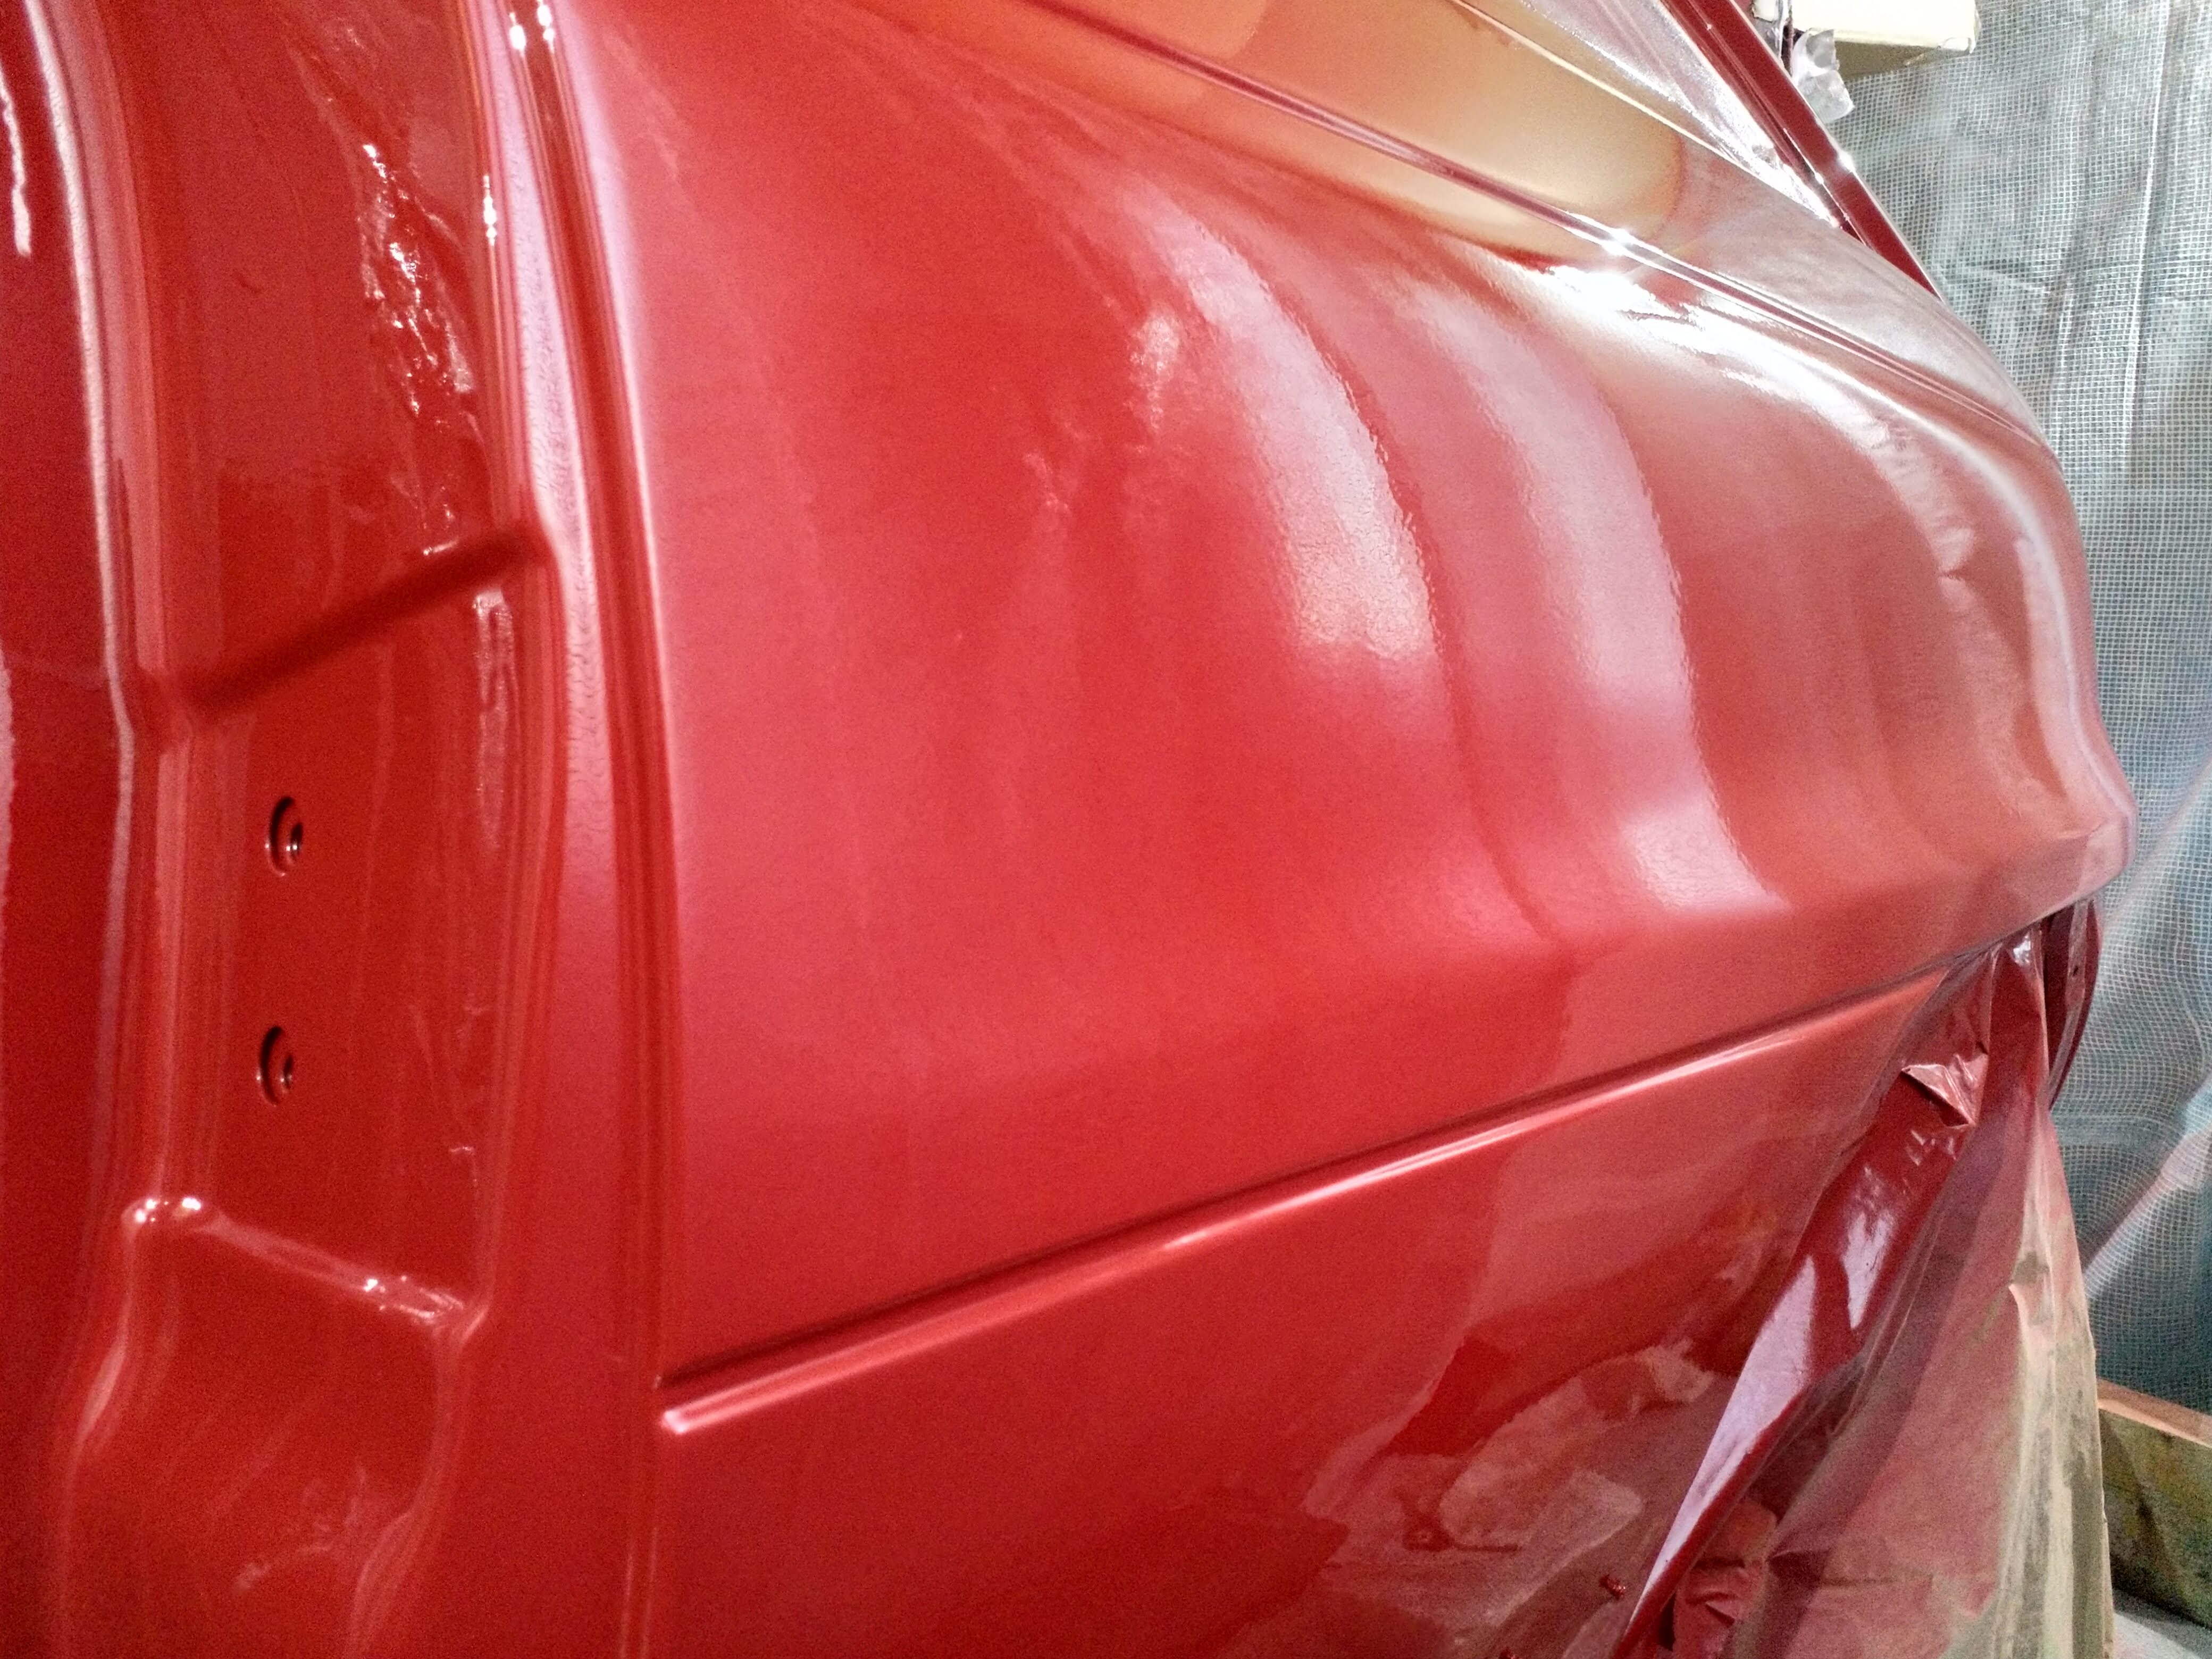
BUT somehow, i ended up with the mother ****** of all runs in one place....

That's gonna take some flatting haha. But if thats the worst thing that happened, im a happy boy")
Let it set for 40mins, then mixed some clear and went at it. Very light spray, wait 5 mins, then 3 thick coats 15mins apart.
So all in all mega pleased. The clear went on well, nice and thick which is the main thing, the odd small run which can be dealt with. But more important the majority has an awesome finish and no reactions.
BUT somehow, i ended up with the mother ****** of all runs in one place....
That's gonna take some flatting haha. But if thats the worst thing that happened, im a happy boy
Todd100
Club Member
Looking good mate, are you doing the roof red too? I guess you didn't do that at the same time so your not reaching over?
Looking good mate, are you doing the roof red too? I guess you didn't do that at the same time so your not reaching over?
Yea hit the nail on the head mate, it's tough to be able to spray the underside of the door sills ( so the car has to be a foot off the ground at least) and also reach the middle of the roof.
Simply, I'm not tall enough

The roof will be a nice panel to do with the wheel off, ramp as low as possible to the floor, whole rest of the car masked off and car just give it a nice deep finish. I'll give the rest of the paint a fair while to go off first, I can loose the join blend in the roof rails and in the top of the boot shut which gets covered when the boot is opened.
I do also have a dent in the roof to sort first. I tried to remove the aerial base and the nut was seized, this caused the whole base to try and spin and it put a ripple in the metal around the aerial base.... annoying. Bought myself a dent hammer kit to get it out, luckily the base will cover it nicely so any imperfection which are tiny won't be an issue. but it need to be flat otherwise it will let water in when i wash it!
I did consider fitting a subtle shark fin style aerial off a modern car as I don't use the fm radio anyways........ something like this...

whats peoples thoughts?
Todd100
Club Member
Yeah makes sense to me, I'm not sure if a shark fin would look right due to the age of the car, I guess you can see if you can get the dent out and go from there?
Ye
Yea your probably right about not looking right, I just see the aerial as pointless cause I don't use it lol. Mayb just a shorter aerial WIP. But on the OE baseYeah makes sense to me, I'm not sure if a shark fin would look right due to the age of the car, I guess you can see if you can get the dent out and go from there?
TubaMagna8
Club Member
Ive got my Old Shark fin Ariel off the yeti after I fitted the DAB one your welcome to have if its of use? Ive had it on eBay for a few months but no interest.Yea hit the nail on the head mate, it's tough to be able to spray the underside of the door sills ( so the car has to be a foot off the ground at least) and also reach the middle of the roof.
Simply, I'm not tall enough
The roof will be a nice panel to do with the wheel off, ramp as low as possible to the floor, whole rest of the car masked off and car just give it a nice deep finish. I'll give the rest of the paint a fair while to go off first, I can loose the join blend in the roof rails and in the top of the boot shut which gets covered when the boot is opened.
I do also have a dent in the roof to sort first. I tried to remove the aerial base and the nut was seized, this caused the whole base to try and spin and it put a ripple in the metal around the aerial base.... annoying. Bought myself a dent hammer kit to get it out, luckily the base will cover it nicely so any imperfection which are tiny won't be an issue. but it need to be flat otherwise it will let water in when i wash it!
I did consider fitting a subtle shark fin style aerial off a modern car as I don't use the fm radio anyways........ something like this...
whats peoples thoughts?
Ive got my Old Shark fin Ariel off the yeti after I fitted the DAB one your welcome to have if its of use? Ive had it on eBay for a few months but no interest.
Ah yes please if you don't mind, I was looking on ebay last night to see if there was any dirt cheap cause I want one to stick o the roof and see what it looks like. Should be a pretty quick yes or no from that point!
Got any pictures TubaMagna8
TubaMagna8
Club Member
Ah yes please if you don't mind, I was looking on ebay last night to see if there was any dirt cheap cause I want one to stick o the roof and see what it looks like. Should be a pretty quick yes or no from that point!
Got any pictures TubaMagna8
.jpg")
.jpg")
.jpg")

Users who are viewing this thread
Total: 3 (members: 0, guests: 3)