Want to remove ads? Become a MK3OC Club Member today!

Dave b's Megane Rs225 diary

do, after 3 lots of filler on the spoiler, the thing is finally going in paint! I do definatly wish i had just given the spoiler back to renault and shoved it up their ass! wayyy to late for that now though!

I am being picky, but this is proper ****...
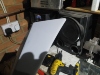
everytime you do something to the spoiler a tiny little pin hole appears. its like the outer shell breaks and the spoiler inside are made of a foam theat just melts or something. its ****

you can see the pin hole here...
full.jpg

annoying, anyways. its going in paint i have spent enough time on it and need to crack on! Now that my cat is back i can crack on with life. spoiler is done and all in paint, came out brilliantly. you can see the pin hole still, which sucks. But noone will ever see it apart from me, let alone from a distance lol.

next.... the doors! Drivers door was in good nice, 1 tiny bit of filler and job done. passenger door on the car was dead, it was also a red door painted black. which is crazy. so got a second hand door. That was probably just as bad!

so alot of filler and flatting later.....

full.jpg

so today before working nights, got them done. Came out mega :cool:

full.jpg
full.jpg
full.jpg
full.jpg
full.jpg
 
I think Dave has a heated garage as he's been spraying a lot inside :d the doors look brilliant fella
 
Looks great dave, you not struggling with runs in this cold weather?


In a word, yes :lol:

At least I know runs can be flatted out and it will be ok in the end, just gonna be some more graft when it's on the car.
I make sure I heat the paint up, keep it in the house, and I have 3 heaters in the workshop aswell!

A problem I had on the door was condensation falling from the ceiling, even with 60mm board in there I still get a small amount of moisture and it dripped on door, luckily only on the inside so got away with it.

The water just ran off the lacquer anyway which was lucky. I am struggling thou! So close now thou!
 
You can put your lacquer/hardener in a bucket of warm water (unmixed) which will make it flow out better without having to over reduce with thinner. Warm your panels before painting which will reduce risk of runs. You wont need to heat the basecoat as it makes no difference.
 
You can put your lacquer/hardener in a bucket of warm water (unmixed) which will make it flow out better without having to over reduce with thinner. Warm your panels before painting which will reduce risk of runs. You wont need to heat the basecoat as it makes no difference.

the bucket of warm water is a bloody good idea actually! nice on cheers mate. I have kept the thinners at 10% but its been harder getting the super smooth finish like glass, so had to put it on a bit thicker causing a few runs. They will flatten out with some hard work but each panel is 95% bang one, and i can double bubble with some orange peel as well flatting some of that out. Orange peel has never bothered me and cause of the colour it hides it so well which is awesome!

The plan is get it all done refit it all and then spend a few days, flatting polishing. That is gonna be so much fun! gonna look awesome!
 
The hot water works a treat. As you may know ive been using hs clears and they are proper thick, so to get round that we've been heating are clears up. I don't like using more than 10% thinner in the clear as it will break that clear down. By heating the clear up it up to around 20c-30c makes the clear thinner reducing orange peel.
 
Man this weather is making life hard lol

had a few odd days of sunshine though so for the first one, i took the sheets down in the work shop, pressure washed them, swept and mopped the floor of the workshop etc. Looks like a workshop for the first time in half a year!

IMG_20180208_172959.jpg


so there was a sunny day! dry weather too so got the megane outside, took the old passenger door off im not using and got the da out!

IMG_20180225_131947.jpg


IMG_20180225_132013.jpg


so first things to sort out before primering are the little dents, luckily these are on the door sills, nothing i can't sort myself with a bit of magic and some filler!

IMG_20180225_132020.jpg


hard to tell but all the under side of the door sill is pushed up.

IMG_20180225_132041.jpg


so stuck it up on the ramp

IMG_20180225_162951.jpg


got the welder and the slide hammer and pulled the dents out!

IMG_20180225_163026.jpg


IMG_20180225_163006.jpg


IMG_20180225_163013.jpg


IMG_20180225_163017.jpg


IMG_20180225_175450.jpg


IMG_20180225_175457.jpg


IMG_20180225_181036.jpg


IMG_20180225_181041.jpg


lucky its the door sill so doesn't have to be brilliant, but hopefully should look pretty good. tbh the bit underneath wouldn't of been that visible, but while i'm here its worth it imo!

so rub back the filler and should look pretty good! passenger side if gonna be a nightmare, the passenger side is the side that has already been repaired in the past from before we bought it as a cat D.... i can imagine there is gonna be alot of filler.

not sure if anyone knows, a bit of the filler is cracked, am i better off tryin to dig all the way down to the metal, or just pick some off and repair the filler that is already there??
 
I would grind the crack down to bare metal as it would have failed for a reason. It will be poor adhesion/rust or big dent still there and they have used to much filler and flexed.
 
it was ok before, the reason it failed was because amy crashed the car :lol:, your right though i suppose it is best to rub it all the way back.

Mega effort though :(
 
been cracking on more, getting so close now!! So after pulling the dents out on both door sills, was pud time! try to get some shape back into the sills...

full.jpg
full.jpg

too me alot of layers of filler, sanding back, more filler etc. took me a fair few attempts to get a good shape and get the filler nice and smooth. Turns out the cold weather was causing me issues aswell. But once i realised that, I heated the filler made it a bit more runny and it was alot more useful in application, filled all the little pin holes I was struggling with and finnally things were away!

slapped some etch primer on there...

full.jpg

and shes good to go, mask it up!

full.jpg

and slap the filler primer on, nice and thick! Gives me plenty to work with a rub back, gettin a nice smooth finish

full.jpg
full.jpg

door sill came out nice and smooth!

full.jpg
full.jpg
full.jpg

can see in this photo it looks like the door sill kinks in, i thought i had messed this up a bit during filler stage, but i checked it and actually both sides go in like this, must be normal! I used CAD to check aswell to be double sure!

full.jpg
full.jpg

stuck some stone chip on the bottom aswell, nice and thick to protect the edges of the filler etc.

full.jpg
full.jpg

wet flatted the roof,in the rails and boot shuts, and slapped some colour on! put an extra layer of clear on to give it a good finish and plenty of protection!

full.jpg
full.jpg
full.jpg

came out amazingly! Just the sides to go!
 
That roof :love:

Keep looking at my GSI and thinking how poor the paint is..... need full bear metal so not looking forward to it but now my engine is where I want it to be need to start looking at the paintwork.

Nice job :thumb:
 
looking great dave. Your gsi up next for a respray?

Gsi has already had a full respray thank god! It was rotten as a pear when I got it, had full respray, arches repaired, back pockets done by Ronnie on here, new front arches, door sills. It's had alot of work lol. Getting to the point now the sills need doing again lol, they were only patched before, not full sills, and floor needs taking right back and starting again from bare metal, and patching etc.

Never ending the chase of rot on old cars
 
That roof :love:

Keep looking at my GSI and thinking how poor the paint is..... need full bear metal so not looking forward to it but now my engine is where I want it to be need to start looking at the paintwork.

Nice job :thumb:

Cheers matey, been 6 months of hard hard work but deffo worth it
 

Users who are viewing this thread

Back
Top